spring boot:集成支付宝(沙箱环境)(spring boot 2.4.0 / wap/h5方式 )
一,配置支付宝沙箱环境:
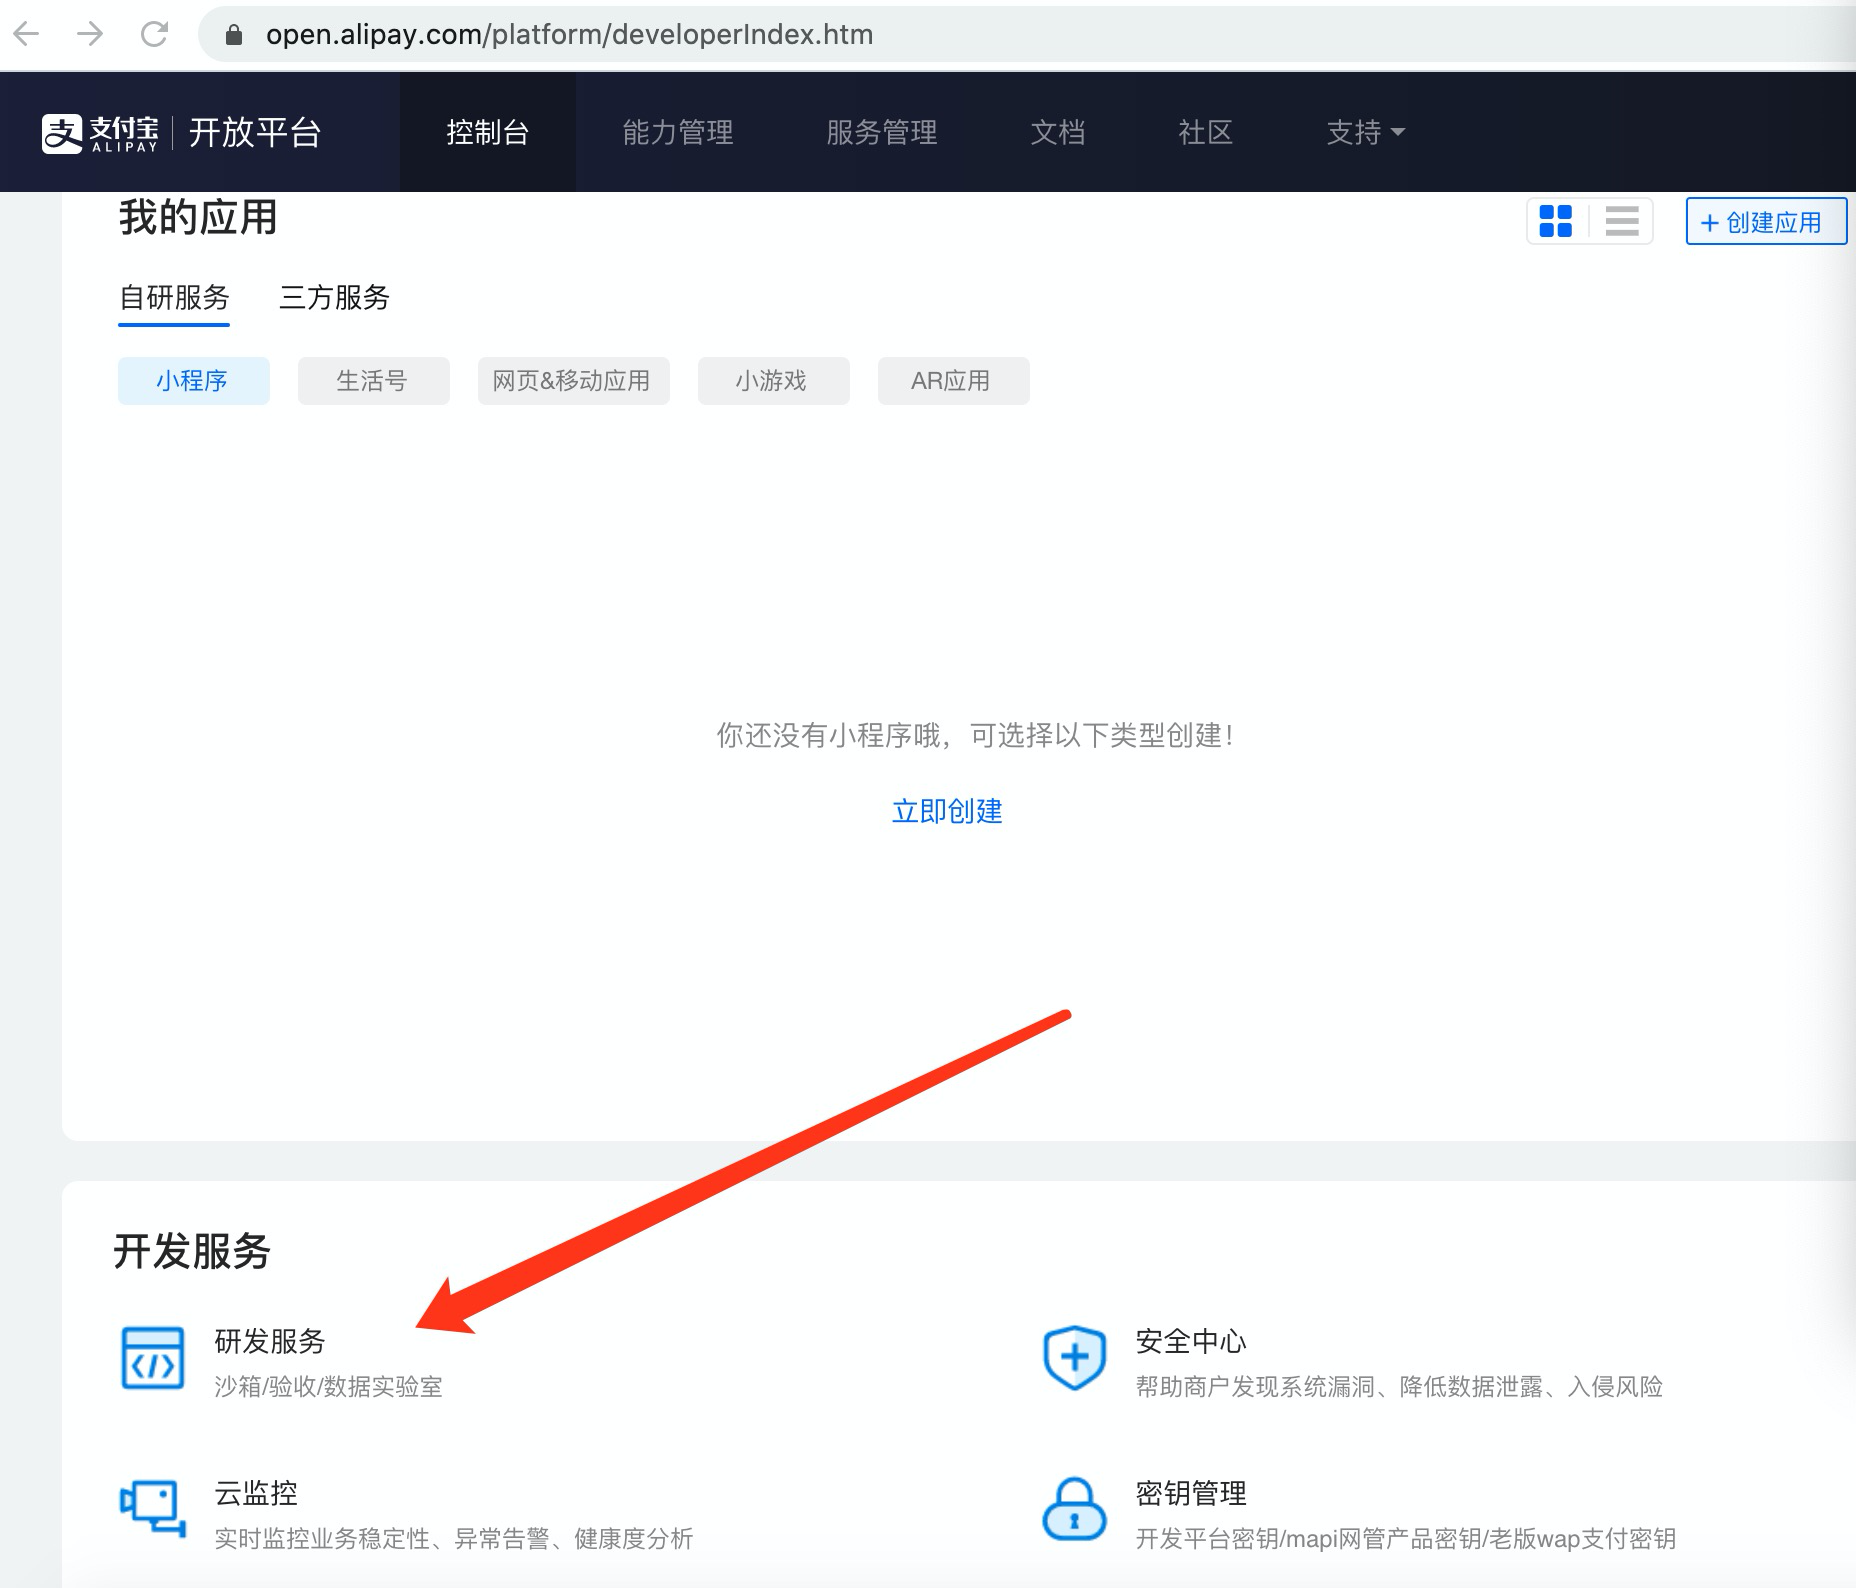
1,沙箱的地址:
也可以登录后,从控制台点击 研发服务 进入
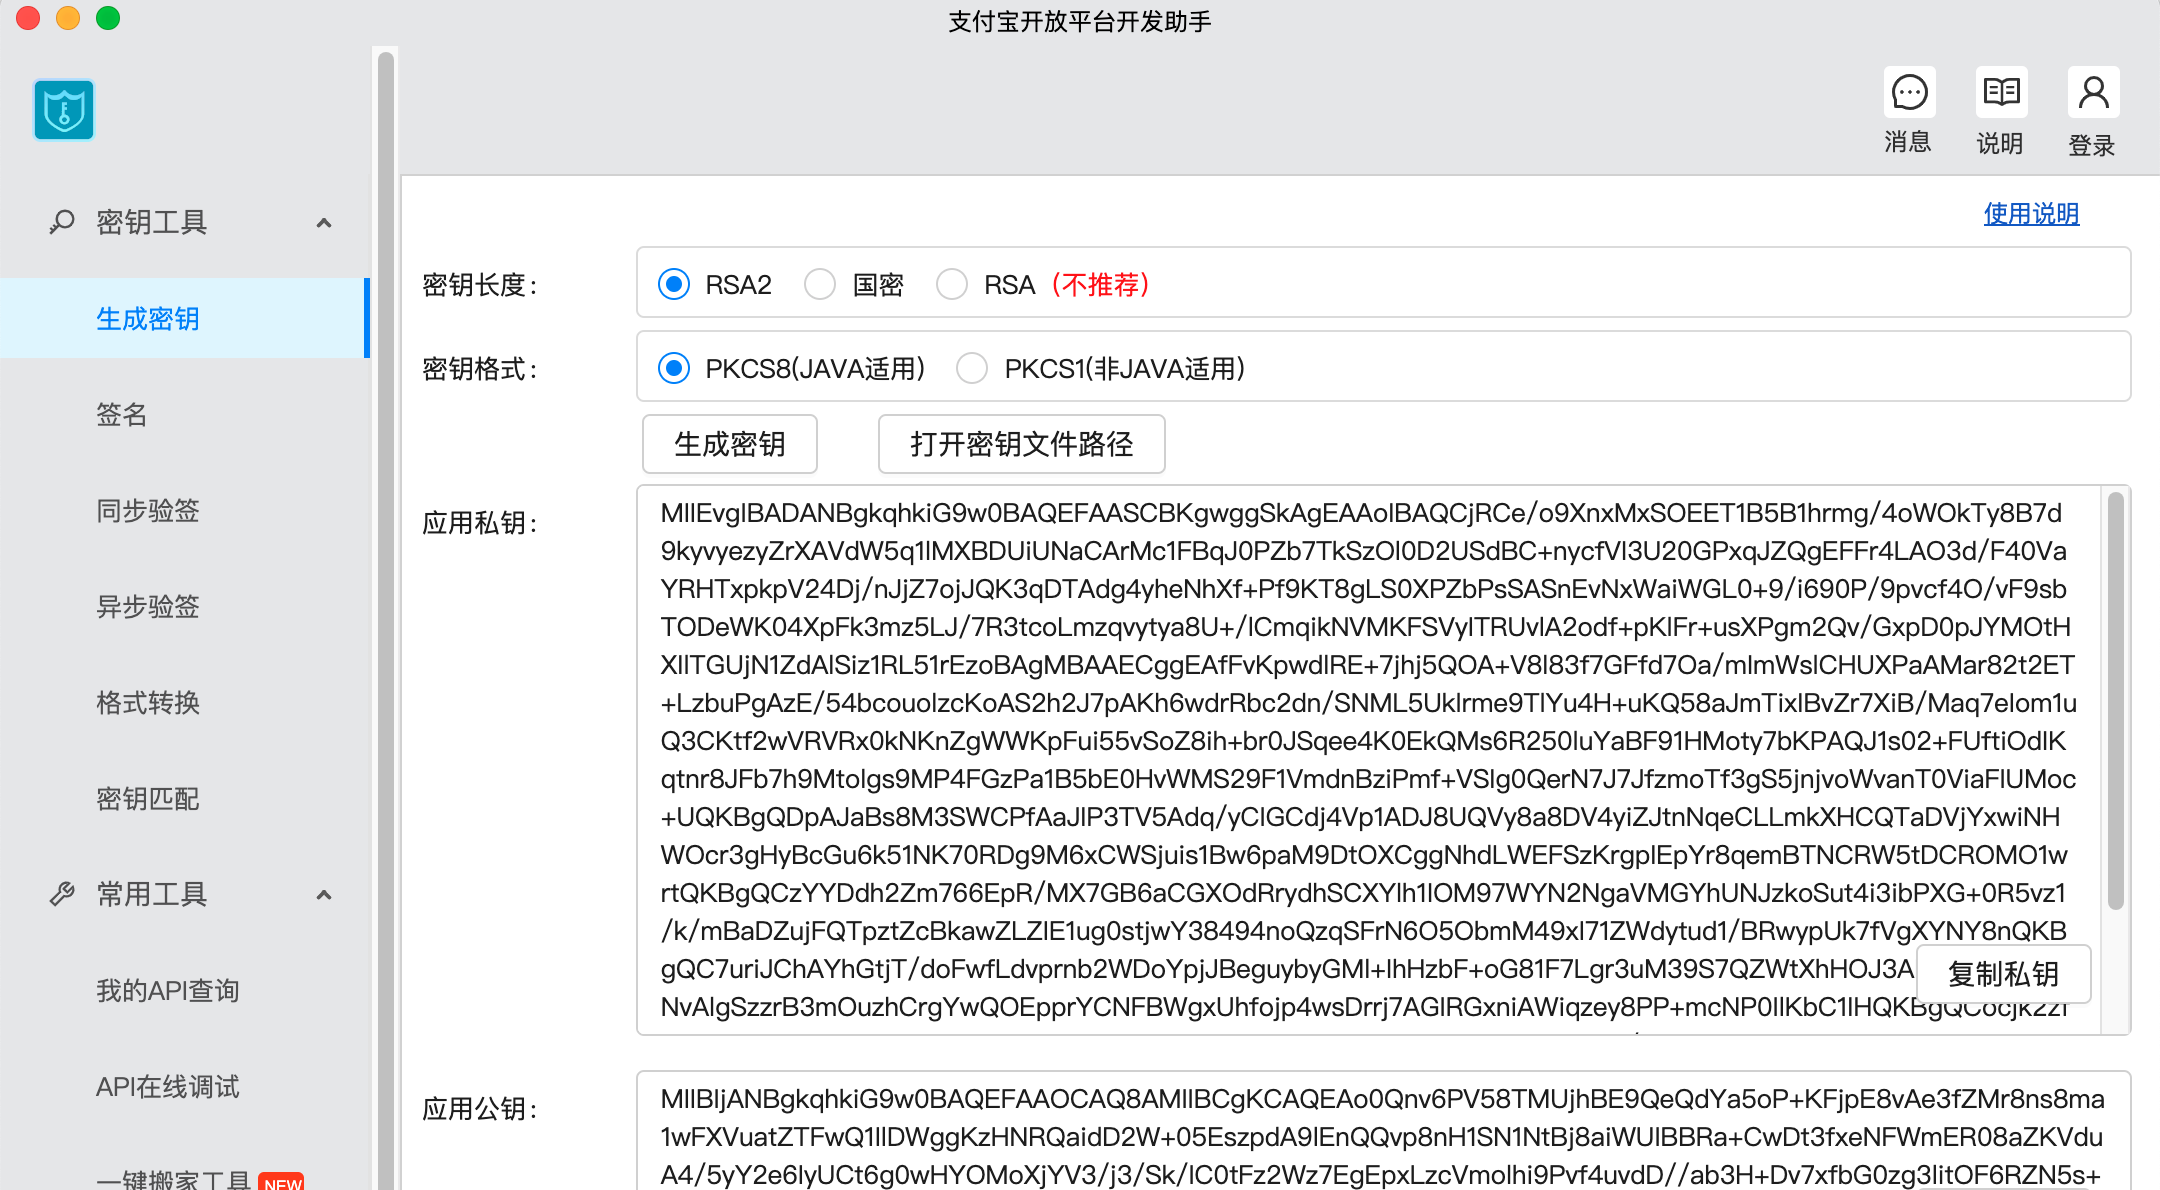
2,下载开发助手:并生成密钥
从这个页面,按自己所在的平台下载,
当前支持 windows,macos
下载完成后安装
运行支付宝开发助手:点击 生成密钥 按钮,
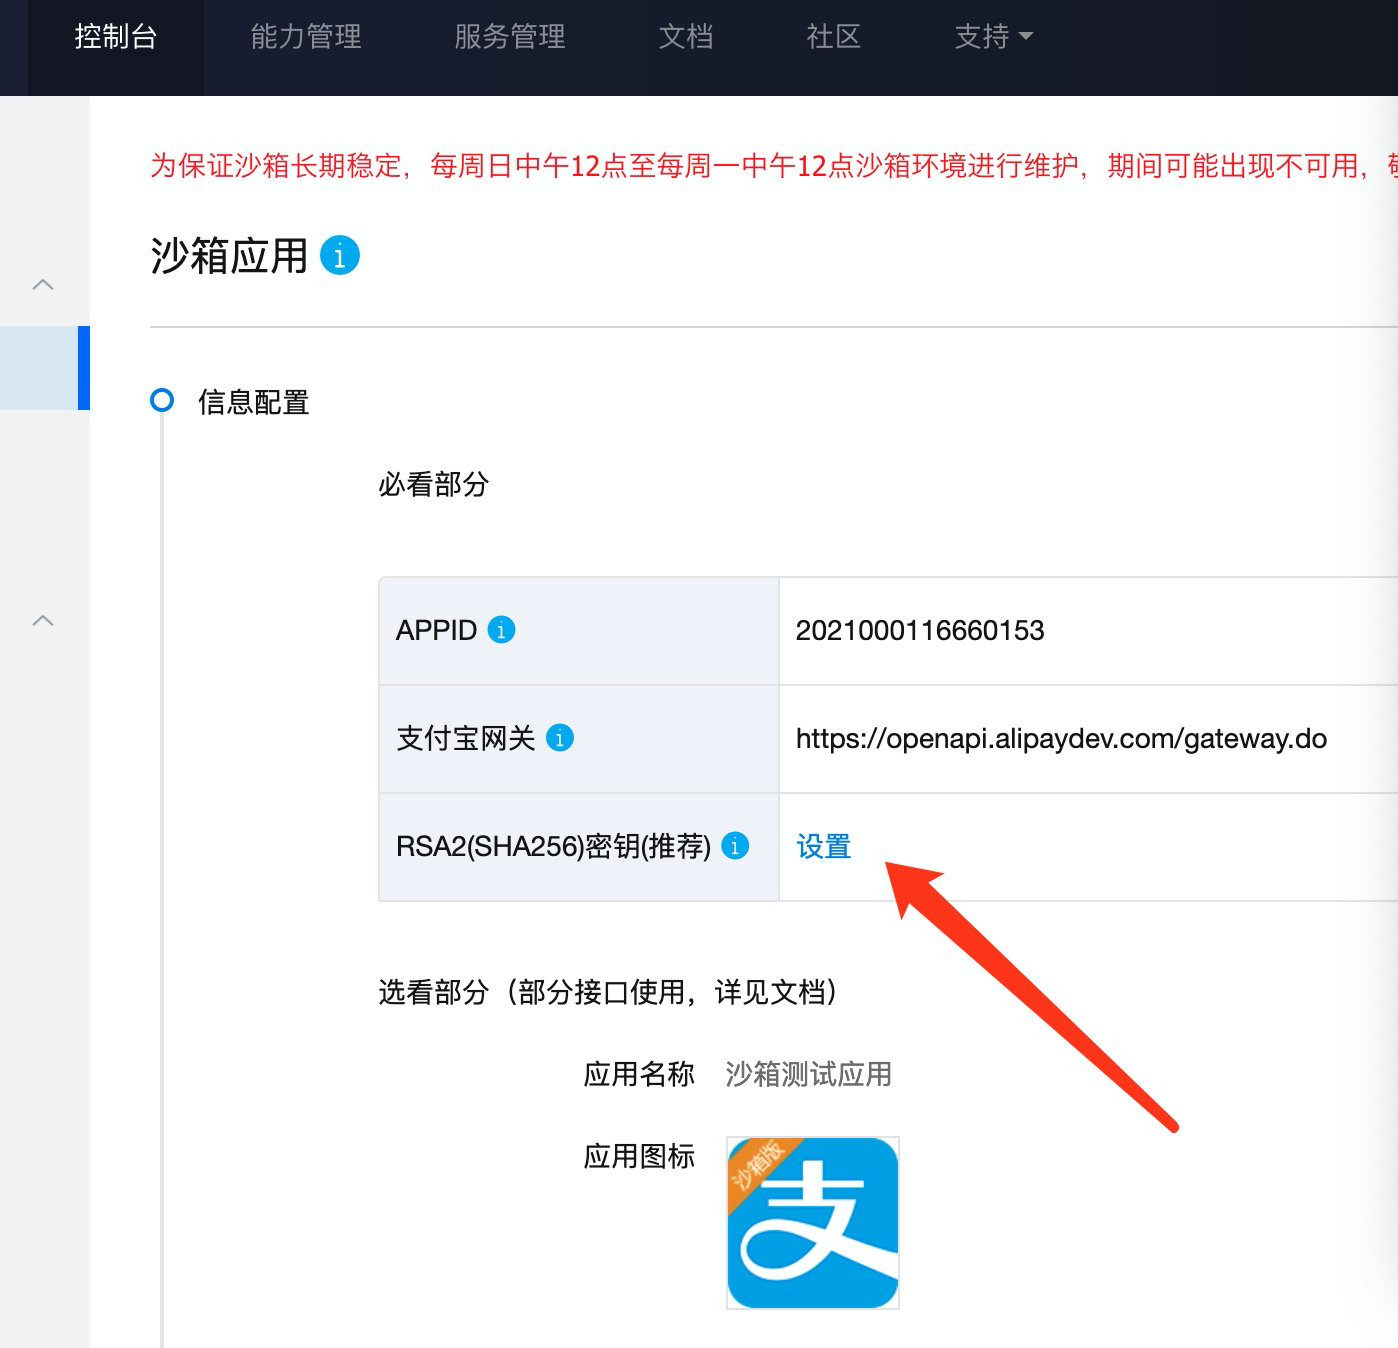
3,把公钥保存到支付宝后台的沙箱环境
后台->沙箱应用->RSA2(SHA256)密钥(推荐)
点击:设置:
加签模式:选择公钥:
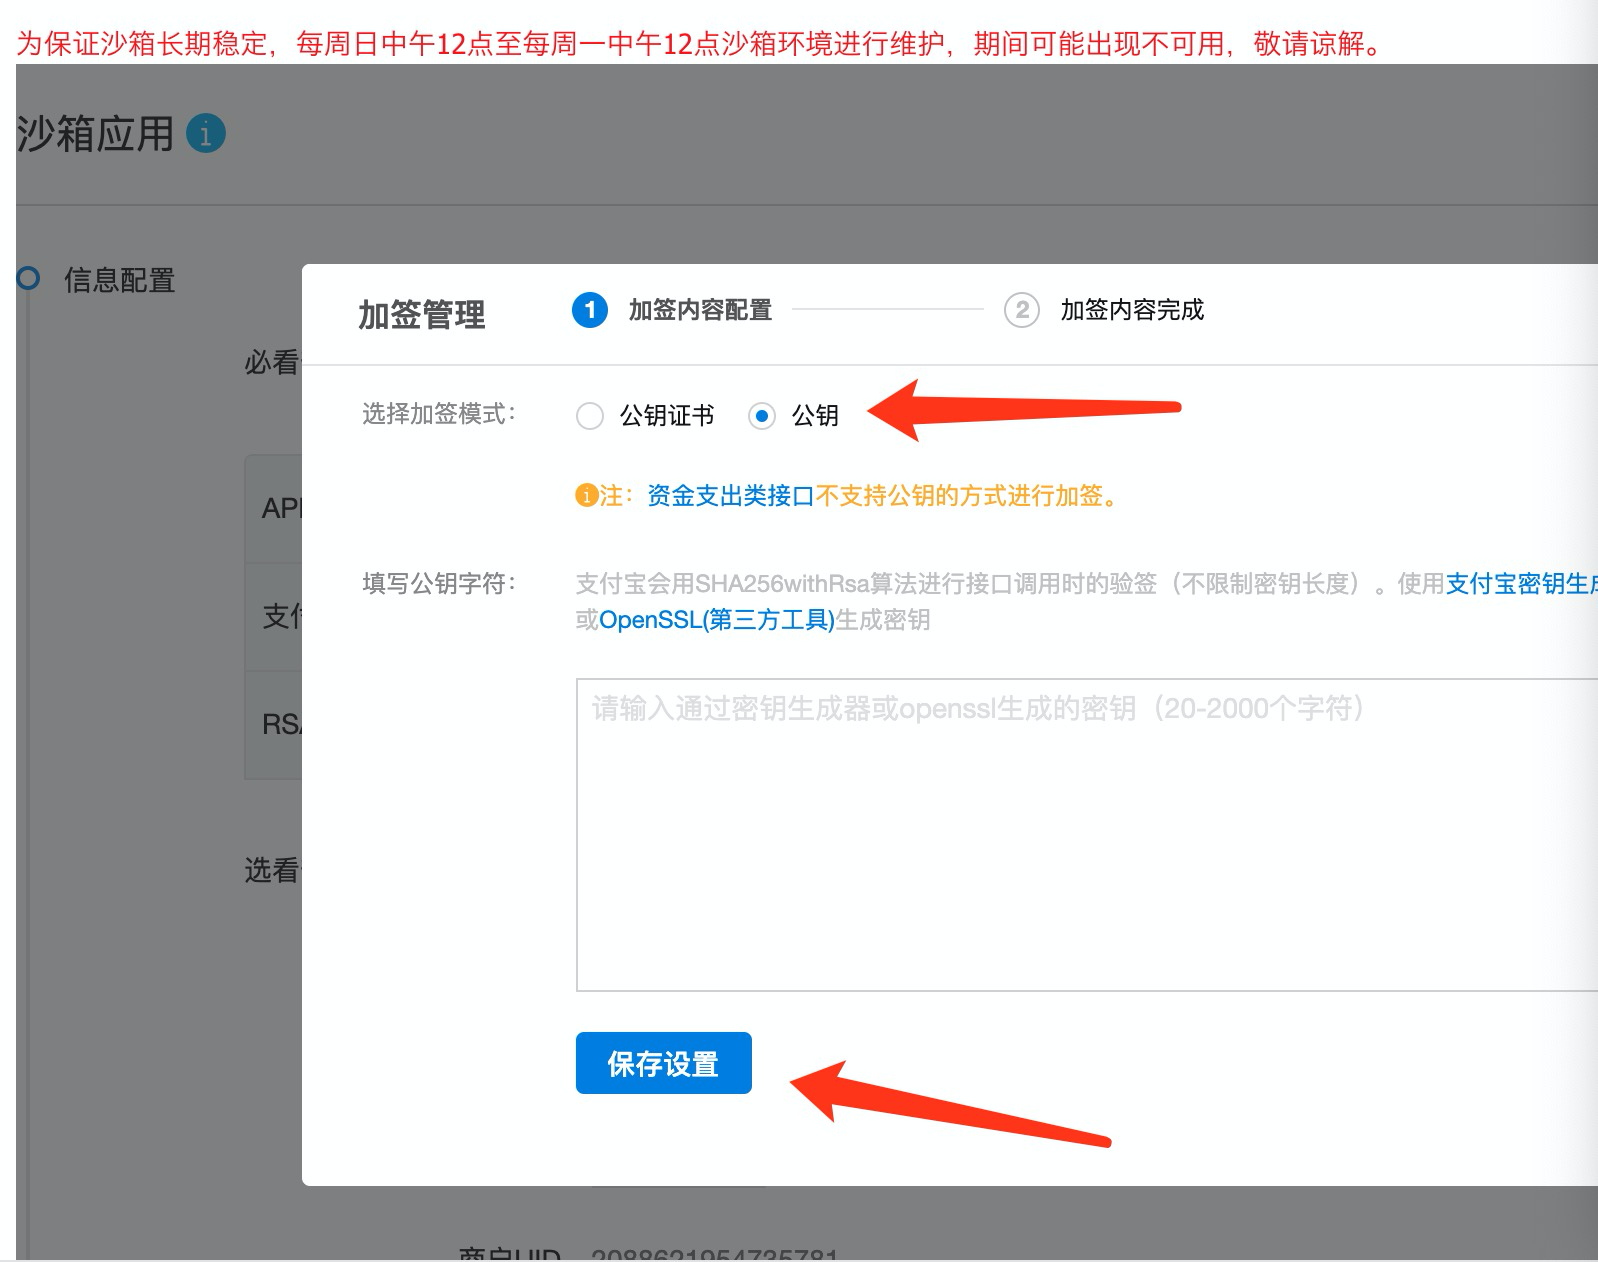
复制公钥后,点 保存设置 按钮
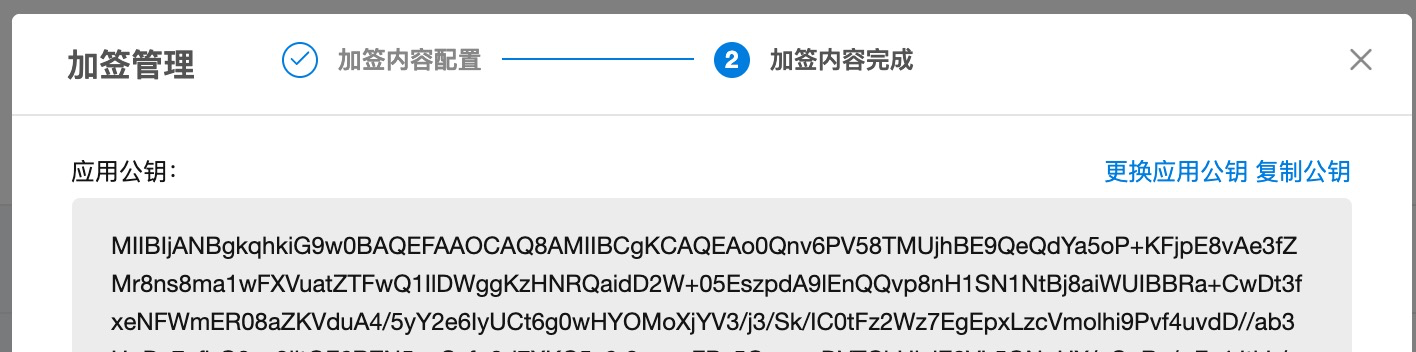
保存生成的 应用公钥 和 支付宝公钥,后面要使用到
4,下载安装支付宝沙箱钱包,目前只有android版
用支付宝扫描后下载到手机,安装
可以在这个页面,选择 用浏览器打开 然后下载完后安装
下载成功后安装,运行app:
注意登录时用支付宝后台沙箱环境的买家账号登录:
说明:刘宏缔的架构森林是一个专注架构的博客,
网站:https://blog.imgtouch.com
本文: https://blog.imgtouch.com/index.php/2023/05/26/spring-boot-ji-cheng-zhi-fu-bao-sha-xiang-huan-jing-spring/
对应的源码可以访问这里获取: https://github.com/liuhongdi/
说明:作者:刘宏缔 邮箱: 371125307@qq.com
二,使用官方sdk
1,服务端支付宝库的maven配置地址:
官方文档地址:
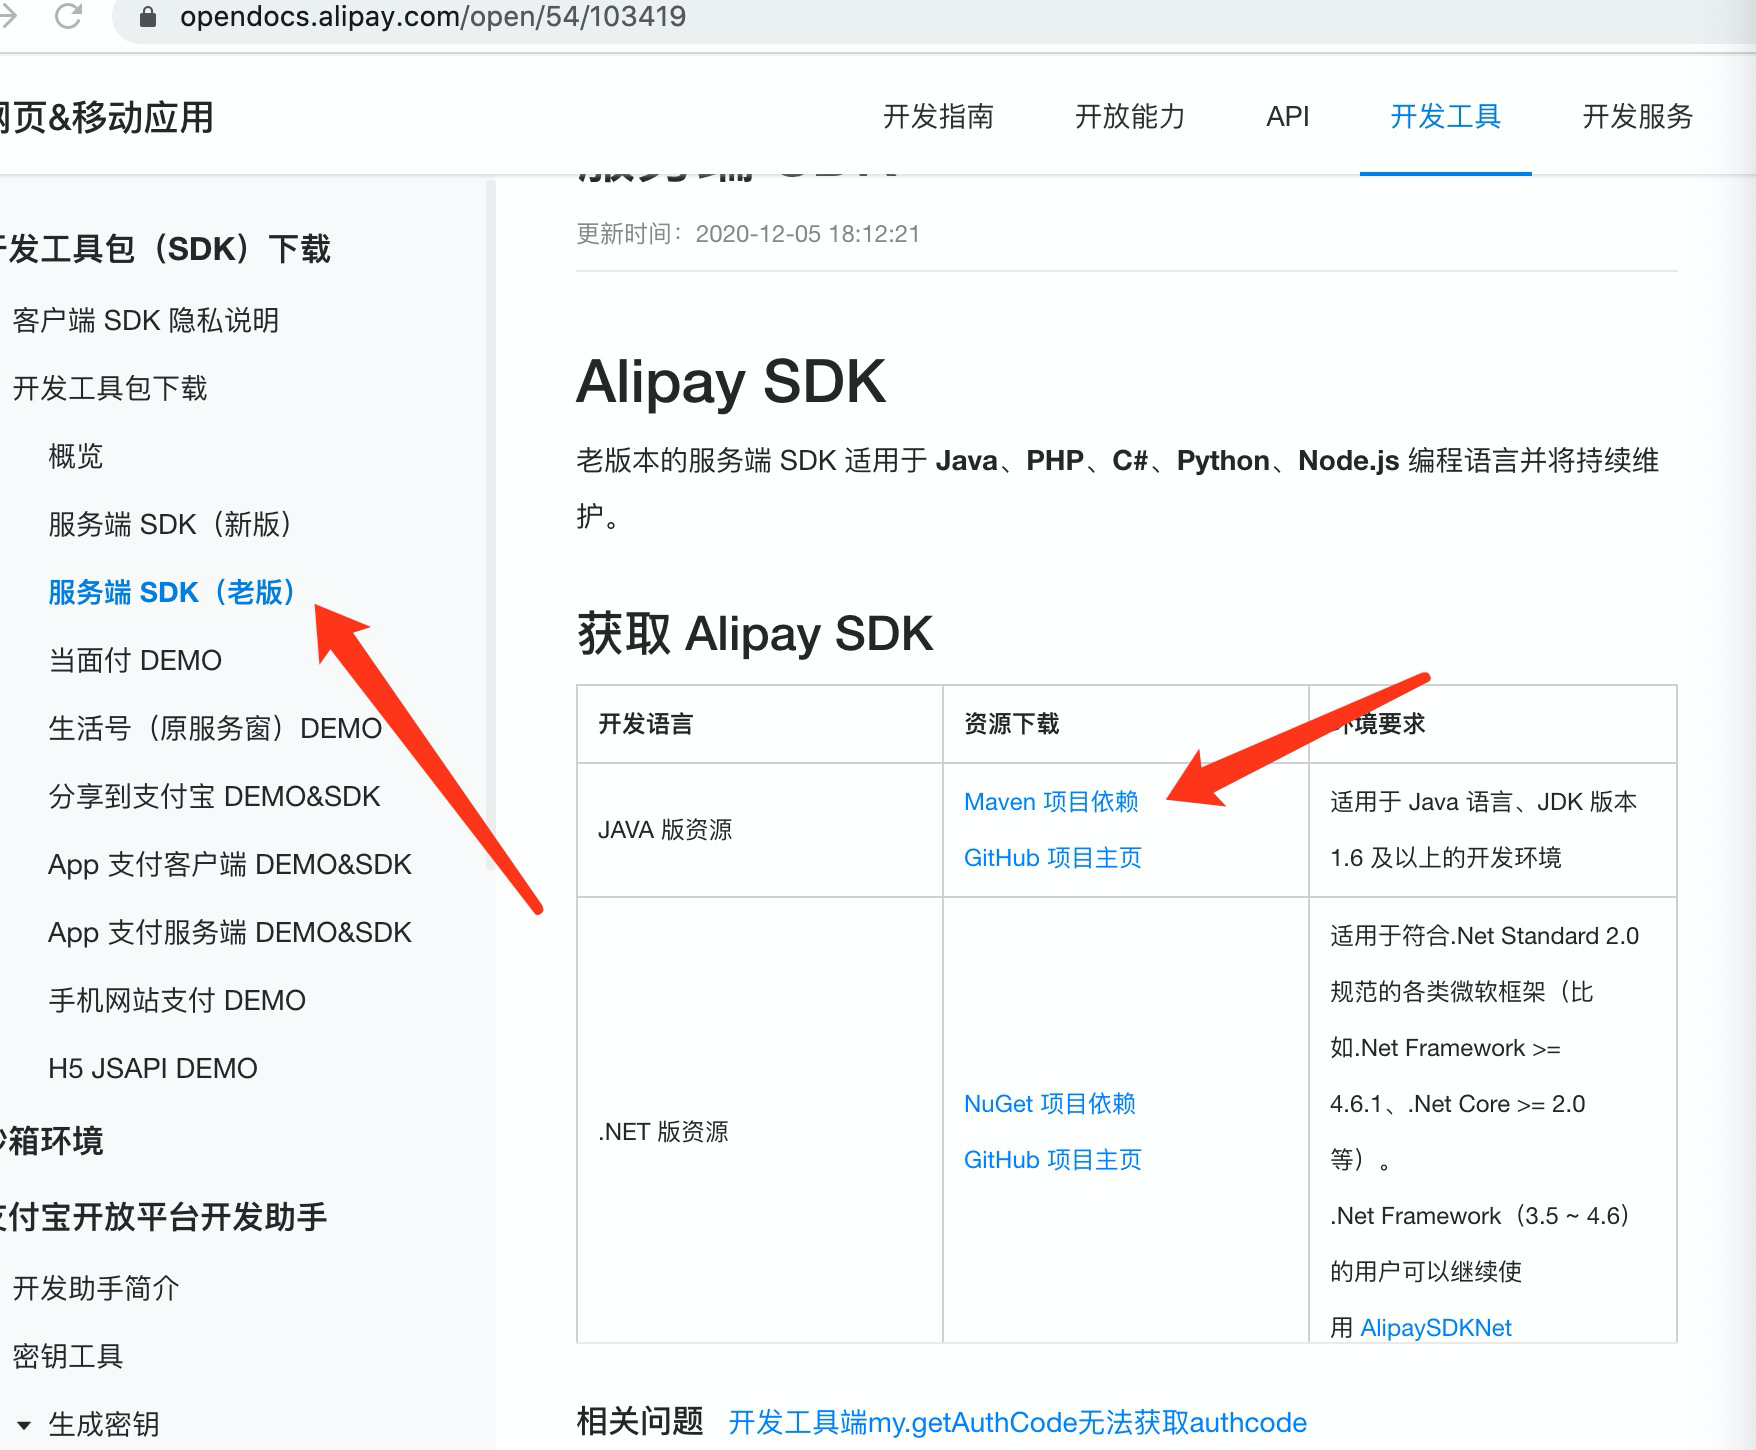
从这里可以看到官方提供的sdk库的地址:
建议大家使用官方的sdk,
因为更新有保障
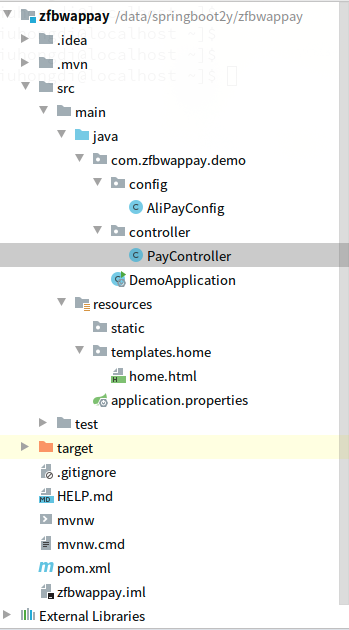
三,java代码
1,结构:
2,pom.xml
        <dependency>
            <groupId>org.springframework.boot</groupId>
            <artifactId>spring-boot-starter-web</artifactId>
        </dependency>

        <dependency>
            <groupId>org.springframework.boot</groupId>
            <artifactId>spring-boot-starter-test</artifactId>
            <scope>test</scope>
        </dependency>

        <dependency>
            <groupId>com.alipay.sdk</groupId>
            <artifactId>alipay-sdk-java</artifactId>
            <version>4.10.192.ALL</version>
        </dependency>

        <dependency>
            <groupId>com.alibaba</groupId>
            <artifactId>fastjson</artifactId>
            <version>1.2.75</version>
        </dependency>

        <dependency>
            <groupId>org.apache.commons</groupId>
            <artifactId>commons-lang3</artifactId>
        </dependency>

        <!--thymeleaf begin-->
        <dependency>
            <groupId>org.springframework.boot</groupId>
            <artifactId>spring-boot-starter-thymeleaf</artifactId>
        </dependency>
3,application.properties
#error
server.error.include-stacktrace=always
#error
logging.level.org.springframework.web=trace

#thymeleaf
spring.thymeleaf.cache=false
spring.thymeleaf.encoding=UTF-8
spring.thymeleaf.mode=HTML
spring.thymeleaf.prefix=classpath:/templates/
spring.thymeleaf.suffix=.html

#port
server.port=9090
4,AliPayConfig.java
@Component
public class AliPayConfig {

    // 应用ID,APPID,开发时是沙箱提供的APPID,生产环境是公司的APPID
    public static String APP_ID = "202100118860153";

    // 商户私钥,之前所生成的密钥中的私钥
    public static String APP_PRIVATE_KEY = "JIP3TV5YNWizgZCuP3";

    // 支付宝公钥,注意是APPID下的支付宝公钥,不是应用的公钥
    public static String ALIPAY_PUBLIC_KEY = "MIIBIjADAQAB";

    // 服务器异步通知页面路径,需要用http://格式的完整路径,不要加自定义参数,需要外网可以正常访问
    public static String notify_url = "http://alipay.paydemo.net/alipay/notify";

    // 同步通知页面跳转路径 需要用http://格式的完整路径,不要加自定义参数,用来显示支付成功后返回的页面
    public static String return_url = "http://alipay.paydemo.net/alipay/return";

    // 签名方式
    public static String sign_type = "RSA2";

    // 字符编码格式
    public static String CHARSET = "utf-8";

    // 支付宝网关,我们这里用沙箱的网关,生产环境中要替换成正式环境的网关
    public static String gatewayUrl = "https://openapi.alipaydev.com/gateway.do";

    // 返回格式
    public static String FORMAT = "json";

}
5,PayController.java
@Controller
@RequestMapping("/alipay")
public class PayController {

    //wap:QUICK_WAP_WAY
    //web:FAST_INSTANT_TRADE_PAY
    private static final String PRODUCT_CODE = "QUICK_WAP_WAY";

    //表单页面
    @GetMapping("/home")
    public String index(ModelMap modelMap) {
        return "home/home";
    }

    //调起支付
    @RequestMapping("/pay")
    @ResponseBody
    public void pay(HttpServletRequest request, HttpServletResponse response) throws IOException {
        // 商户订单号,商户网站订单系统中唯一订单号,必填
        String out_trade_no = request.getParameter("out_trade_no");
        // 付款金额,必填
        String total_amount = request.getParameter("total_amount");
        // 订单名称,必填
        String subject = request.getParameter("subject");
        // 商品描述,可空
        String body = request.getParameter("body");

        AlipayClient client = new DefaultAlipayClient(AliPayConfig.gatewayUrl, AliPayConfig.APP_ID, AliPayConfig.APP_PRIVATE_KEY, AliPayConfig.FORMAT, AliPayConfig.CHARSET, AliPayConfig.ALIPAY_PUBLIC_KEY,AliPayConfig.sign_type);
        AlipayTradeWapPayRequest alipay_request=new AlipayTradeWapPayRequest();

        String timeout_express="2m";

        // 封装请求支付信息
        AlipayTradeWapPayModel model=new AlipayTradeWapPayModel();
        model.setOutTradeNo(out_trade_no);
        model.setSubject(subject);
        model.setTotalAmount(total_amount);
        model.setBody(body);
        model.setTimeoutExpress(timeout_express);
        model.setProductCode(PRODUCT_CODE);
        alipay_request.setBizModel(model);
        // 设置异步通知地址
        alipay_request.setNotifyUrl(AliPayConfig.notify_url);
        // 设置同步地址
        alipay_request.setReturnUrl(AliPayConfig.return_url);

        // form表单生成
        String form = "";
        try {
            // 调用SDK生成表单
            form = client.pageExecute(alipay_request).getBody();

            System.out.println("form:");
            System.out.println(form);

            response.setContentType("text/html;charset=" + AliPayConfig.CHARSET);
            response.getWriter().write(form);//将表单html写到页面
            response.getWriter().flush();
            response.getWriter().close();
        } catch (AlipayApiException e) {

            e.printStackTrace();
        }
    }

    //支付完成后的返回
    @RequestMapping("/return")
    @ResponseBody
    public String returnCall(HttpServletRequest request, HttpSession session, Model model) throws Exception {
        // 获取支付宝GET过来反馈信息
        Map<String, String> params = new HashMap<String, String>();
        Map<String, String[]> requestParams = request.getParameterMap();
        for (Iterator<String> iter = requestParams.keySet().iterator(); iter.hasNext(); ) {
            String name = (String) iter.next();
            String[] values = (String[]) requestParams.get(name);
            String valueStr = "";
            for (int i = 0; i < values.length; i++) {
                valueStr = (i == values.length - 1) ? valueStr + values[i]
                        : valueStr + values[i] + ",";
            }
            params.put(name, valueStr);
        }
        System.out.println("params");
        System.out.println(params);
        System.out.println("\n验签开始.....\n");

        boolean signVerified = AlipaySignature.rsaCheckV1(params, AliPayConfig.ALIPAY_PUBLIC_KEY, AliPayConfig.CHARSET, AliPayConfig.sign_type); //调用SDK验证签名
        if (signVerified) {
            System.out.println("return sign  success");
            return "验证签名成功,现在跳转到订单详情页面";
        } else {
            System.out.println("return sign  failed");
            return "验证签名失败";
        }
    }

/*
*
*
* TRADE_SUCCESS状态代表了充值成功,也就是说钱已经进了支付宝(担保交易)或卖家(即时到账);
* 这时候,这笔交易应该还可以进行后续的操作(比如三个月后交易状态自动变成TRADE_FINISHED),
* 因为整笔交易还没有关闭掉,也就是说一定还有主动通知过来。
* 而TRADE_FINISHED代表了这笔订单彻底完成了,不会再有任何主动通知过来了。

综上所述,收到TRADE_FINISHED请求后,这笔订单就结束了,支付宝不会再主动请求商户网站了;
* 收到TRADE_SUCCESS请求后,后续一定还有至少一条通知记录,即TRADE_FINISHED。
* 所以,在做通知接口时,切记使用判断订单状态用或的关系
*
*
* */

    //异步通知
    @RequestMapping("/notify")
    @ResponseBody
    public String notifyCall(HttpServletRequest request, HttpSession session, Model model) throws Exception {
        // 获取支付宝反馈信息
        Map<String, String> params = new HashMap<String, String>();
        Map<String, String[]> requestParams = request.getParameterMap();
        for (Iterator<String> iter = requestParams.keySet().iterator(); iter.hasNext(); ) {
            String name = (String) iter.next();
            String[] values = (String[]) requestParams.get(name);
            String valueStr = "";
            for (int i = 0; i < values.length; i++) {
                valueStr = (i == values.length - 1) ? valueStr + values[i]
                        : valueStr + values[i] + ",";
            }
            params.put(name, valueStr);
        }
        System.out.println("params:");
        System.out.println(params);

        String tradeStatus = params.get("trade_status");
        System.out.println("tradeStatus:");
        System.out.println(tradeStatus);

        System.out.println("\n验签开始.....\n");
        boolean signVerified = AlipaySignature.rsaCheckV1(params, AliPayConfig.ALIPAY_PUBLIC_KEY, AliPayConfig.CHARSET, AliPayConfig.sign_type); //调用SDK验证签名

        if (signVerified) {
            System.out.println("notify sign  success");
            /*
            if(trade_status.equals("TRADE_FINISHED")){
            } else if (trade_status.equals("TRADE_SUCCESS")){
            }
             */
            return "success";
        } else {
            System.out.println("notify sign  failed");
            return "fail";
        }
    }
}
6,home.html
<!DOCTYPE html>
<html lang="en">
<head>
    <meta charset="UTF-8">
    <title>Title</title>
    <meta content="width=device-width, initial-scale=1.0, maximum-scale=1.0, user-scalable=no" name="viewport">
    <meta name="viewport" content="width=640, user-scalable=no">
</head>
<body style="width:640px;margin:0px;font-size: 24px;">
<div style="width:calc(100vw - 20px); margin-left: 10px;margin-top: 10px;">
<form action="/alipay/pay" method="post">
    订单编号:<input style="width:400px;font-size: 22px;" type="text" name="out_trade_no" required><br/>
    订单名称:<input style="width:400px;font-size: 22px;" type="text" name="subject" required><br/>
    付款金额:<input style="width:400px;font-size: 22px;" type="text" name="total_amount" required><br/>
    b o d y:<input style="width:400px;font-size: 22px;" type="text" name="body"><br/>
    <input style="width:150px;height:30px;margin-top: 10px;" type="submit" value="下单">
    <input style="width:150px;height:30px;margin-top: 10px;" type="reset" value="重置">
</form>
</div>
</body>
</html>
四,配置nginx,及运行demo
1,nginx的配置文件
[root@blog ~]# more /usr/local/openresty/nginx/conf/conf.d/alipay.conf
upstream alipay {
      server  127.0.0.1:9090 weight=10;
}
server {
    listen       80;
    server_name  alipay.paydemo.net;
    index         index.html;
    location /{
                proxy_pass http://alipay/;
    }
    access_log      /data/logs/nginxlogs/alipay_web.access_log;
    error_log       /data/logs/nginxlogs/alipay_web.error_log;
}
2,jar包的运行脚本
[root@blog ~]# more /data/alipay/tools/startalipay.sh
#!/bin/bash
export BUILD_ID=dontKillme
whoami
WORKSPACE=/data/alipay/jar
JDK_PATH=/usr/local/soft/jdk-15/bin/java
JAR_NAME=demo-0.0.1-SNAPSHOT.jar

#echo ${JAR_NAME}
#echo "ps -ef | grep ${JAR_NAME} | grep -v grep | awk '{print \$2}'";
PID=`ps -ef | grep ${JAR_NAME} | grep -v grep | grep -v startup | awk '{print \$2}'`
echo $PID;
if [ ! "$PID" ] ;then
     echo "进程不存在"
else
    echo "进程存在,杀死进程PID$PID"
    kill -9 $PID
fi

echo "服务启动开始"
nohup ${JDK_PATH} -jar ${WORKSPACE}/${JAR_NAME} >/data/alipay/logs/run.log 2>&1 &
五,测试效果:
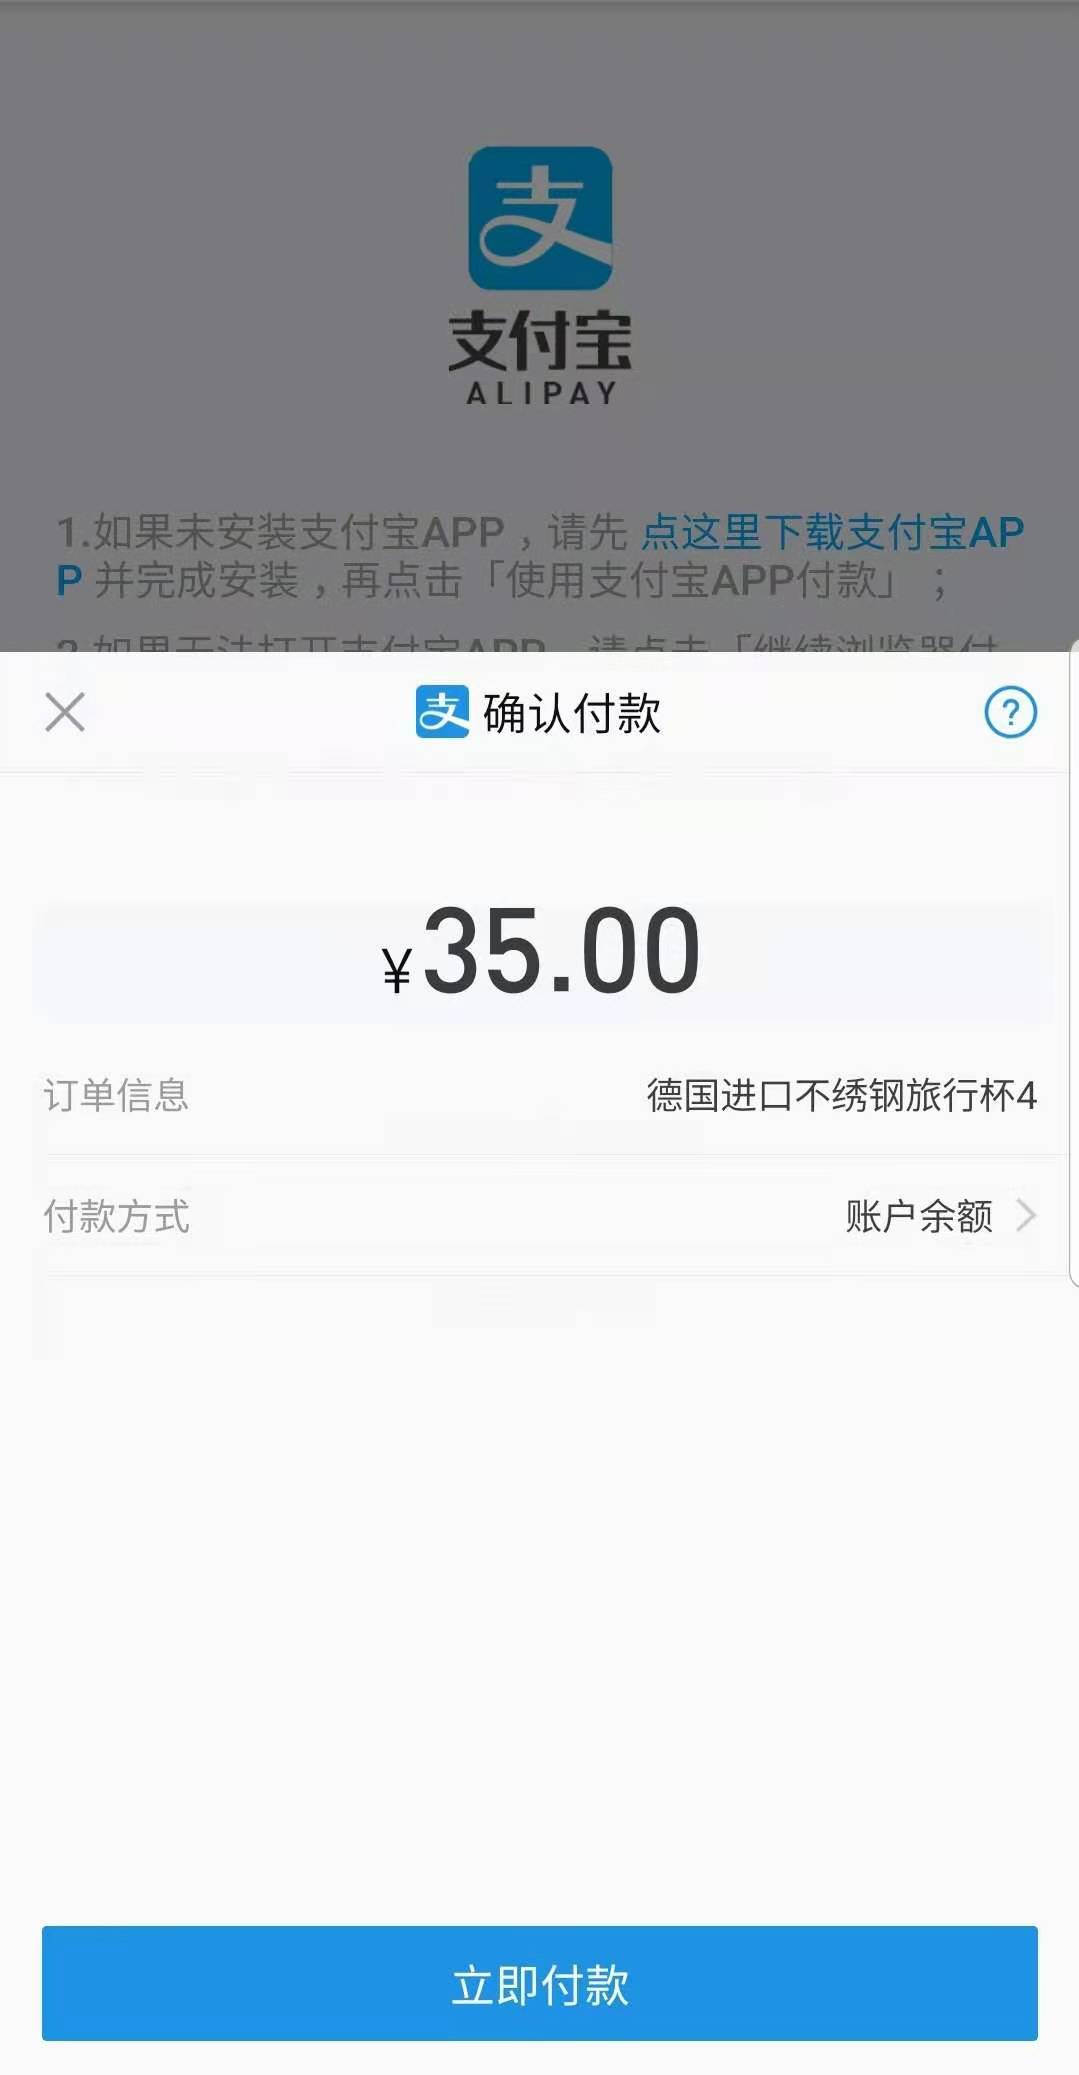
1,访问/alipay/home地址
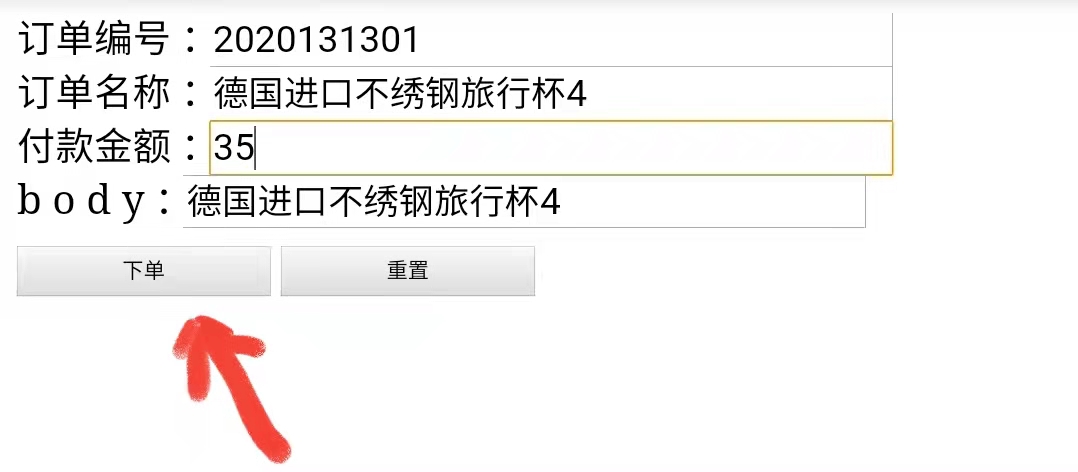
跳转到支付页面,如图:
选择 使用支付宝app付款

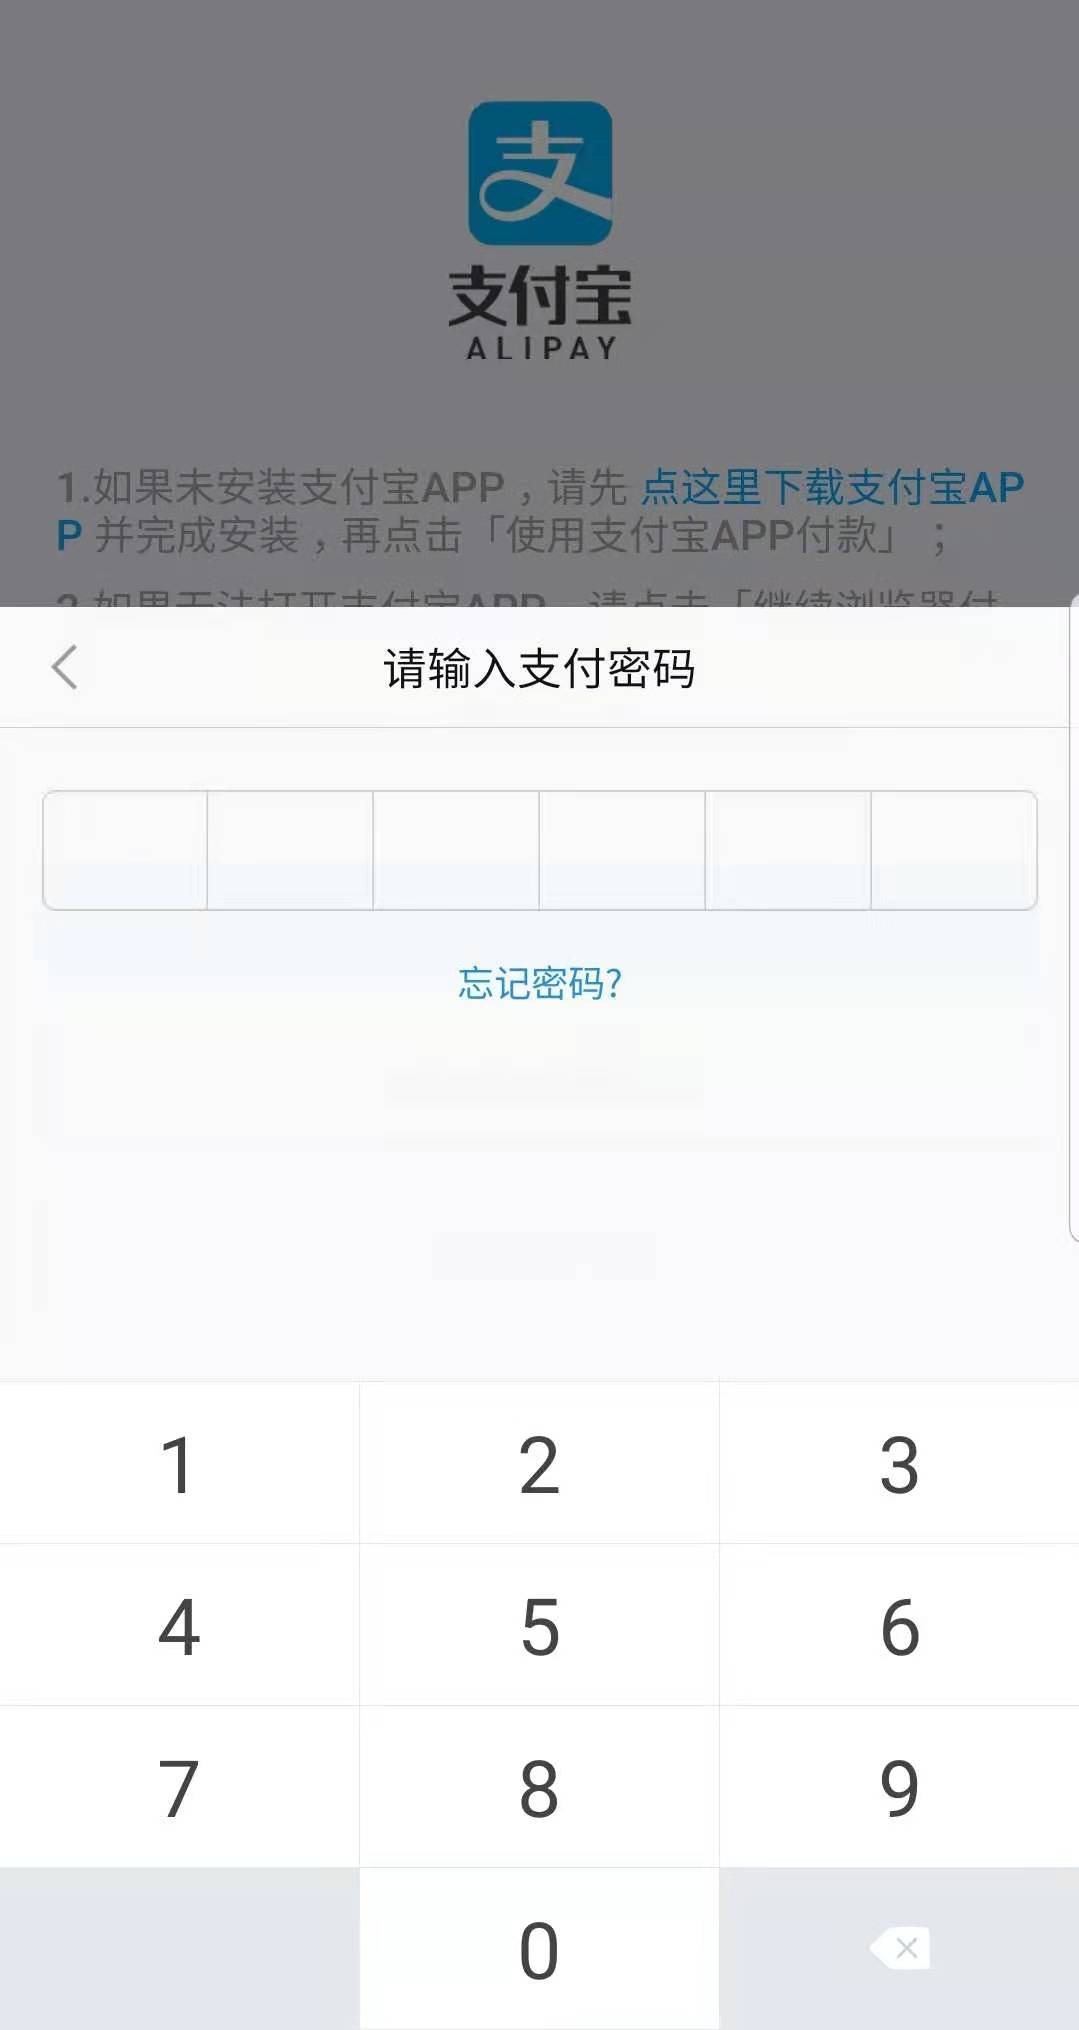
在弹出选择两个支付宝app时,选择 沙箱版,
注意密码是沙箱后台给出的买家的支付密码
支付成功后点 已完成付款:
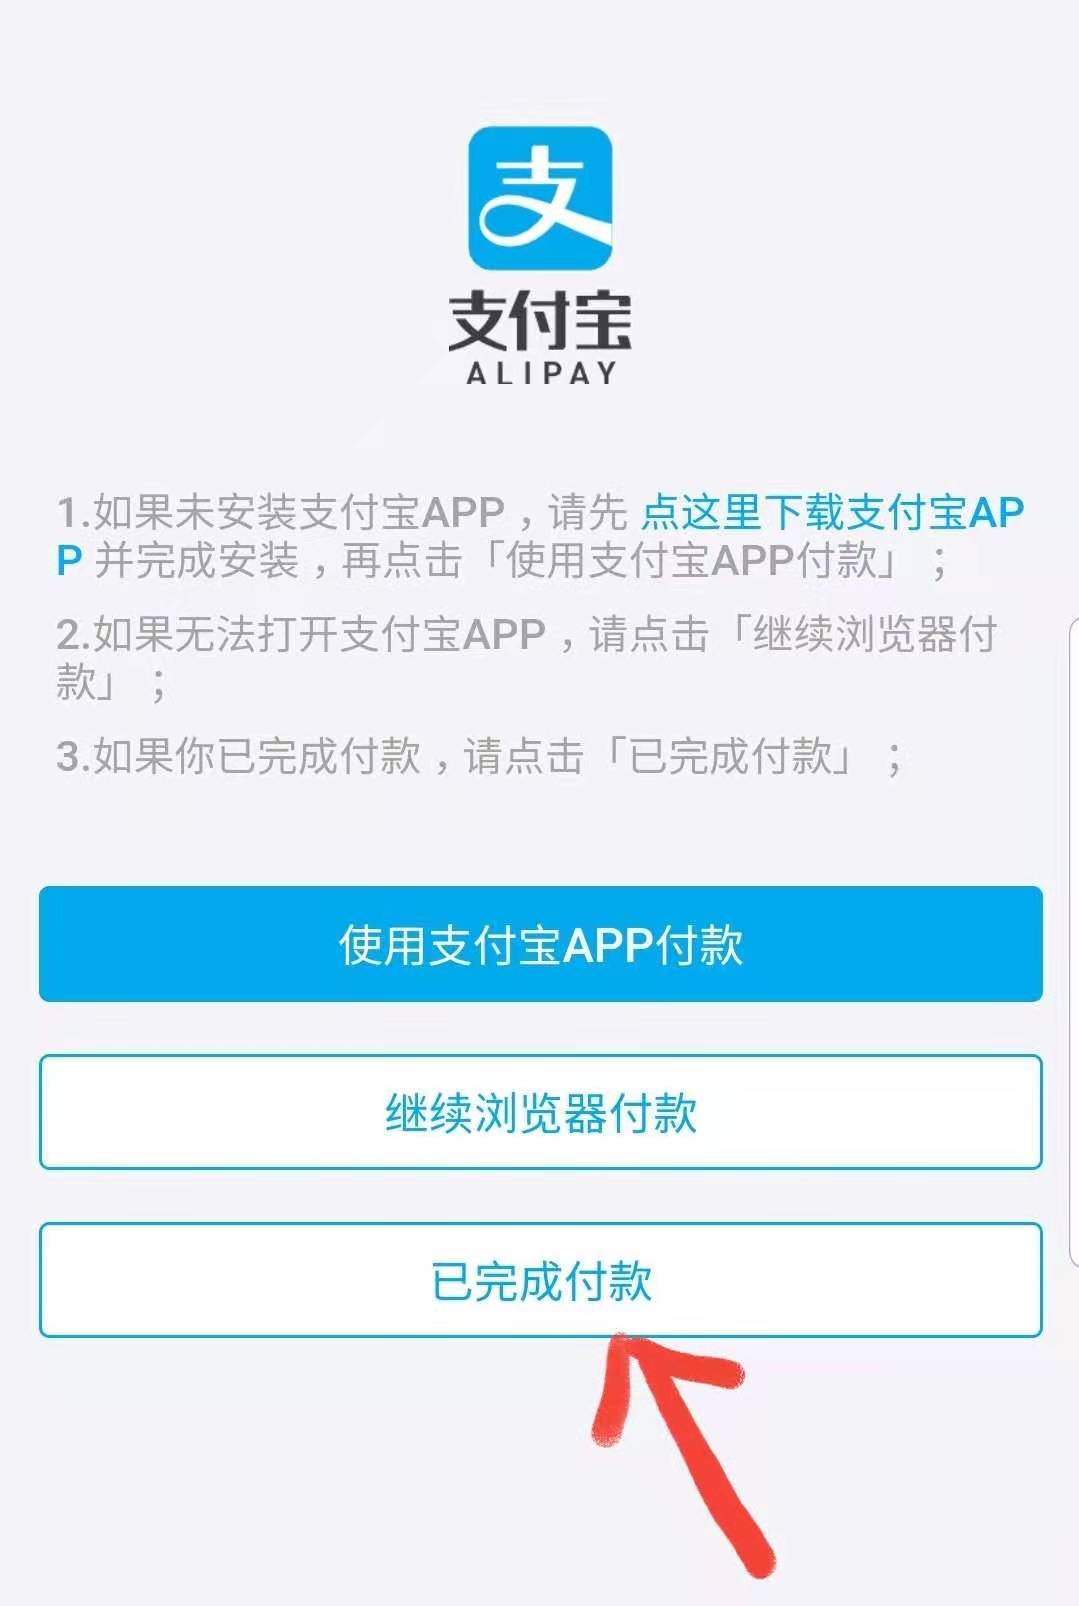
页面返回:

2,查看运行日志:
notify回调记录的日志
params:
{gmt_create=2020-12-08 11:29:49, charset=utf-8, seller_email=mesays4070@sandbox.com, subject=德国进口不绣钢旅行杯4,
sign=D/9wd/EmZ9xPZVhyx/reTiFGqOB2sgL4KKj2G6ta8mJT2GhAw18+Iuuog3rNwfeGHfaF679cMczTKxUQlJD9JnAsGmt8j7FsgDYhlk/CIKmTB79lj
7kouDavDCB0bxjDA+mqBu3oVOZCXH0qoRYA0dq+4pWJPTosMUsYMXHD9Q5UCS6Q3REOakTFGnYwvWs5+xf3CBSW1uBZUsa17vsw==,
body=德国进口不绣钢旅行杯4, buyer_id=20885145241, invoice_amount=35.00, notify_id=202012222112945240513810363,
fund_bill_list=[{"amount":"35.00","fundChannel":"ALIPAYACCOUNT"}], notify_type=trade_status_sync, trade_status=TRADE_SUCCESS,
receipt_amount=35.00, buyer_pay_amount=35.00, app_id=2021000660153, sign_type=RSA2, seller_id=208862735781,
gmt_payment=2020-12-08 11:29:49, notify_time=2020-12-08 11:29:50, version=1.0, out_trade_no=2020131301,
total_amount=35.00, trade_no=2020120822001445240514181897, auth_app_id=20210060153,
buyer_logon_id=nxq***@sandbox.com, point_amount=0.00}
tradeStatus:
TRADE_SUCCESS

验签开始.....

notify sign  success
六,查看spring boot的版本
  .   ____          _            __ _ _
 /\\ / ___'_ __ _ _(_)_ __  __ _ \ \ \ \
( ( )\___ | '_ | '_| | '_ \/ _` | \ \ \ \
 \\/  ___)| |_)| | | | | || (_| |  ) ) ) )
  '  |____| .__|_| |_|_| |_\__, | / / / /
 =========|_|==============|___/=/_/_/_/
 :: Spring Boot ::                (v2.4.0)

 浙公网安备 33010602011771号