
C++vs2019操作mysql workbench 8.0 ce
1.首先安装好mysql workbench/vs2019
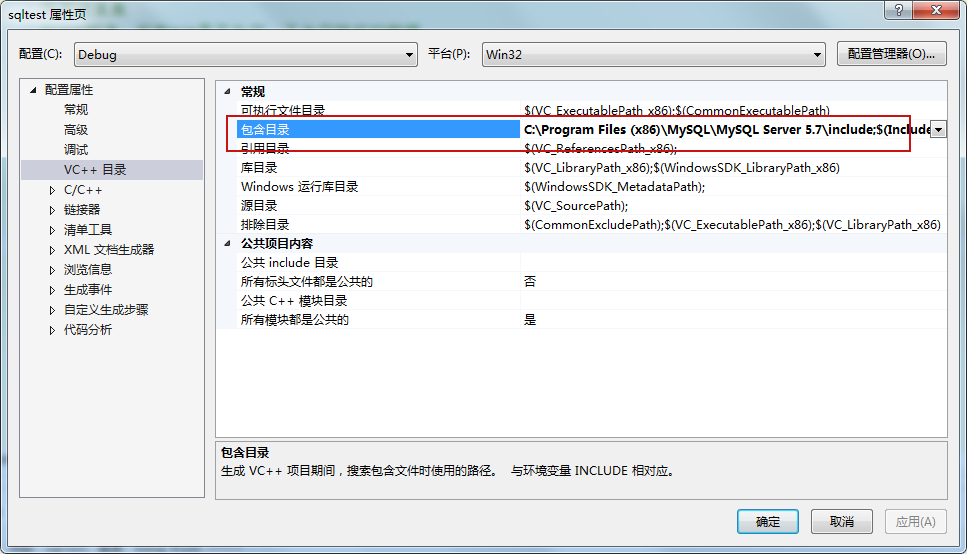
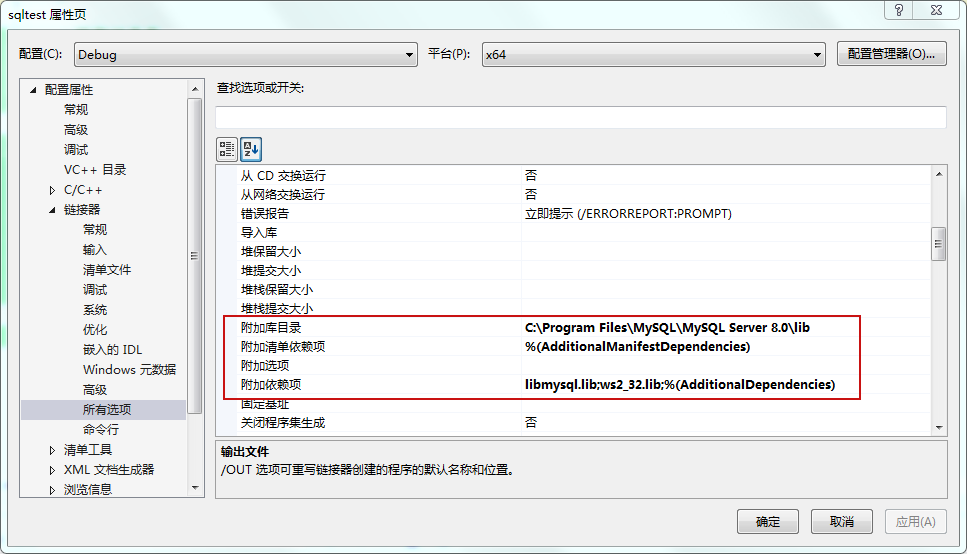
2.工程配置,32位跟64位系统配置路径是不同的


3.配置好后添加测试代码
#include <iostream>
#include <mysql.h>
using namespace std;
int main()
{
MYSQL mysql;
MYSQL_RES* res;
MYSQL_ROW row;
//初始化数据库
mysql_init(&mysql);
//设置编码方式
//mysql_options(&mysql, MYSQL_SET_CHARSET_NAME, "utf8");
//连接数据库
// mysql_real_connect参数:2.本地地址 3.用户名 4.密码 5.数据库名字 6.端口号
//if (mysql_real_connect(&mysql, "localhost", "root", "1234", "test", 3306, NULL, 0) == NULL) { //本地数据库
if (mysql_real_connect(&mysql, "192.168.6.28", "root", "1234", "usertest1", 3306, NULL, 0) == NULL) {//远程服务器
cout << (mysql_error(&mysql));
return 0;
}
////切换数据库
//if (mysql_select_db(&mysql, "usertest2"))
//{
// cout << (mysql_error(&mysql));
// return 0;
//}
//查询数据
if (mysql_query(&mysql, "SELECT * from new_table;"))//new_table 是表名
{
cout << (mysql_error(&mysql));
}
//获取结果集
//给ROW赋值,判断ROW是否为空,不为空就打印数据。
res = mysql_store_result(&mysql);
while (row = mysql_fetch_row(res))
{
printf("%s ", row[0]);//打印1行第一列数据
//...
cout << endl;
}
//关闭数据库
mysql_free_result(res);
mysql_close(&mysql);
}
4.mysql workbench 8.0起的版本操作以及遇到问题
常用cmd操作远程控制
Enter password: ****
use mysql
select host,user from user;
update user set host='%' where user='root';
grant all privileges on *.* to 'user'@'%';
grant all privileges on *.* to 'user'@'%';
flush privileges;
exit;
//解决mysql创建远程访问用户,服务器最好使用软件里面的方法,当然客户操作的话只能用指令
https://www.runoob.com/w3cnote/mysql8-error-1410-42000-you-are-not-allowed-to-create-a-user-with-grant.html
//服务端设置
https://jingyan.baidu.com/article/ac6a9a5e12bc592b653eac9d.html
//输入密码后闪退问题
https://www.cnblogs.com/sunshinewang/p/6789603.html
//实现客户端连接Mysql数据库服务器
https://www.cnblogs.com/pengjw/p/4789927.html
//本地Mysql Workbench远程连接云服务器Mysql
https://blog.csdn.net/moumourenaini/article/details/103652159
//如何在阿里云服务器安装Mysql数据库
https://blog.csdn.net/m0_51173023/article/details/109583452
本文来自博客园,作者:{archer},转载请注明原文链接:https://www.cnblogs.com/archer-mowei/p/15071500.html
