Nginx运维---安装
一、安装nginx前准备
1、安装依赖
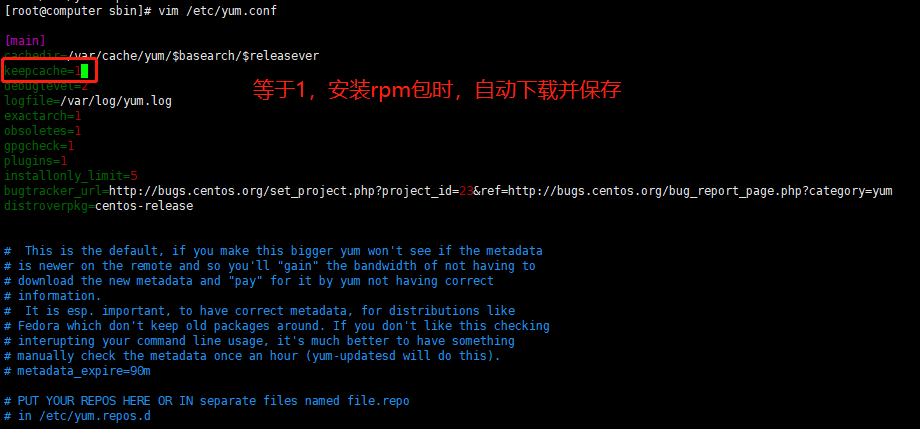
修改rpm参数,设置为安装自动下载软件包
2、安装依赖
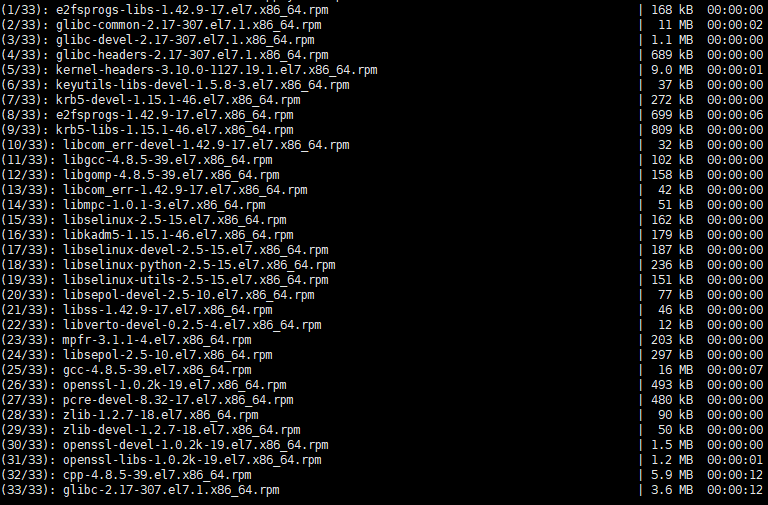
yum install gcc openssl openssl-devel pcre pcre-devel zlib zlib-devel -y
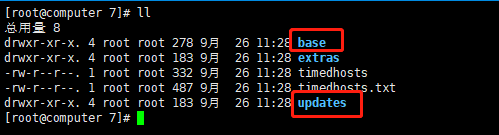
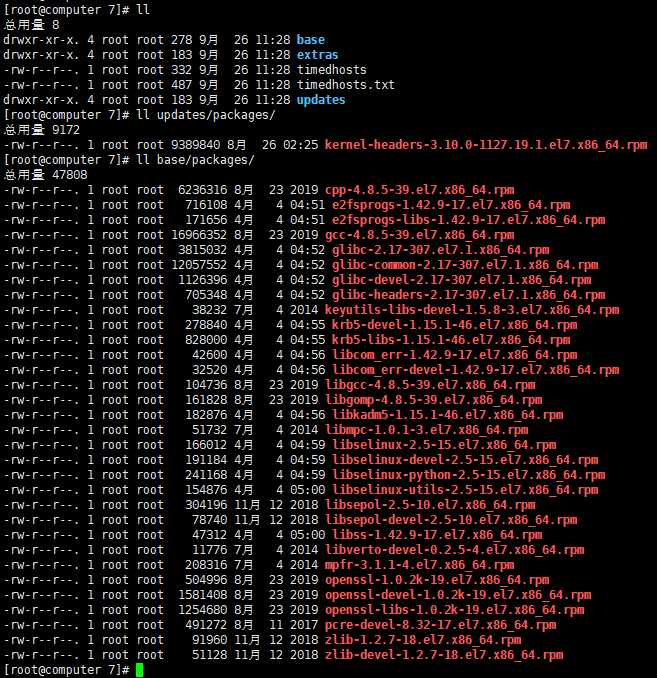
3、打包所需要的依赖,下次无网备用
安装顺序:
二、开始安装
1、进入安装目录,预编译
[root@computer nginx-1.14.2]# ./configure --prefix=/usr/local/nginx
生产环境中安装

2、make、make install
[root@computer nginx-1.14.2]# make
[root@computer nginx-1.14.2]# make install
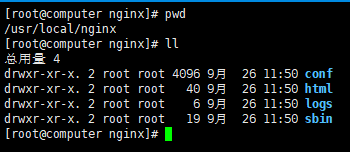
3、进入安装目录,conf配置文件,logs日志文件,sbin下是启动文件
4、普通启动
[root@computer nginx]# cd sbin/
[root@computer sbin]# ./nginx
5、用配置文件启动
[root@computer sbin]# ./nginx  -c /usr/local/nginx/conf/nginx.conf
[root@computer sbin]# /usr/local/nginx/sbin/nginx  -c /usr/local/nginx/conf/nginx.conf                  绝对路径
6、正常关闭nginx
[root@computer sbin]# kill -QUIT 16630(主进程id)

7、快速关闭
[root@computer sbin]# kill -TERM 16637(主进程id)

8、重启nginx,重新加载配置文件
[root@computer sbin]# ./nginx -s reload
9、检查配置文件
[root@computer sbin]# /usr/local/nginx/sbin/nginx -c /usr/local/nginx/conf/nginx.conf -t
nginx: the configuration file /usr/local/nginx/conf/nginx.conf syntax is ok
nginx: configuration file /usr/local/nginx/conf/nginx.conf test is successful
9、查看版本
[root@computer sbin]# /usr/local/nginx/sbin/nginx -V
nginx version: nginx/1.14.2
built by gcc 4.8.5 20150623 (Red Hat 4.8.5-39) (GCC)
configure arguments: --prefix=/usr/local/nginx
[root@computer sbin]# /usr/local/nginx/sbin/nginx -v
nginx version: nginx/1.14.2

10、去除空格和#号

三、配置文件nginx.conf详解
#user  nobody;

#开启进程数 <=CPU数
worker_processes  1;

#错误日志保存位置
#error_log  logs/error.log;
#error_log  logs/error.log  notice;
#error_log  logs/error.log  info;

#进程号保存文件
#pid        logs/nginx.pid;

#每个进程最大连接数(最大连接=连接数x进程数)每个worker允许同时产生多少个链接,默认1024
events {
    worker_connections  1024;
}

http {
    #文件扩展名与文件类型映射表
    include       mime.types;
    #默认文件类型
    default_type  application/octet-stream;

    #日志文件输出格式 这个位置相于全局设置
    log_format  main  '$remote_addr - $remote_user [$time_local] "$request" '
                      '$status $body_bytes_sent "$http_referer" '
                      '"$http_user_agent" "$http_x_forwarded_for"';

    #请求日志保存位置
    #access_log  logs/access.log  main;

    #打开发送文件
    sendfile        on;
    #tcp_nopush     on;

    #keepalive_timeout  0;
    #连接超时时间
    keepalive_timeout  65;

    #打开gzip压缩
    #gzip  on;

    #设定请求缓冲
    #client_header_buffer_size 1k;
    #large_client_header_buffers 4 4k;

    #设定负载均衡的服务器列表
    #upstream myproject {
        #weigth参数表示权值,权值越高被分配到的几率越大
        #max_fails 当有#max_fails个请求失败,就表示后端的服务器不可用,默认为1,将其设置为0可以关闭检查
        #fail_timeout 在以后的#fail_timeout时间内nginx不会再把请求发往已检查出标记为不可用的服务器
    #}

    #webapp
    #upstream myapp {
      # server 192.168.1.171:8080 weight=1 max_fails=2 fail_timeout=30s;
    # server 192.168.1.172:8080 weight=1 max_fails=2 fail_timeout=30s;
    #}

    #配置虚拟主机,基于域名、ip和端口
    server {
        #监听端口
        listen       80;
        #监听域名
        server_name  localhost;

        #charset koi8-r;

        #nginx访问日志放在logs/host.access.log下,并且使用main格式(还可以自定义格式)
        #access_log  logs/host.access.log  main;

        #返回的相应文件地址
        location / {
            #设置客户端真实ip地址
            #proxy_set_header X-real-ip $remote_addr;
            #负载均衡反向代理
            #proxy_pass http://myapp;

            #返回根路径地址(相对路径:相对于/usr/local/nginx/)
            root   html;
            #默认访问文件
            index  index.html index.htm;
        }

        #配置反向代理tomcat服务器:拦截.jsp结尾的请求转向到tomcat
        #location ~ \.jsp$ {
        #    proxy_pass http://192.168.1.171:8080;
        #}

        #error_page  404              /404.html;
        # redirect server error pages to the static page /50x.html
        #

        #错误页面及其返回地址
        error_page   500 502 503 504  /50x.html;
        location = /50x.html {
            root   html;
        }

        # proxy the PHP scripts to Apache listening on 127.0.0.1:80
        #
        #location ~ \.php$ {
        #    proxy_pass   http://127.0.0.1;
        #}

        # pass the PHP scripts to FastCGI server listening on 127.0.0.1:9000
        #
        #location ~ \.php$ {
        #    root           html;
        #    fastcgi_pass   127.0.0.1:9000;
        #    fastcgi_index  index.php;
        #    fastcgi_param  SCRIPT_FILENAME  /scripts$fastcgi_script_name;
        #    include        fastcgi_params;
        #}

        # deny access to .htaccess files, if Apache's document root
        # concurs with nginx's one
        #
        #location ~ /\.ht {
        #    deny  all;
        #}
    }

    #虚拟主机配置:
    server {
        listen 1234;
        server_name bhz.com;
        location / {
        #正则表达式匹配uri方式:在/usr/local/nginx/bhz.com下 建立一个test123.html 然后使用正则匹配
        #location ~ test {
            ## 重写语法:if return (条件 = ~ ~*)
            #if ($remote_addr = 192.168.1.200) {
            #       return 401;
            #}

            #if ($http_user_agent ~* firefox) {
            #       rewrite ^.*$ /firefox.html;
            #       break;
            #}

            root bhz.com;
            index index.html;
        }

        #location /goods {
        #        rewrite "goods-(\d{1,5})\.html" /goods-ctrl.html;
        #        root bhz.com;
        #        index index.html;
        #}

        #配置访问日志
        access_log logs/bhz.com.access.log main;
    }


    # another virtual host using mix of IP-, name-, and port-based configuration
    #
    #server {
    #    listen       8000;
    #    listen       somename:8080;
    #    server_name  somename  alias  another.alias;

    #    location / {
    #        root   html;
    #        index  index.html index.htm;
    #    }
    #}

    # HTTPS server
    #
    #server {
    #    listen       443 ssl;
    #    server_name  localhost;

    #    ssl_certificate      cert.pem;
    #    ssl_certificate_key  cert.key;

    #    ssl_session_cache    shared:SSL:1m;
    #    ssl_session_timeout  5m;

    #    ssl_ciphers  HIGH:!aNULL:!MD5;
    #    ssl_prefer_server_ciphers  on;

    #    location / {
    #        root   html;
    #        index  index.html index.htm;
    #    }
    #}
}
四、配置文件讲解
1、基本配置文件
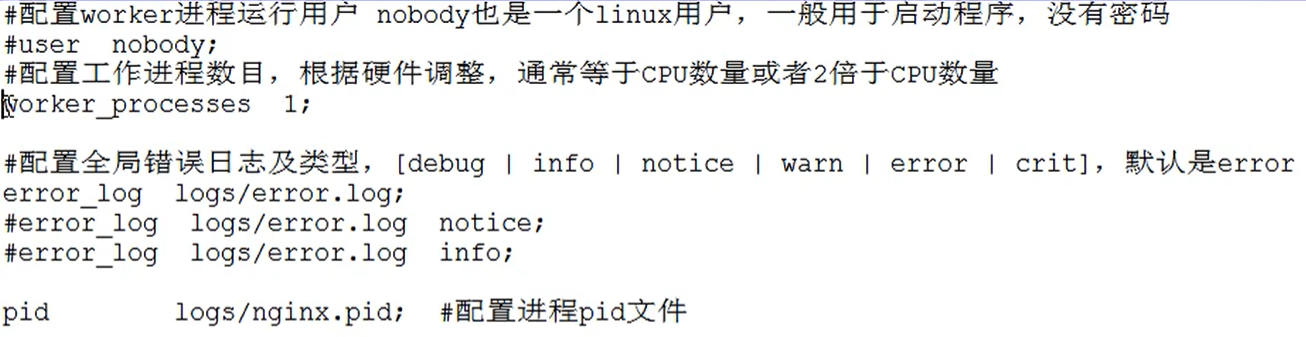
2、配置worker进程,上线是65535,nginx支持的总连接数=worker_connections*workerprocesses

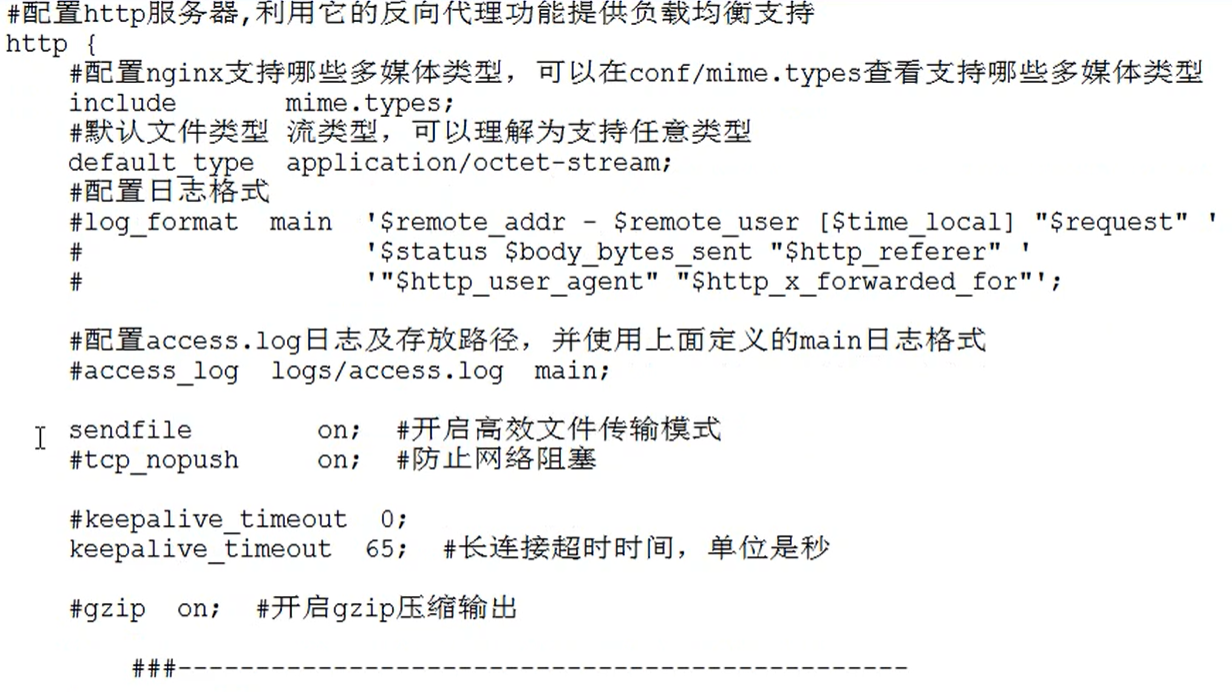
3、http服务器
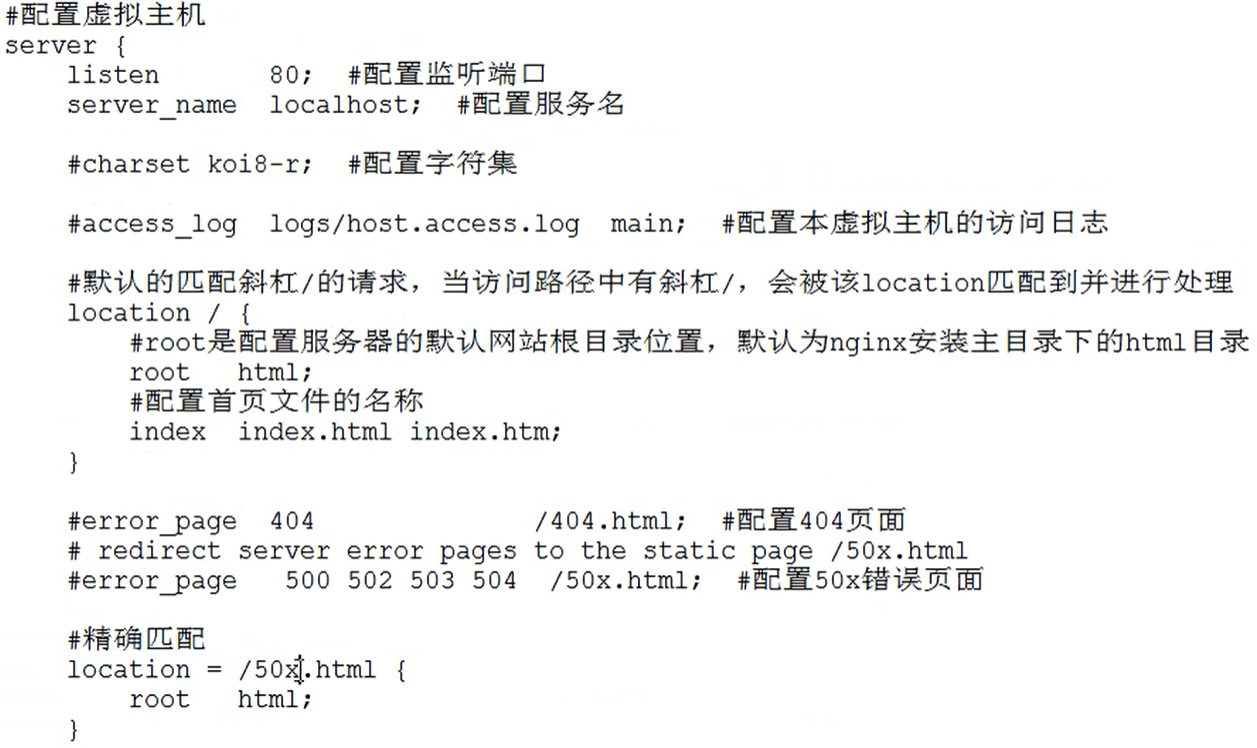
4、配置server
四、负载均衡
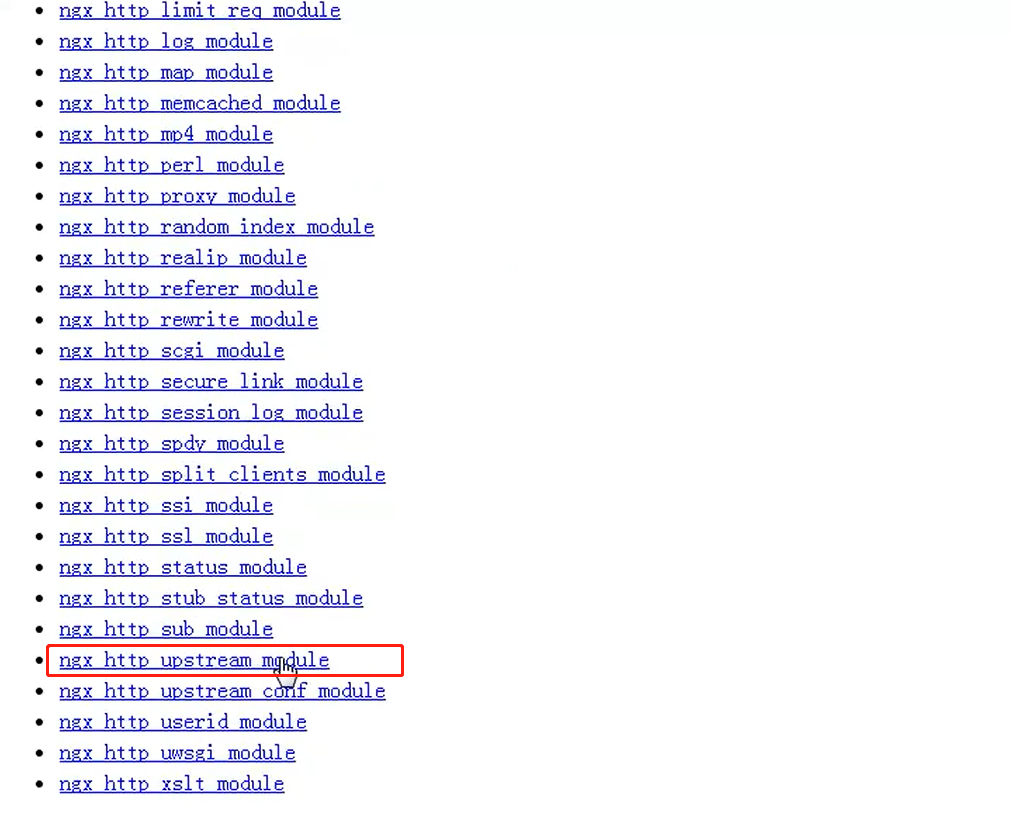
查看官网帮助文档

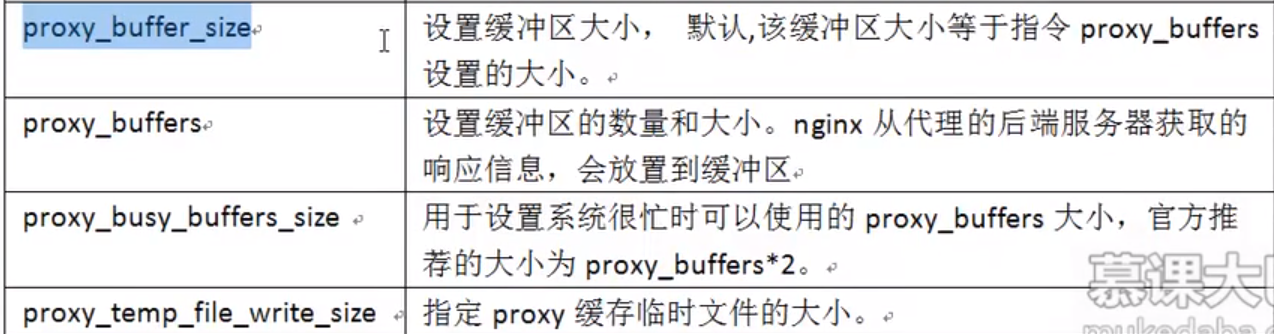
1、参数

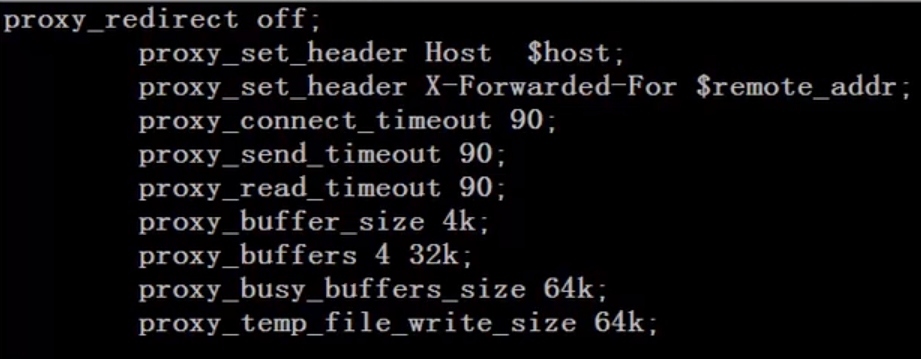

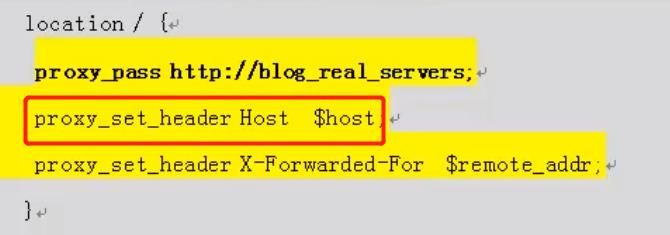
2、proxy_set_header参数

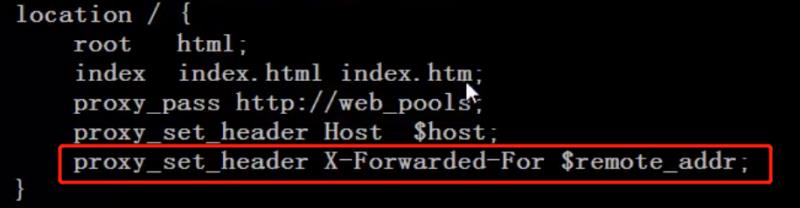
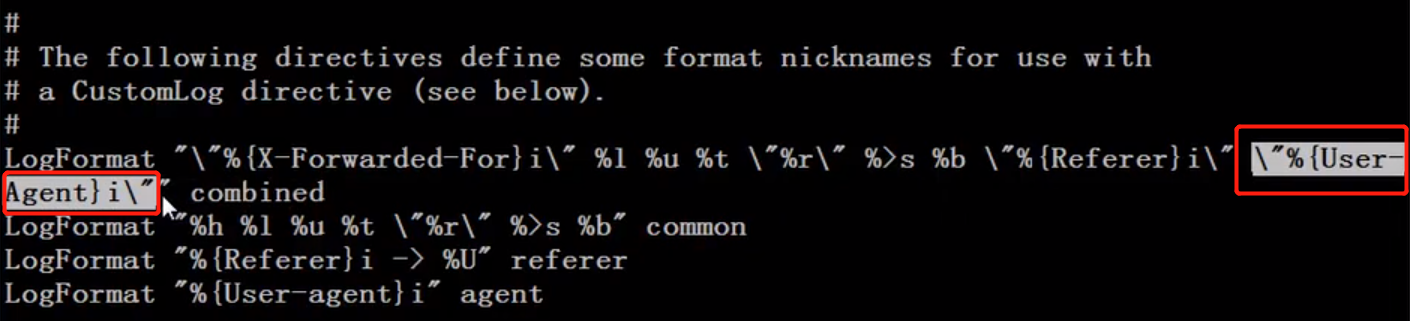
3、配置日志记录客户端IP地址
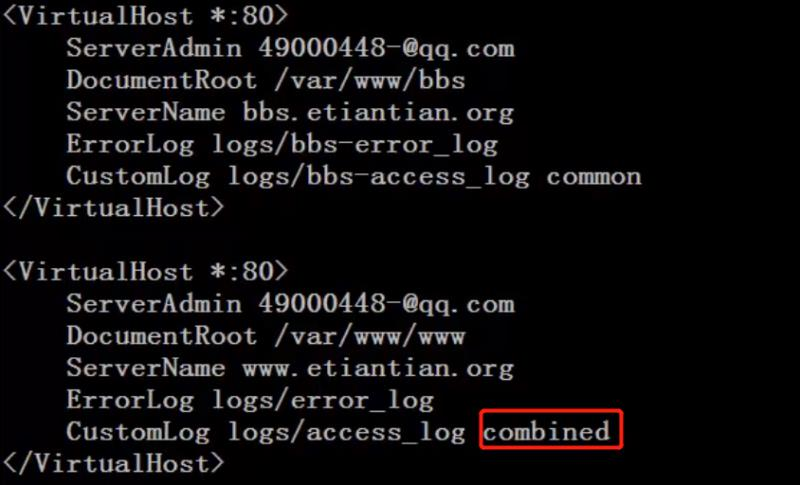
配置apache日志收集
![]()

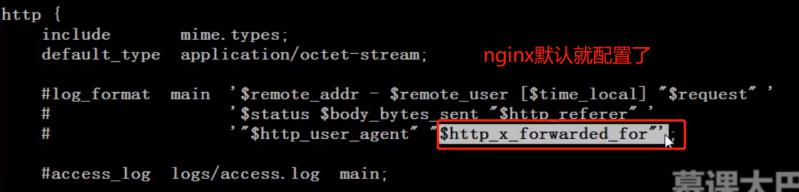
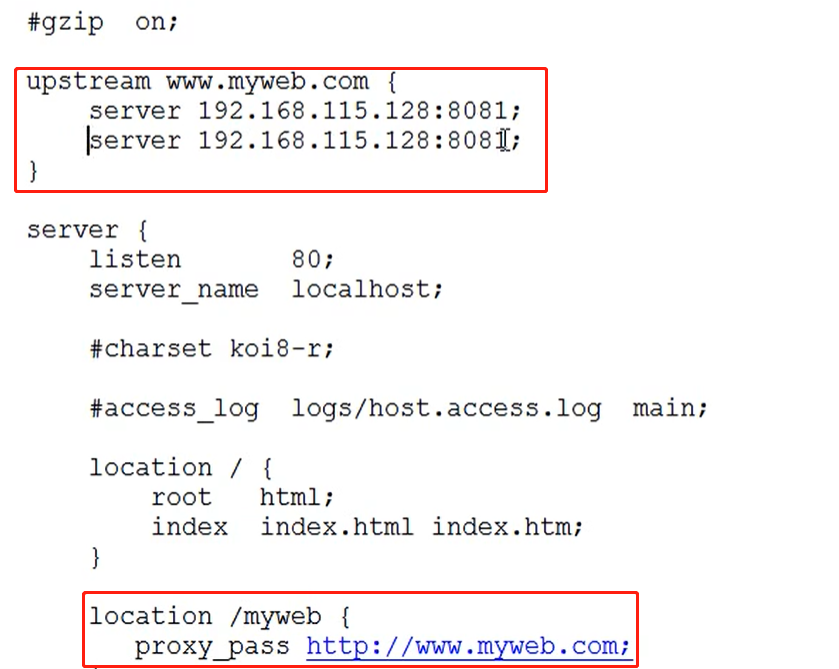
nginx配置:
4、负载均衡配置
1)轮询策略
2)权重策略

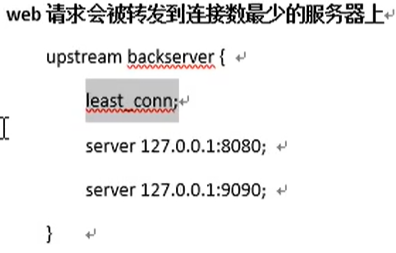
3)最小连接数
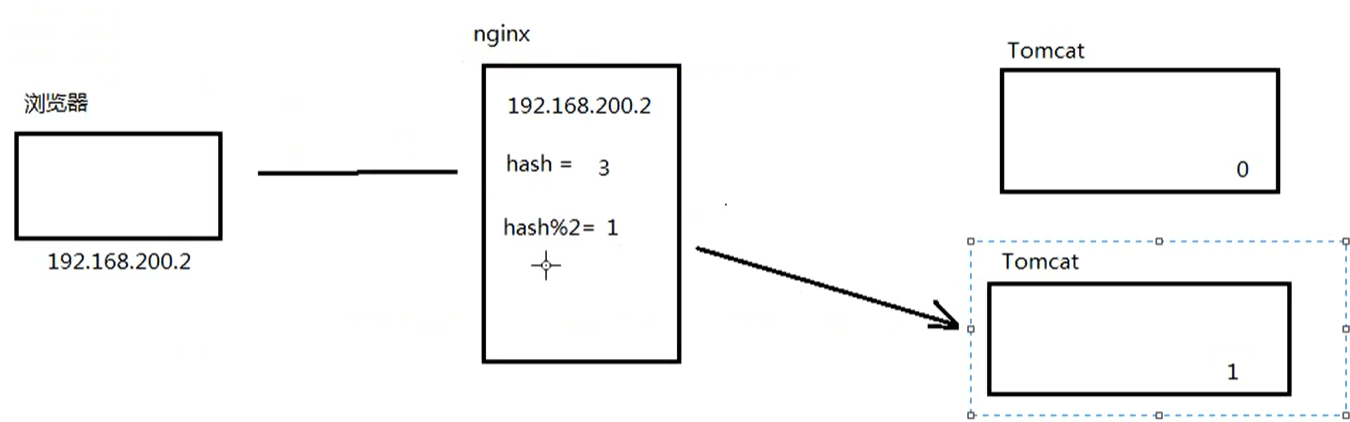
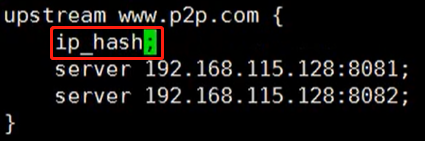
4)hash(这种方式不会丢失session)


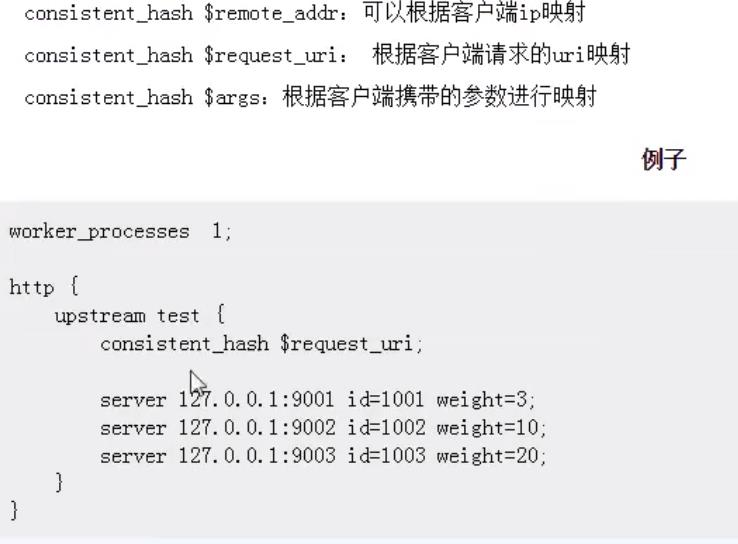
5)url_hash

5、max_fails参数

6、fail_timeout参数

7、两个参数配合案例


五、热更新
1、backup实现图,关闭主服务器,更新备份服务器
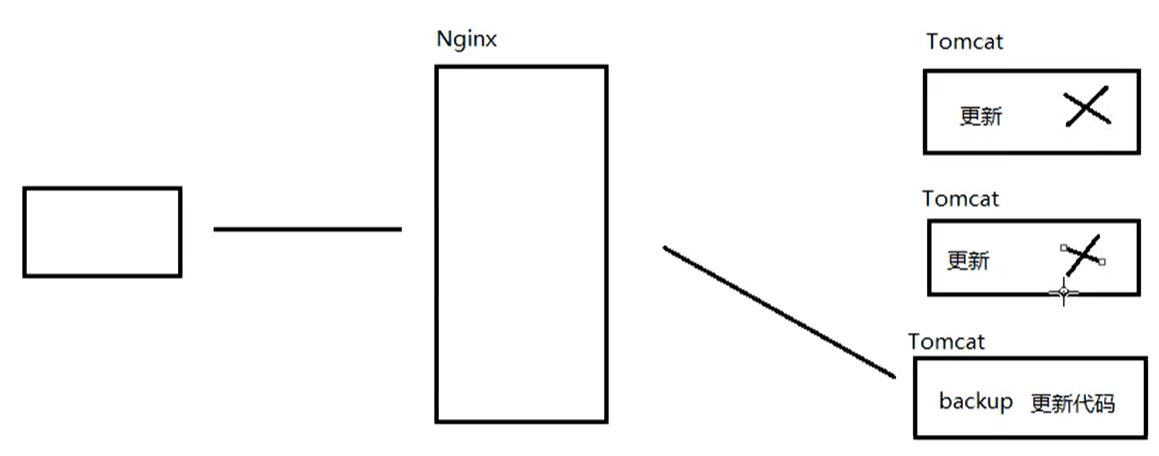
2、启动主服务器

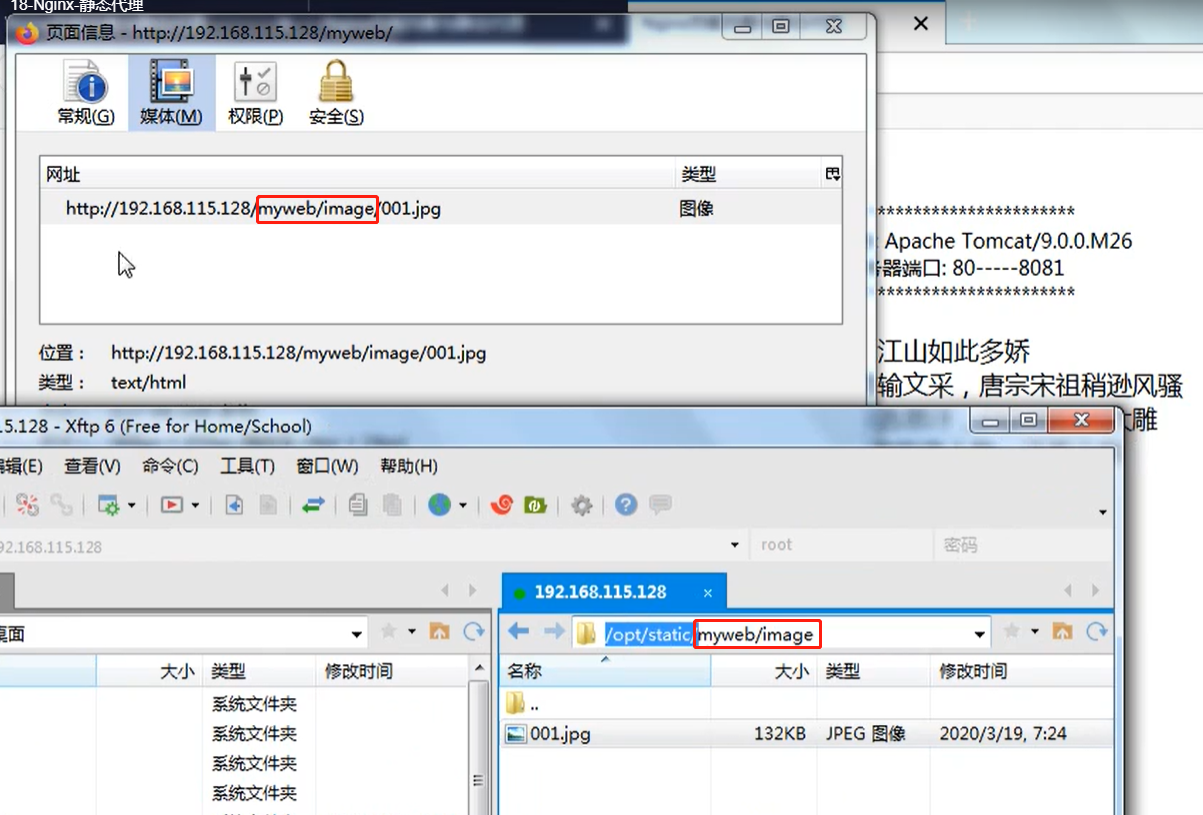
六、静态代理
1、静态代理方式
1)目录过滤

2)后缀名过滤

2、目录对应
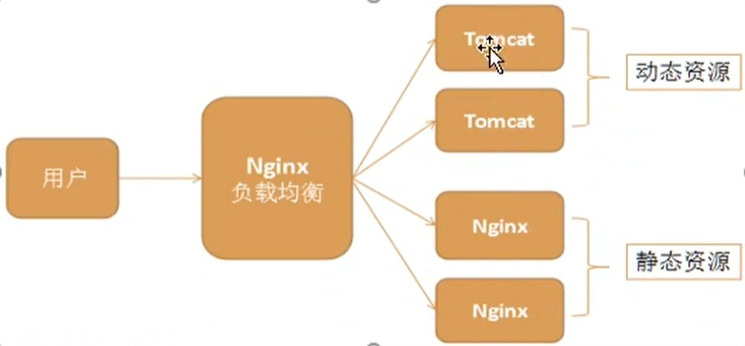
七、动静分离
1、概念优势

2、架构图

3、实施步骤
1)部署两个tomcat,用作动态资源
2)部署两个nginx,用作静态资源
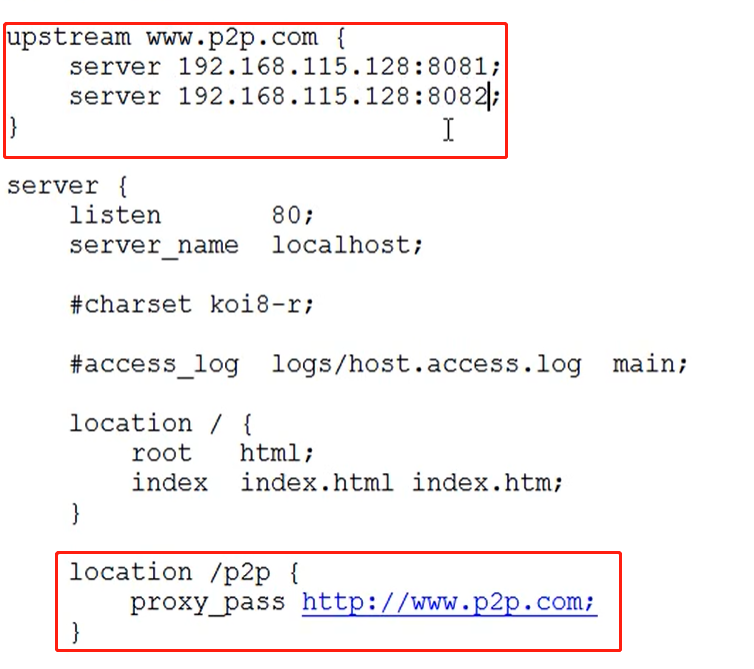
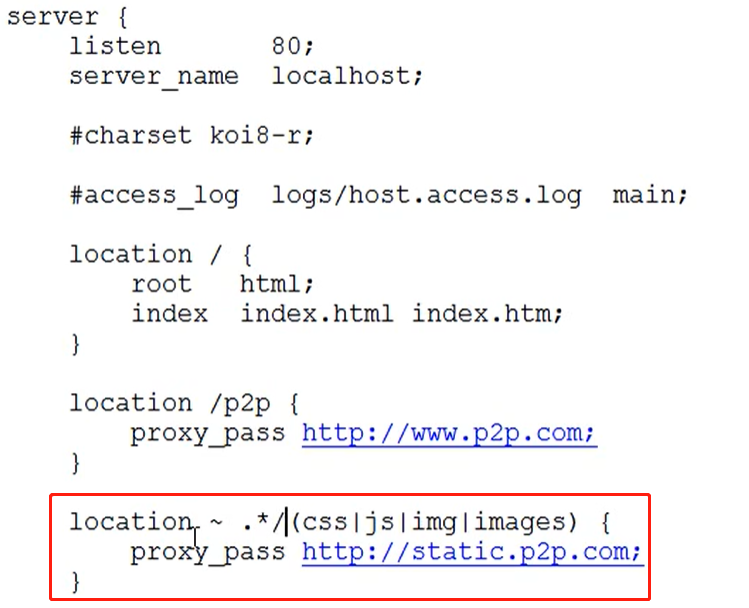
3) nginx负载均衡配置
动态资源负载
解决session丢失问题
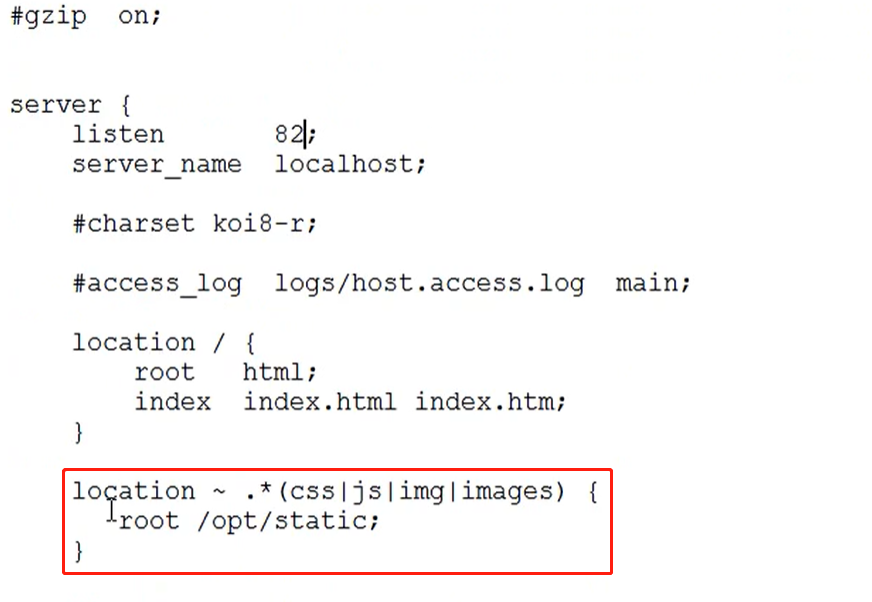
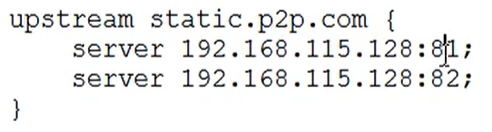
静态资源负载,拦截静态资源文件夹
负载均衡设置
4、案例二

生产建议权限控制:

1)配置文件
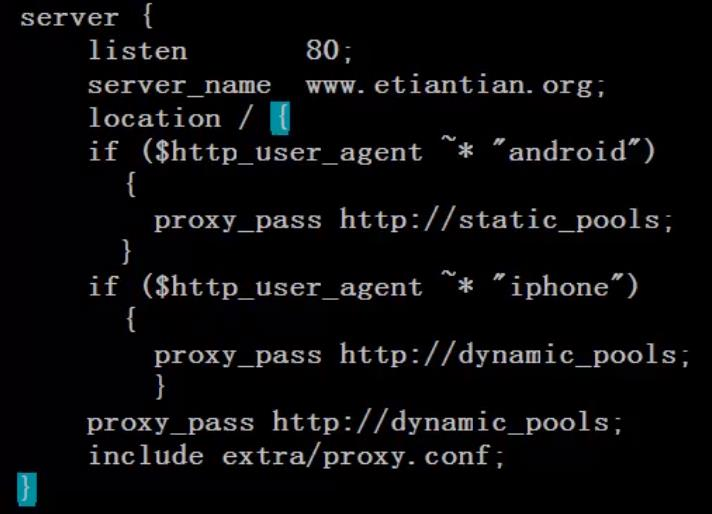
2)配置记录浏览器的型号
八、虚拟主机
1、基于域名的虚拟主机

2、架构图
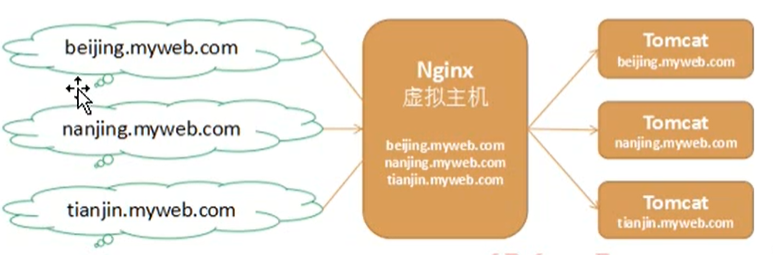
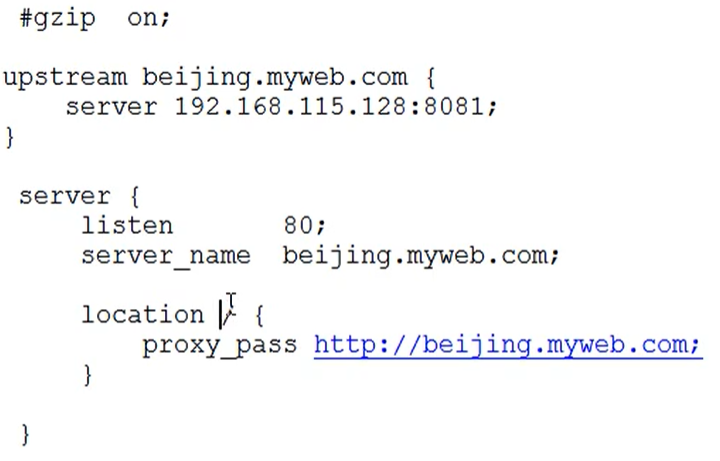
3、具体配置

 浙公网安备 33010602011771号