微信点餐之后台订单管理(8)
创建公共页面
1:左侧功能目录页面:
resources\templates\common\nav.ftl
<nav class="navbar navbar-inverse navbar-fixed-top" id="sidebar-wrapper" role="navigation">
    <ul class="nav sidebar-nav">
        <li class="sidebar-brand">
            <a href="#">
                卖家管理系统
            </a>
        </li>
        <li>
            <a href="/sell/seller/order/list"><i class="fa fa-fw fa-list-alt"></i> 订单</a>
        </li>
        <li class="dropdown open">
            <a href="#" class="dropdown-toggle" data-toggle="dropdown" aria-expanded="true"><i class="fa fa-fw fa-plus"></i> 商品 <span class="caret"></span></a>
            <ul class="dropdown-menu" role="menu">
                <li class="dropdown-header">操作</li>
                <li><a href="/sell/seller/product/list">列表</a></li>
                <li><a href="/sell/seller/product/index">新增</a></li>
            </ul>
        </li>
        <li class="dropdown open">
            <a href="#" class="dropdown-toggle" data-toggle="dropdown" aria-expanded="true"><i class="fa fa-fw fa-plus"></i> 类目 <span class="caret"></span></a>
            <ul class="dropdown-menu" role="menu">
                <li class="dropdown-header">操作</li>
                <li><a href="/sell/seller/category/list">列表</a></li>
                <li><a href="/sell/seller/category/index">新增</a></li>
            </ul>
        </li>

        <li>
            <a href="/sell/seller/logout"><i class="fa fa-fw fa-list-alt"></i> 登出</a>
        </li>
    </ul>
</nav>
2:成功跳转页面:
resources\templates\common\success.ftl
<html>
<head>
    <meta charset="UTF-8">
    <title>成功提示</title>
    <link href="https://cdn.bootcss.com/twitter-bootstrap/3.0.1/css/bootstrap.min.css" rel="stylesheet">
</head>
<body>

<div class="container">
    <div class="row clearfix">
        <div class="col-md-12 column">
            <div class="alert alert-dismissable alert-success">
                <button type="button" class="close" data-dismiss="alert" aria-hidden="true">×</button>
                <h4>
                成功!
                </h4>${msg!""}!<a href="${url!""}" class="alert-link">3S后自动跳转</a>
                <#--${msg!""} :判断为空的话 就复制一个空值-->
            </div>
        </div>
    </div>
</div>

</body>
<script>

    setTimeout('location.href="${url}"',3000);

</script>
</html>
3:错误跳转页面:
resources\templates\common\error.ftl
<html>
<head>
    <meta charset="UTF-8">
    <title>错误提示</title>
    <link href="https://cdn.bootcss.com/twitter-bootstrap/3.0.1/css/bootstrap.min.css" rel="stylesheet">
</head>
<body>

<div class="container">
    <div class="row clearfix">
        <div class="col-md-12 column">
            <div class="alert alert-dismissable alert-danger">
                <button type="button" class="close" data-dismiss="alert" aria-hidden="true">×</button>
                <h4>
                    错误!
                </h4> <strong>${msg!""}!</strong> Best check yo self, you're not looking too good. <a href="${url!""}" class="alert-link">3S后自动跳转</a>
            </div>
        </div>
    </div>
</div>

</body>
<script>

    setTimeout('location.href="${url}"',3000);

</script>
</html>
实现orderservice的findList查询所有订单的方法
com\imooc\service\imp\OrderServiceImp.java
Override
public Page<OrderDTO> findList(Pageable pageable) {

    Page<OrderMaster> orderMasterPage = orderMasterDao.findAll(pageable);

    /*Page<OrderMaster>转成List<OrderDTO>*/
    List<OrderDTO> orderDTOList = OrderMaster2OrderDTOConverter.convert(orderMasterPage.getContent());
    /*封装成page对象*/
    Page<OrderDTO> orderDTOPage = new PageImpl<OrderDTO>(orderDTOList,pageable,orderMasterPage.getTotalElements());
    return orderDTOPage;
}
创建controller控制层
com\imooc\controller\SellerOrderController.java
package com.imooc.controller;

import com.imooc.dto.OrderDTO;
import com.imooc.exception.SellException;
import com.imooc.service.OrderService;
import com.imooc.vo.enums.ResultEnum;
import lombok.extern.slf4j.Slf4j;
import org.springframework.beans.factory.annotation.Autowired;
import org.springframework.data.domain.Page;
import org.springframework.data.domain.PageRequest;
import org.springframework.stereotype.Controller;
import org.springframework.web.bind.annotation.GetMapping;
import org.springframework.web.bind.annotation.RequestMapping;
import org.springframework.web.bind.annotation.RequestParam;
import org.springframework.web.servlet.ModelAndView;
import java.util.Map;

/**
 * @author: menghaibin
 * @create: 2020-02-22 20:15
 * @description: 卖家端订单
 **/
Controller
RequestMapping("/seller/order")
@Slf4j
public class SellerOrderController {

    @Autowired
    private OrderService orderService;
}
1:查询所有订单:
/*后台查询订单列表
* page:第几页
* size:一页有多少条数据
* */
@GetMapping("/list")
public ModelAndView list(@RequestParam(value = "page",defaultValue = "1") Integer page,
                          @RequestParam(value = "size",defaultValue = "3") Integer size,
                          Map<String,Object> map){
    PageRequest request = new PageRequest(page-1,size);
    Page<OrderDTO> orderDTOPage = orderService.findList(request);

    map.put("orderDTOPage",orderDTOPage);
    map.put("currentPage",page);/*当前页,用于前端分页*/
    map.put("size",size);/*每页多少条*/
    return new ModelAndView("/list",map);
}
创建list方法需要返回的list的页面:
resources\templates\list.ftl
<html>
    <head>
        <meta charset="UTF-8">
        <title>卖家商品列表</title>
        <link href="https://cdn.bootcss.com/twitter-bootstrap/3.0.1/css/bootstrap.min.css" rel="stylesheet">
        <#--侧边栏样式-->
        <link rel="stylesheet" href="/sell/css/style.css">
    </head>
    <body>
<div id="wrapper" class="toggled">
    <#--左侧功能侧栏-->
    <#include "common/nav.ftl" >
    <#--主内容-->
    <div id="page-content-wrapper">
        <div class="container-fluid">
            <div class="row clearfix">
                <div class="col-md-12 column">
                    <table class="table table-bordered">
                        <thead>
                        <tr>
                            <th>订单id</th>
                            <th>姓名</th>
                            <th>手机号</th>
                            <th>地址</th>
                            <th>金额</th>
                            <th>订单状态</th>
                            <th>支付状态</th>
                            <th>创建时间</th>
                            <th colspan="2">操作</th>
                        </tr>
                        </thead>
                        <tbody>
                        <#--遍历获取订单列表-->
                        <#list orderDTOPage.getContent() as orderDTO>
                        <tr>
                            <td>${orderDTO.orderId}</td>
                            <td>${orderDTO.buyerName}</td>
                            <td>${orderDTO.buyerPhone}</td>
                            <td>${orderDTO.buyerAddress}</td>
                            <td> ${orderDTO.orderAmount}</td>
                            <td>${orderDTO.orderStatus}</td>
                            <td>${orderDTO.payStatus}</td>
                            <td> ${orderDTO.createTime}</td>
                            <td>
                                <a href="/sell/seller/order/detail?orderId=${orderDTO.orderId}">详情</a>
                            </td>
                            <td>
                                <#if orderDTO.orderStatus == 0 >
                                    <a href="/sell/seller/order/cancel?orderId=${orderDTO.orderId}">取消</a>
                                </#if>
                            </td>
                        </tr>
                        </#list>

                        </tbody>
                    </table>
                </div>

            </div>
        </div>
    </div>

</div>

    </body>
</html>
预览页面:
http://127.0.0.1/sell/seller/order/list
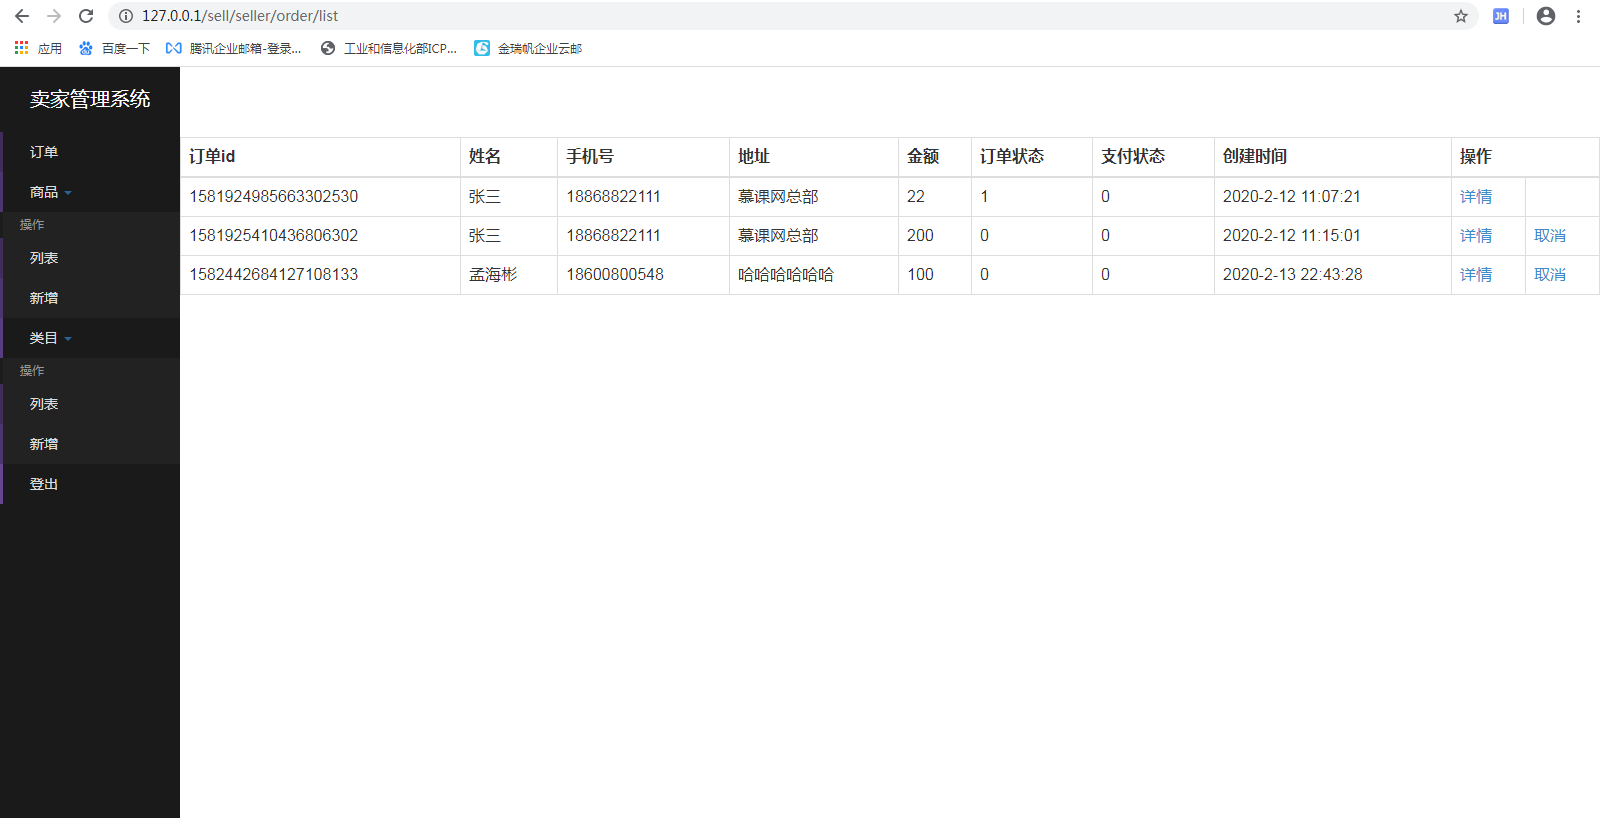
2:列表分页功能:
在list.ftl中追加分页组件的html代码
resources\templates\list.ftl
                        </tbody>
                    </table>
                </div>
<#--在此插入分页代码-->
            <#--分页-->
                <div class="col-md-12 column">
                    <ul class="pagination pull-right">
                    <#--判断上一页是否可点击-->
                    <#if currentPage lte 1>
                        <li class="disabled"><a href="#">上一页</a></li>
                    <#else>
                        <li><a href="/sell/seller/order/list?page=${currentPage-1}&size=${size}">上一页</a></li>
                    </#if>

                    <#--获取总页数-->
                    <#list 1..orderDTOPage.getTotalPages() as index>
                    <#--如果等于当前页 当前页的分页标签不可点击-->
                        <#if currentPage == index>
                            <li class="disabled"><a href="#"> ${index}</a></li>
                        <#else>
                            <li><a href="/sell/seller/order/list?page=${index}&size=${size}"> ${index}</a></li>
                        </#if>

                    </#list>
                    <#--判断下一页是否可点击-->
                    <#if currentPage gte orderDTOPage.getTotalPages()>
                        <li class="disabled"><a href="#">下一页</a></li>
                    <#else>
                        <li><a href="/sell/seller/order/list?page=${currentPage+1}&size=${size}">下一页</a></li>
                    </#if>
                    </ul>
                </div>
3:取消订单功能:
在SellerOrderController中追加cancel订单取消方法
/*取消订单*/
@GetMapping("/cancel")
public ModelAndView cancel(@RequestParam("orderId") String orderId,
                           Map<String,Object> map){

    try{
        /*订单如果不存在 在findone方法里已经做了判断 会抛出异常*/
        OrderDTO orderDTO = orderService.findOne(orderId);
        orderService.cancel(orderDTO);
    }catch(SellException e){
        log.error("订单不存在 取消订单失败");
        map.put("msg", e.getMessage());
        map.put("url","/sell/seller/order/list");
        return new ModelAndView("common/error",map);
    }

    map.put("msg", ResultEnum.SUCCESS.getMsg());
    map.put("url","/sell/seller/order/list");
    return new ModelAndView("common/success",map);
}
在list页面已经有了取消订单的连接:

4:订单详细功能:
在SellerOrderController中追加detail订单取消方法
/*订单详情*/
@GetMapping("/detail")
public ModelAndView detail(@RequestParam("orderId") String orderId,
                           Map<String,Object> map){
    OrderDTO orderDTO = new OrderDTO();
    try{
        /*订单如果不存在 在findone方法里已经做了判断 会抛出异常*/
        orderDTO = orderService.findOne(orderId);
    }catch(SellException e){
        log.error("订单不存在 取消订单失败");
        map.put("msg", e.getMessage());
        map.put("url","/sell/seller/order/list");
        return new ModelAndView("common/error",map);
    }

    map.put("orderDTO",orderDTO);
    return new ModelAndView("order/detail",map);
}
创建detail方法需要返回的detail.ftl的页面:
resources\templates\order\detail.ftl
<html>
<head>
    <meta charset="UTF-8">
    <title>卖家订单详细页</title>
    <link href="https://cdn.bootcss.com/twitter-bootstrap/3.0.1/css/bootstrap.min.css" rel="stylesheet">
    <#--侧边栏样式-->
    <link rel="stylesheet" href="/sell/css/style.css">
</head>
<body>

<div id="wrapper" class="toggled">

<#--侧栏-->
    <#include "../common/nav.ftl" >

<#--主内容-->
    <div id="page-content-wrapper">
        <div class="container-fluid">
            <div class="row clearfix">
                <div class="col-md-4 column">
                    <table class="table table-bordered">
                        <thead>
                        <tr>
                            <th>订单id</th>
                            <th>订单总金额 </th>
                        </tr>
                        </thead>
                        <tbody>
                        <tr>
                            <td>${orderDTO.orderId}</td>
                            <td>${orderDTO.orderAmount}</td>
                        </tr>
                        </tbody>
                    </table>
                </div>

                <br>

                <div class="col-md-12 column">
                    <table class="table table-bordered">
                        <thead>
                        <tr>
                            <th>商品id</th>
                            <th>商品名称</th>
                            <th>商品价格</th>
                            <th>数量</th>
                            <th>总额</th>
                        </tr>
                        </thead>
                        <tbody>
                        <#list orderDTO.orderDetailList as orderDetail>
                        <tr>
                            <td>${orderDetail.productId}</td>
                            <td>${orderDetail.productName}</td>
                            <td>${orderDetail.productPrice}</td>
                            <td>${orderDetail.productQuantity}</td>
                            <td>${orderDetail.productPrice*orderDetail.productQuantity}</td>
                        </tr>
                        </#list>
                        </tbody>
                    </table>
                </div>

                <div class="col-md-12 column">
                <#if orderDTO.orderStatus ==0 >
             <a href="/sell/seller/order/finish?orderId=${orderDTO.orderId}"
                type="button" class="btn btn-default btn-primary">完结订单</a>
             <a href="/sell/seller/order/cancel?orderId=${orderDTO.orderId}"
                type="button" class="btn btn-default btn-danger">取消订单</a>
                </#if>
                </div>


            </div>
        </div>
    </div>

</div>

</body>
</html>
预览页面:在列表页中点击详情
http://127.0.0.1/sell/seller/order/list
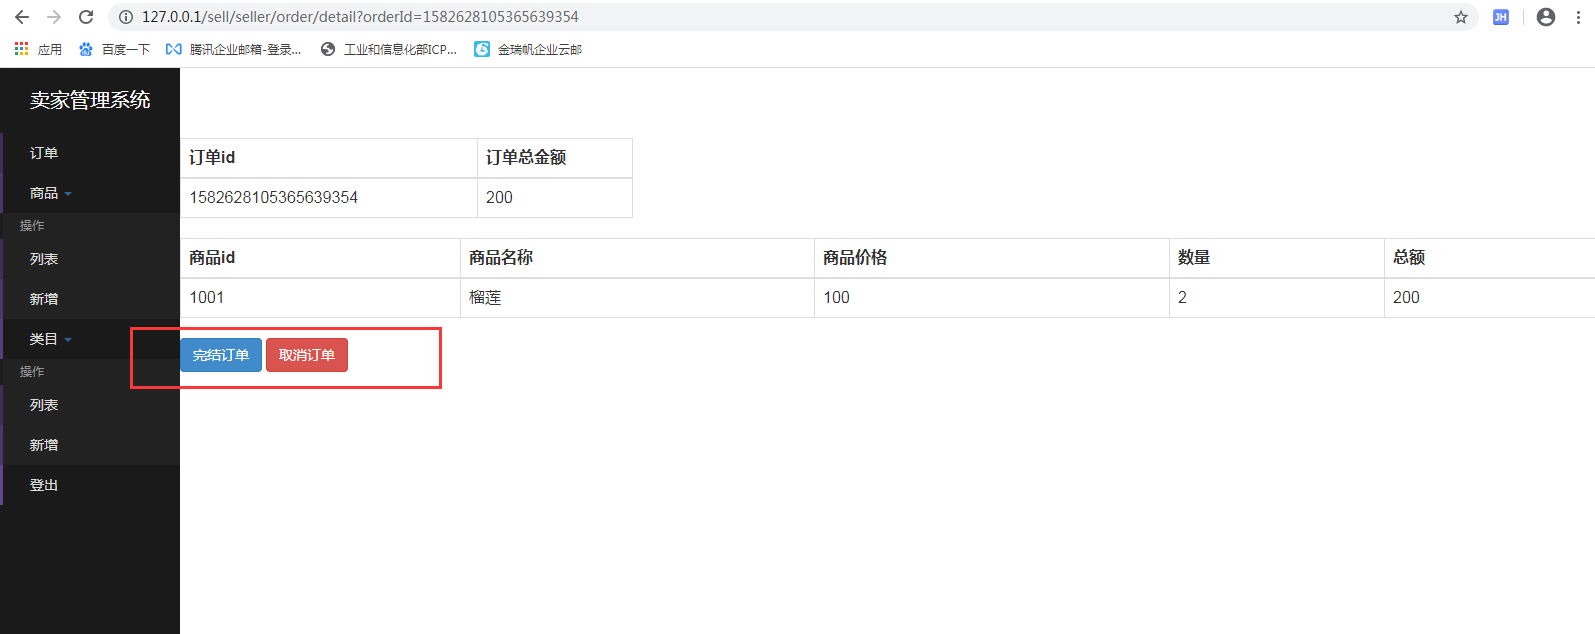
5:订单完结的功能:
在SellerOrderController中追加finish订单取消方法
/*完结订单*/
@GetMapping("/finish")
public ModelAndView finish(@RequestParam("orderId") String orderId,
                           Map<String,Object> map){
    OrderDTO orderDTO;
    try{
        orderDTO = orderService.findOne(orderId);/*订单如果不存在 在findone方法里已经做了判断 会抛出异常*/
        orderService.finish(orderDTO);
    }catch(SellException e){
        log.error("订单不存在 完结订单失败");
        map.put("msg", e.getMessage());
        map.put("url","/sell/seller/order/list");
        return new ModelAndView("common/error",map);
    }

    map.put("msg", ResultEnum.SUCCESS.getMsg());
    map.put("url","/sell/seller/order/list");
    return new ModelAndView("common/success",map);
}

 浙公网安备 33010602011771号