

CANoe使用python-can模拟发送CAN FD总线信号
目的:中间件将CAN总线信号转成dds信号发出,为测试中间件的准确性,模拟发送CAN信号,并模拟dds接收器接收信号,将发送和接收的数据比较
1.安装XL Driver Library,必须安装,里面包含各种网络接口,可上官网下载
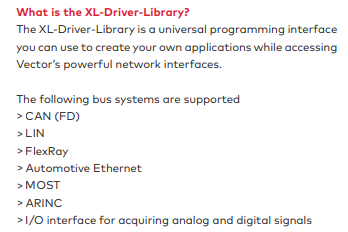
通过XL-Driver-Library访问Vector网络接口

2.下载develop分支代码并安装
3.安装python-can
The project can be built with:
pip install wheel
python setup.py sdist bdist_wheel
The project can be installed in editable mode with:
pip install -e .
4.找到安装的python-can包,找到vector文件夹,修改vxlapi.py 140行
# CAN FD configuration structure
class XLcanFdConf(ctypes.Structure):
    _fields_ = [('arbitrationBitRate', ctypes.c_uint), ('sjwAbr', ctypes.c_uint),
                ('tseg1Abr', ctypes.c_uint), ('tseg2Abr', ctypes.c_uint),
                ('dataBitRate', ctypes.c_uint), ('sjwDbr', ctypes.c_uint),
                ('tseg1Dbr', ctypes.c_uint), ('tseg2Dbr', ctypes.c_uint),
                ('options', ctypes.c_uint), # 手动增加
                ('reserved', ctypes.c_uint * 2)]
5.修改canlib.py,新增加一个option参数

class VectorBus(BusABC):
    """The CAN Bus implemented for the Vector interface."""

    deprecated_args = dict(
        sjwAbr="sjw_abr",
        tseg1Abr="tseg1_abr",
        tseg2Abr="tseg2_abr",
        sjwDbr="sjw_dbr",
        tseg1Dbr="tseg1_dbr",
        tseg2Dbr="tseg2_dbr",
    )

    @deprecated_args_alias(**deprecated_args)
    def __init__(
        self,
        channel: Union[int, Sequence[int], str],
        can_filters: Optional[CanFilters] = None,
        poll_interval: float = 0.01,
        receive_own_messages: bool = False,
        bitrate: Optional[int] = None,
        rx_queue_size: int = 2 ** 14,
        app_name: Optional[str] = "CANalyzer",
        serial: Optional[int] = None,
        fd: bool = True,
        data_bitrate: Optional[int] = None,
        sjw_abr: int = 32,
        tseg1_abr: int = 127,
        tseg2_abr: int = 32,
        sjw_dbr: int = 8,
        tseg1_dbr: int = 31,
        tseg2_dbr: int = 8,
        option=0, # 手动增加
        **kwargs: Any,
    ) -> None:
8.搜索 self.canFdConf = vxlapi.XLcanFdConf() ,新增以下内容
if fd:
    self.canFdConf = vxlapi.XLcanFdConf()
    self.canFdConf.options = ctypes.c_uint(option) # 手动新增
9.找到python-can的安装路径,在vector目录下修改canlib.py
参考:\venv\Lib\site-packages\can\interfaces\vector\canlib.py\
sjw_abr: int = 32,
tseg1_abr: int = 127,
tseg2_abr: int = 32,
sjw_dbr: int = 8,
tseg1_dbr: int = 31,
tseg2_dbr: int = 8,
# 改接口仅支持windows,详细说明参考结尾的文档链接
bus = can.interfaces.vector.VectorBus(bustype='vector', app_name='CANalyzer', channel=2, bitrate=500 * 1000, data_bitrate=2000 * 1000, fd=True)
在User Manual文档5.4.1 XLcanFdConf章节的函数解释中可以看到sample point和sjw_abr、tseg1_abr、tseg2_abr的关系
打开本地CANoe -> CANFD工程 -> Network Hardware :

此时python-can发送CANFD信号已经完成,接下来完成使用dds API接收dds信号
参考文档:
- Short overview of facts (PDF)
- User Manual (PDF)
- python-can对Vector CAN FD(no-iso)的支持
- can.interfaces.vector.VectorBus() 出自 python-can接口文档


【推荐】国内首个AI IDE,深度理解中文开发场景,立即下载体验Trae
【推荐】编程新体验,更懂你的AI,立即体验豆包MarsCode编程助手
【推荐】抖音旗下AI助手豆包,你的智能百科全书,全免费不限次数
【推荐】轻量又高性能的 SSH 工具 IShell:AI 加持,快人一步
· 10年+ .NET Coder 心语 ── 封装的思维:从隐藏、稳定开始理解其本质意义
· 提示词工程——AI应用必不可少的技术
· 地球OL攻略 —— 某应届生求职总结
· 字符编码:从基础到乱码解决
· SpringCloud带你走进微服务的世界