scrapy微信爬虫使用总结
scrapy+selenium+Chrome+微信公众号爬虫
概述
1、微信公众号爬虫思路:
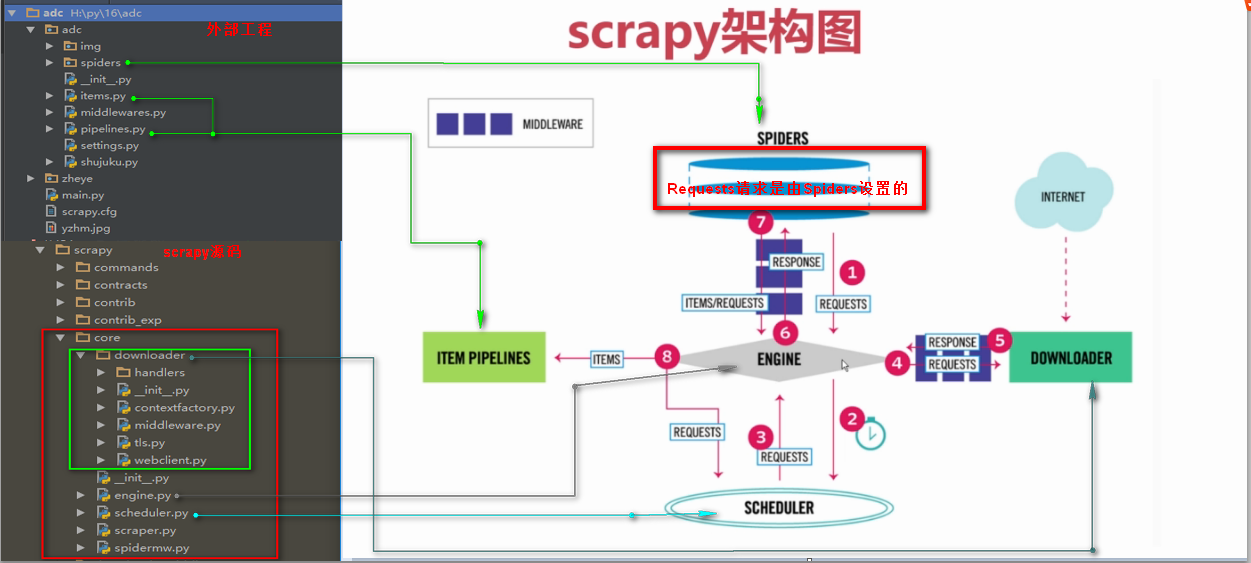
2、scrapy框架图

3、scrapy经典教程
参考:
4、其它
参考:
实践
1、环境的安装
- selenium安装(pip install selenium)
- chromedriver安装(注意与chrome版本兼容问题)
- beautifulsoup4
- scrapy
- MongoDB、pymongo
MongoDB:
具体命令如下:
python连接MongoDB,需安装pip install mongoengine
启动:
sudo ./mongod --port 27017 dbpath "/software/mongodb-4.0.0/data/db" --logpath "/software/mongodb-4.0.0/log/mongodb.log" --logappend --replSet rs0
Windows下MongoDB数据导出:
mongodump --port 27017 -d wechat -o D:\MongoDB
Linux下MongoDB数据导入:
./mongorestore -h 127.0.0.1 --port 27017 -d wechat --drop /software/mongodb-4.0.0/wechat
数据导入时注意:
Do you run mongo in replica set, i.e., mongod --replSet rs0?
If yes, please remember to run in your mongo shell the command: rs.initiate()
参考:
2、cookie获取
selenium进行登录验证,保存cookies,为scrapy做准备。
3、爬虫
- cookies:scrapy spider初始化函数调用Chromedriver,并获取cookies
- 定位:spider初始化函数利用Chromedriver定位到需要抓取的页面
- 解析:parse函数处理Chromedriver自动定scrapy爬虫利用selenium实现用户登录和cookie传递位的页面信息,以及下一页URL
- 保存:scrapy配置MongoDB保存数据
参考:
scrapy爬虫利用selenium实现用户登录和cookie传递
4、django调用爬虫
5、django构建搜索引擎,搜索爬过的信息
参考:
环境配置:
elasticsearch-rtf安装、pip install mongo-connector、pip install mongo-connector[elastic5]、pip install elastic2-doc-manager
MongoDB数据同步到elasticsearch:
mongo-connector -m localhost:27017 -t localhost:9200 -d elastic2_doc_manager
其它问题
1、selenium在新页面定位元素问题
参考:
解决Selenium弹出新页面无法定位元素问题(Unable to locate element)
3、在管道中关闭爬虫
spider.crawler.engine.close_spider(spider, 'bandwidth_exceeded')

