Java SpringBoot配置Redis多数据源
写了一个功能实时性要求比较高,读写操作也很频繁,决定逻辑层使用Redis支持,当流程结束后再做数据持久化。因为该功能有高并发需求且数据比较独立,配置了一个独立的Redis使用
pom.xml 文件引入Redis依赖:spring-boot-starter-data-redis 、线程池:commons-pool2 :
<dependencies>
  ...
    <dependency>
        <groupId>org.springframework.boot</groupId>
        <artifactId>spring-boot-starter-data-redis</artifactId>
        <version>2.1.3.RELEASE</version>
    </dependency>
    <dependency>
        <groupId>org.apache.commons</groupId>
        <artifactId>commons-pool2</artifactId>
        <version>2.9.0</version>
    </dependency>
  ...
</dependencies>
在 配置文件 application.yml 添加Redis配置:
1: 配置一个端口为6379的默认Redis;
2: 配置一个端口为6380的 UserRedis;
spring:
  redis:
    host: localhost
    port: 6379
    timeout: 3000
    database: 0

  # 第二个redis配置
  redis-user:
    # Host
    host: localhost
    # 密码
    password:
    # 端口
    port: 6380
    # 超时时间
    timeout: 3000
    # 数据库
    database: 0
    # 连接池最大活跃连接数
    max-active: 100
    # 连接池最大建立连接等待时间, 单位为ms, 如果超过此时间将抛出异常
    max-wait: 3000
    # 连接池最大空闲连接数, 超过空闲数将被标记为不可用,然后被释放
    max-idle: 20
    # 连接池里始终应该保持的最小连接数
    min-idle: 0
这里将端口6380的Redis作为User逻辑独立使用,创建一个读取UserRedis配置类:UserRedisProperties.java
package com.demo.redisdemo.config.redis;

import lombok.Data;
import org.springframework.boot.context.properties.ConfigurationProperties;
import org.springframework.stereotype.Component;

/**
 * @author AnYuan
 */

@Data
@Component
// 配置前缀
@ConfigurationProperties( prefix = "spring.redis-user")
public class UserRedisProperties {

    /**
     * 配置里面的中划线: '-' 转为驼峰写法即可读取配置
     */

    private String host;
    private String password;
    private int port;
    private int timeout;
    private int database;
    private int maxWait;
    private int maxActive;
    private int maxIdle;
    private int minIdle;
}
创建一个初始化的配置类:RedisConfigure.java,声明一个 @Bean ,设置好对应的参数,创建第二个RedisTemplate。
package com.demo.redisdemo.config.redis;

import org.apache.commons.pool2.impl.GenericObjectPoolConfig;
import org.apache.logging.log4j.util.Strings;
import org.springframework.beans.factory.annotation.Autowired;
import org.springframework.cache.annotation.CachingConfigurerSupport;
import org.springframework.cache.annotation.EnableCaching;
import org.springframework.context.annotation.Bean;
import org.springframework.context.annotation.Configuration;
import org.springframework.data.redis.connection.RedisConnectionFactory;
import org.springframework.data.redis.connection.RedisPassword;
import org.springframework.data.redis.connection.RedisStandaloneConfiguration;
import org.springframework.data.redis.connection.lettuce.LettuceConnectionFactory;
import org.springframework.data.redis.connection.lettuce.LettucePoolingClientConfiguration;
import org.springframework.data.redis.core.RedisTemplate;
import org.springframework.data.redis.serializer.RedisSerializer;
import org.springframework.data.redis.serializer.StringRedisSerializer;

import java.time.Duration;

/**
 * Redis 初始化配置
 * @author AnYuan
 */

@Configuration
@EnableCaching
public class RedisConfigure extends CachingConfigurerSupport {

    @Autowired
    private UserRedisProperties userRedisProperties;

    /**
     * @Bean:
     * 1: 这里声明该方法返回的是受Spring容器管理的Bean
     * 2: 方法名与返回类名一致 redisTemplateUser
     */

    @Bean
    public <T> RedisTemplate<String, T> redisTemplateUser() {

        // 基本配置
        RedisStandaloneConfiguration configuration = new RedisStandaloneConfiguration();
        configuration.setHostName(userRedisProperties.getHost());
        configuration.setPort(userRedisProperties.getPort());
        configuration.setDatabase(userRedisProperties.getDatabase());
        if (Strings.isNotBlank(userRedisProperties.getPassword())) {
            configuration.setPassword(RedisPassword.of(userRedisProperties.getPassword()));
        }

        // 连接池配置
        GenericObjectPoolConfig<Object> genericObjectPoolConfig = new GenericObjectPoolConfig<>();
        genericObjectPoolConfig.setMaxTotal(userRedisProperties.getMaxActive());
        genericObjectPoolConfig.setMaxWaitMillis(userRedisProperties.getMaxWait());
        genericObjectPoolConfig.setMaxIdle(userRedisProperties.getMaxIdle());
        genericObjectPoolConfig.setMinIdle(userRedisProperties.getMinIdle());

        // lettuce pool
        LettucePoolingClientConfiguration.LettucePoolingClientConfigurationBuilder builder = LettucePoolingClientConfiguration.builder();
        builder.poolConfig(genericObjectPoolConfig);
        builder.commandTimeout(Duration.ofSeconds(userRedisProperties.getTimeout()));
        LettuceConnectionFactory lettuceConnectionFactory = new LettuceConnectionFactory(configuration, builder.build());

        lettuceConnectionFactory.afterPropertiesSet();
        return createRedisTemplate(lettuceConnectionFactory);
    }

    private <T> RedisTemplate<String, T> createRedisTemplate(RedisConnectionFactory redisConnectionFactory) {
        RedisTemplate<String, T> stringObjectRedisTemplate = new RedisTemplate<>();
        stringObjectRedisTemplate.setConnectionFactory(redisConnectionFactory);

        RedisSerializer<String> redisSerializer = new StringRedisSerializer();

        // key序列化
        stringObjectRedisTemplate.setKeySerializer(redisSerializer);
        // value序列化
        stringObjectRedisTemplate.setValueSerializer(redisSerializer);
        // value hashMap序列化
        stringObjectRedisTemplate.setHashValueSerializer(redisSerializer);
        // key haspMap序列化
        stringObjectRedisTemplate.setHashKeySerializer(redisSerializer);

        return stringObjectRedisTemplate;
    }
}
启动SpringBoot应用,Spring的容器里面就管理着一个name为redisTemplateUser的Bean,通过这个Bean可以使用第二个数据源的Redis。
单元测试创建一个测试类:RedisTest.java :
package com.demo.redisdemo.redis;


import org.junit.jupiter.api.Test;
import org.springframework.beans.factory.annotation.Autowired;
import org.springframework.beans.factory.annotation.Qualifier;
import org.springframework.boot.test.context.SpringBootTest;
import org.springframework.data.redis.core.RedisTemplate;
import org.springframework.data.redis.core.StringRedisTemplate;

import java.util.concurrent.TimeUnit;

@SpringBootTest
public class RedisTest {

    /**
     * 当一个接口有多个实现类的时候
     * 将 @Qualifier 注解使用的 Spring Bean 名称一起进行装配
     * Spring 框架就能从多个相同类型并满足装配要求的 Bean 中找到对应的Bean
     *
     * 这里绑定初始化里面注入的Bean:redisTemplateUser
     */

    /**
     * 第二个数据源的配置并指定String数据类型 UserRedis
     */
    @Autowired
    @Qualifier("redisTemplateUser")
    private RedisTemplate<String, String> redisTemplateUser;

    /**
     * 默认数据源配置并指定String数据类型的Redis
     */
    @Autowired
    private RedisTemplate<String, String> redisTemplate;

    /**
     * 默认数据源配置的String数据类型的Redis
     */
    @Autowired
    private StringRedisTemplate stringRedisTemplate;


    @Test
    public void redisTest() {
        System.out.println("----------Start----------");

        // 端口6380的Redis
        redisTemplateUser.opsForValue().set("redisTemplateUser", "success", 1, TimeUnit.DAYS);

        // 端口6379默认Redis
        redisTemplate.opsForValue().set("redisTemplate", "success", 1, TimeUnit.DAYS);

        // 端口6379并指定String数据类型的默认Redis
        stringRedisTemplate.opsForValue().set("stringRedisTemplate", "success", 1, TimeUnit.DAYS);

        System.out.println("----------End----------");

    }
}
最后开启两个Redis,当前无数据:
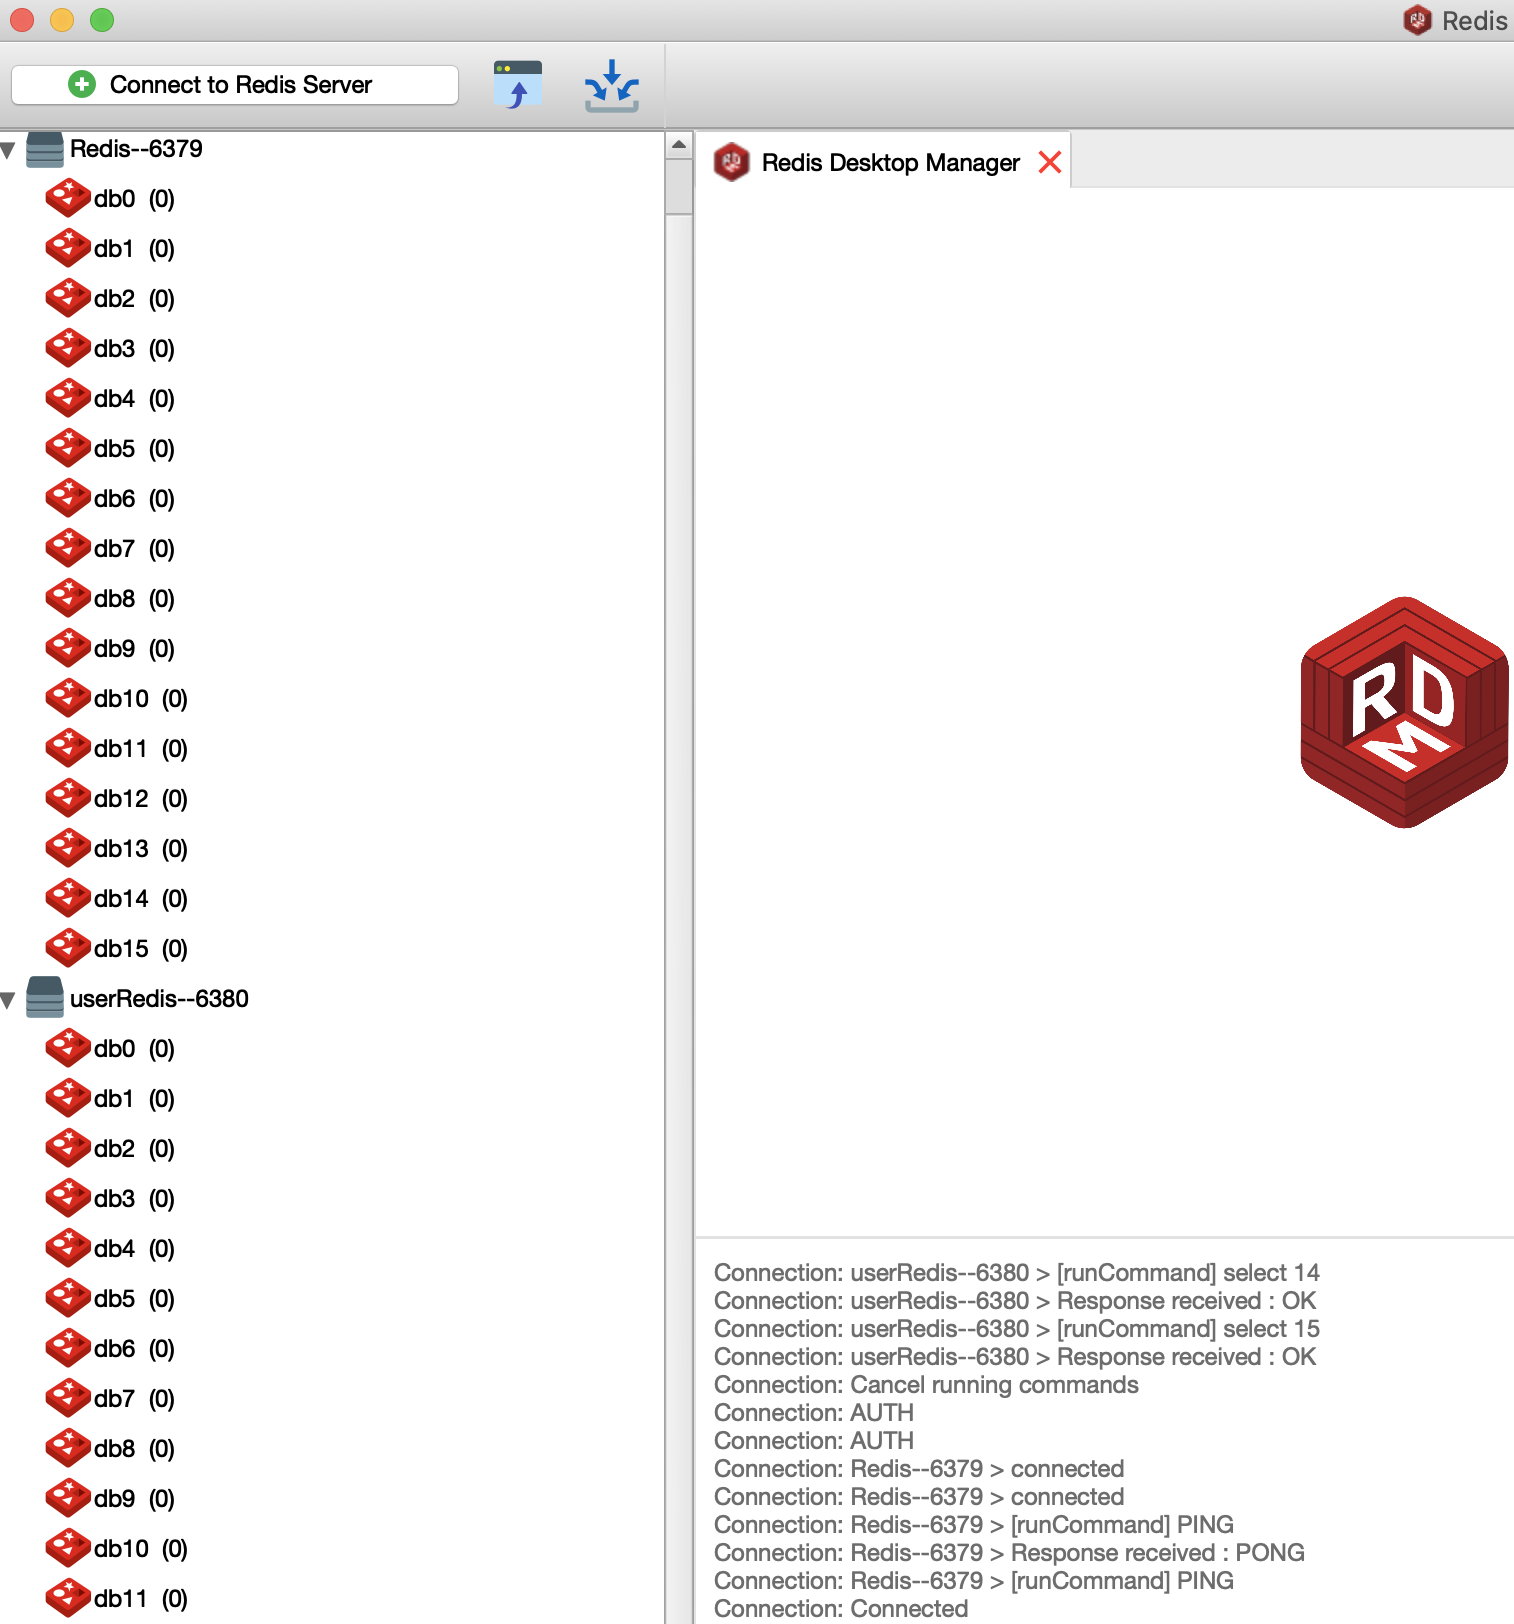
运行测试用例后,再查看Redis的缓存情况:

引入扩展包,配置多数据源,读取数据源,初始化Bean,最后使用@Qualifier注解并指定前面Bean注入的名字就可以操作了
本篇代码Github:https://github.com/Journeyerr/cnblogs/tree/master/redisDemo
Redis扩展包:https://mvnrepository.com/artifact/org.springframework.boot/spring-boot-starter-data-redis
线程池扩展包:https://mvnrepository.com/artifact/org.apache.commons/commons-pool2

 浙公网安备 33010602011771号