Struts2之项目搭建
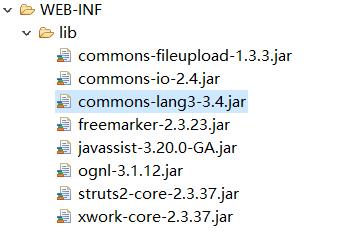
1.导入jar包
2.配置struts核心过滤器
在web.xml中添加如下配置:
  <filter>
      <filter-name>struts2</filter-name>
      <filter-class>org.apache.struts2.dispatcher.ng.filter.StrutsPrepareAndExecuteFilter</filter-class>
  </filter>
  <filter-mapping>
      <filter-name>struts2</filter-name>
      <url-pattern>/*</url-pattern>
  </filter-mapping>
3.创建并配置struts.xml文件
(1)在src目录下创建struts.xml文件
(2)在struts.xml中添加约束文件信息
<!DOCTYPE struts PUBLIC "-//Apache Software Foundation//DTD Struts Configuration 2.3//EN" "http://struts.apache.org/dtds/struts-2.3.dtd">
(3)添加struts根标签
<struts>

</struts>
(4)在根标签中添加请求映射信息
<package name="/" namespace="/" extends="struts-default">
     <action name="hello" class="com.yg.study.action.HelloAction" method="sayHello">
         <result name="success">/welcome.jsp</result>
     </action>
</package>
package标签:
name:定义包名,用于区分各个package
namespace:命名空间,用于定义拦截请求所属的父路径
extends:固定写法,把struts-default.xml文件中定义的内容引进来
action标签:
name:请求的URI
class:声明处理该请求的类的完整类名
method:声明出来该请求的类的方法
result标签:
name:定义结果名称,主要与Action方法的返回值进行匹配进行跳转
type:跳转的类型,默认dispatcher(请求转发),常用的还有redirect(重定向)
注意:result开始标签和结束标签之间声明要跳转的路径
这一块根据项目需要自定义
完整的struts.xml如下:
<?xml version="1.0" encoding="UTF-8"?>
<!DOCTYPE struts PUBLIC "-//Apache Software Foundation//DTD Struts Configuration 2.3//EN" "http://struts.apache.org/dtds/struts-2.3.dtd">
<struts>
    <package name="/" namespace="/" extends="struts-default">
        <action name="hello" class="com.yg.study.action.HelloAction" method="sayHello">
            <result name="success">/welcome.jsp</result>
        </action>
    </package>
</struts>
4.定义HelloAction.java(根据需要自定义)
package com.yg.study.action;

import java.text.SimpleDateFormat;
import java.util.Date;

import com.opensymphony.xwork2.ActionContext;

public class HelloAction {

    public String sayHello(){
        String dateStr = new SimpleDateFormat("yyyy年MM月dd日").format(new Date());
        ActionContext.getContext().put("message", "欢迎访问,今天是"+dateStr);
        return "success";
    }
}
5.定义index.jsp和welcome.jsp(根据需要自定义)
index.jsp
<%@ page language="java" contentType="text/html; charset=UTF-8"
    pageEncoding="UTF-8"%>
<!DOCTYPE html PUBLIC "-//W3C//DTD HTML 4.01 Transitional//EN" "http://www.w3.org/TR/html4/loose.dtd">
<html>
<head>
<meta http-equiv="Content-Type" content="text/html; charset=UTF-8">
<title>index页面</title>
</head>
<body>
    <a href="hello">访问HelloAction</a>
</body>
</html>
welcome.jsp
<%@ page language="java" contentType="text/html; charset=UTF-8"
    pageEncoding="UTF-8"%>
<!DOCTYPE html PUBLIC "-//W3C//DTD HTML 4.01 Transitional//EN" "http://www.w3.org/TR/html4/loose.dtd">
<html>
<head>
<meta http-equiv="Content-Type" content="text/html; charset=UTF-8">
<title>welcome页面</title>
</head>
<body>
${message }
</body>
</html>
6.启动项目
浏览器地址栏输入项目地址,回车
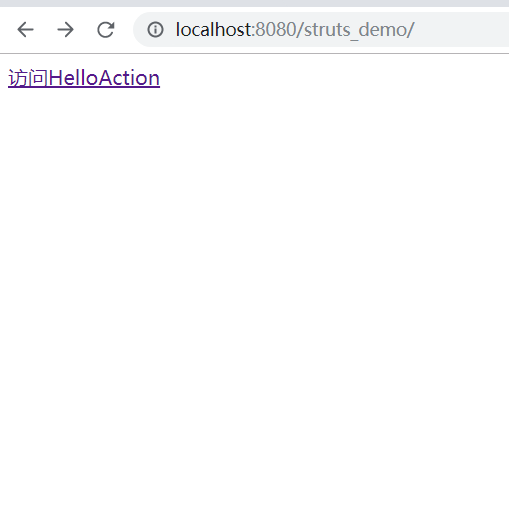
点击访问HelloAction

至此,项目的基础搭建算是完成了,未完待续......

 浙公网安备 33010602011771号