Linux7安装pacemaker+corosync集群-02--配置集群文件系统gfs2(dlm+clvmd)
配置集群文件系统:
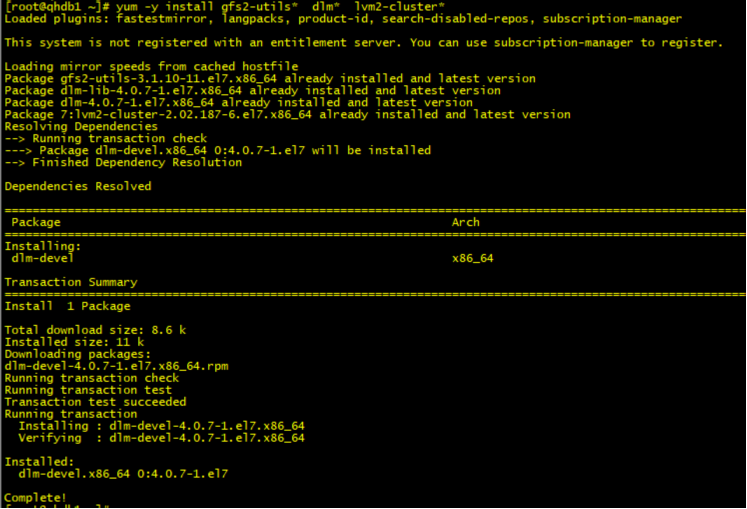
安装软件包: yum -y install lvm2* gfs2* dlm*
1.安装rpm包
yum -y install lvm2* gfs2* dlm* fence-agents*
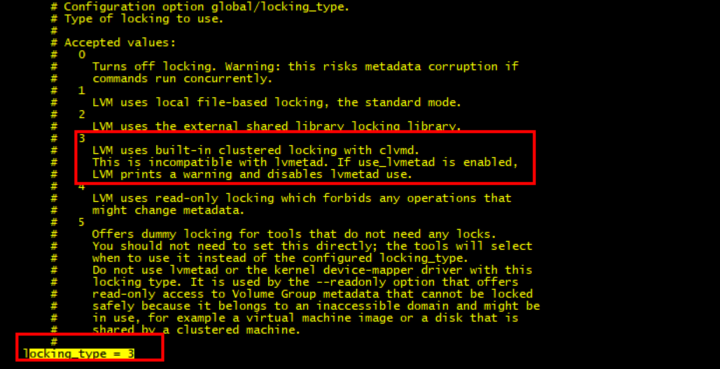
2.修改LVM配置文件改为集群模式-----暂时不做
/etc/lvm/lvm.conf
locking_type = 1 改为 locking_type = 3
[root@qhdb2 lvm]# lvmconf -h
Usage: /usr/sbin/lvmconf <command>
Commands:
Enable clvm: --enable-cluster [--lockinglibdir <dir>] [--lockinglib <lib>]
Disable clvm: --disable-cluster
Enable halvm: --enable-halvm
Disable halvm: --disable-halvm
Set locking library: --lockinglibdir <dir> [--lockinglib <lib>]
Global options:
Config file location: --file <configfile>
Set services: --services [--mirrorservice] [--startstopservices]
Use the separate command 'lvmconfig' to display configuration information
重启主机生效
------------ 创建cluster CLVM必须得创建fence机制
禁止集群投票,防止脑裂(由于我们集群是2个节点)
pcs property set no-quorum-policy=freeze
在生产环境中,可以用
[root@qhdb1 ~]# pcs stonith list
fence_aliyun - Fence agent for Aliyun (Aliyun Web Services)
fence_amt_ws - Fence agent for AMT (WS)
fence_apc - Fence agent for APC over telnet/ssh
fence_apc_snmp - Fence agent for APC, Tripplite PDU over SNMP
fence_aws - Fence agent for AWS (Amazon Web Services)
fence_azure_arm - Fence agent for Azure Resource Manager
fence_bladecenter - Fence agent for IBM BladeCenter
fence_brocade - Fence agent for HP Brocade over telnet/ssh
fence_cisco_mds - Fence agent for Cisco MDS
fence_cisco_ucs - Fence agent for Cisco UCS
fence_compute - Fence agent for the automatic resurrection of OpenStack compute instances
fence_drac5 - Fence agent for Dell DRAC CMC/5
fence_eaton_snmp - Fence agent for Eaton over SNMP
fence_emerson - Fence agent for Emerson over SNMP
fence_eps - Fence agent for ePowerSwitch
fence_evacuate - Fence agent for the automatic resurrection of OpenStack compute instances
fence_gce - Fence agent for GCE (Google Cloud Engine)
fence_heuristics_ping - Fence agent for ping-heuristic based fencing
fence_hpblade - Fence agent for HP BladeSystem
fence_ibmblade - Fence agent for IBM BladeCenter over SNMP
fence_idrac - Fence agent for IPMI
fence_ifmib - Fence agent for IF MIB
fence_ilo - Fence agent for HP iLO
fence_ilo2 - Fence agent for HP iLO
fence_ilo3 - Fence agent for IPMI
fence_ilo3_ssh - Fence agent for HP iLO over SSH
fence_ilo4 - Fence agent for IPMI
fence_ilo4_ssh - Fence agent for HP iLO over SSH
fence_ilo5 - Fence agent for IPMI
fence_ilo5_ssh - Fence agent for HP iLO over SSH
fence_ilo_moonshot - Fence agent for HP Moonshot iLO
fence_ilo_mp - Fence agent for HP iLO MP
fence_ilo_ssh - Fence agent for HP iLO over SSH
fence_imm - Fence agent for IPMI
fence_intelmodular - Fence agent for Intel Modular
fence_ipdu - Fence agent for iPDU over SNMP
fence_ipmilan - Fence agent for IPMI
fence_kdump - fencing agent for use with kdump crash recovery service
fence_lpar - Fence agent for IBM LPAR
fence_mpath - Fence agent for multipath persistent reservation
fence_redfish - I/O Fencing agent for Redfish
fence_rhevm - Fence agent for RHEV-M REST API
fence_rsa - Fence agent for IBM RSA
fence_rsb - I/O Fencing agent for Fujitsu-Siemens RSB
fence_sanlock - Fence agent for watchdog and shared storage
fence_sbd - Fence agent for sbd
fence_scsi - Fence agent for SCSI persistent reservation
fence_virsh - Fence agent for virsh
fence_virt - Fence agent for virtual machines
fence_vmware_rest - Fence agent for VMware REST API
fence_vmware_soap - Fence agent for VMWare over SOAP API
fence_wti - Fence agent for WTI
fence_xvm - Fence agent for virtual machines
在我的生产环境中、我则会优先选择使用fence_mpath作为stonith资源限制
配置:我的存储使用的日立的盘
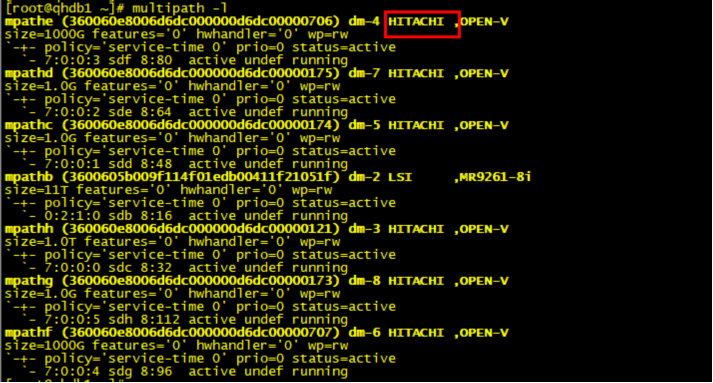
修改/etc/multipath.conf 配置文件
defaults {
user_friendly_names yes
find_multipaths yes
reservation_key 0x2 依次命名节点1 2 3
}

2节点:

重启multipath
systemctl restart multipathd
multipath
配置stonith设备:
pcs stonith create qhdb1_pcmk fence_mpath key=1 pcmk_host_list="qhdb1" pcmk_reboot_action="off" devices="/dev/mapper/mpathe,/dev/mapper/mpathf" meta provides=unfencing
pcs stonith create qhdb2_pcmk fence_mpath key=2 pcmk_host_list="qhdb2" pcmk_reboot_action="off" devices="/dev/mapper/mpathe,/dev/mapper/mpathf" meta provides=unfencing
或者
pcs stonith create pg_cluster_st fence_mpath devices="/dev/mapper/mpathe,/dev/mapper/mpathf" pcmk_host_map="qhdb1:1;qhdb2:2" pcmk_monitor_action="metadata" pcmk_reboot_action="off" pcmk_host_argument="key" meta provides=unfencing
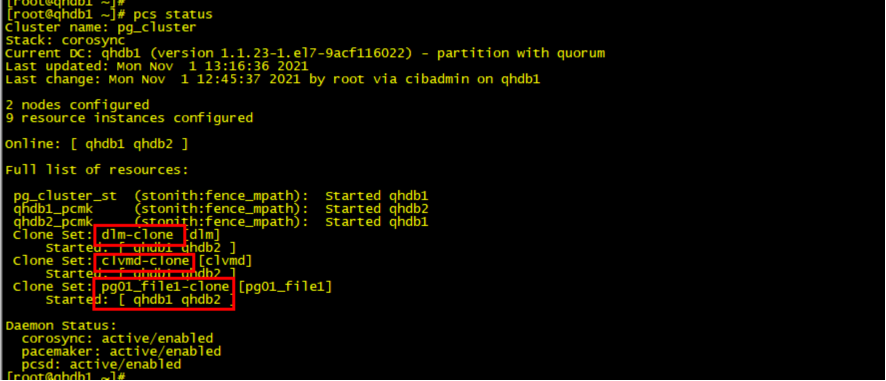
禁止集群投票,防止脑裂(由于我们集群是2个节点)
pcs property set no-quorum-policy=freeze
添加dlm资源
pcs resource create dlm ocf:pacemaker:controld op monitor interval=30s on-fail=fence clone interleave=true ordered=true
启用集群锁模式的clvm
lvmconf --enable-cluster ---
添加clvm资源
pcs resource create clvmd ocf:heartbeat:clvm op monitor interval=30s on-fail=fence clone interleave=true ordered=true
创建dlm资源和clvm资源的依赖关系和启动顺序:
pcs constraint order start dlm-clone then clvmd-clone
pcs constraint colocation add clvmd-clone with dlm-clone
创建文件系统gfs2
pvcreate /dev/mapper/mpathe /dev/mapper/mpathf
vgcreate -Ay -cy vg01 /dev/mapper/mpathe /dev/mapper/mpathf
lvcreate -L +200G -n lv_01 vg01
mkfs.gfs2 -p lock_dlm -j 2 -t pg_cluster:file1 /dev/vg01/lv_01
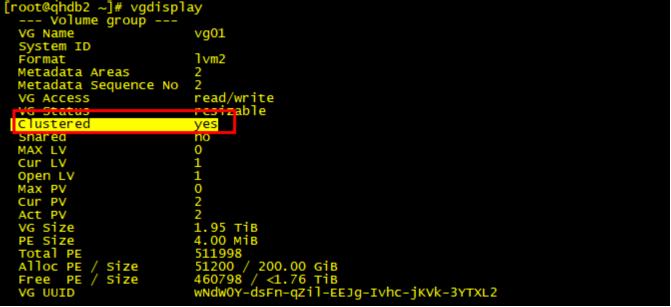
添加clusterfs资源:
pcs resource create pg01_file1 ocf:heartbeat:Filesystem device="/dev/vg01/lv_01" directory="/pg01" fstype="gfs2" "options=noatime" op monitor interval=10s on-fail=fence clone interleave=true
或者????
pcs resource create pg01_file1 Filesystem device="/dev/vg01/lv_01" directory="/pg01" fstype="gfs2" "options=noatime" op monitor interval=10s on-fail=fence clone interleave=true
创建 gfs2和clvmd的启动顺序和依赖关系:
pcs constraint order start clvmd-clone then pg01_file1-clone
pcs constraint colocation add pg01_file1-clone with clvmd-clone
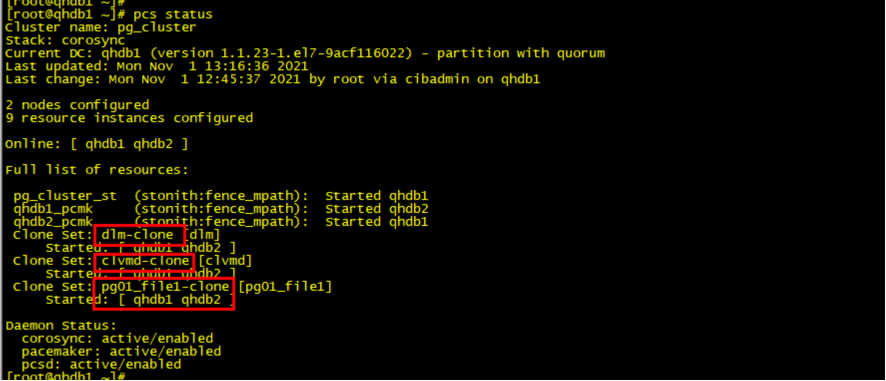
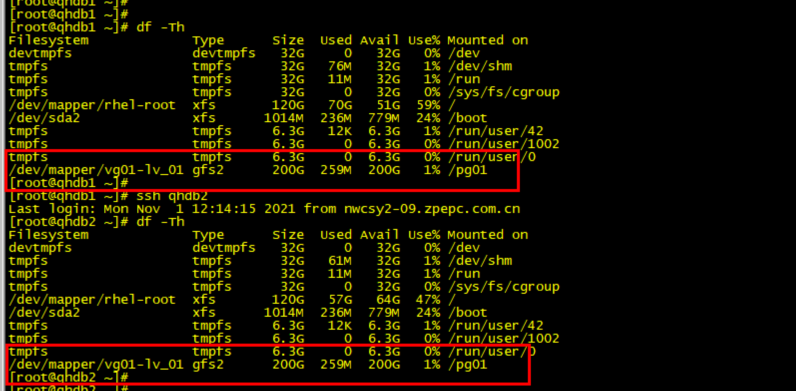
查看文件系统:
