linxu7下安装pacemaker+corosync集群-01
1.yum仓库的配置-自行配置
2.安装软件包:
yum -y install pacemaker* corosync* pcs* psmisc
yum -y install pcs fence-agents*
因为安装pacemaker依赖于corosync,所以两者直接安装了。

由于我们还需要安装数据库软件,所以需要配置文件系统。
安装lvm2和gfs的包
yum -y install gfs2-utils dlm
yum -y install lvm2-cluster gfs2-utils
3.关闭防火墙或者允许防火墙通过PCS集群组件
关闭防火墙:
iptables -L
iptables -F
iptables -X
iptables -Z
允许防火墙通过集群组件
firewall-cmd --permanent --add-service=high-availability
firewall-cmd --add-service=high-availability
4.安装完毕后这是PCSD开机启动
systemctl enable pcsd --now
systemctl enable pcsd --now
systemctl restart pcsd --now
systemctl restart pcsd
5.pcs集群节点间认证
创建hacluster用户组
echo Admin123|passwd --stdin hacluster

pcs cluster auth qhdb1 qhdb2
systemctl start corosync
systemctl start pacemaker
systemctl enable corosync
systemctl enable pacemaker
6.创建集群和同步集群节点
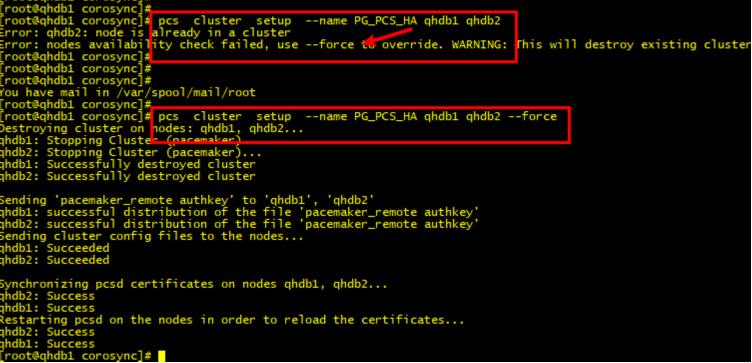
[root@qhdb1 corosync]# pcs cluster setup --name PG_PCS_HA qhdb1 qhdb2
Error: qhdb2: node is already in a cluster
Error: nodes availability check failed, use --force to override.
WARNING: This will destroy existing cluster on the nodes. You should remove the nodes from their clusters instead to keep the clusters working properly.
[root@qhdb1 corosync]#

7.启动集群各个节点
systemctl start corosync
systemctl start pacemaker
systemctl enable corosync
systemctl enable pacemaker
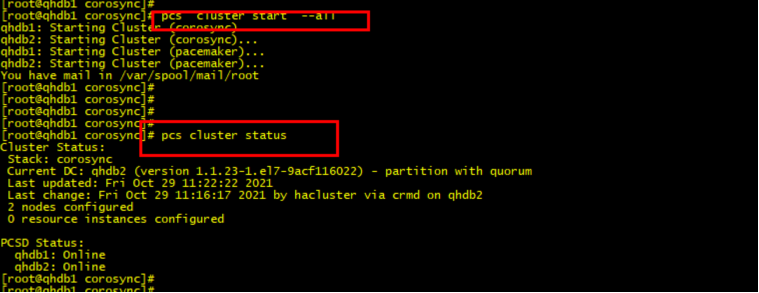
pcs cluster start --all

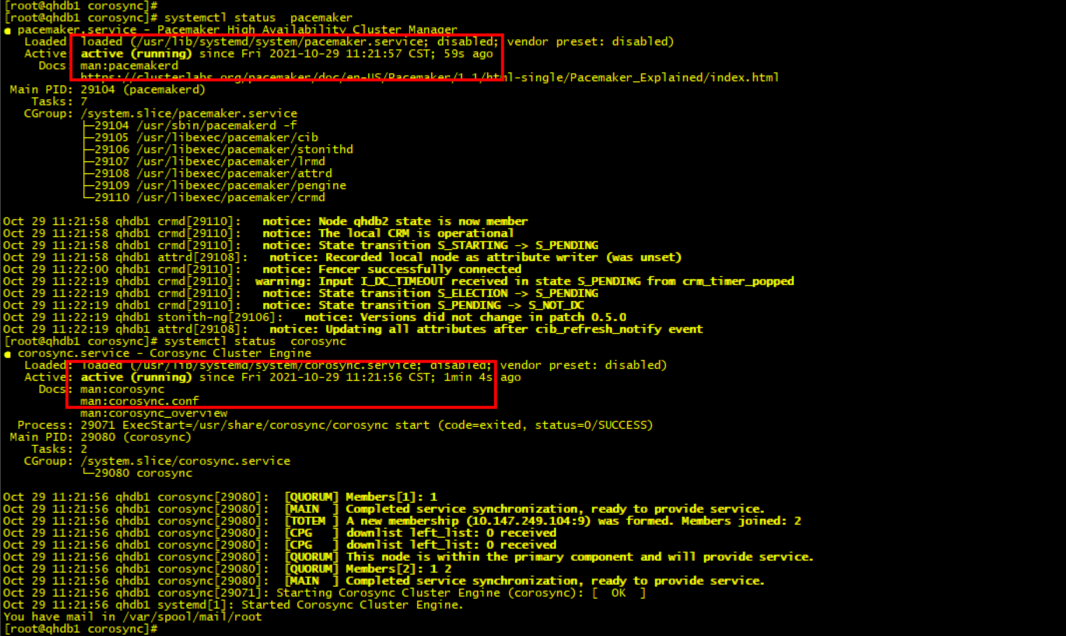
各个节点查看pacemaker+corosync 服务是否启动!
├─29106 /usr/libexec/pacemaker/stonith 需要特别注意一下。后面再详细解释

8.查看集群状态和验证集群配置信息
pcs cluster status
crm_verify -LV

关闭STONITH选项
pcs property set stonith-enabled=false
再次验证集群配置信息,无错误输出。

到此为止集群安装完毕,接下来就是配置集群资源!!!


 浙公网安备 33010602011771号