

WPF(二)之为对象属性赋值
浅析用户界面的树形结构
在winform中的界面是一种平面布局的方式,所有的控件都是在同一平面上的。但是wpf是树形结构的,控件是可以嵌套的。
在xaml中为对象属性赋值
1 Attribute=Value方式
这种赋值方法Value值只能是字符串类型的。
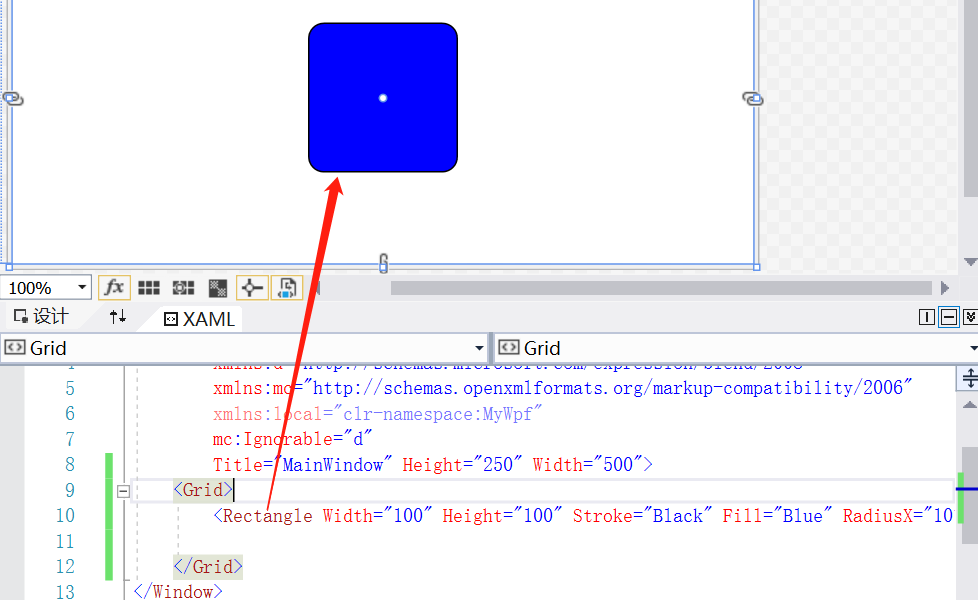
比如我们用Rectangle标签来画一个几何图形, 宽度100,高度100,笔触(Stroke)为黑色,填充色为蓝色,圆角为10。
但是这样的话是做不了太复杂的东西的,所以我们可以用Path标签(path标签可以看这2个博客: wpf详解 wpf例子讲解)

<Window x:Class="MyWpf.MainWindow"
        xmlns="http://schemas.microsoft.com/winfx/2006/xaml/presentation"
        xmlns:x="http://schemas.microsoft.com/winfx/2006/xaml"
        xmlns:d="http://schemas.microsoft.com/expression/blend/2008"
        xmlns:mc="http://schemas.openxmlformats.org/markup-compatibility/2006"
        xmlns:local="clr-namespace:MyWpf"
        mc:Ignorable="d"
        Title="MainWindow" Height="250" Width="500">
    <Grid>
        <!--使用StreamGeometry的表示方法  M表示开始的坐标,Z表示结束的坐标-->
        <Path Data="M 0,0 L 200,100 L 100,200 Z" Stroke="Black" Fill="Red" ></Path>
    </Grid>
</Window>
界面:
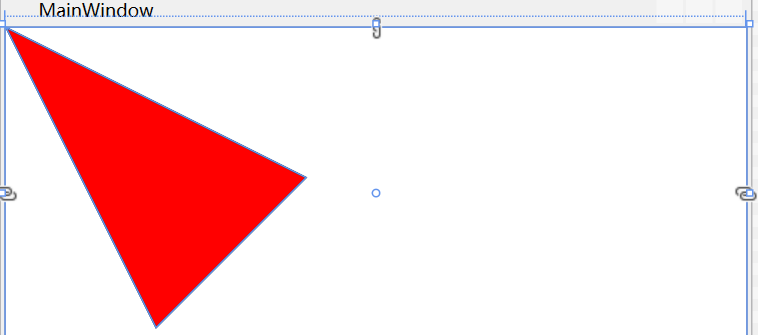
表示从坐标(0,0)开始到坐标(200,100),再到坐标(100,200)的一个图形,填充色是red,边框线是black。
下面我们自定义一个Human对象:
namespace MyWpf
{
    /// <summary>
    /// MainWindow.xaml 的交互逻辑
    /// </summary>
    public partial class MainWindow : Window
    {
        public MainWindow()
        {
            InitializeComponent();
        }
    }

    public class Human
    {
        public string Name { get; set; }
        public Human Child { get; set; }
    }

}
然后我们把自定义的Human引用到xaml文件中,可以在window标签中使用下面属性:
xmlns:local="clr-namespace:MyWpf"
xmlns:local表示引用当前程序集MyWpf中的数据。
下面我们使用wpf中的Resources资源,注意:Application.Resources中的资源在整个项目中都可以使用,Window.Resources中的资源只在当前窗口中使用。
后台代码:
namespace MyWpf
{
    /// <summary>
    /// MainWindow.xaml 的交互逻辑
    /// </summary>
    public partial class MainWindow : Window
    {
        public MainWindow()
        {
            InitializeComponent();
        }

        private void Button_Click(object sender, RoutedEventArgs e)
        {
            //首先将windows资源拿出来
            Human human = this.FindResource("human") as Human;
            if (human != null)
            {
                MessageBox.Show(human.HumanName);
            }
        }
    }

    public class Human
    {
        public string HumanName { get; set; }
        public Human Child { get; set; }
    }

}
xaml:
<Window x:Class="MyWpf.MainWindow"
        xmlns="http://schemas.microsoft.com/winfx/2006/xaml/presentation"
        xmlns:x="http://schemas.microsoft.com/winfx/2006/xaml"
        xmlns:d="http://schemas.microsoft.com/expression/blend/2008"
        xmlns:mc="http://schemas.openxmlformats.org/markup-compatibility/2006"
        xmlns:local="clr-namespace:MyWpf"
        mc:Ignorable="d"
        Title="MainWindow" Height="250" Width="500">
    <Window.Resources>
        <!-- 获取后台代码这的Human类,并且设置遍历对象为human,HumanName表示Human模型值的一个属性字段,这里默认设置值为Tim-->
        <local:Human x:Key="human" HumanName="Tim"/>
    </Window.Resources>
    <Grid>
        <Button Content="Show" Width="42" Height="30" Click="Button_Click"></Button>

    </Grid>
</Window>
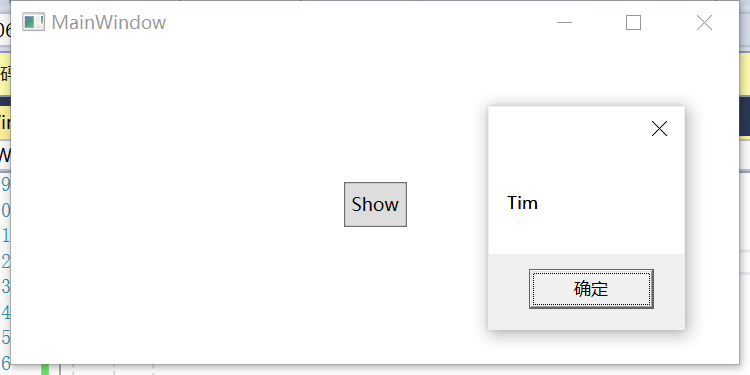
运行之后获取到在xaml文件之后设置的属性值为Tim,结果如下:
但是如果我们想要获取Human类型的Child怎么实现呢?首先继承TypeConverter类,进行处理:
   /// <summary>
    /// 我们继承 TypeConverter,
    /// TypeConverter:提供一种将值的类型转换为其他类型以及访问标准值和子属性的统一方法。
    /// 重写ConvertFrom方法,按照实际情况进行重写更改
    /// </summary>
    public class NameToHumanTypeConverter:TypeConverter
    {
        public override object ConvertFrom(ITypeDescriptorContext context, CultureInfo culture, object value)
        {
            return new Human() {
                //这里的value就是xaml文件中设置的Child属性值
                HumanName = value.ToString()
            };
        }
    }
}
然后还要在对应的模型类中通过特性使用这个类,
[TypeConverterAttribute(typeof(NameToHumanTypeConverter))]
    public class Human
    {
        public string HumanName { get; set; }
        public Human Child { get; set; }
    }
xaml文件中:
  <Window.Resources>
        <!-- 获取后台代码这的Human类,并且设置遍历对象为human,HumanName表示Human模型值的一个属性字段,这里默认设置值为Tim-->
        <local:Human x:Key="human" HumanName="Tim" Child="ChildName Z"/>
    </Window.Resources>
调用:
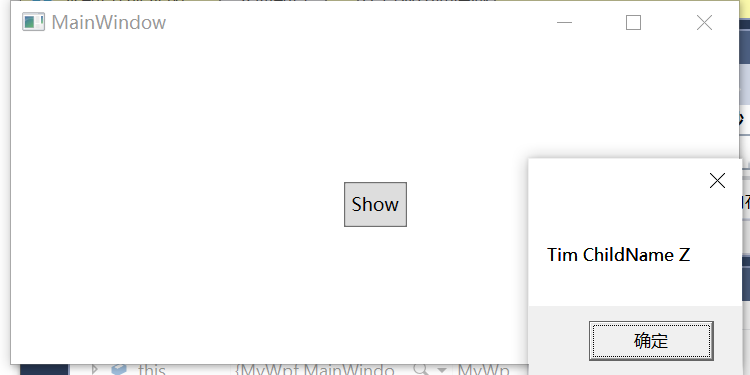
   private void Button_Click(object sender, RoutedEventArgs e)
        {
            //首先将windows资源拿出来
            Human human = this.FindResource("human") as Human;
            if (human != null)
            {
                MessageBox.Show(human.HumanName+" "+human.Child.HumanName);
            }
        }
结果如下:
2 使用属性标签的形式为对象属性赋值
使用Attribute=Value方式的话,Value只能是字符串类型的值,不能使用更复杂的情况,比如我想在button中添加一块几何图形,这个几何图形的实现是:
<Rectangle Width="20" Height="20" Stroke="Black" Fill="Red"> </Rectangle>
如果还是第一种方式的话总不能写成下面的形式:
        <Button Content="        <Rectangle Width="20" Height="20" Stroke="Black" Fill="Red"> </Rectangle>
" Width="42" Height="30" Click="Button_Click"></Button>
很明显是编译不了的,所以使用属性标签来赋值:
<Grid>
        <Button  Width="42" Height="30" Click="Button_Click">
            <Button.Content>
                <Rectangle Width="20" Height="20" Stroke="Black" Fill="Red"></Rectangle>
            </Button.Content>

        </Button>

    </Grid>
结果:
![]()
3 标签扩展的方式赋值
下面是StaticResource的标签扩展
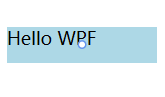
<Window x:Class="MyWpf.MainWindow"
        xmlns="http://schemas.microsoft.com/winfx/2006/xaml/presentation"
        xmlns:x="http://schemas.microsoft.com/winfx/2006/xaml"
        xmlns:d="http://schemas.microsoft.com/expression/blend/2008"
        xmlns:mc="http://schemas.openxmlformats.org/markup-compatibility/2006"
        xmlns:local="clr-namespace:MyWpf"
        xmlns:sys="clr-namespace:System;assembly=mscorlib"
        mc:Ignorable="d"
        Title="MainWindow" Height="250" Width="500">
    <Window.Resources>
        <!--使用下面的形式必须要先引用 xmlns:sys="clr-namespace:System;assembly=mscorlib"
        表示引用system空间下的mscorlib程序集,这样不仅可以使用字符串string。也可以
        使用int等类型-->
        <sys:String x:Key="stringHello">Hello WPF</sys:String>
    </Window.Resources>
    <Grid>
        <!--表示引用资源stringHello -->
        <TextBlock Height="24" Width="100" Background="LightBlue" Text="{StaticResource ResourceKey=stringHello}"></TextBlock>
    </Grid>
</Window>
界面显示:
还可以使用Binding扩展:
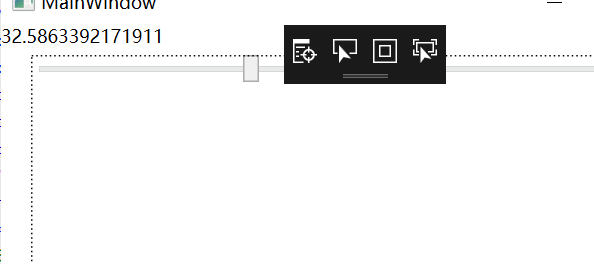
<Window x:Class="MyWpf.MainWindow"
        xmlns="http://schemas.microsoft.com/winfx/2006/xaml/presentation"
        xmlns:x="http://schemas.microsoft.com/winfx/2006/xaml"
        xmlns:d="http://schemas.microsoft.com/expression/blend/2008"
        xmlns:mc="http://schemas.openxmlformats.org/markup-compatibility/2006"
        xmlns:local="clr-namespace:MyWpf"
        xmlns:sys="clr-namespace:System;assembly=mscorlib"
        mc:Ignorable="d"
        Title="MainWindow" Height="250" Width="500">
    <Window.Resources>
        <!--使用下面的形式必须要先引用 xmlns:sys="clr-namespace:System;assembly=mscorlib"
        表示引用system空间下的mscorlib程序集,这样不仅可以使用字符串string。也可以
        使用int等类型-->
        <sys:String x:Key="stringHello">Hello WPF</sys:String>
    </Window.Resources>
    <Grid  >
        <!--使用Binding绑定name为sld的标签,比如name为sld的标签是Slider,但是具体绑定这个标签中的哪个属性呢?
        因为这个标签属性有很多的,比如Margin,Value等,所以用path来限制,下面Path=Value,就表示绑定了Value属性,当Slider标签中的
        Value属性值变化的时候,TextBlock中的Text值就会跟着变化-->
        <TextBlock x:Name="tb" Text="{Binding ElementName=sld,Path=Value}"></TextBlock>
        <Slider x:Name="sld"  Margin="20" Value="20" Maximum="100" Minimum="0" ></Slider>
    </Grid>
</Window>
界面:
但是大部分中binding绑定的数据还是跟业务相关的,是在后台声明的一些模型类,比如下面一种写法:
    public class Student
    {
        private string _name = "哈哈";
        public string Name
        {
            get
            {
                return _name;
            }
            set
            {
                _name = value;
            }
        }
    }
xaml:
<Window x:Class="MyWpf.MainWindow"
        xmlns="http://schemas.microsoft.com/winfx/2006/xaml/presentation"
        xmlns:x="http://schemas.microsoft.com/winfx/2006/xaml"
        xmlns:d="http://schemas.microsoft.com/expression/blend/2008"
        xmlns:mc="http://schemas.openxmlformats.org/markup-compatibility/2006"
      xmlns:local="clr-namespace:MyWpf"
        mc:Ignorable="d"
        Title="MainWindow" Height="250" Width="500">
    <!--DataContext表示上下文,可以在这里加载对应的类-->
    <Window.DataContext>
        <local:Student/>
    </Window.DataContext>
    <Grid  >
        <!--这里绑定的是Student类中的Name属性-->
        <TextBlock Text="{Binding Name}"></TextBlock>
    </Grid>
</Window>
DataContext还可以直接在后台写:
xaml:
<Window x:Class="MyWpf.MainWindow"
        xmlns="http://schemas.microsoft.com/winfx/2006/xaml/presentation"
        xmlns:x="http://schemas.microsoft.com/winfx/2006/xaml"
        xmlns:d="http://schemas.microsoft.com/expression/blend/2008"
        xmlns:mc="http://schemas.openxmlformats.org/markup-compatibility/2006"
      xmlns:local="clr-namespace:MyWpf"
        mc:Ignorable="d"
        Title="MainWindow" Height="250" Width="500">
    <Grid  >
        <!--这里绑定的是Student类中的Name属性-->
        <TextBlock Text="{Binding Name}"></TextBlock>
    </Grid>
</Window>
后台:
 public partial class MainWindow : Window
    {
        public MainWindow()
        {
            InitializeComponent();
            this.DataContext = new Student();
        }
   }


· 10年+ .NET Coder 心语,封装的思维:从隐藏、稳定开始理解其本质意义
· .NET Core 中如何实现缓存的预热?
· 从 HTTP 原因短语缺失研究 HTTP/2 和 HTTP/3 的设计差异
· AI与.NET技术实操系列:向量存储与相似性搜索在 .NET 中的实现
· 基于Microsoft.Extensions.AI核心库实现RAG应用
· 阿里巴巴 QwQ-32B真的超越了 DeepSeek R-1吗?
· 10年+ .NET Coder 心语 ── 封装的思维:从隐藏、稳定开始理解其本质意义
· 【设计模式】告别冗长if-else语句:使用策略模式优化代码结构
· 字符编码:从基础到乱码解决
· 提示词工程——AI应用必不可少的技术