
python 多进程处理图像
主要内容
比较是否开启多进程对图片处理速度的差异
任务目标:
研究生的第一个任务是做皮肤检测,这是一个老问题了,我还记得小时候买的数码相机就有这个功能。因为这里主要是比较处理的速度,所以只使用简单的基于RGB颜色空间。
处理上采用对每个像素点遍历的方法
def deal_img(img, func, axis=2):  # func 对每个像素做的处理
    return apply_along_axis(func, axis, img)
def rgb_test(pixel):
    B, G, R = int(pixel[0]), int(pixel[1]), int(pixel[2])
    # 均匀日光照射环境下
    return R > 95 and G > 40 and B > 20 and max(R, G, B)-min(R, G, B) > 15 \
        and abs(R-G) > 15 and R > G and R > B
多进程的核心就是下面的代码
def skin_test(img):
    return deal_img(img, rgb_test)

def skin_test_multiprocess(imgs):
    res = []
    with ProcessPoolExecutor() as executor:
        # 将一系列源数据送入同一个函数中处理,返回的结果是一个迭代器
        #   结果                处理函数    源数据
        for ans in executor.map(skin_test, imgs):
            res.append(ans)
    return res
ProcessPoolExecutor
这个类的简单使用就像上面写的那样,值得注意的有两点
- executor.map(func, iterables, timeout=None)其中func是执行的函数,iterables是一个可迭代对象,返回的是一个可迭代对象,不能直接print;
- 实践过程中发现在skin_test_multiprocess()中嵌套定义func函数会导致AttributeError,原因不明;
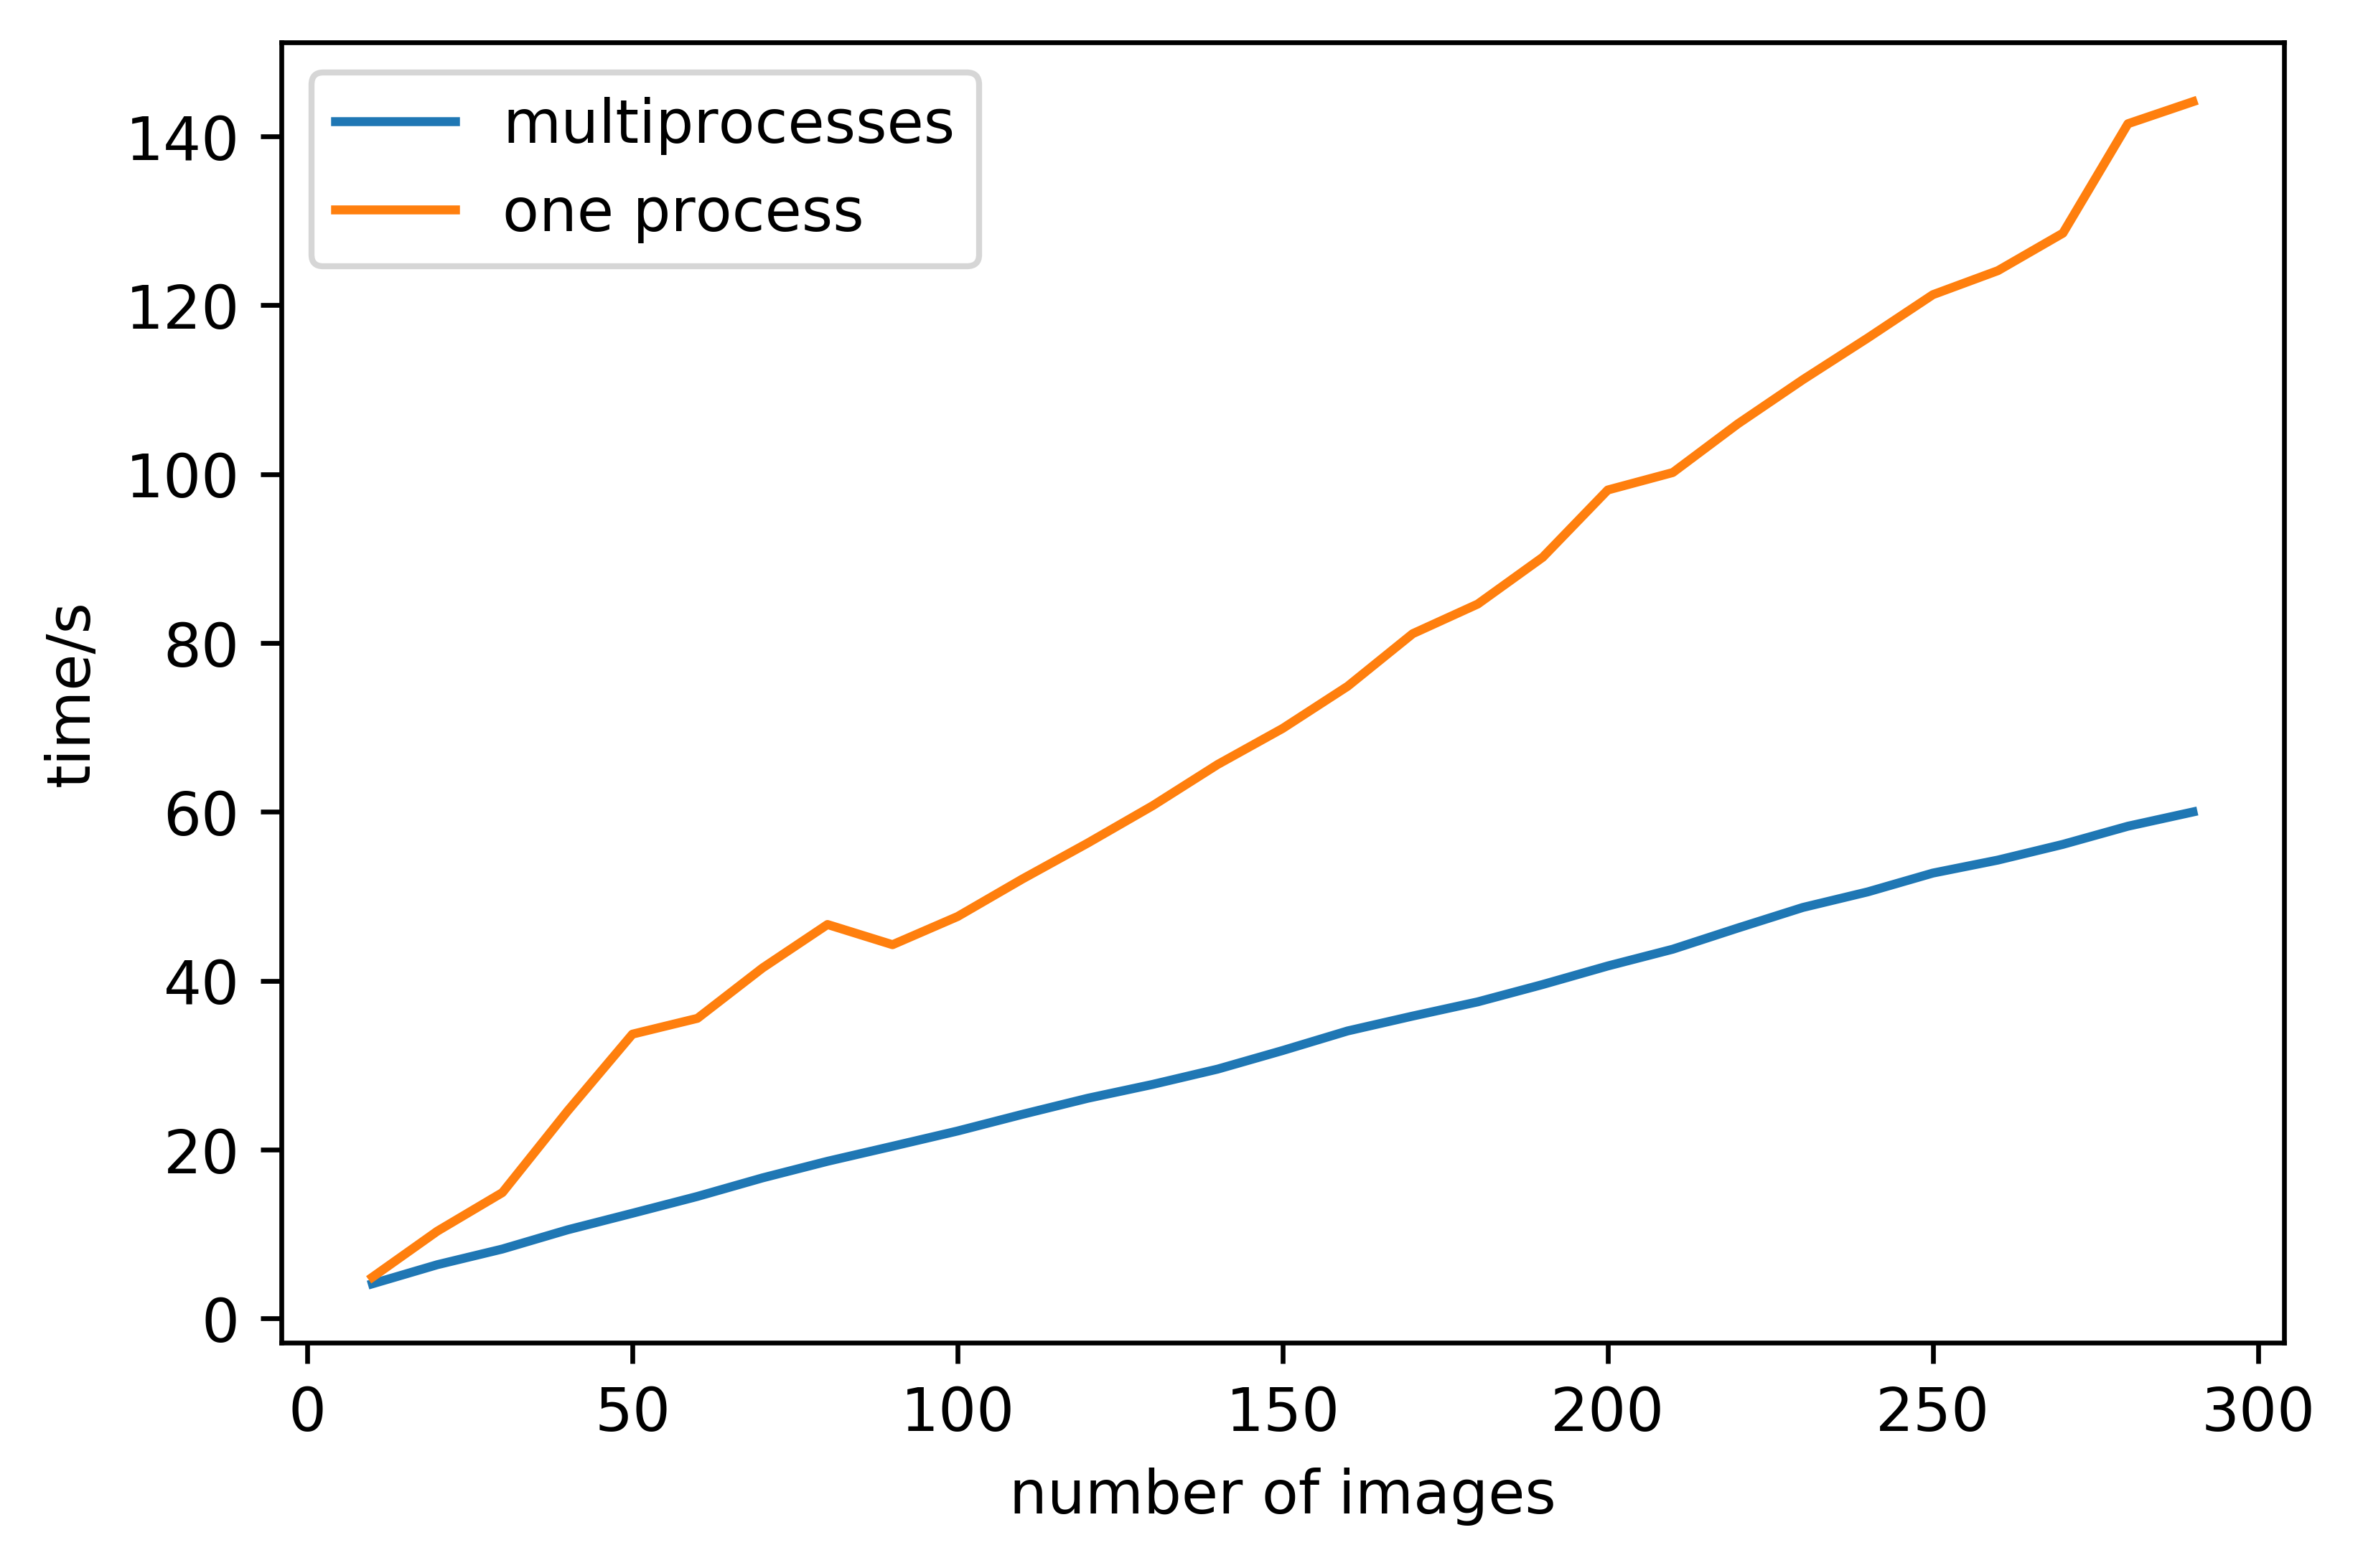
- 过程中发现了一些有趣的现象:两种方式在数据量小的时候差别不大,但多进程在处理大量数据时会比较有优势。
结果
本地运行的结果如下图所示,CPU为i5-1035G1
服务器运行的结果如下图,CPU为双核四线程
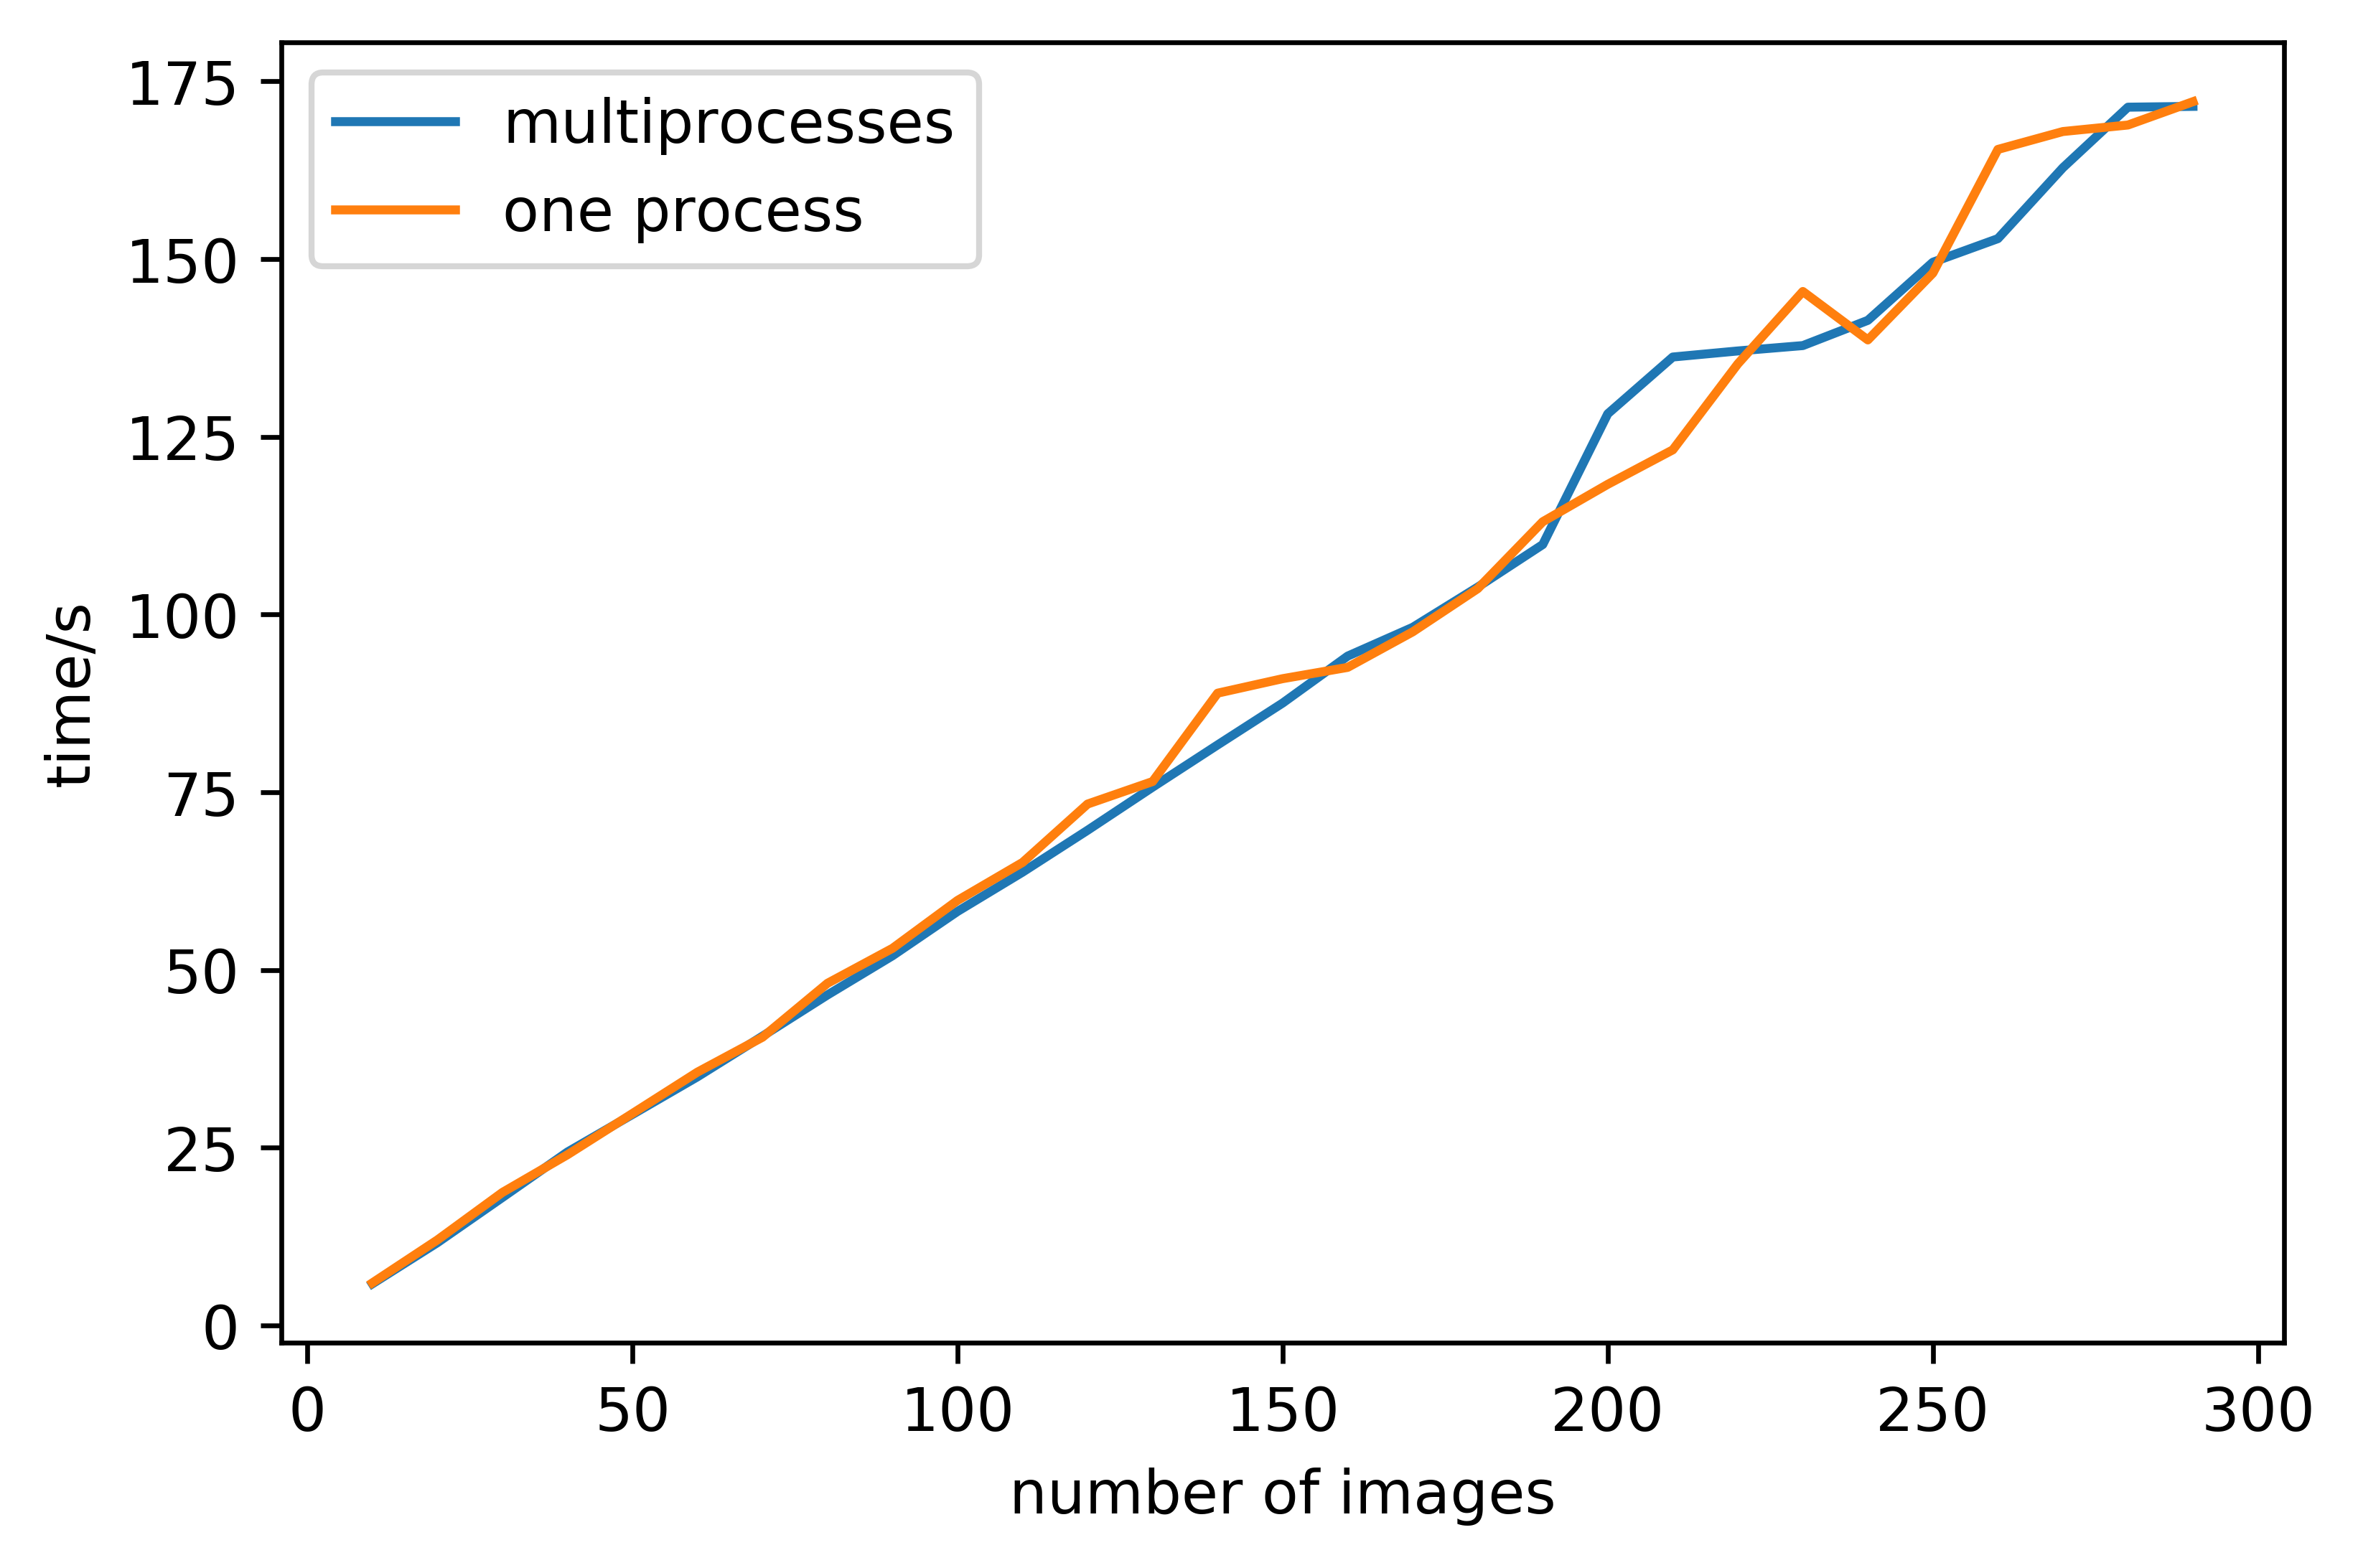
(图中的multipeocesses有误,应为multipeocess)
注意点:
-
ipython可以在启动时自动导入包,可以参考文档中对c.InteractiveShellApp.exec_files的描述
http://ipython.org/ipython-doc/stable/config/intro.html#setting-configurable-options
但要注意【】 -
ubuntu上opencv的安装
apt install python3-opencv
上面这一行代码就可以了,注意的是pip中直接安装opencv可能会有问题,容易出现缺少运行库的问题,至少在我的实践中conda和pip都没能安装好opencv
