win10 下载 Chromium 源码并编译
https://www.yangdx.com/2022/07/215.html
辅助看 https://blog.csdn.net/weixin_42081389/article/details/132127613
git fetch origin --tags
git reset --hard 版本号
gclient sync --force --nohooks --with branch heads -D
设置fq 的代理
http_proxy 192.168.1.17:7890
https_proxy 192.168.1.17:7890
--
编译时候如果报错 没有ninja, 下载ninja-win.zip
下面放到path
https://github.com/ninja-build/ninja/releases
cmd 要管理员权限
报错
File "D:\src\chromium\src\tools\grit\grit\util.py", line 214, in ReadFile
with io.open(filename, mode, encoding=encoding) as f:
^^^^^^^^^^^^^^^^^^^^^^^^^^^^^^^^^^^^^^^^^^
ValueError: invalid mode: 'rU'
把上面的文件 'rU' 改成 r
报错
ValueError: path is on mount '\\\\tab_group_types.mojom-webui.js', start on mount 'D:'
https://bugs.chromium.org/p/chromium/issues/detail?id=1422178#c4
D:\src\chromium\src\mojo\public\tools\bindings\generators\mojom_js_generator.py
把 def _GetWebUiModulePath(module): 方法里面
def _GetWebUiModulePath(module):
  """Returns the path to a WebUI module, from the perspective of a WebUI page
  that makes it available. This is based on the corresponding mojom target's
  webui_module_path value. Returns None if the target specifies no module
  path. Otherwise, returned paths always end in a '/' and begin with either
  `chrome://resources/` or a '/'."""
  path = module.metadata.get('webui_module_path')
  if path is None or path == '/':
    return path
  //下面两行新加的
  if path == '':
    return '/'
  if _IsAbsoluteChromeResourcesPath(path):
    return path.rstrip('/') + '/'
  return '/{}/'.format(path.strip('/'))
- 本文地址: https://www.yangdx.com/2022/07/215.html
- 转载请注明出处
1、一些信息
- Chromium 的官网是 https://www.chromium.org/
- Git 仓库是 https://chromium.googlesource.com/chromium/src.git
- 版本分支说明 https://chromiumdash.appspot.com/branches
当前 Chrome 、Edge 都是基于 Chromium 核心开发的浏览器。
众所周知的原因,你无法直接访问到上面的 Git 仓库,需要自己准备代理!
2、确定使用的版本
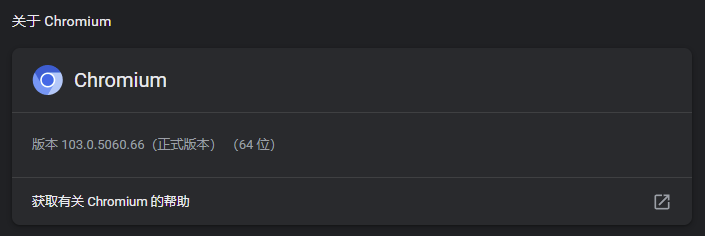
Chrome 浏览器的关于页面截图如下:
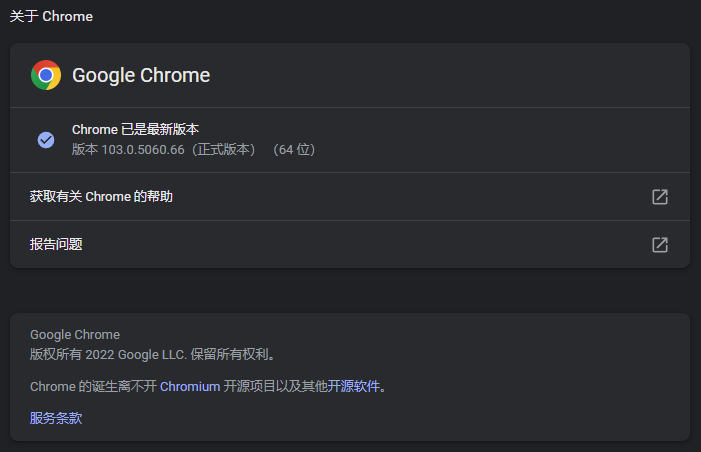
通过以上得知,Chrome 是基于 Chromium 的 tag 103.0.5060.66 开发的,也可以间接说明,这个版本比较稳定,可用。所以,我也打算选用这个版本的 Chromium 代码来编译。
3、找到对应版本的构建说明
确定了版本号,然后就是找到对应的编译说明。
用浏览器打开 https://chromium.googlesource.com/chromium/src.git ,在左侧 Tags 列表找到对应版本的链接:
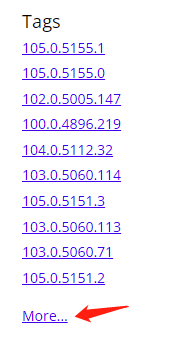
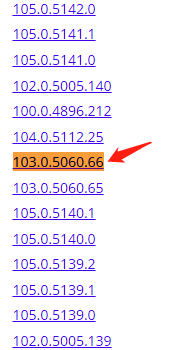
找到 103.0.5060.66 版本,点击进入,或者直接访问:https://chromium.googlesource.com/chromium/src.git/+/refs/tags/103.0.5060.66
滚动到页面底部,看到 README.md 的说明:
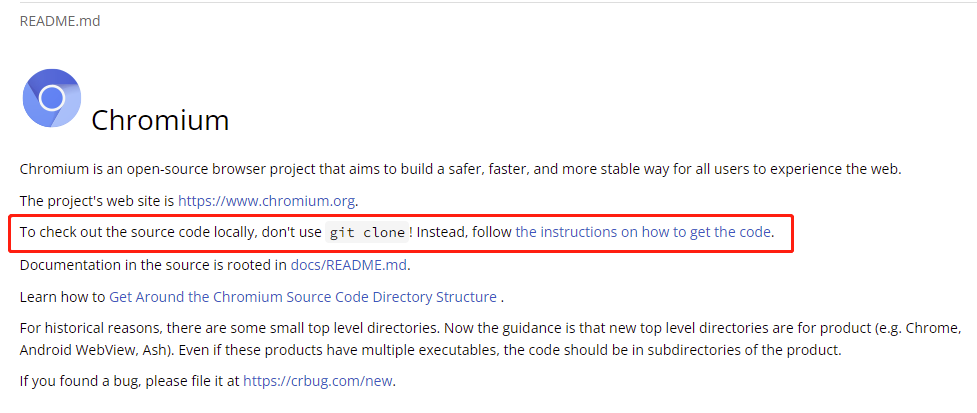
不要直接使用 git clone 克隆仓库,而是根据后面的链接指引来获取代码。因为编译时依赖的第三方库并不在这个 git 仓库里,需要使用专用工具来获取。
根据指引,最终找到 Windows 平台的构建说明页面:https://chromium.googlesource.com/chromium/src.git/+/refs/tags/103.0.5060.66/docs/windows_build_instructions.md
因为不同的 tag 对 Visual Studio 和 Windows 10 SDK 的版本要求不一样,所以我们必须找到对应版本的编译说明页面。
4、系统要求
- 具有至少 8GB 内存,强烈建议超过 16GB。
- 硬盘至少有 100GB 的可用空间,且为 NTFS 格式。
- 适当版本的 Visual Studio,后面会讲。
- 系统为 Windows 10 或更高版本。
我的机器是一台笔记本电脑,16GB 内存,CPU 是 AMD Ryzen 7 4800U,硬盘 500GB SSD,操作系统是 Windows 10 专业版。
5、安装 Visual Studio
需要安装 Visual Studio 2017 (>=15.7.2),推荐 Visual Studio 2019 (>=16.0.0) 。有时 VS 版本太高了也不行,例如 Chromium 95 的编译不能用 VS2022。
我自己安装的是 Visual Studio 2022 专业版,下载地址:https://visualstudio.microsoft.com/zh-hans/downloads/
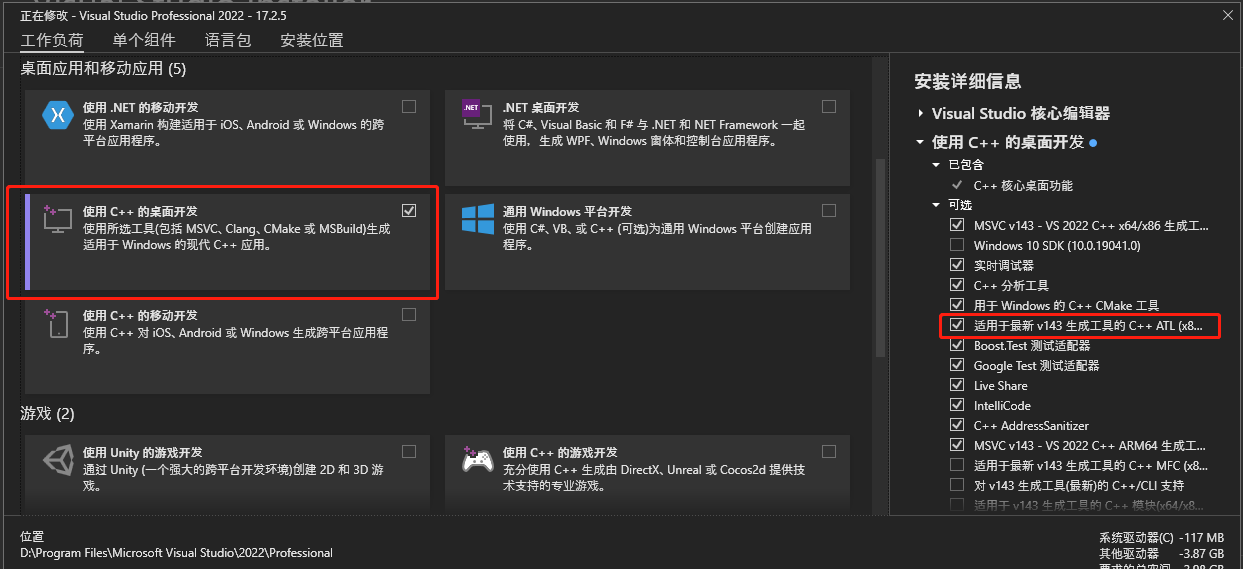
安装的时候,左侧勾选使用 C++ 的桌面开发,右侧勾选 C++ ATL 生成工具,其他项默认就可以了:
安装完成后,需要在系统中配置环境变量:
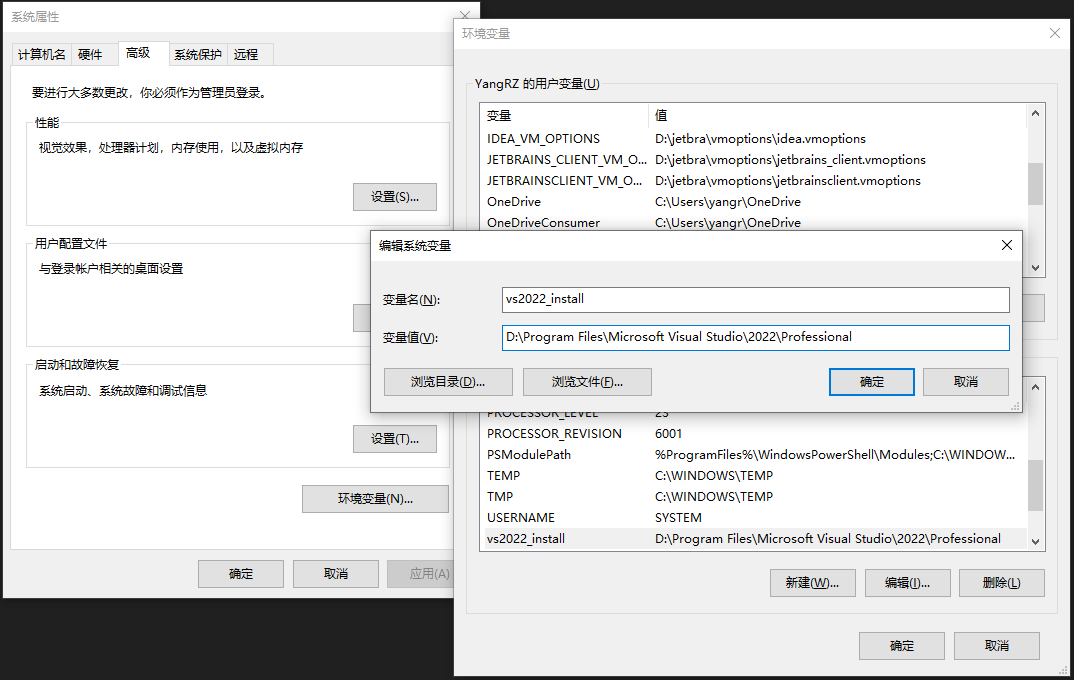
变量名 vs2017_install 或 vs2019_install 或 vs2022_install 是根据你安装的 Visual Studio 版本来定的,变量值就是具体的安装目录。
6、安装 Windows 10 SDK
页面中要求安装 10.0.20348.0 这个版本的 Windows 10 SDK,下载地址是:https://developer.microsoft.com/zh-cn/windows/downloads/sdk-archive/
注意,别下载错了,必须安装指定版本的 SDK,低了高了都不行!
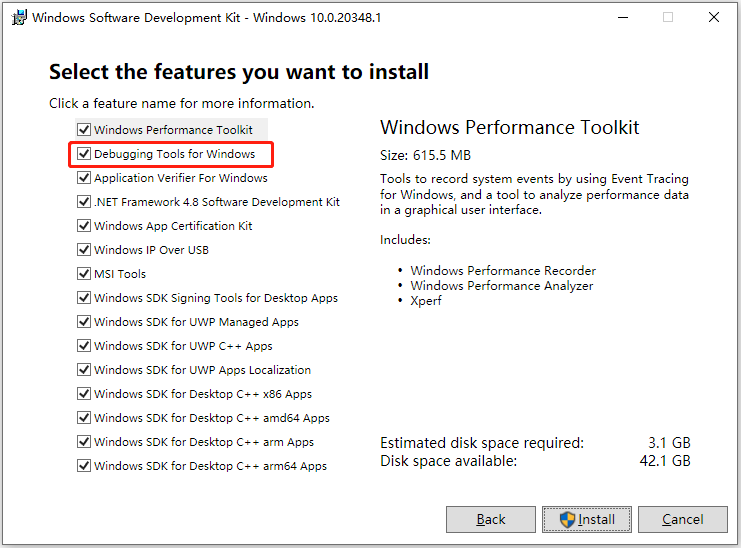
安装的时候,直接选默认项就行了,确保勾选了 “Debugging Tools For Windows”:
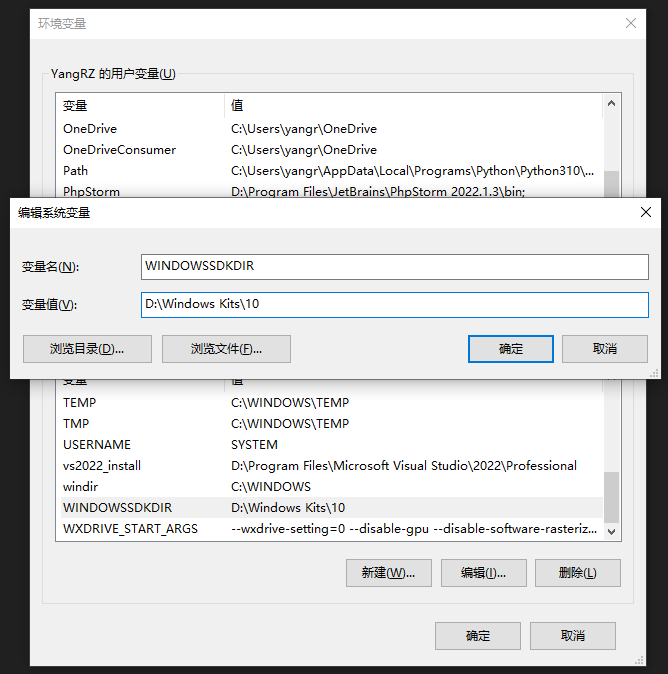
安装完成后,还需要设置环境变量 WINDOWSSDKDIR,值是 Windows 10 SDK 的安装目录:
7、安装 depot_tools
下载地址 https://storage.googleapis.com/chrome-infra/depot_tools.zip,将其解压至 D:\src\depot_tools 目录。
注意:不要使用鼠标拖拽或复制粘贴,否则其中 .git 目录可能不会正常复制过来,请使用 zip 压缩包管理工具直接解压到目标目录。
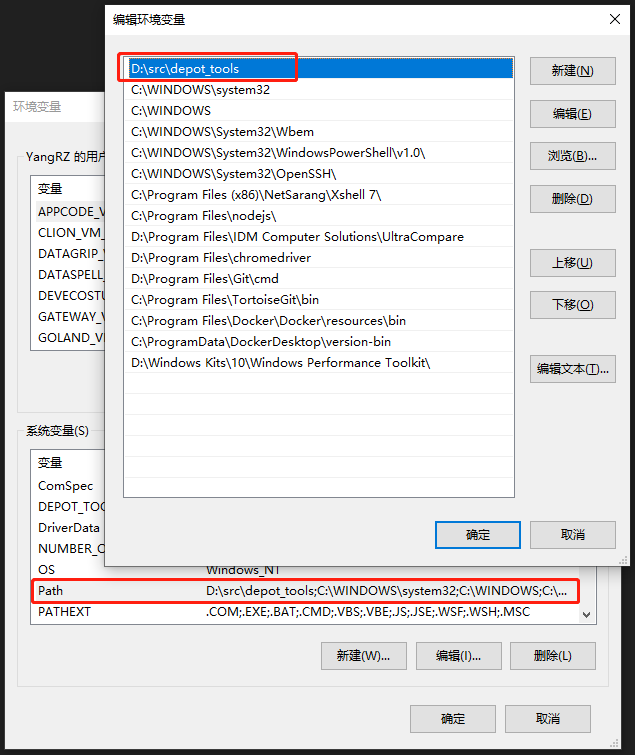
解压完成后,将 depot_tools 目录添加到 PATH 环境变量。确保要在你已经安装的 git 和 python 前面,因为 depot_tools 内置了 git 和 python 包。为了省事,我直接把它放到最前面:
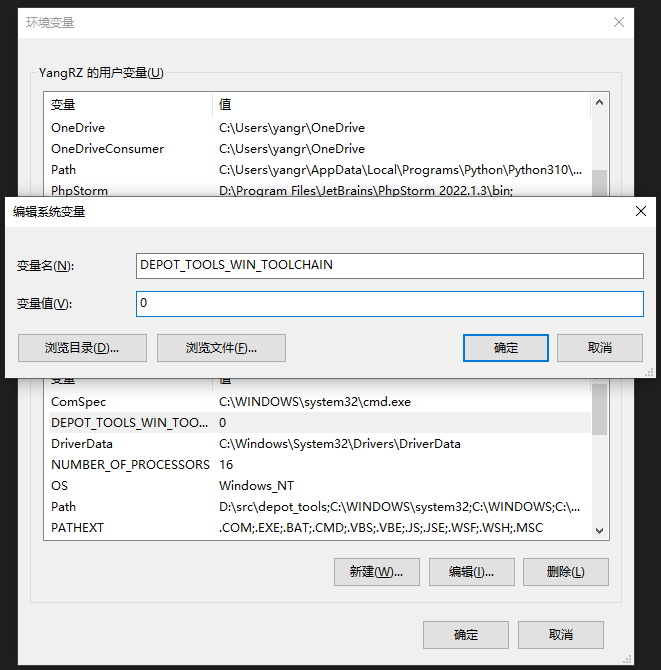
还需要再添加一个环境变量 DEPOT_TOOLS_WIN_TOOLCHAIN,其值为 0,作用是让 depot_tools 使用本地安装的 Visual Studio 版本(默认情况下,depot_tools 将尝试使用 google 内部版本):
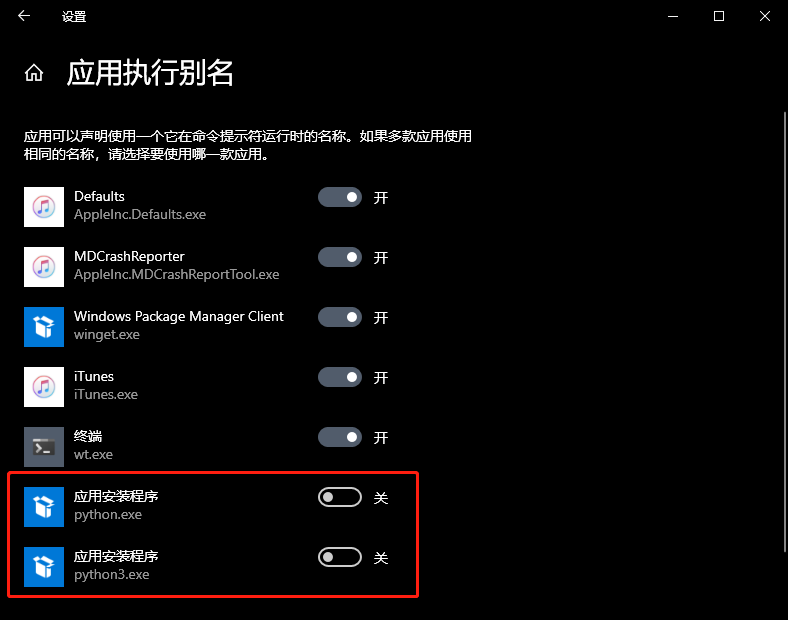
需要关闭 win10 系统中的 python 别名(开始菜单→设置→应用→应用执行别名):
8、depot_tools 初始化
使用管理员身份运行 CMD 命令提示符,它的路径是 C:\WINDOWS\System32\cmd.exe,切忌不可以用 cygwin、PowerShell 代替。
建议关闭杀毒软件,因为初始化会下载第三方依赖包,可能会被杀毒软件拦截。
在 CMD 下通过环境变量设置 HTTP 代理(因为我是通过 HK云服务器 + Xshell隧道 + Charles代理 的方式上网,所以要单独配置,如果你已经使用其他软件配置了系统全局代理则可以忽略):
set HTTP_PROXY=http://127.0.0.1:8888
set HTTPS_PROXY=http://127.0.0.1:8888
如图(记得每个新建的 CMD 窗口都要设置一遍代理):

执行 gclient 初始化(这个指令只需要执行一次):

配置一下 Git 默认项:
# 配置git用户名和email,如已配置请跳过
git config --global user.name "My Name"
git config --global user.email "my-name@chromium.org"

# 检出代码时不自动转换换行符(为true时Windows下会将检出文件的换行符\n转成\r\n)
git config --global core.autocrlf false

# 忽略文件权限的变化
git config --global core.filemode false

# 所有的分支都支持rebase
git config --global branch.autosetuprebase always
9、拉取代码
将 CMD 的工作目录切换至 D:\src 目录(确保有100GB可用空间),创建 chromium 目录(也可以换成其他名称)并切换至该目录,指令:
cd /d D:\src
mkdir chromium && cd chromium
如图:

拉取 Git 仓库代码,有两种方式:一种是直接从 Google 的代码仓库拉,另一种是从国内 Gitee 镜像仓库拉。后者快一点,但可能没有最新版本。
第一种,从 google 拉取(需要代理):
git clone --depth 100 -b 103.0.5060.66 https://chromium.googlesource.com/chromium/src.git src第二种,从 gitee 拉取(不需要代理):
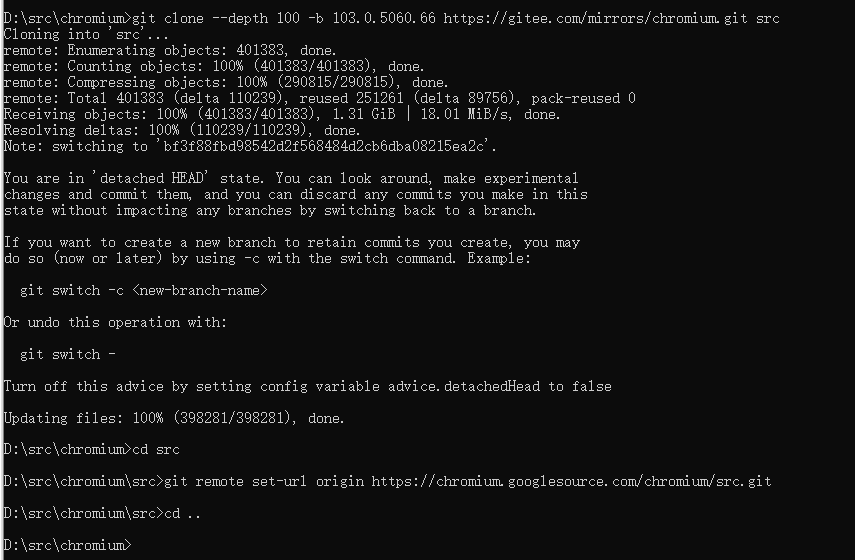
git clone --depth 100 -b 103.0.5060.66 https://gitee.com/mirrors/chromium.git src

# 还原git仓库地址
cd src
git remote set-url origin https://chromium.googlesource.com/chromium/src.git
cd ..
参数说明:
--depth 100意思是拉取深度为100,这将会拉取一些 log,因为编译脚本会基于仓库的 log 反查版本发布时间。如果这个值太小,可能会查不到,因而报错。所以,建议设为 100 或更大些。或者,直接去掉这个参数,但这样将拉取全部的 log,特别慢。-b 103.0.5060.66指定拉取的 tag 版本。
我使用第二种方式拉取:
注:我没有使用官方的 fetch chromium 指令,是因为这个指令拉取的是主分支最新代码。
10、生成 .gclient 文件
指令:
gclient config --unmanaged https://chromium.googlesource.com/chromium/src.git如图:

11、同步第三方依赖
第三方依赖,是指编译 chromium 时用到的软件,在 Windows 和 Linux 上分别使用不同的依赖包,它们并没有包含到 chromium 的仓库里。
指令是:
gclient sync等同于:
gclient sync --nohooks
gclient runhooks
注:在 runhooks 阶段,脚本会调用 PowerShell 下载软件包,而 PowserShell 使用的是系统的代理。使用 Charles 代理的话,记得启用 Windows Proxy,仅通过环境变量设置代理是不够的。
执行指令后,要下载几个 G 的依赖包,比较慢,窗口也会输出 “Still working on” 的提示,防止假死被误关:
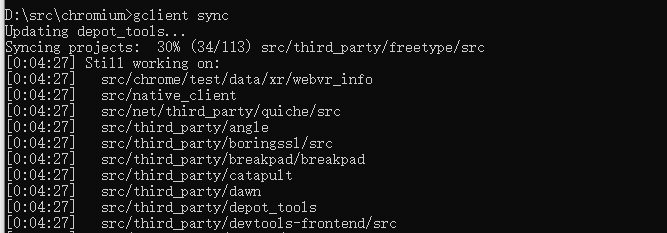
根据自身网络环境不同,下载完成可能需要几个小时,请耐心等待。如果执行意外中断,可以重复执行上述指令继续下载。
执行完毕如下(Running hooks: 100%):
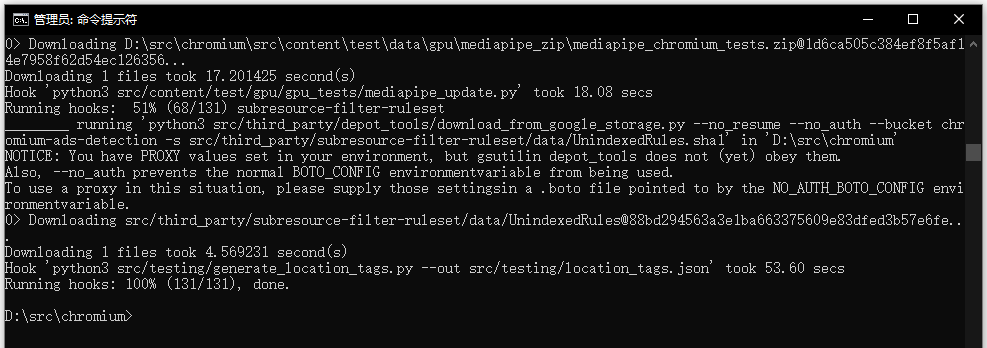
中间的这个提示可以忽略不管:
NOTICE: You have PROXY values set in your environment, but gsutilin depot_tools does not (yet) obey them.
Also, --no_auth prevents the normal BOTO_CONFIG environmentvariable from being used.
To use a proxy in this situation, please supply those settingsin a .boto file pointed to by the NO_AUTH_BOTO_CONFIG environmentvariable.
12、编译调试版浏览器
进入 D:\src\chromium\src 目录编译:
cd src

# 生成方案
gn gen out\Default

# 编译
autoninja -C out\Default chrome
如图:

指令 gn gen out\Default 生成的方案默认是编译为调试版的浏览器。
编译过程很久,根据机器性能决定,持续几个小时是正常的。如果意外中断,可再次执行 autoninja -C out\Default chrome 继续编译。
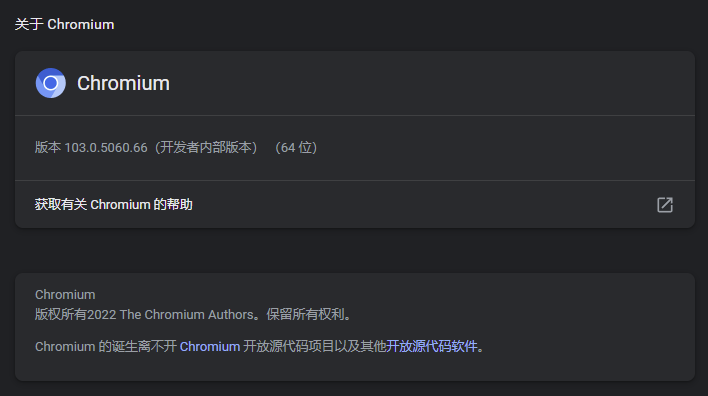
编译完成后,可打开 D:\src\chromium\src\out\Default\chrome.exe 运行浏览器,显示为开发者内部版本:
13、编译正式版浏览器
进入 D:\src\chromium\src 目录,执行:
gn args out\Release弹出一个记事本文件编辑框,让我们输入编译参数,填写:
target_os="win"
target_cpu="x64"
is_component_build=false
is_debug=false
is_official_build=true
保存后,报错了:
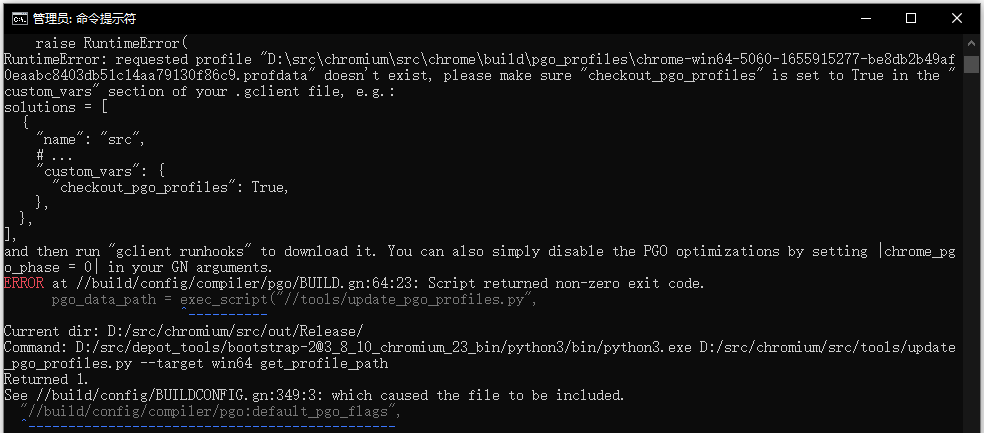
根据提示,在 .gclient 文件中添加配置项 "checkout_pgo_profiles": True:
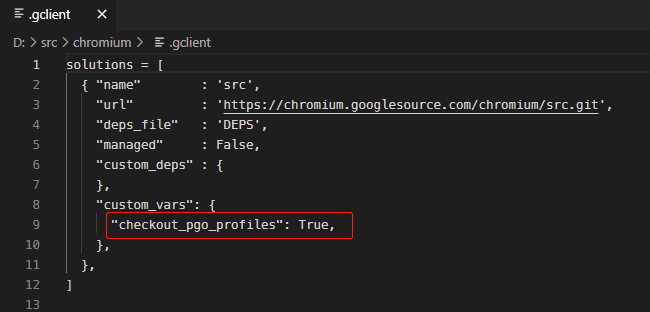
然后执行 gclient runhooks 拉取依赖,完成后,重新执行 gn args out\Release。
最后,执行 autoninja -C out\Release mini_installer 编译。

编译完成后,可在 D:\src\chromium\src\out\Release\mini_installer.exe 得到安装程序。
14、程序的断点调试
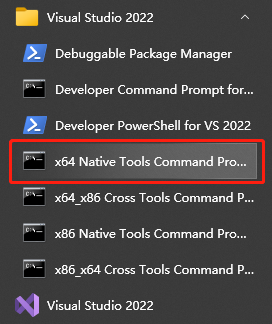
以管理员身份运行开始菜单 Visual Studio 2022 文件夹的 “x64 Native Tools Command Prompt for VS 2022” 程序:
执行:
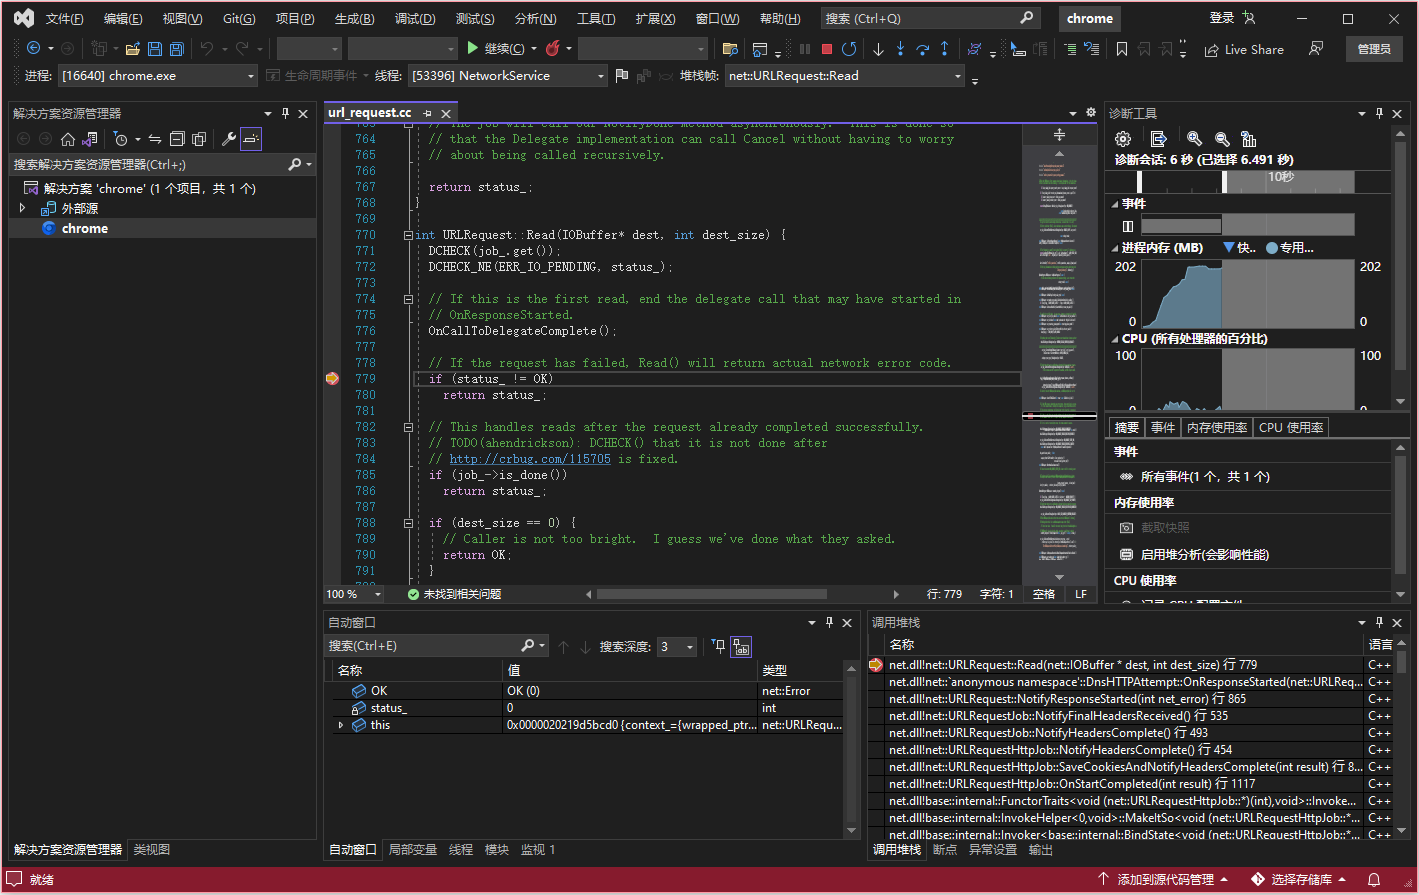
devenv /DEBUGEXE D:\src\chromium\src\out\Default\chrome.exe --single-process
将会启动 VS2022,按快捷键 Ctrl + O 打开源代码文件,如 D:\src\chromium\src\net\url_request\url_request.cc,设置断点,再按 F5 启动调试:


【推荐】国内首个AI IDE,深度理解中文开发场景,立即下载体验Trae
【推荐】编程新体验,更懂你的AI,立即体验豆包MarsCode编程助手
【推荐】抖音旗下AI助手豆包,你的智能百科全书,全免费不限次数
【推荐】轻量又高性能的 SSH 工具 IShell:AI 加持,快人一步
· TypeScript + Deepseek 打造卜卦网站:技术与玄学的结合
· 阿里巴巴 QwQ-32B真的超越了 DeepSeek R-1吗?
· 【译】Visual Studio 中新的强大生产力特性
· 张高兴的大模型开发实战:(一)使用 Selenium 进行网页爬虫
· 【设计模式】告别冗长if-else语句:使用策略模式优化代码结构
2019-01-24 转:对比python 链接 neo4j 驱动,py2neo 和 neo4j-driver 和 neo4jrestclient