【译】 双向流传输和ASP.NET Core 3.0上的gRPC简介
原文相关
 原文作者:Eduard Los
 原文地址:https://medium.com/@eddyf1xxxer/bi-directional-streaming-and-introduction-to-grpc-on-asp-net-core-3-0-part-2-d9127a58dcdb
 Demo地址:https://github.com/f1xxxer/CustomerGrpc
现在,让我们看一下代码。可以使用Visual Studio UI或使用命令行命令轻松创建gRPC服务项目:dotnet new grpc -n YourGrpcService
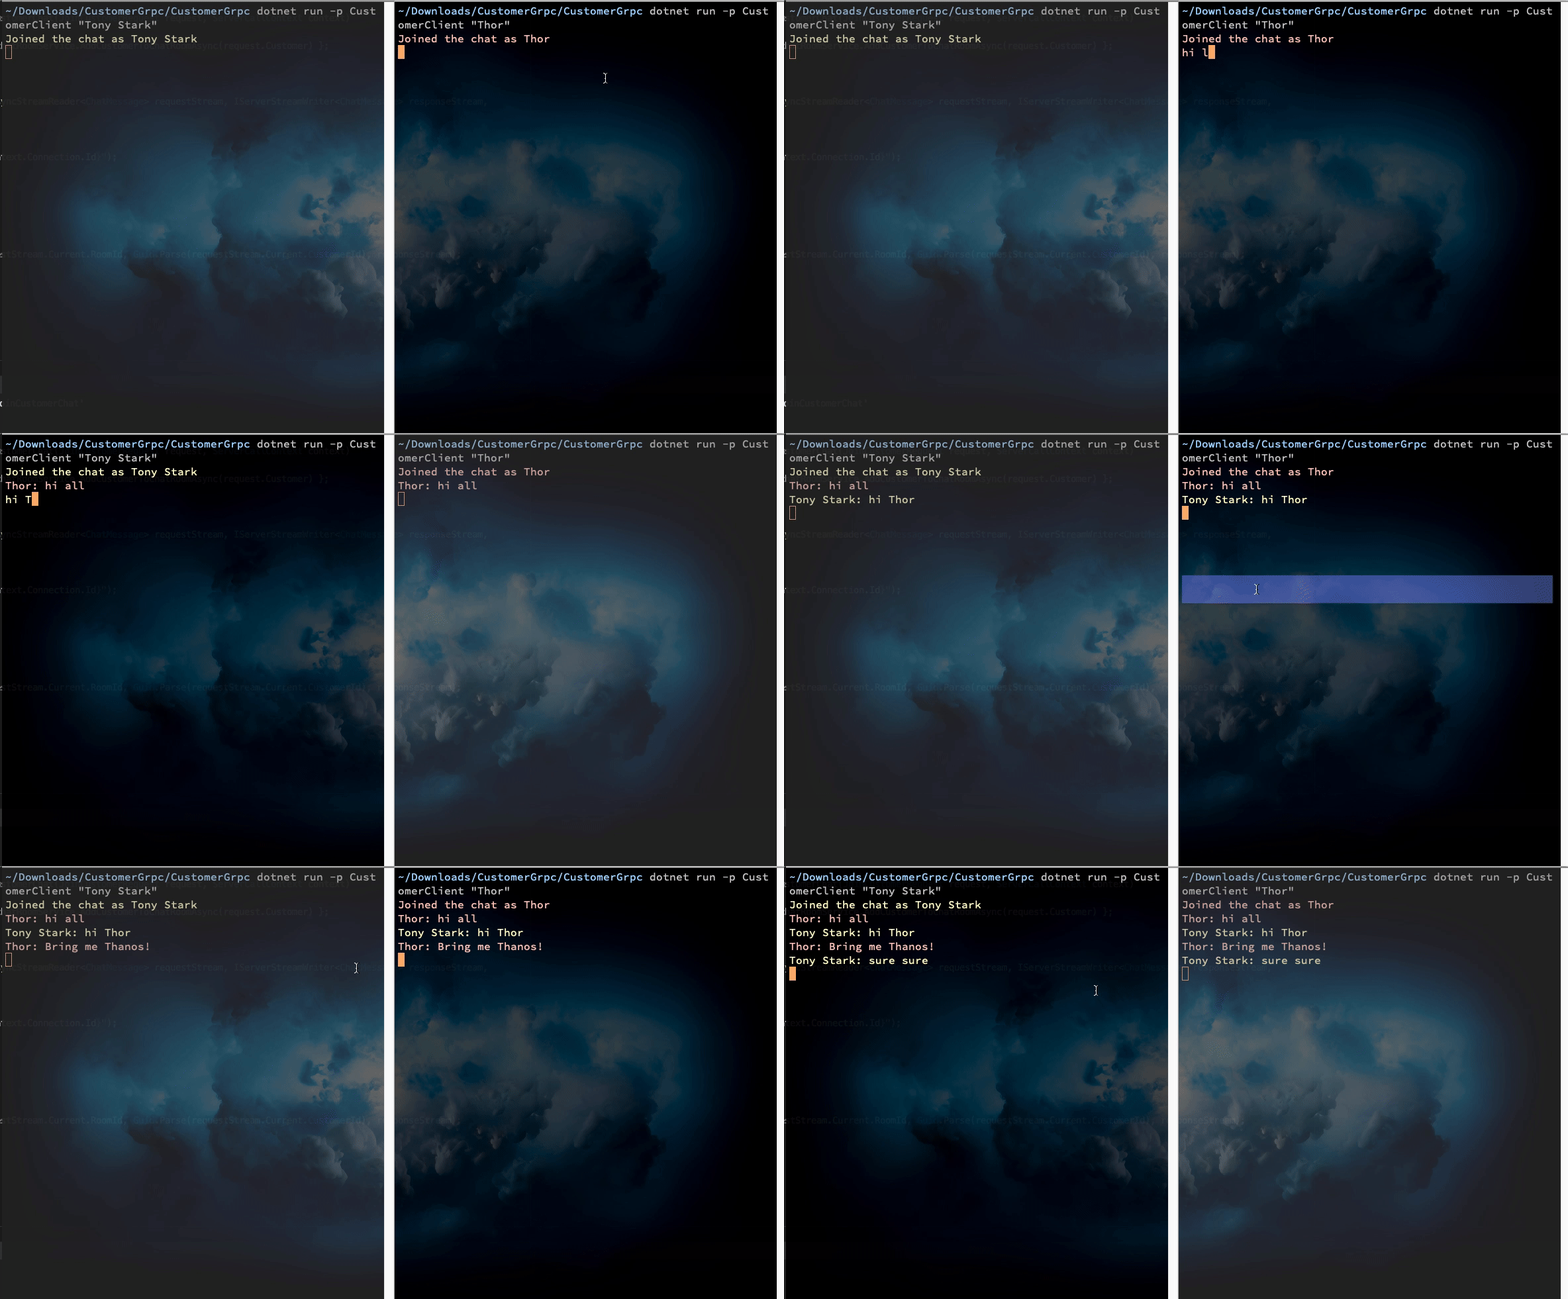
在我的解决方案中,gRPC服务器和客户端的代码都在C#中。gRPC服务器正在管理客户连接并处理消息,并将消息广播给所有连接的客户端。客户端接收客户的输入,将其发送到服务器,还接受来自服务器的其他客户端发送的消息。
我们首先查看CustomerGrpc项目中的服务器代码,但在此之前,我想在标准的Startup.cs和Program.cs文件中指出一些内容。
public class Startup {
    // This method gets called by the runtime. Use this method to add services to the container.
    // For more information on how to configure your application, visit https://go.microsoft.com/fwlink/?LinkID=398940
    public void ConfigureServices (IServiceCollection services) {
        services.AddGrpc (opts => {
            opts.EnableDetailedErrors = true;
            opts.MaxReceiveMessageSize = 4096;
            opts.MaxSendMessageSize = 4096;
        });
        services.AddTransient<IChatRoomService, ChatRoomService> ();
        services.AddSingleton<IChatRoomProvider, ChatRoomProvider> ();
    }

    // This method gets called by the runtime. Use this method to configure the HTTP request pipeline.
    public void Configure (IApplicationBuilder app, IWebHostEnvironment env) {
        if (env.IsDevelopment ()) {
            app.UseDeveloperExceptionPage ();
        }

        app.UseRouting ();

        app.UseEndpoints (endpoints => {
            endpoints.MapGrpcService<Services.CustomerService> ();

            endpoints.MapGet ("/",
                async context => {
                    await context.Response.WriteAsync (
                        "Communication with gRPC endpoints must be made through a gRPC client. To learn how to create a client, visit: https://go.microsoft.com/fwlink/?linkid=2086909");
                });
        });
    }
}
该services.AdddGrpc();方法启用了gRPC 。此方法添加了用于构建用于处理gRPC调用的管道的不同服务和中间件。Undercover方法使用GrpcMarkerService类来确保添加了所有必需的gRPC服务,并且还添加了一些对基础HTTP / 2消息进行操作的中间件。您还可以通过GrpcServiceOptions类型提供服务的配置,该类型稍后将在管道中使用。例如,最大传入消息大小可以这样配置:
services.AddGrpc(opts =>
{
    opts.EnableDetailedErrors = true;
    opts.MaxReceiveMessageSize = 4096;
    opts.MaxSendMessageSize = 4096;
});
对于我们来说,另一种有趣的方法是在端点路由中:endpoints.MapGrpcService<Services.CustomerService>();该方法将gRPC服务添加到路由管道中。在ASP.NET Core中,路由管道在中间件和功能之间共享,这意味着我们可以在其中拥有其他请求处理程序,例如MVC控制器。其他请求处理程序与配置的gRPC服务并行工作。见下文:
app.UseEndpoints(endpoints =>
{
	endpoints.MapGrpcService<Services.CustomerService>();

	endpoints.MapGet("/",	async context =>
		{
			await context.Response.WriteAsync(
				"Communication with gRPC endpoints must be made through a gRPC client. To learn how to create a client, visit: 						https://go.microsoft.com/fwlink/?linkid=2086909");
		});
});
现在我们需要配置Kestrel服务器。
Kestrel gRPC端点:
- 需要HTTP/2。
- 应该使用HTTPS进行保护。
HTTP / 2
gRPC需要HTTP / 2,并且ASP.NET Core的gRPC验证HttpRequest.Protocol. 为HTTP/2。
Kestrel 在大多数现代操作系统上都支持Http/2.。默认情况下,Kestrel端点配置为支持HTTP / 1.1和HTTP / 2连接。
HTTPS
用于gRPC的Kestrel端点应使用HTTPS保护。在开发中,https://localhost:5001当存在ASP.NET Core开发证书时,将自动创建HTTPS终结点。无需配置。
在生产中,必须显式配置HTTPS。在我们的情况下,我们有以下内容:
public class Program
{
	public static void Main(string[] args)
	{
		CreateHostBuilder(args).Build().Run();
	}

	// Additional configuration is required to successfully run gRPC on macOS.
	// For instructions on how to configure Kestrel and gRPC clients on macOS, visit https://go.microsoft.com/fwlink/?linkid=2099682
	public static IHostBuilder CreateHostBuilder(string[] args) =>
		Host.CreateDefaultBuilder(args)
			.ConfigureWebHostDefaults(webBuilder =>
			{
				webBuilder.ConfigureKestrel(options =>
				{
					// Setup a HTTP/2 endpoint without TLS for OSX.
					options.ListenLocalhost(5001, o => o.Protocols = HttpProtocols.Http2);
				});
				webBuilder.UseStartup<Startup>();
			});
}
请注意,存在一个已知问题,即macOS不支持带有传输层安全性(Http/2.)的 ASP.NET Core gRPC 。要在macOS上成功运行gRPC服务,需要进行其他配置。这正是我们的情况,这就是为什么我们必须在options.ListenLocalhost(5001, o => o.Protocols = HttpProtocols.Http2);不带TLS的情况下使用HTTP / 2行禁用TLS的原因,只能在应用程序开发期间使用。生产应用程序应始终使用传输安全性。有关更多信息,请参见ASP.NET Core的gRPC中.的安全注意事项。
现在,让我们看一下我们的gRPC客户服务。一开始我们看到的是我们的CustomerService类是从CustomerGrpc.CustomerService.CustomerServiceBase类继承的。
此类基于我们的.proto文件生成,如果您在文件上按F12键,则会看到一堆自动生成的代码,这些代码描述了我们的服务,消息和通信。
在我们班,我们重写父类中定义了两个自定义的方法:JoinCustomerChat与SendMessageToChatRoom这基本上是所有的我们的代码是怎么回事。JoinCustomerChat演示了相对简单的请求/响应模式,我们在其中发送JoinCustomerRequest客户信息,并在客户加入JoinCustomerReply 的聊天室RoomId中进行接收。
public override async Task<JoinCustomerReply> JoinCustomerChat (JoinCustomerRequest request, ServerCallContext context)
{
    return new JoinCustomerReply { RoomId = await _chatRoomService.AddCustomerToChatRoomAsync (request.Customer) };
}
然后,我们有一个更有趣的SendMessageToChatRoom方法,它是双向流的演示。
public override async Task SendMessageToChatRoom (IAsyncStreamReader<ChatMessage> requestStream, IServerStreamWriter<ChatMessage> responseStream, ServerCallContext context)
 {
    var httpContext = context.GetHttpContext ();
    _logger.LogInformation ($"Connection id: {httpContext.Connection.Id}");

    if (!await requestStream.MoveNext ()) {
        return;
    }

    _chatRoomService.ConnectCustomerToChatRoom (requestStream.Current.RoomId, Guid.Parse (requestStream.Current.CustomerId), responseStream);
    var user = requestStream.Current.CustomerName;
    _logger.LogInformation ($"{user} connected");

    try {
        while (await requestStream.MoveNext ())
        {
            if (!string.IsNullOrEmpty (requestStream.Current.Message))
            {
                if (string.Equals (requestStream.Current.Message, "qw!", StringComparison.OrdinalIgnoreCase)) {
                    break;
                }
                await _chatRoomService.BroadcastMessageAsync (requestStream.Current);
            }
        }
    }
    catch (IOException)
    {
        _chatRoomService.DisconnectCustomer (requestStream.Current.RoomId, Guid.Parse (requestStream.Current.CustomerId));
        _logger.LogInformation ($"Connection for {user} was aborted.");
    }
}
让我们仔细看一下该方法的参数。IAsyncStreamReader
IServerStreamWriter
ServerCallContext context 提供一些方便的属性,例如呼叫的HttpContext,HostName等。
该方法中的逻辑并不复杂。当服务器上接到呼叫时,首先我们存储IServerStreamWriter
_chatRoomService.ConnectCustomerToChatRoom(requestStream.Current.RoomId, Guid.Parse(requestStream.Current.CustomerId), responseStream);
然后在一个while(await requestStream.MoveNext())循环中,我们浏览从客户端收到的消息,并将它们广播到当前已连接的另一个客户端。
await _chatRoomService.BroadcastMessageAsync(requestStream.Current);
该BroadcastMessageAsync()方法中的代码将遍历所有连接的客户端的响应流,并将消息写入该流。
foreach (var customer in chatRoom.CustomersInRoom)
{
   await customer.Stream.WriteAsync(message);
   Console.WriteLine($"Sent message from {message.CustomerName} to   {customer.Name}");
}
我们还有一个try / catch块来处理连接失败并从聊天室中删除相应的流。
catch (IOException)
{
   _chatRoomService.DisconnectCustomer(requestStream.Current.RoomId,     Guid.Parse(requestStream.Current.CustomerId));
   _logger.LogInformation($"Connection for {user} was aborted.");
}
这基本上是与gRPC直接相关的所有服务器逻辑。我已经在服务和包装器中创建了一些附加功能,您可以在此处找到。
现在,我们可以简短地查看客户端代码。首先,我们创建GrpcChannel然后将其提供给gRPC客户端。
var channel = GrpcChannel.ForAddress("http://localhost:5001", new GrpcChannelOptions { Credentials = ChannelCredentials.Insecure });
var client = new CustomerService.CustomerServiceClient(channel);
然后,客户端将JoinCustomerChatAsync返回聊天室的RoomId。之后,我们通过执行SendMessageToChatRoom呼叫和开始消息交换来打开或双向流。

using (var streaming = client.SendMessageToChatRoom (new Metadata { new Metadata.Entry ("CustomerName", customer.Name) }))
{
    var response = Task.Run (async () =>
    {
        while (await streaming.ResponseStream.MoveNext ())
        {
            Console.ForegroundColor = Enum.Parse<ConsoleColor> (streaming.ResponseStream.Current.Color);
            Console.WriteLine ($"{streaming.ResponseStream.Current.CustomerName}: {streaming.ResponseStream.Current.Message}");
            Console.ForegroundColor = Enum.Parse<ConsoleColor> (customer.ColorInConsole);
        }
    });

    ...

    while (!string.Equals (line, "qw!", StringComparison.OrdinalIgnoreCase)) {
        await streaming.RequestStream.WriteAsync (new ChatMessage {
            Color = customer.ColorInConsole,
                CustomerId = customer.Id,
                CustomerName = customer.Name,
                Message = line,
                RoomId = joinCustomerReply.RoomId
        });
        line = Console.ReadLine ();
        DeletePrevConsoleLine ();
    }
    await streaming.RequestStream.CompleteAsync ();
}
打开连接后,我们在后台任务中开始循环,该循环从响应流中读取消息,然后将其显示在控制台中。第二个循环只是从键盘获取输入,并将该输入发送到服务器。
总体而言,代码并不是那么复杂,但是指出了在哪里需要使用或设计选择来使用.net core和c#来实现自己的gRPC服务的地方。
非常感谢作者Eduard Los.给我们的分享
如您喜欢的话不妨点个赞收藏一下吧


【推荐】国内首个AI IDE,深度理解中文开发场景,立即下载体验Trae
【推荐】编程新体验,更懂你的AI,立即体验豆包MarsCode编程助手
【推荐】抖音旗下AI助手豆包,你的智能百科全书,全免费不限次数
【推荐】轻量又高性能的 SSH 工具 IShell:AI 加持,快人一步
· AI与.NET技术实操系列:基于图像分类模型对图像进行分类
· go语言实现终端里的倒计时
· 如何编写易于单元测试的代码
· 10年+ .NET Coder 心语,封装的思维:从隐藏、稳定开始理解其本质意义
· .NET Core 中如何实现缓存的预热?
· 25岁的心里话
· 闲置电脑爆改个人服务器(超详细) #公网映射 #Vmware虚拟网络编辑器
· 零经验选手,Compose 一天开发一款小游戏!
· 通过 API 将Deepseek响应流式内容输出到前端
· 因为Apifox不支持离线,我果断选择了Apipost!