SSH不对称密钥自动登入服务器
1、先在自己的电脑上创建密钥对
ssh-keygen -t rsa
Windows下生成SSH密钥
$ ssh-keygen -t rsa -C "youremail@example.com"
这时可以在主机A上看到生成的秘钥~/.ssh/idrsa 和公钥 ~/.ssh/ idrsa.pub
2、把公钥放传输到服务器上
第一步是以安装Ubuntu 22.04时创建的用户名和密码登入服务器。
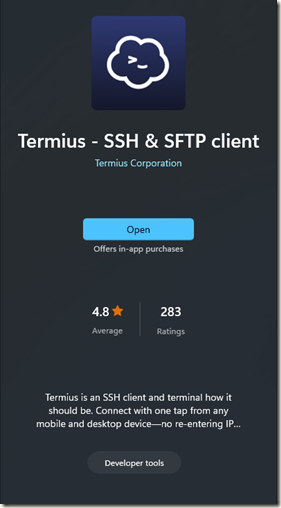
我们用最优秀的跨平台SSH客户端,在windows store里直接下载
新建一个Host,配置如下:
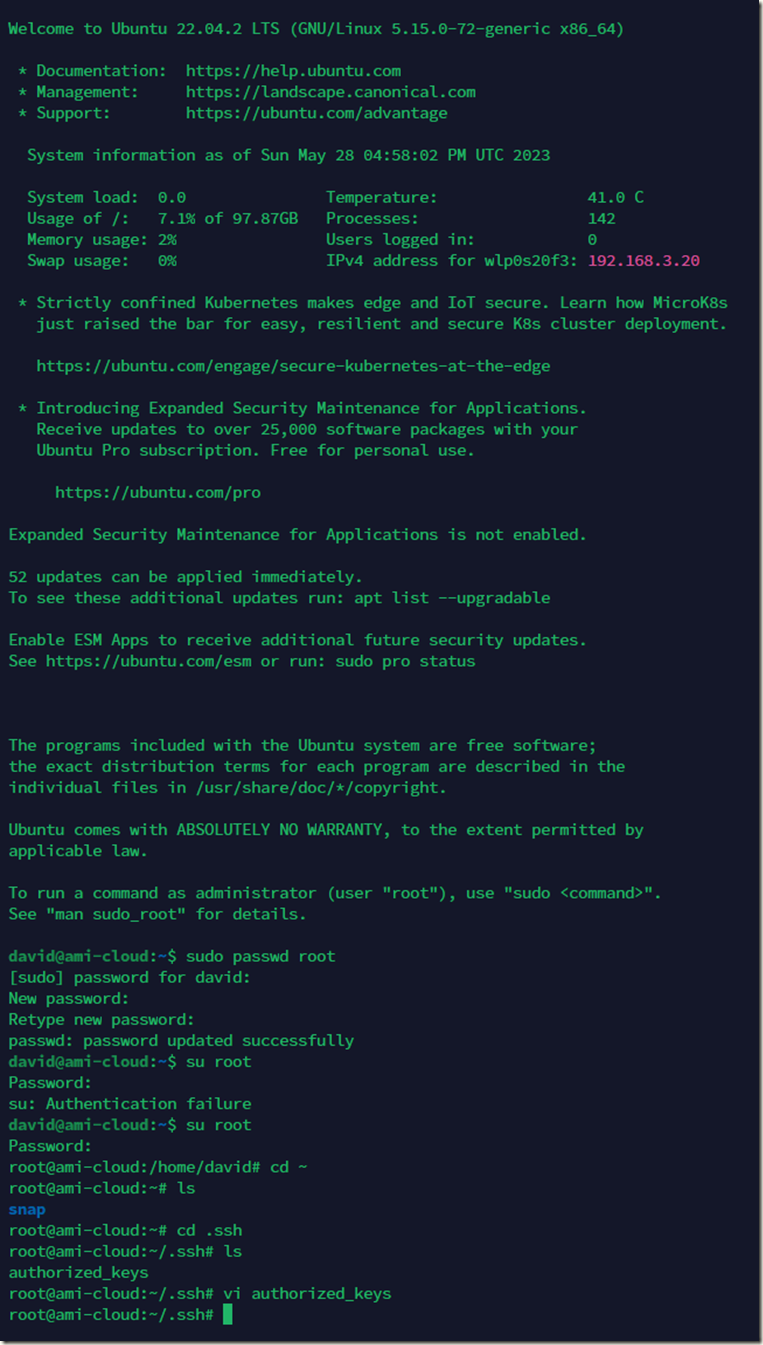
新的服务器,用这条命令给root账户设置密码
sudo passwd root
然后切换到root账户登入
su root
去修改root用户的SSH公钥配置
cd /root
cd .ssh
vi authorized_keys
把自己的公钥贴到上述文件,保存后退出vi编辑器
上述一堆命令的效果图如下:
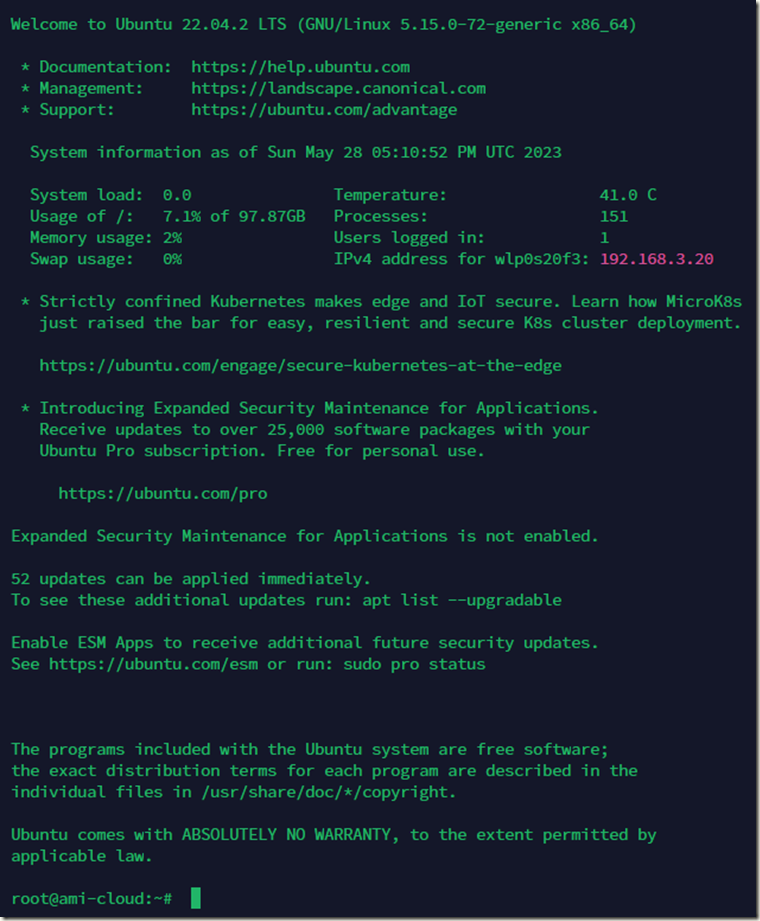
3、使用客户端工具免密密码登入
上述演示基于从ubuntu.com官方网站下载的iso映像,全新安装的Ubuntu 22.04服务器。如果不是这样的服务器环境,可能您还需要继续往下看:
4、修改ssh服务配置文件
sudo vi /etc/ssh/sshd_config
- 要检查的几个选项:
PermitRootLogin yes #允许root登录
PermitEmptyPasswords yes #允许空密码登录
PasswordAuthentication yes # 设置是否使用口令验证。
5、重新启动SSH服务
service sshd start 开启ssh服务
service sshd stop 停止ssh服务
service sshd restart 重启ssh服务
6、SSH命令的两个重要开关
1)-i,用途是指定私钥的文件路径
2)-vT,用途是输出详细的信息
PS C:\Users\David> ssh -i X:\gitlab-runner\ssh\id_rsa great@proget.abcdefg.cn -vT
OpenSSH_for_Windows_8.6p1, LibreSSL 3.4.3
debug1: Authenticator provider $SSH_SK_PROVIDER did not resolve; disabling
debug1: Connecting to proget.abcdefg.cn [47.106.133.5] port 22.
debug1: Connection established.
debug1: identity file X:\\gitlab-runner\\ssh\\id_rsa type 0
debug1: identity file X:\\gitlab-runner\\ssh\\id_rsa-cert type -1
debug1: Local version string SSH-2.0-OpenSSH_for_Windows_8.6
debug1: Remote protocol version 2.0, remote software version OpenSSH_8.9p1 Ubuntu-3ubuntu0.1
debug1: compat_banner: match: OpenSSH_8.9p1 Ubuntu-3ubuntu0.1 pat OpenSSH* compat 0x04000000
debug1: Authenticating to proget.abcdefg.cn:22 as 'great'
debug1: load_hostkeys: fopen C:\\Users\\David/.ssh/known_hosts2: No such file or directory
debug1: load_hostkeys: fopen __PROGRAMDATA__\\ssh/ssh_known_hosts: No such file or directory
debug1: load_hostkeys: fopen __PROGRAMDATA__\\ssh/ssh_known_hosts2: No such file or directory
debug1: SSH2_MSG_KEXINIT sent
debug1: SSH2_MSG_KEXINIT received
debug1: kex: algorithm: curve25519-sha256
debug1: kex: host key algorithm: ssh-ed25519
debug1: kex: server->client cipher: chacha20-poly1305@openssh.com MAC: <implicit> compression: none
debug1: kex: client->server cipher: chacha20-poly1305@openssh.com MAC: <implicit> compression: none
debug1: expecting SSH2_MSG_KEX_ECDH_REPLY
debug1: SSH2_MSG_KEX_ECDH_REPLY received
debug1: Server host key: ssh-ed25519 SHA256:g+AgPHqhDZhgIE0yiuMlkIEQfefGlSSO4jeWM8Ekd5A
debug1: load_hostkeys: fopen C:\\Users\\David/.ssh/known_hosts2: No such file or directory
debug1: load_hostkeys: fopen __PROGRAMDATA__\\ssh/ssh_known_hosts: No such file or directory
debug1: load_hostkeys: fopen __PROGRAMDATA__\\ssh/ssh_known_hosts2: No such file or directory
debug1: Host 'proget.abcdefg.cn' is known and matches the ED25519 host key.
debug1: Found key in C:\\Users\\David/.ssh/known_hosts:1
debug1: rekey out after 134217728 blocks
debug1: SSH2_MSG_NEWKEYS sent

debug1: expecting SSH2_MSG_NEWKEYS
debug1: SSH2_MSG_NEWKEYS received
debug1: rekey in after 134217728 blocks
debug1: pubkey_prepare: ssh_get_authentication_socket: No such file or directory
debug1: Will attempt key: X:\\gitlab-runner\\ssh\\id_rsa RSA SHA256:6QNUIUX5zptZfoIHVWBJW8slxrzUsCwMojRe4vo3Fnk explicitdebug1: SSH2_MSG_EXT_INFO received
debug1: kex_input_ext_info: server-sig-algs=<ssh-ed25519,sk-ssh-ed25519@openssh.com,ssh-rsa,rsa-sha2-256,rsa-sha2-512,ssh-dss,ecdsa-sha2-nistp256,ecdsa-sha2-nistp384,ecdsa-sha2-nistp521,sk-ecdsa-sha2-nistp256@openssh.com,webauthn-sk-ecdsa-sha2-nistp256@openssh.com>
debug1: kex_input_ext_info: publickey-hostbound@openssh.com (unrecognised)
debug1: SSH2_MSG_SERVICE_ACCEPT received
debug1: Authentications that can continue: publickey,password
debug1: Next authentication method: publickey
debug1: Offering public key: X:\\gitlab-runner\\ssh\\id_rsa RSA SHA256:6QNUIUX5zptZfoIHVWBJW8slxrzUsCwMojRe4vo3Fnk explicit
debug1: Authentications that can continue: publickey,password
debug1: Next authentication method: password
great@proget.abcdefg.cn's password:
PS C:\Users\David>
7、远程服务器.ssh权限问题
远程服务器~/.ssh文件夹及其文件权限不对,包括
1、~./ssh/authorized_keys文件权限
2、~/.ssh文件夹权限
3、~/.ssh文件夹所有权
Solution
通过其它方式登录到远程服务器,如果是阿里云则可以在网页中通过验证之后打开一个终端,然后进行如下操作
7.1、更改文件所有权
$ chown -R your_user:your_group ~/.ssh
//我用root登录,your_user是root
7.2、更改.ssh文件夹权限
$ chmod 700 ~/.ssh
7.3、更改.ssh/authorized_keys文件权限
$ chmod 600 ~/.ssh/authorized_keys
第7段是拷贝自这个作者:
作者:delta1037
链接:https://www.jianshu.com/p/14027e35b900
来源:简书
著作权归作者所有。商业转载请联系作者获得授权,非商业转载请注明出处。
暂时总结这么多。


 浙公网安备 33010602011771号