Ubuntu Server 18.04 LTS安装
Please choose your preferred language。
选择您喜欢的语言
这里直接选择【English】

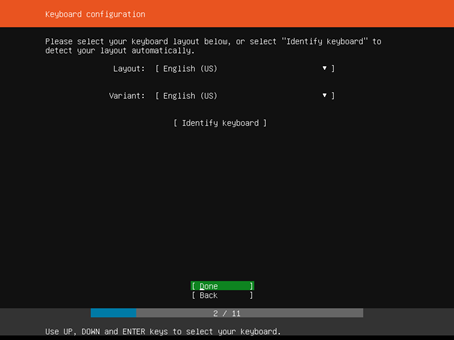
Keyboard configuration
键盘配置
Please select your keyboard layout below,or select "Identify keyboard" to detect your layout automatically
请在下面选择键盘布局,或选择“识别键盘”自动检测布局
这里保持默认设置,直接回车
Welcome to Ubuntu ! The world's favourite platform for clouds, clusters, and amazing internet things. This is the installer for Ubuntu on servers and internet devices.
欢迎来到Ubuntu!世界上最受欢迎的云平台、集群和惊人的互联网事物。这是服务器和Internet设备上Ubuntu的安装程序。
Install Ubuntu
Install MAAS bare-metal cloud (region)
Install MAAS bare-metal cloud (rack)
对于这里我们选择的是【Install Ubuntu】

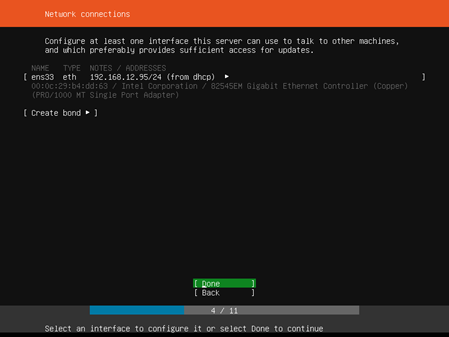
Network connections
网络连接
Configure at least one interface this server can use to talk to other machines,and which preferably provides sufficient access for updates.
配置此服务器可用于与其他计算机对话的至少一个接口,该接口最好为更新提供足够的访问权限。
这里默认通过dhcp的方式获取到一个IP地址192.168.12.65,这里直接选择【Done】执行下一步
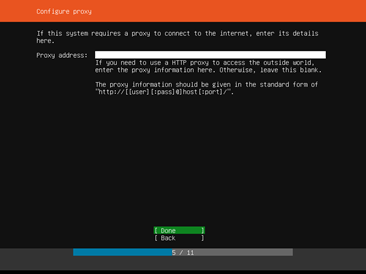
Configure proxy
配置代理
If this system requires a proxy to connect to the internet, enter its details here.
如果此系统需要代理连接到Internet,请在此处输入其详细信息。
If you need to use a HTTP proxy to access the outside world,enter the proxy information here.Otherwise,leave this blank.
如果需要使用HTTP代理访问外部世界,请在此处输入代理信息。否则,请将此项留空。
the proxy information should be given in the standard form of http://[[user][:pass]@]host[:port]/
代理信息应以“http://[[user][:pass]@]host[:port]/”的标准格式提供。
这里我们没有使用到代理,所以直接选择【Done】执行下一步
Configure Ubuntu archive mirror
配置Ubuntu存档镜像
If you use an alternative mirror for Ubuntu, enter its details here.
如果为Ubuntu使用备用镜像,请在此处输入其详细信息。
mirror address:
镜像地址:
you may provide an archive mirror that will be used instead of the default 'http://archive.ubuntu.com/ubuntu'
您可以提供一个存档镜像,而不是默认的'http://archive.ubuntu.com/ubuntu'
关于这个信息是修改apt-get源而对于这个后面我们可以进行修改的,所以这里直接选择【Done】执行下一步

Filesystem setup
文件系统设置
The installer can guide you through partitioning an entire disk either directly or using LVM, or, if you prefer,you can do it manually.
安装程序可以指导您直接或使用lvm对整个磁盘进行分区,或者,如果您愿意,您可以手动分区。
If you choose to partition an entire disk you will still have a chance to review and modify the results.
如果选择对整个磁盘进行分区,您仍有机会查看和修改结果。
Use An entire Disk 使用整个磁盘
Use An Entire Disk And Set Up LVM 使用整个磁盘并设置lvm
Manual 手动
Back 返回
这里我们选择【Manual】手动分区

Filesystem setup 文件系统设置
FILE SYSTEM SUMMARY 文件系统摘要
No disk or partitions mounted 未安装磁盘或分区
AVAILABLE DEVICES 可用设备

按如图

这里我们建立一个500M的/boot分区
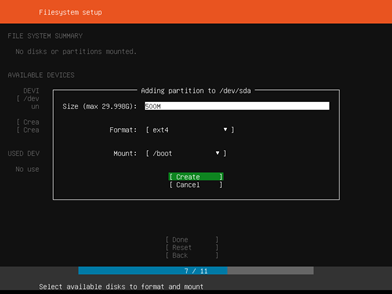
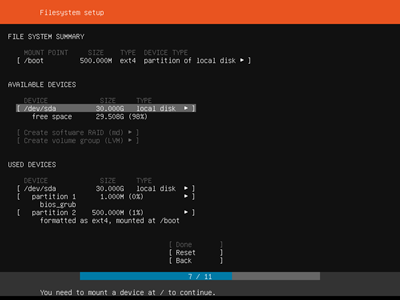
然后再用相同的方法建立/swp分区为16G,因为这里我设置了虚拟机的内存大小为4G;根分区为剩下的大小:

然后,按Tab键选择【Done】后,弹出下面内容:
Confirm destructive action
确认破坏性行为
Selecting Continue below will begin the installation process and result in the loss of data on the disks selected to be formatted.
选择下面的继续将开始安装过程,并导致选定要格式化的磁盘上的数据丢失。
You will not be able to return to this or a previous screen once the installation has started.
安装开始后,您将无法返回此屏幕或上一个屏幕。
Are you sure you want to continue?
是否确实要继续?
对于这里是将我们划分的分区进行格式化,并且说明会丢失分区中的数据,因为我们是虚拟机所以对于这里是没有关系的。这里选择【Continue】直接下一步:

Enter the username and password (or ssh identity) you will use to log in to the system.
输入用于登录系统的用户名和密码(或ssh标识)。
The name it uses when it talks to other computers.
它与其他计算机对话时使用的名称(主机名)。
pick a username
选择用户名(这是登录时候输入的用户名)
这里输入完成后选择【Done】执行下一步。

These are popular snaps in server environments. Select or deselect with SPACE,press ENTER to see more details of the package,publisher and versions abailable.
这些是服务器环境中常见的快照。使用空格选择或取消选择,按Enter键可查看可用的软件包、发布者和版本的详细信息。
这里我们不按照任何快照程序,因为这里都是可以后面需要的时候再进行安装的,使用Tab键选择【Done】下一步:
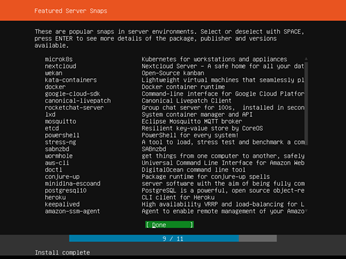
接着是一个安装过程,请耐心等待,安装完成后会在[View full log]按钮下多出一个[Reboot Now]按钮。
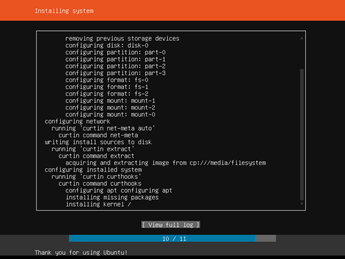
接着我们选择【Reboot Now】重启ubuntu:
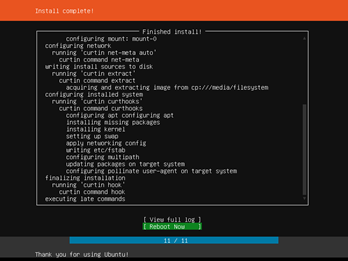
然后会跳转到看到下面看到的画面,然后我们按下键盘上的【回车】,系统就会开始重新启动:

重启后就会来到下面页面,回车就可以看到提示输入用户名:
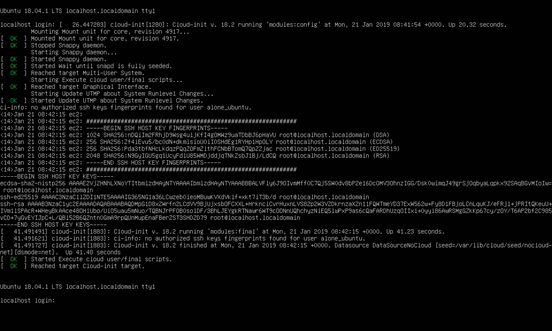
这里的登录用户名就是刚刚的pick a username。


 浙公网安备 33010602011771号