
Python测试框架pytest(06)fixture - 依赖、重命名、request、pytestconfig
1、fixture依赖其他fixture
添加了 @pytest.fixture,如果 fixture 还想依赖其他 fixture,需要用函数传参的方式,不能用 @pytest.mark.usefixtures() 的方式,否则会不生效。
1、创建test_fixture3.py文件
脚本代码:
#!/usr/bin/env python
# -*- coding: utf-8 -*-
"""
微信公众号:AllTests软件测试
"""
import pytest

@pytest.fixture(scope="session")
def open():
    print("===打开浏览器open===")

@pytest.fixture
# @pytest.mark.usefixtures("open") 不可取、不生效
def login(open):
    # 方法级别前置操作setup
    print("===登陆操作login===")

def test_case(login):
    print("===执行用例test_case===")
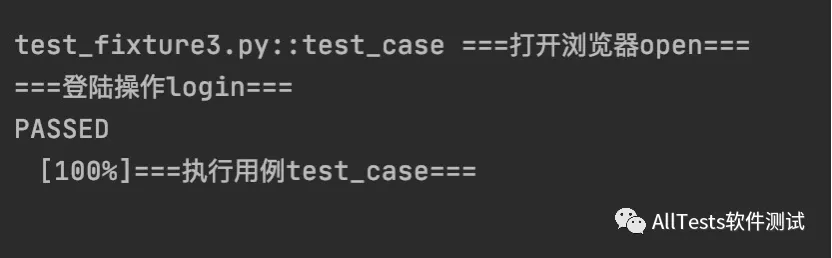
2、执行结果:
执行用例test_case,会先执行login,但login里会先执行open
所以执行顺序是open->login->test_case
2、fixture重命名
fixture 允许使用 @pytest.fixture 的 name 参数对 fixture 重命名。
1、创建test_fixture_3.py文件
脚本代码:
#!/usr/bin/env python
# -*- coding: utf-8 -*-
"""
微信公众号:AllTests软件测试
"""
import pytest

@pytest.fixture(name="AllTests")
def fixturefun():
    print("====fixturefun====")

@pytest.mark.usefixtures("AllTests")
def test_case():
    print("====执行用例====")
2、运行结果:

3、fixture之request
为请求对象提供对 request 测试上下文的访问权,并且在 fixture 被间接参数化的情况下具有可选的“param”属性。
参数:
-
fixturename = None: 正在执行此 request 的 Fixtures。
-
scope = None: 范围字符串,“方法”,“类”,“模块”,“会话”之一。
-
fixturenames: 此 request 中所有活动 Fixture 方法的名称。
-
node: 底层集合节点(取决于当前 request 范围)。
-
config: 与此 request 关联的 pytest 配置对象。
-
function: 如果 request 具有按方法范围,则测试函数对象。
-
cls: 收集测试函数的 class(可以是None)。
-
instance: 收集测试函数的实例(可以是None)。
-
module: 收集测试函数的 python 模块对象。
-
fspath: 收集此测试的测试模块的文件系统路径。
-
keywords: 底层节点的关键字/标记字典。
-
session: pytest 会话对象。
-
addfinalizer(finalizer): 在 request 测试上下文完成执行的最后一次测试之后添加要调用的终结器/拆卸函数。
-
applymarker(marker): 将标记应用于单个测试函数调用。如果你不希望在所有函数调用中都有关键字/标记,则此方法很有用。
创建test_fixture_request.py文件
fixture函数可以通过接受request对象来反向获取请求中的测试函数、类或模块上下文。
request.module属性从测试模块中获取smtpserver值。
脚本代码:
#!/usr/bin/env python
# -*- coding: utf-8 -*-
"""
微信公众号:AllTests软件测试
"""

import pytest
import smtplib

@pytest.fixture(scope="module")
def my_smtp(request):
    server = getattr(request.module, "smtpserver", "smtp.163.com")
    print("\nfixture 获取到的server :%s" %server)
    smtp = smtplib.SMTP(server, 587, timeout=5)
    yield smtp
    print("\n执行完毕 %s (%s)" % (smtp, server))
    smtp.close()

smtpserver = "mail.python.org"

def test_smtp(my_smtp):
    print("\n执行测试")
打开命令行,执行命令
pytest -s test_fixture_request.py
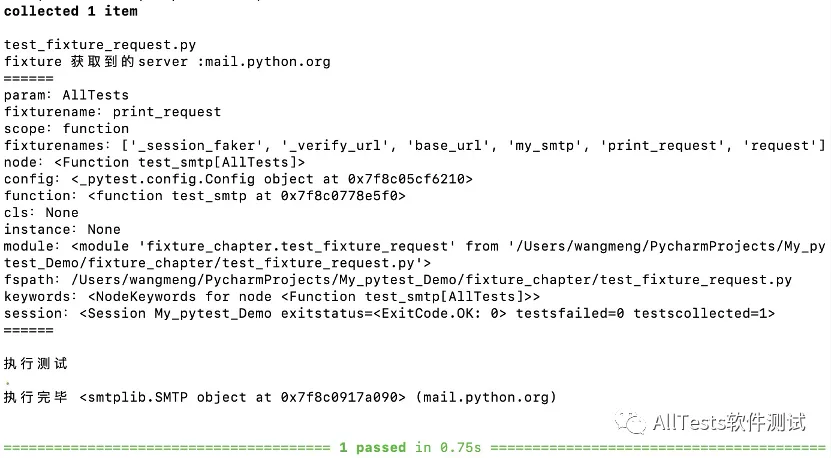
运行结果:
获取到smtpserver值mail.python.org

如果将脚本里的smtpserver = "mail.python.org"这句禁用,再次执行后,会用默认值smtp.163.com
创建conftest.py文件,填写获取request其他属性信息
脚本代码:
#!/usr/bin/env python
# -*- coding: utf-8 -*-
"""
微信公众号:AllTests软件测试
"""
import pytest

data = ["AllTests"]

@pytest.fixture(params=data, autouse=True)
def print_request(request):
    print("======")
    print("param:" + str(request.param))
    print("fixturename:" + str(request.fixturename))
    print("scope:" + str(request.scope))
    print("fixturenames:" + str(request.fixturenames))
    print("node:" + str(request.node))
    print("config:" + str(request.config))
    print("function:" + str(request.function))
    print("cls:" + str(request.cls))
    print("instance:" + str(request.instance))
    print("module:" + str(request.module))
    print("fspath:" + str(request.fspath))
    print("keywords:" + str(request.keywords))
    print("session:" + str(request.session))
    print("======")
打开命令行,再次执行命令
pytest -s test_fixture_request.py
运行结果:
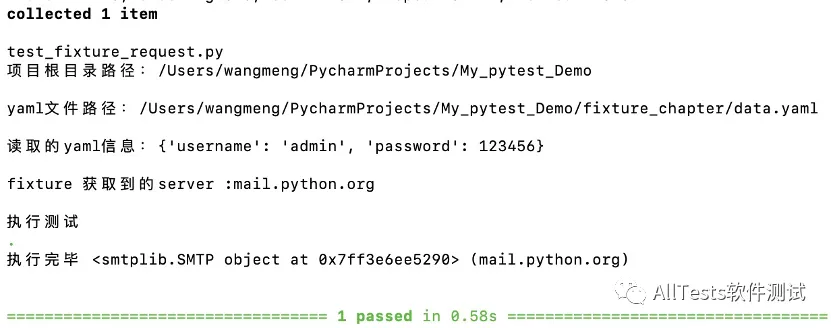
3.1、request.config.rootdir
request.config.rootdir 获取项目的根目录地址
在fixture_chapter目录下创建data.yaml文件
文件内容:
username: admin
password: 123456
修改conftest.py文件,
脚本代码:
#!/usr/bin/env python
# -*- coding: utf-8 -*-
"""
微信公众号:AllTests软件测试
"""
import pytest
import yaml
import os

@pytest.fixture(scope="session", autouse=True)
def datainfo(request):
    print("\n项目根目录路径:%s" % request.config.rootdir)
    datafile = os.path.join(request.config.rootdir, "fixture_chapter", "data.yaml")
    print("\nyaml文件路径:%s" % datafile)
    with open(datafile) as f:
        data_config = yaml.load(f.read(), Loader=yaml.SafeLoader)
    print("\n读取的yaml信息:%s" % data_config)
    return data_config
命令行再次执行命令:
pytest -s test_fixture_request.py
运行结果:
request.config.rootdir获取到项目的根目录地址。
3.2、request.getfixturevalue
request.getfixturevalue 获取 fixture 的返回值
示例一:
1、创建test_fixture_request2.py文件
脚本代码:
#!/usr/bin/env python
# -*- coding: utf-8 -*-
"""
微信公众号:AllTests软件测试
"""

import pytest

@pytest.fixture(scope="session")
def my_fixture1():
    aaa = "AllTests软件测试"
    return aaa

@pytest.fixture(scope="session")
def my_fixture2():
    bbb = "1234567890"
    return bbb

@pytest.fixture(scope="session", params=["my_fixture1", "my_fixture2"])
def get_fixture_value(request):
    ccc = request.getfixturevalue(request.param)
    return ccc

def test_case(get_fixture_value):
    print("\n获取到的fixture值:" + get_fixture_value)
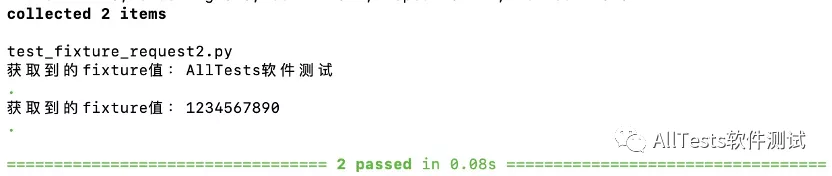
2、打开命令行,输入执行命令:
pytest -s test_fixture_request2.py
运行结果:
示例二:项目实战
在自动化测试执行阶段,如果想用Chrome、Firefox等分别执行同样的测试用例,可以使用如下的脚本写法。
1、创建项目,项目目录结构:
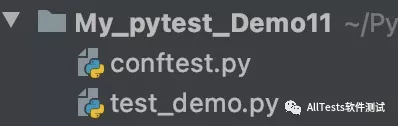
2、创建conftest.py文件
脚本代码:
#!/usr/bin/env python
# -*- coding: utf-8 -*-
"""
微信公众号:AllTests软件测试
"""

from selenium import webdriver
import pytest

@pytest.fixture(scope="session")
def my_chrome():
    driver = webdriver.Chrome()
    yield driver
    driver.quit()

@pytest.fixture(scope="session")
def my_firefox():
    driver = webdriver.Firefox()
    yield driver
    driver.quit()

@pytest.fixture(scope="session", params=["my_chrome", "my_firefox"])
def driver(request):
    return request.getfixturevalue(request.param)
3、创建test_demo.py文件,编写1条测试用例。
脚本代码:
#!/usr/bin/env python
# -*- coding: utf-8 -*-
"""
微信公众号:AllTests软件测试
"""

def test_case(driver):
    driver.get("https://www.cnblogs.com/alltests/")
4、打开命令行,输入执行命令:
pytest -s test_demo.py
运行结果:
分别打开Chrome、Firefox执行测试用例。

4、fixture之pytestconfig
获取配置对象,除了 request.config 方法,还有一种方法也是可以的,那就是pytestconfig。
pytestconfig 是一个内置 fixture,用于获取配置对象。实际调用 pytestconfig 方法,其实就是返回 request.config。
方法:
-
pytestconfig.getoption() 获取命令行参数
-
pytestconfig.getini() 获取 ini 配置文件参数
示例一:pytestconfig.getoption() 获取命令行参数
1、创建test_fixture_pytestconfig.py文件
脚本代码:
#!/usr/bin/env python
# -*- coding: utf-8 -*-
"""
微信公众号:AllTests软件测试
"""

import pytest

@pytest.fixture
def cmd_param(pytestconfig):
    return pytestconfig.getoption("--tb")

def test_getoption1(pytestconfig):
    param = pytestconfig.getoption("--tb")
    print("\n获取到命令行参数:%s" % param)

def test_getoption2(cmd_param):
    print("\n获取到命令行参数:%s" % cmd_param)
2、打开命令行,输入执行命令
pytest -s test_fixture_pytestconfig.py --tb=long
运行结果:
命令行参数--tb=style,可以设置用例报错的时候回溯打印的内容。
style的值可以设置的打印模式:auto、long、short、line、native、no
获取命令行参数为long

示例二:pytestconfig.getini() 获取 ini 配置文件参数
1、项目的根目录创建pytest.ini文件,用于填写配置参数,并安装pytest-base-url包
文件内容:
[pytest]
base_url = https://www.cnblogs.com/alltests/
2、创建test_fixture_pytestconfig2.py文件
脚本代码:
#!/usr/bin/env python
# -*- coding: utf-8 -*-
"""
微信公众号:AllTests软件测试
"""

def test_getini(pytestconfig):
    base_url = pytestconfig.getini("base_url")
    print("\n获取到ini文件参数 :%s" % base_url)
3、打开命令行,输入执行命令
pytest -s test_fixture_pytestconfig2.py
运行结果:
从pytest.ini文件获取到base_url的参数值为
https://www.cnblogs.com/alltests/


本文来自博客园,作者:AllTests软件测试,转载请注明原文链接:https://www.cnblogs.com/alltests/p/15425842.html

 浙公网安备 33010602011771号