APISIX配置
APISIX
yum install -y apisix-2.12.1-0.el7.x86_64.rpm
yum install -y cyrus-sasl-devel-2.1.26-23.el7.x86_64.rpm
yum install -y openresty-pcre-8.44-1.el7.x86_64.rpm
yum install -y openldap-devel-2.4.44-13.el7.x86_64.rpm
yum install -y openresty-zlib-1.2.11-3.el7.centos.x86_64.rpm
yum install -y cyrus-sasl-2.1.26-23.el7.x86_64.rpm
yum install -y openresty-openssl111-1.1.1l-1.el7.x86_64.rpm
yum install -y apisix-base-1.19.9.1.3-0.el7.x86_64.rpm

# 这几个包是依赖关系,缺一不可
安装完成后,关闭apisix ipv6支持
[root@hmy conf]# cd /usr/local/apisix/conf
[root@hmy conf]# ls
apisix.uid  cert  config.yaml  mime.types  nginx.conf
[root@hmy conf]# cat config.yaml |grep ipv6
  enable_ipv6: false
启动apisix
apisix init
apisix test
apisix start
默认情况下,APISIX 启动在 9080 端口,使用如下命令测试服务是否正常启动:
[root@hmy conf]# curl http://127.0.0.1:9080/
{"error_msg":"404 Route Not Found"}
#  表示你的apisix 已经安装完成
apisix dashboard
yum install -y https://github.com/apache/apisix-dashboard/releases/download/v2.10.1/apisix-dashboard-2.10.1-0.el7.x86_64.rpm
# 不通外网可以下载后离线安装
yum install -y apisix-dashboard-2.10.1-0.el7.x86_64.rpm

# run dashboard in the shell
sudo manager-api -p /usr/local/apisix/dashboard/

# or run nohup
nohup manager-api -p /usr/local/apisix/dashboard/ &

# or run dashboard as a service
systemctl start apisix-dashboard
APISIX使用
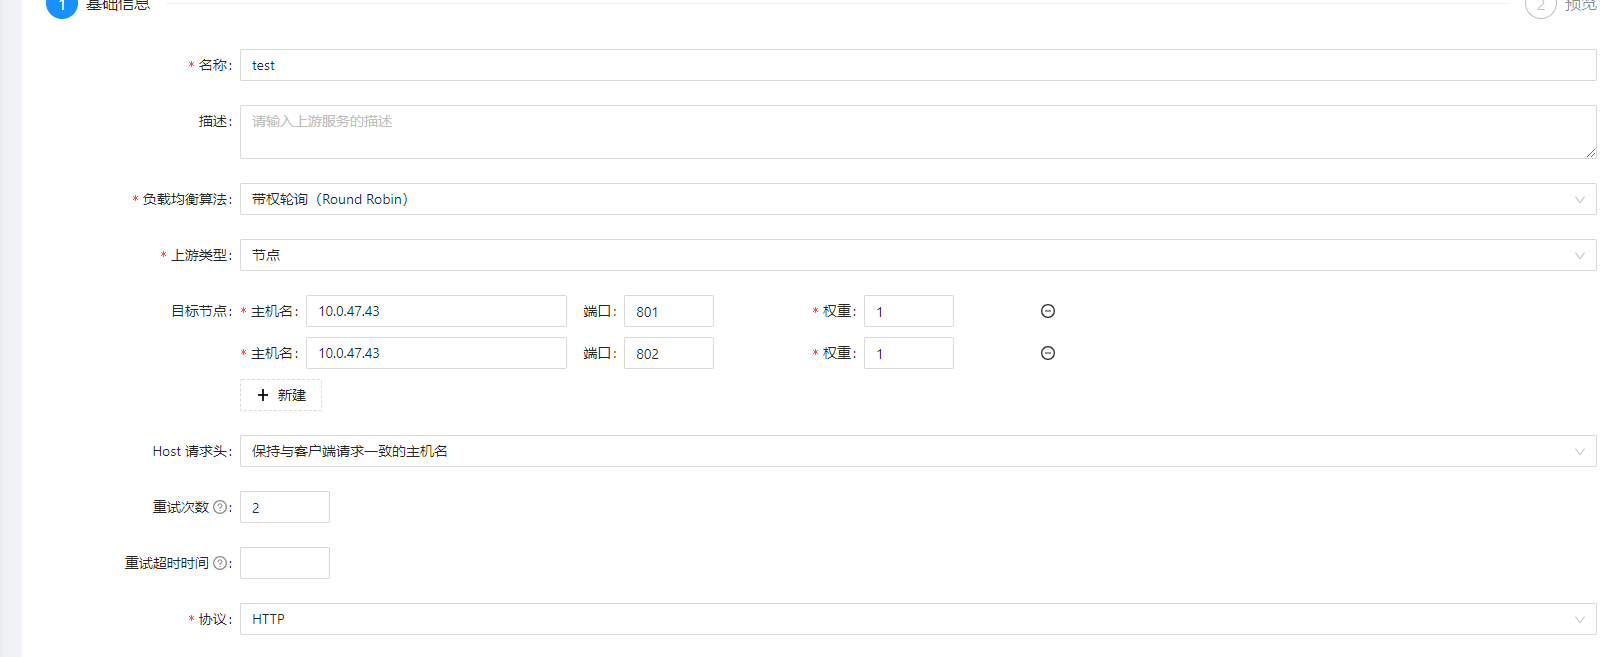
1、创建一个上游服务(upstream)
名称:test
负载均衡算法:带权轮询
上游类型:节点
目标节点:
  主机名 10.0.47.43 端口 801 权重 3
  主机名 10.0.47.43 端口 802 权重 1
协议:http
其他的默认就行

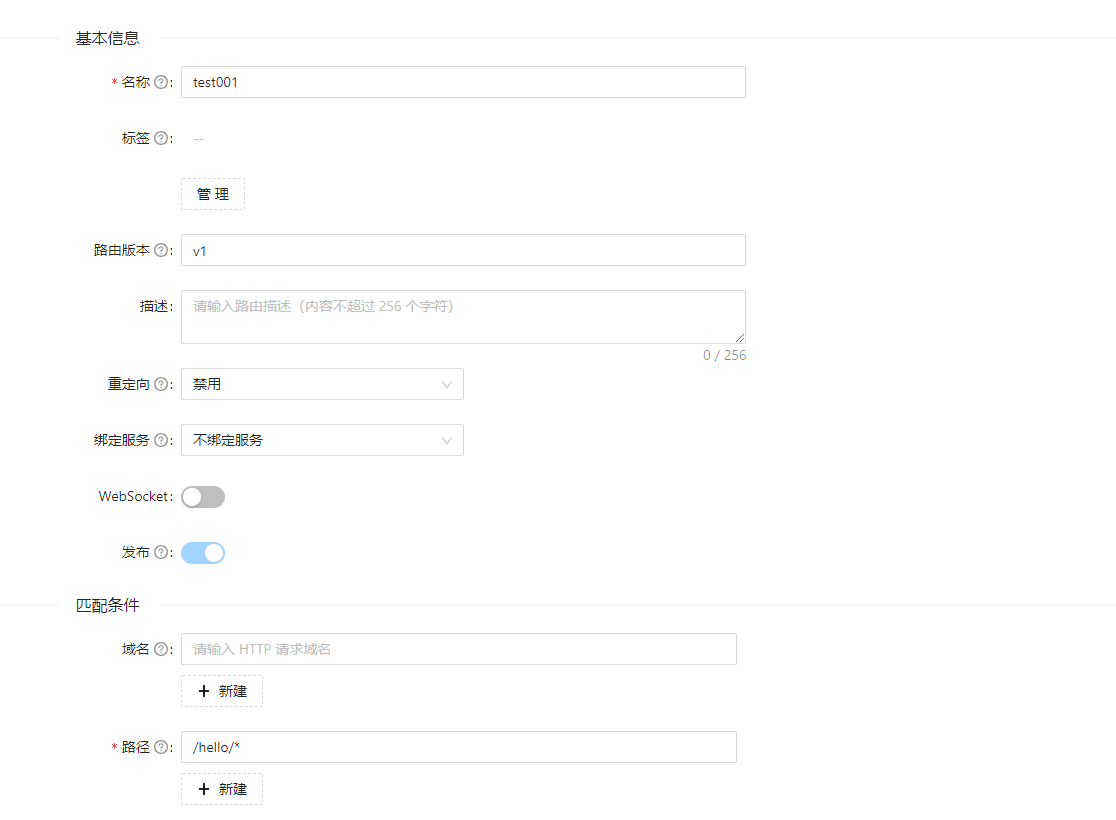
2、创建一个路由
名称:test001
路径 /hello/*

3、其它默认,下一步
选择我们刚刚创建的上游服务test

下一步,不选择任何插件,然后预览下,应该没问题,点击提交
4、测试
简单的用curl命令试下

10.0.47.42为部署apisix的IP地址
端口为9080
可以看到分别输出了801和802


 浙公网安备 33010602011771号