
spring+springMVC+mybatis+maven+mysql环境搭建(二)
上一篇整合了spring+mybatis,基本上还不是web工程,接下来接入springMVC,Let's go!
一、工程转换成Web工程
首先右击项目-->properties-->project facets,观察是否出现下图配置

没出现也不要慌张,先把Dynamic Web Module√去掉,然后点击ok,再次右击项目,进入priperties-->project facets,勾上Dynamic Web Module,该配置就出现了,点击箭头所指,进入下图界面:

这时发现新增了webapp文件夹以及web.xml等,如下所示:

二、配置springMVC.xml以及web.xml
1、增加依赖
<!-- javaee-api包 注意和项目使用的JDK版本对应 -->
        <dependency>
            <groupId>javax</groupId>
            <artifactId>javaee-api</artifactId>
            <version>8.0</version>
            <scope>provided</scope>
        </dependency>

        <!-- javaee-web-api包 注意和项目使用的JDK版本对应 -->
        <dependency>
            <groupId>javax</groupId>
            <artifactId>javaee-web-api</artifactId>
            <version>8.0</version>
            <scope>provided</scope>
        </dependency>
2、springMVC.xml
<?xml version="1.0" encoding="UTF-8"?>
<beans xmlns="http://www.springframework.org/schema/beans"
  xmlns:p="http://www.springframework.org/schema/p"
  xmlns:xsi="http://www.w3.org/2001/XMLSchema-instance"
  xmlns:context="http://www.springframework.org/schema/context"
  xmlns:mvc="http://www.springframework.org/schema/mvc"
  xsi:schemaLocation="
    http://www.springframework.org/schema/beans
    http://www.springframework.org/schema/beans/spring-beans-3.2.xsd
    http://www.springframework.org/schema/context
    http://www.springframework.org/schema/context/spring-context-3.2.xsd
    http://www.springframework.org/schema/mvc
    http://www.springframework.org/schema/mvc/spring-mvc-3.2.xsd">

    <!-- 扫描controller(controller层注入) -->
   <context:component-scan base-package="com.ty.controller"/>

   <!-- 对模型视图添加前后缀 -->
     <bean id="viewResolver" class="org.springframework.web.servlet.view.InternalResourceViewResolver"
      p:prefix="/WEB-INF/view/" p:suffix=".jsp"/>
</beans>
3、web.xml
<?xml version="1.0" encoding="UTF-8"?>
<web-app xmlns:xsi="http://www.w3.org/2001/XMLSchema-instance"
    xmlns="http://java.sun.com/xml/ns/javaee"
    xsi:schemaLocation="http://java.sun.com/xml/ns/javaee http://java.sun.com/xml/ns/javaee/web-app_2_5.xsd"
    id="WebApp_ID" version="2.5">
    <display-name>Welcome to my java kingdom!</display-name>
    <!-- 起始欢迎界面 -->
    <welcome-file-list>
        <welcome-file>index.jsp</welcome-file>
    </welcome-file-list>

    <!-- 读取spring配置文件 -->
    <context-param>
        <param-name>contextConfigLocation</param-name>
        <param-value>classpath:application.xml</param-value>
    </context-param>
    <!-- 设计路径变量值 -->
    <context-param>
        <param-name>webAppRootKey</param-name>
        <param-value>springmvc.root</param-value>
    </context-param>


    <!-- Spring字符集过滤器 -->
    <filter>
        <filter-name>SpringEncodingFilter</filter-name>
        <filter-class>org.springframework.web.filter.CharacterEncodingFilter</filter-class>
        <init-param>
            <param-name>encoding</param-name>
            <param-value>UTF-8</param-value>
        </init-param>
        <init-param>
            <param-name>forceEncoding</param-name>
            <param-value>true</param-value>
        </init-param>
    </filter>
    <filter-mapping>
        <filter-name>SpringEncodingFilter</filter-name>
        <url-pattern>/*</url-pattern>
    </filter-mapping>

    <!-- 日志记录 -->
    <context-param>
        <!-- 日志配置文件路径 -->
        <param-name>log4jConfigLocation</param-name>
        <param-value>classpath:log4j.properties</param-value>
    </context-param>
    <context-param>
        <!-- 日志页面的刷新间隔 -->
        <param-name>log4jRefreshInterval</param-name>
        <param-value>6000</param-value>
    </context-param>
    <listener>
        <listener-class>org.springframework.web.util.Log4jConfigListener</listener-class>
    </listener>

    <listener>
        <listener-class>org.springframework.web.context.ContextLoaderListener</listener-class>
    </listener>

    <!-- springMVC核心配置 -->
    <servlet>
        <servlet-name>dispatcherServlet</servlet-name>
        <servlet-class>org.springframework.web.servlet.DispatcherServlet</servlet-class>
        <init-param>
            <param-name>contextConfigLocation</param-name>
            <!--spingMVC的配置路径 -->
            <param-value>classpath:springMVC/springMVC.xml</param-value>
        </init-param>
        <load-on-startup>1</load-on-startup>
    </servlet>
    <!-- 拦截设置 -->
    <servlet-mapping>
        <servlet-name>dispatcherServlet</servlet-name>
        <url-pattern>*</url-pattern>
    </servlet-mapping>

    <!-- 错误跳转页面 -->
    <error-page>
        <!-- 路径不正确 -->
        <error-code>404</error-code>
        <location>/WEB-INF/errorpage/404.jsp</location>
    </error-page>
    <error-page>
        <!-- 没有访问权限,访问被禁止 -->
        <error-code>405</error-code>
        <location>/WEB-INF/errorpage/405.jsp</location>
    </error-page>
    <error-page>
        <!-- 内部错误 -->
        <error-code>500</error-code>
        <location>/WEB-INF/errorpage/500.jsp</location>
    </error-page>
</web-app>
4、添加一个初始页面index.jsp
<%@ page language="java" contentType="text/html; charset=UTF-8" pageEncoding="UTF-8"%>
<html>
<body>
<h2>Hello World!</h2>
 ${user.userId}<br>
 ${user.userName}<br>
 ${user.userPassword}<br>
 ${user.userEmail}<br>
</body>
</html>
5、创建controller
package com.ty.controller;

import java.util.Map;

import org.springframework.beans.factory.annotation.Autowired;
import org.springframework.stereotype.Controller;
import org.springframework.web.bind.annotation.RequestMapping;
import org.springframework.web.bind.annotation.RequestMethod;

import com.ty.dto.User;
import com.ty.service.UserService;

/**
 * @author Taoyong
 * @date 2018年5月20日
 * 天下没有难敲的代码!
 */
@Controller
public class UserController {

    @Autowired
    private UserService userService;

    @RequestMapping(value = "/user/obtainUserMessage", method = RequestMethod.POST)
    public String obtainUserMessage(int userId, Map<String, Object> map) {
        User user = userService.selectUserById(userId);
        map.put("user", user);
        return "user";
    }
}
三、测试
配置好tomcat,然后启动服务,在浏览器访问http://localhost:8080/ssm_ty出现问题,连http://localhost:8080/也是404。
原因:是因为在eclipse使用tomcat发布项目没有配置好。
解决方法:首先,删除server下的所有项目,然后双击server下的tomcat,进入到tomcat配置页面,
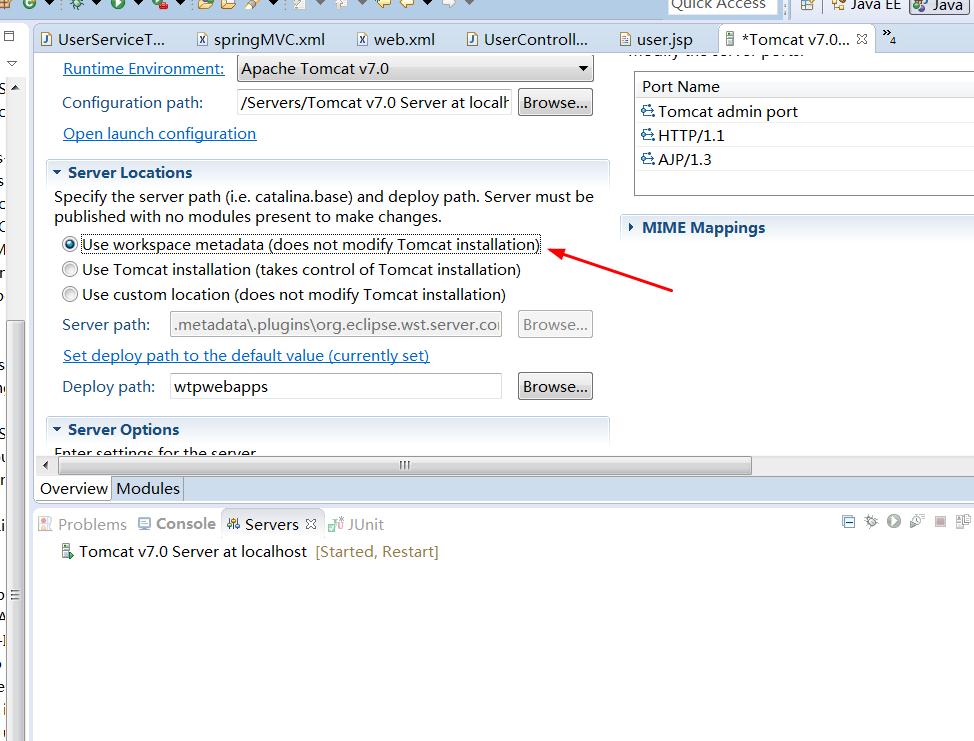
修改,选择第二条,使用tomcat安装路径。不过这种运行一直都是报错状态,百度了很久也没有找到办法解决,换种思路来运行,如下:
运行成功的方法:
1、eclipse运行maven项目方法
a、tomcat安装目录/config/tomcat-users.xml,做如下更改:

首先说下这是干嘛的,这是配置tomcat相关的用户角色,用户角色又是干嘛的,往下看。
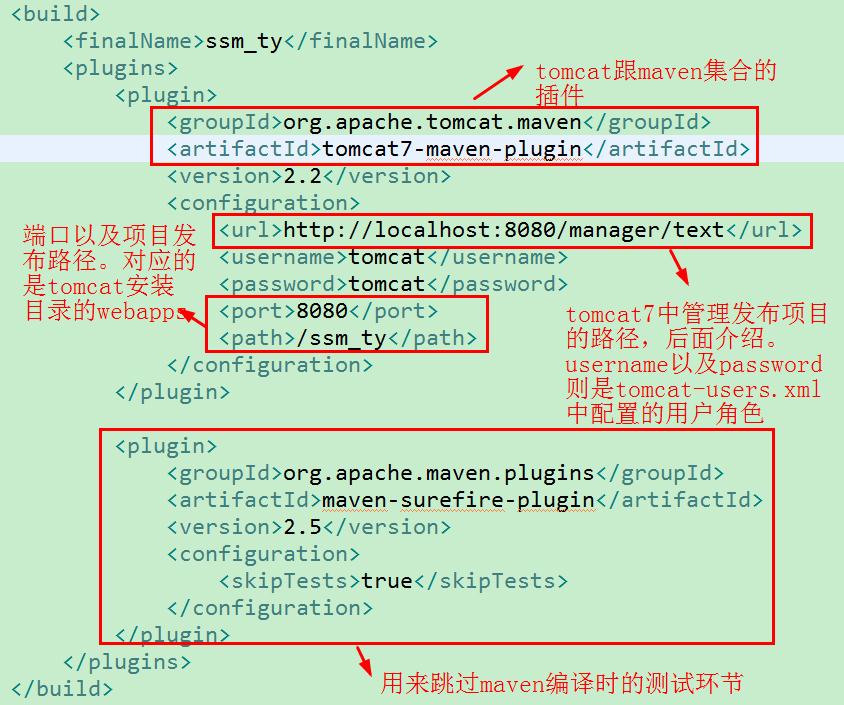
b、pom.xml需要新增插件
c、window-->preference-->maven-->installations和user settings

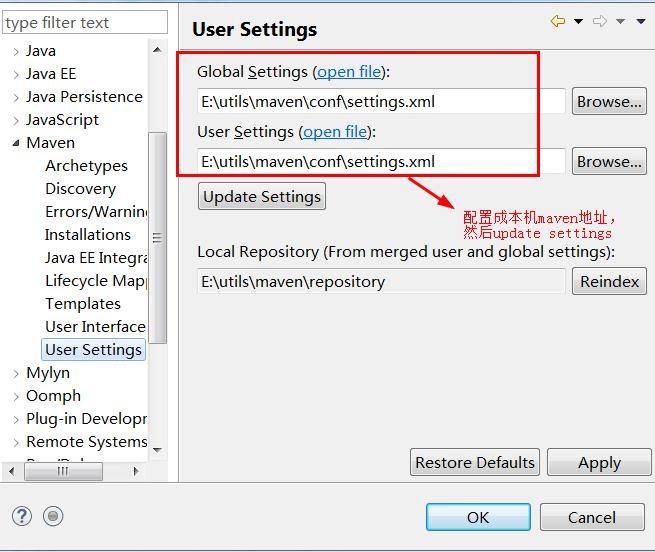
d、maven安装目录/conf/settings.xml
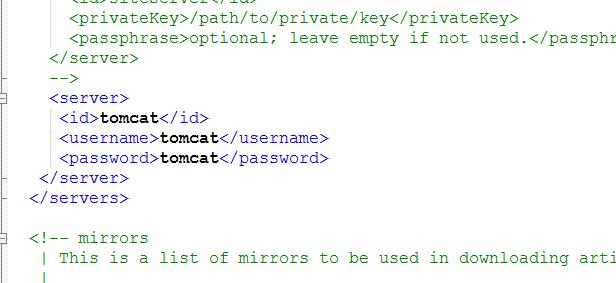
username、password分别与a、b步骤对应。
2、开始运行
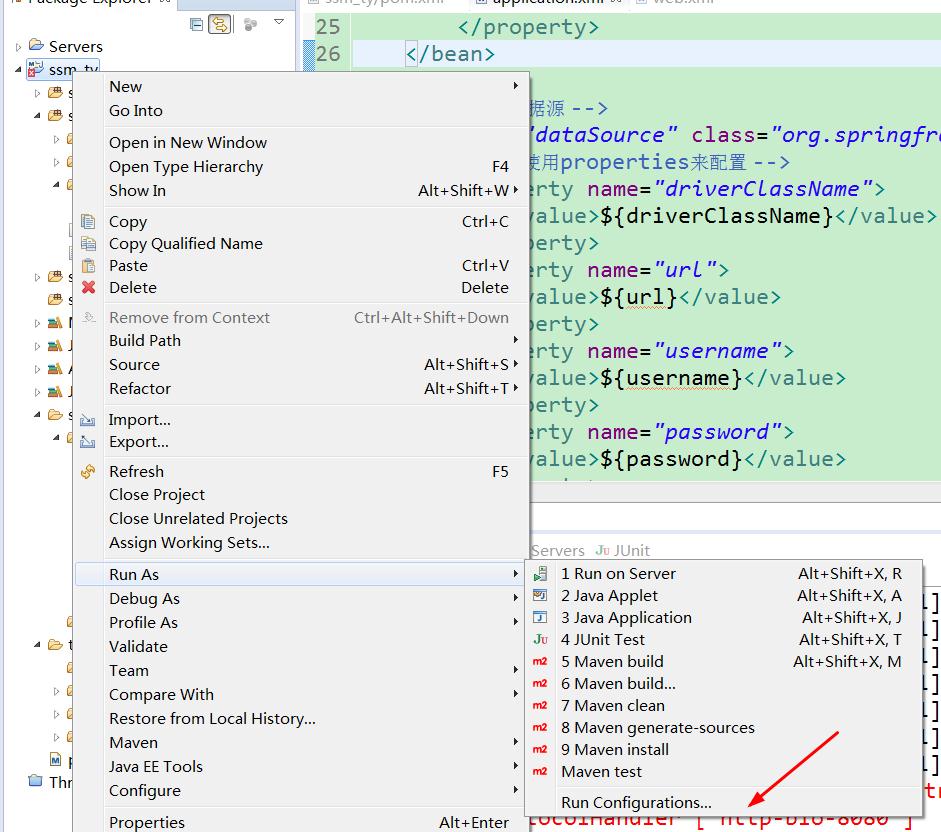

有关goals这里,多说几句:


启动成功后,浏览器输入:http://localhost:8080/ssm_ty/
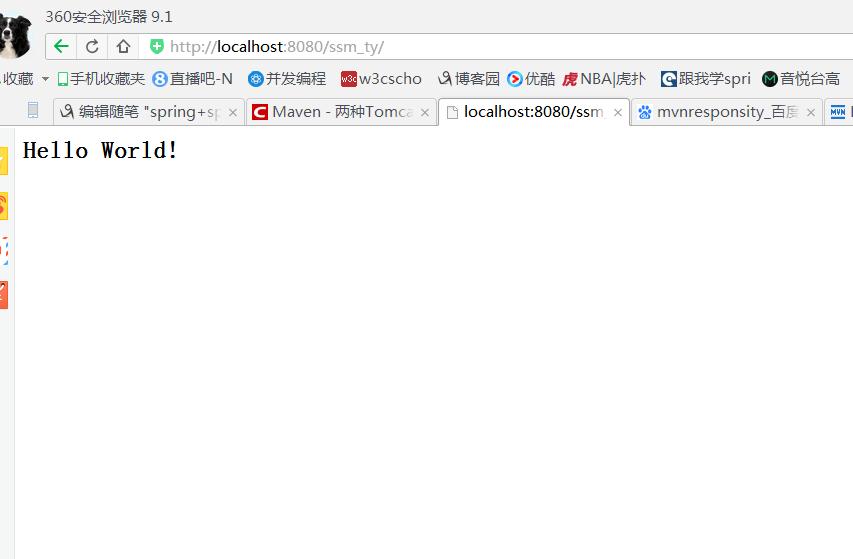
终于搞定,踩得坑也是非常的多,不过完整流程下来,还是有不少收获的!

posted on 2018-05-22 00:06 阿里-马云的学习笔记 阅读(1173) 评论(0) 收藏 举报

 浙公网安备 33010602011771号