Grafana+Prometheus监控mysql数据库
在做性能测试的时候难免会被定位搞得晕头转向,那么有一套好的监控系统对于测试来说那就是天眼,今天我们就来搭建一套监控mysql数据库的监控系统 Grafana+Prometheus+MySQL+Mysqld_Exporter。
准备工具:
MySQL:5.7
InfluxDB:1.7.9
Grafana:5.3.2
Prometheus:
Mysqld_Exporter:0.12.1
一.安装MySQL
1.下载mysql5.7:wget -i -c http://dev.mysql.com/get/mysql57-community-release-el7-10.noarch.rpm
2.安装客户端:yum -y install mysql57-community-release-el7-10.noarch.rpm
3.安装服务端:yum -y install mysql-community-server
4.启动mysql服务:systemctl start mysqld.service
5.查看服务是否启动:systemctl status mysqld.service

6.修改默认密码
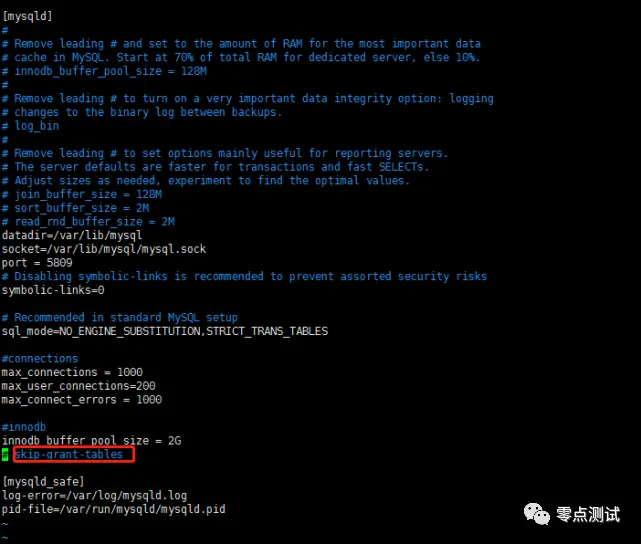
进入mysql的配置文件:vim /etc/my.cnf
添加如下信息

输入命令重启服务:systemctl restart mysqld
执行mysql进入myslq命令行
修改密码:
5.7之前:update user set password=password("123456") where user='root';
5.7之后:update mysql.user set authentication_string=password('123456') where user='root';
刷新:flush privileges;
退出:exit;
把/etc/my.cnf中的skip-grant-tables注释再重启服务
查看是否重启成功
二.安装mysqld_exporter
提前:在数据库中创建监控账号 和密码并授权
GRANT REPLICATION CLIENT,PROCESS,SELECT ON *.* TO qa_group@'127.0.0.1' identified by 'nF5kbr9Y6Jm1ZDQ7xTW0';
1.下载:wget https://github.com/prometheus/mysqld_exporter/releases/download/v0.12.1/mysqld_exporter-0.12.1.linux-amd64.tar.gz
2.解压 tar -zxvf mysqld_exporter-0.12.1.linux-amd64.tar.gz
3.重命名:mv mysqld_exporter-0.12.1.linux-amd64 mysqld_exporter
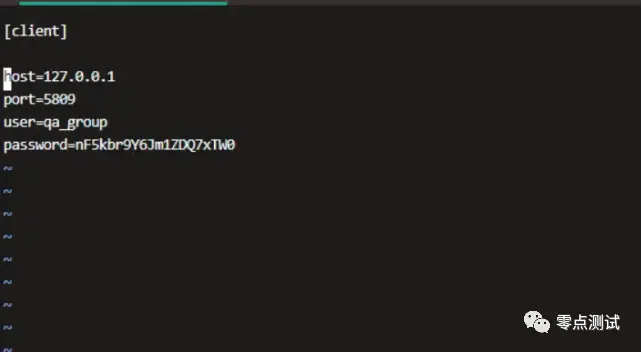
4.在root目录下新建文件:.my.cnf
5.进行.my.cnf文件配置
注意:user和password可以使用mysql的登录用户名和密码也可以自己定义

6.启动 服务
7.浏览器输入部署的ip+9104端口进行测试,出现以下为启动成功

三.集成Grafana+prometheus
Grafana+prometheus在前面文章都安装多,就不多说啦,直接进入配置过程
1.修改 vim prometheus.yml 配置文件 并重启服务prometheus

2.下载mysql模板(7362)
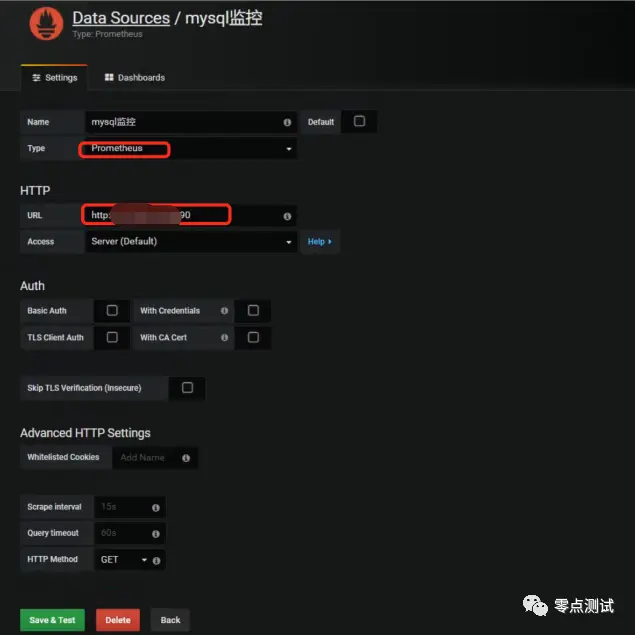
3.新建prometheus数据源

来看一下监控效果


 浙公网安备 33010602011771号