3-HelloSpring项目
HelloSpring项目
使用maven创建
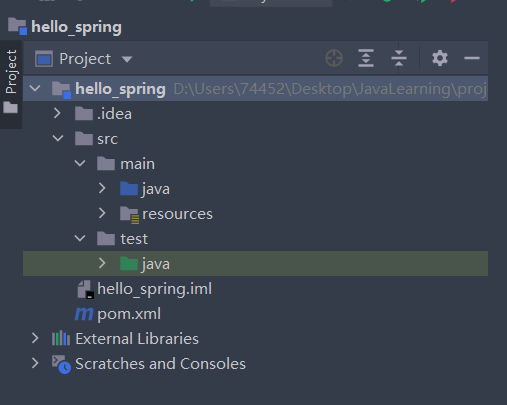
创建后目录结构如下:
pom.xml:
<?xml version="1.0" encoding="UTF-8"?>
<project xmlns="http://maven.apache.org/POM/4.0.0"
         xmlns:xsi="http://www.w3.org/2001/XMLSchema-instance"
         xsi:schemaLocation="http://maven.apache.org/POM/4.0.0 http://maven.apache.org/xsd/maven-4.0.0.xsd">
    <modelVersion>4.0.0</modelVersion>

    <groupId>org.ajream</groupId>
    <artifactId>hello_spring</artifactId>
    <version>1.0-SNAPSHOT</version>
    <dependencies>
        <dependency>
            <groupId>org.springframework</groupId>
            <artifactId>spring-context</artifactId>
            <version>5.2.9.RELEASE</version>
            <scope>test</scope>
        </dependency>
    </dependencies>

    <properties>
        <maven.compiler.source>8</maven.compiler.source>
        <maven.compiler.target>8</maven.compiler.target>
    </properties>

</project>
代码
- 在java文件夹下创建
com.xxx.pojo.Hello类
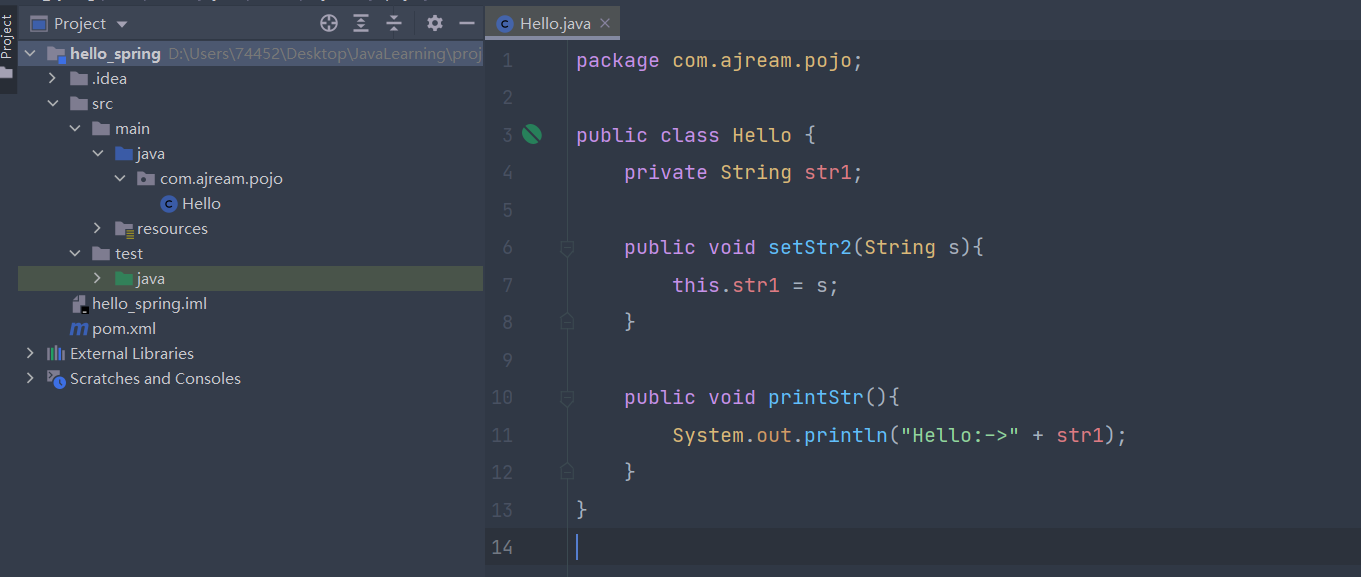
package com.ajream.pojo;

public class Hello {
    private String str1;       //先不管属性名为什么是str1

    public void setStr2(String s){        //先不管为什么函数名设置为setStr2
        this.str1 = s;
    }

    public void printStr(){
        System.out.println("Hello:->" + str1);
    }
}
- 在resources下创建
beans.xml配置文件
<?xml version="1.0" encoding="UTF-8"?>
<beans xmlns="http://www.springframework.org/schema/beans"
       xmlns:xsi="http://www.w3.org/2001/XMLSchema-instance"
       xsi:schemaLocation="http://www.springframework.org/schema/beans
        https://www.springframework.org/schema/beans/spring-beans.xsd">

    <bean id="helloworld" class="com.ajream.pojo.Hello">
<!--        通过name来识别出调用了哪个函数, value为传入参数-->
        <property name="str2" value="spring" />   <!--这行代码表示调用函数 setStr2, 传入参数为字符串"spring" -->

    </bean>
</beans>
该文件内容模板可以从spring官网中找到
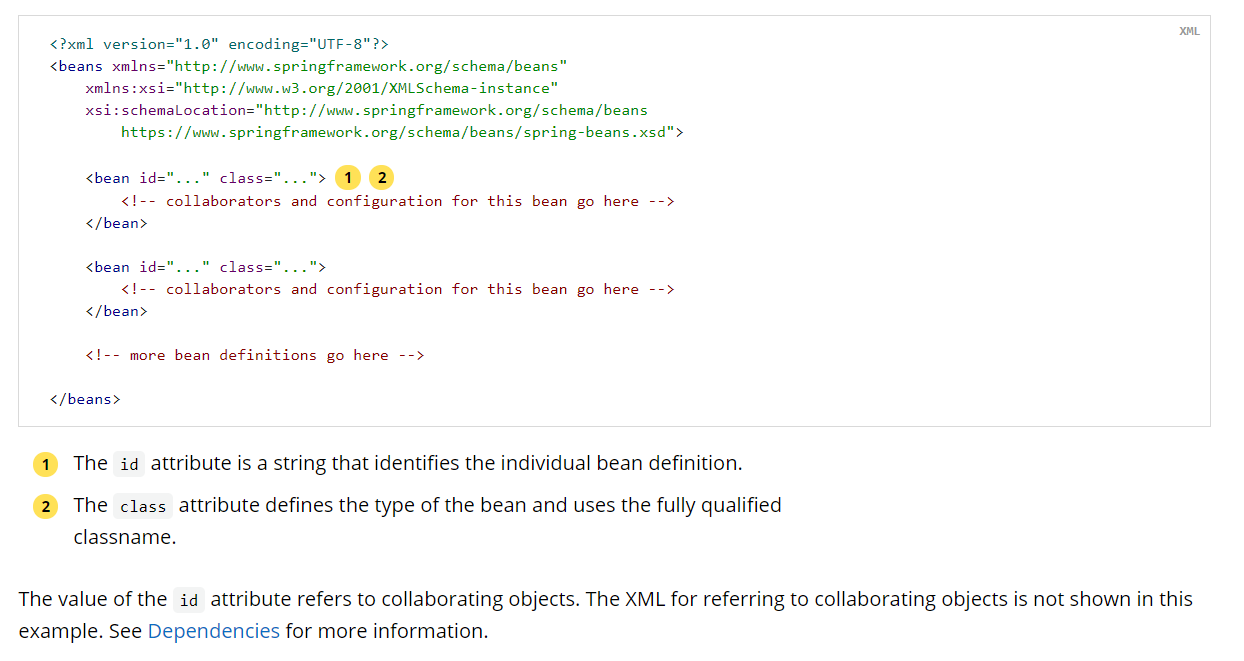
<?xml version="1.0" encoding="UTF-8"?>
<beans xmlns="http://www.springframework.org/schema/beans"
    xmlns:xsi="http://www.w3.org/2001/XMLSchema-instance"
    xsi:schemaLocation="http://www.springframework.org/schema/beans
        https://www.springframework.org/schema/beans/spring-beans.xsd">

    <bean id="..." class="...">
        <!-- collaborators and configuration for this bean go here -->
    </bean>

    <bean id="..." class="...">
        <!-- collaborators and configuration for this bean go here -->
    </bean>

    <!-- more bean definitions go here -->

</beans>
- 在test/java下创建MyTest类来进行测试输出:
import com.ajream.pojo.Hello;
import org.springframework.context.ApplicationContext;
import org.springframework.context.support.ClassPathXmlApplicationContext;

public class MyTest {
    public static void main(String[] args){
        ApplicationContext context = new ClassPathXmlApplicationContext("beans.xml");  //加载xml配置文件
        Hello h = (Hello) context.getBean("helloworld");
        h.printStr();
    }
}
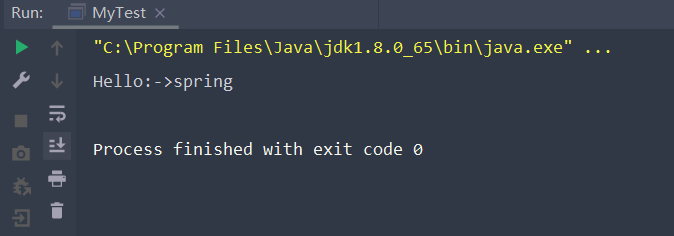
输出:
三者之间的关系
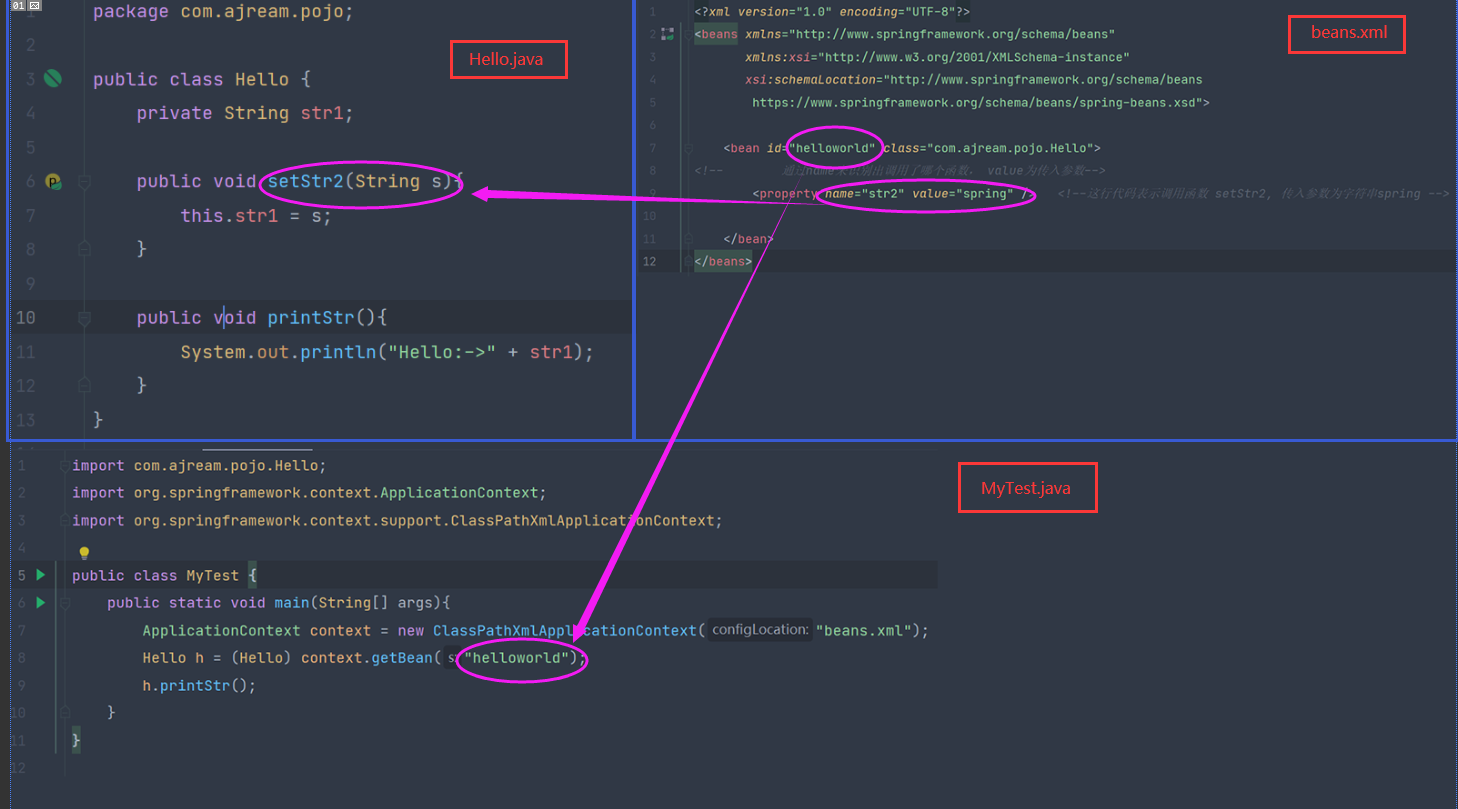
执行流程:
- 获取
beans.xml配置文件信息 - 根据beans.xml中的
id获取bean,创建对象h,并调用了setStr2方法 - 调用函数
printStr
本文来自博客园,作者:aJream,转载请记得标明出处:https://www.cnblogs.com/ajream/p/15383528.html

 浙公网安备 33010602011771号