
微服务Spring Cloud17_微服务场景模拟4
首先,我们需要模拟一个服务调用的场景。方便后面学习微服务架构
需求:查询数据库中的用户数据并输出到浏览器
父工程heima-springcloud:添加springboot父坐标和管理其他组件的依赖
用户服务工程user-service:整合mybatis查询数据库中用户数据;提供查询用户服务
用户消费工程cousumer-demo:利用查询用户服务获取用户数据并输出到浏览器
一、创建父工程
微服务中需要同时创建多个项目,为了方便课堂演示,先创建一个父工程,然后后续的工程都以这个工程为父,实现 maven的聚合。这样可以在一个窗口看到所有工程,方便讲解。在实际开发中,每个微服务可独立一个工程。
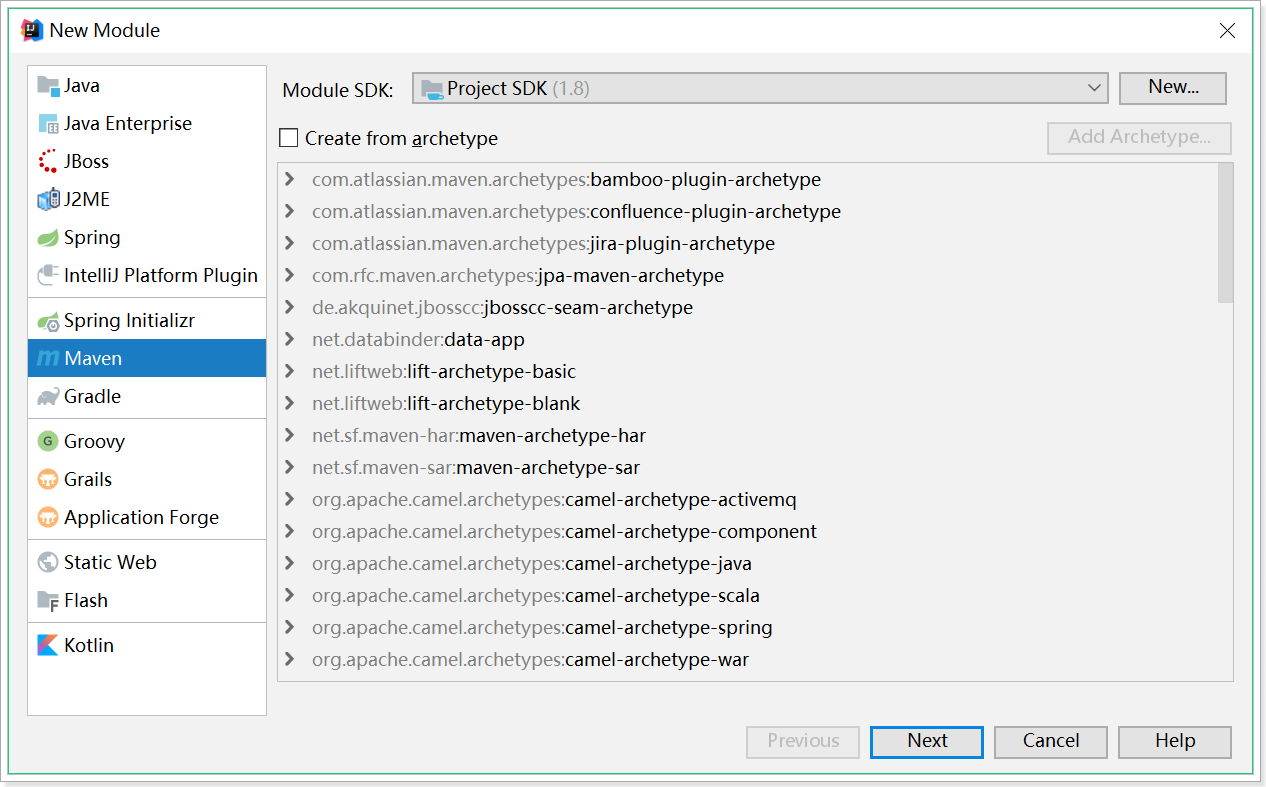
编写项目信息:
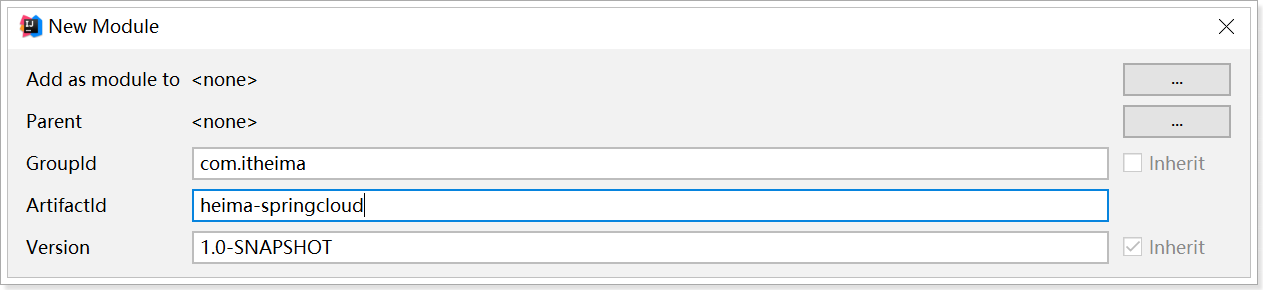
编写保存位置:

然后将 pom.xml 修改成如下(请从 资料\heima-springcloud.xml 文件中复制):
<?xml version="1.0" encoding="UTF-8"?>
<project xmlns="http://maven.apache.org/POM/4.0.0"
         xmlns:xsi="http://www.w3.org/2001/XMLSchema-instance"
         xsi:schemaLocation="http://maven.apache.org/POM/4.0.0 http://maven.apache.org/xsd/maven-4.0.0.xsd">
    <modelVersion>4.0.0</modelVersion>

    <groupId>com.itheima</groupId>
    <artifactId>heima-springcloud</artifactId>
    <packaging>pom</packaging>
    <version>1.0-SNAPSHOT</version>
    <modules>
        <module>user-service</module>
        <module>consumer-demo</module>
    </modules>

    <parent>
        <groupId>org.springframework.boot</groupId>
        <artifactId>spring-boot-starter-parent</artifactId>
        <version>2.1.5.RELEASE</version>
        <relativePath/>
    </parent>

    <properties>
        <java.version>1.8</java.version>
        <spring-cloud.version>Greenwich.SR1</spring-cloud.version>
        <mapper.starter.version>2.1.5</mapper.starter.version>
        <mysql.version>5.1.46</mysql.version>
    </properties>

    <dependencyManagement>
        <dependencies>
            <!-- springCloud -->
            <dependency>
                <groupId>org.springframework.cloud</groupId>
                <artifactId>spring-cloud-dependencies</artifactId>
                <version>${spring-cloud.version}</version>
                <type>pom</type>
                <scope>import</scope><!--通过scope的import可以继承spring-cloud-dependencies工程中的依赖-->
            </dependency>
            <!-- 通用Mapper启动器 -->
            <dependency>
                <groupId>tk.mybatis</groupId>
                <artifactId>mapper-spring-boot-starter</artifactId>
                <version>${mapper.starter.version}</version>
            </dependency>
            <!-- mysql驱动 -->
            <dependency>
                <groupId>mysql</groupId>
                <artifactId>mysql-connector-java</artifactId>
                <version>${mysql.version}</version>
            </dependency>
            <dependency>
                <groupId>org.springframework.cloud</groupId>
                <artifactId>spring-cloud-starter-config</artifactId>
            </dependency>
        </dependencies>
    </dependencyManagement>
    <dependencies>
        <dependency>
            <groupId>org.projectlombok</groupId>
            <artifactId>lombok</artifactId>
        </dependency>
    </dependencies>

    <build>
        <plugins>
            <plugin>
                <groupId>org.springframework.boot</groupId>
                <artifactId>spring-boot-maven-plugin</artifactId>
            </plugin>
        </plugins>
    </build>
</project>
这里已经对大部分要用到的依赖的版本进行了管理,方便后续使用
二、服务提供者
新建一个项目user-service,对外提供查询用户的服务。
需求:可以访问http://localhost:9091/user/8输出用户数据
步骤:
1、创建module
2、添加启动器依赖(web、通用Mapper)
3、编写启动引导类和配置文件
4、编写代码(UserMapper,UserService,UserController)
5、启动并测试
1、创建module
实现:
1、创建module
选中父工程:heima-springcloud

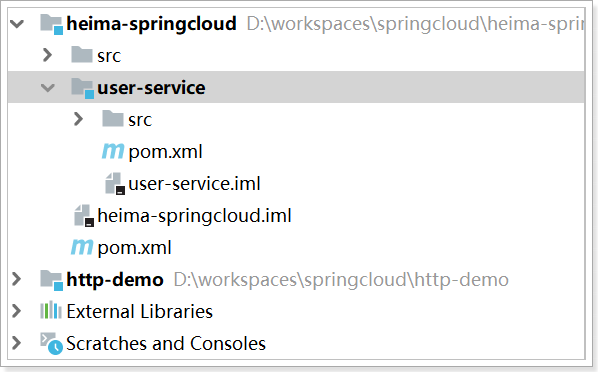
填写module信息:

注意,子模块要在父工程的下级目录:

2、添加依赖
pom.xml 文件中的内容如下:
<?xml version="1.0" encoding="UTF-8"?>
<project xmlns="http://maven.apache.org/POM/4.0.0"
         xmlns:xsi="http://www.w3.org/2001/XMLSchema-instance"
         xsi:schemaLocation="http://maven.apache.org/POM/4.0.0 http://maven.apache.org/xsd/maven-4.0.0.xsd">
    <parent>
        <artifactId>heima-springcloud</artifactId>
        <groupId>com.itheima</groupId>
        <version>1.0-SNAPSHOT</version>
    </parent>
    <modelVersion>4.0.0</modelVersion>

    <artifactId>user-service</artifactId>

    <dependencies>
        <dependency>
            <groupId>org.springframework.boot</groupId>
            <artifactId>spring-boot-starter-web</artifactId>
        </dependency>
        <!-- 通用Mapper启动器 -->
        <dependency>
            <groupId>tk.mybatis</groupId>
            <artifactId>mapper-spring-boot-starter</artifactId>
        </dependency>
        <!-- mysql驱动 -->
        <dependency>
            <groupId>mysql</groupId>
            <artifactId>mysql-connector-java</artifactId>
        </dependency>
    </dependencies>
</project>
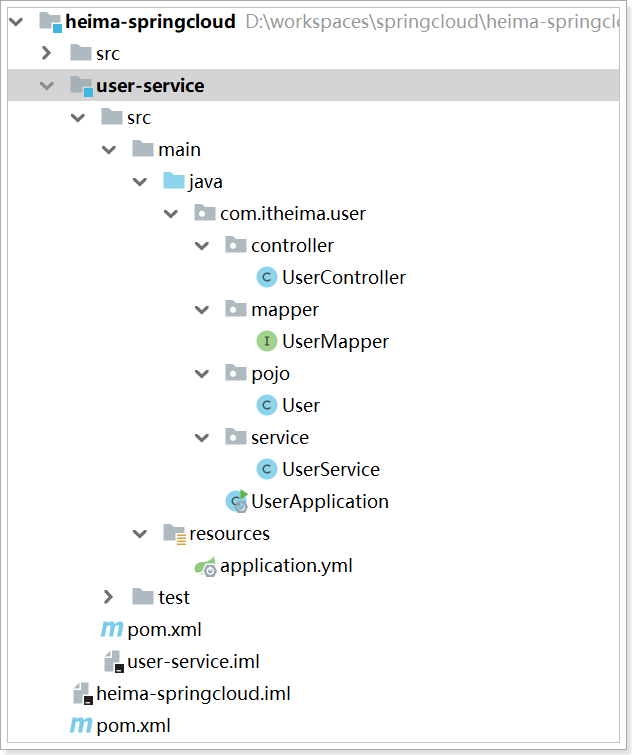
项目结构:
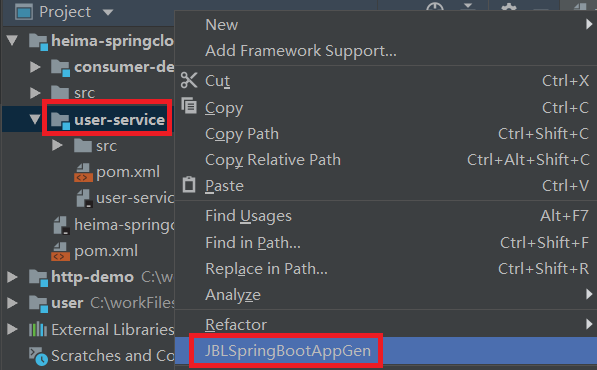
3、编写启动引导类和配置文件
IDEA 安装JBLSpringBootAppGen插件,通过插件去创建启动引导类和配置文件

创建 user-service\src\main\java\com\itheima\user\UserApplication.java 启动类:
package com.itheima.user;
import org.springframework.boot.SpringApplication;
import org.springframework.boot.autoconfigure.SpringBootApplication;
import tk.mybatis.spring.annotation.MapperScan;
@SpringBootApplication
@MapperScan("com.itheima.user.mapper")
public class UserApplication {
    public static void main(String[] args) {
        SpringApplication.run(UserApplication.class, args);
   }
}
创建 user-service\src\main\resources\application.yml 属性文件,这里我们采用了yaml语法,而不是 properties:
server:
 port: 9091
spring:
 datasource:
   driver-class-name: com.mysql.jdbc.Driver
   url: jdbc:mysql://localhost:3306/springcloud
   username: root
   password: root
mybatis:
 type-aliases-package: com.itheima.user.pojo
使用mysql图形界面工具创建 springcloud 数据库,将数据导入;
/*
Navicat MySQL Data Transfer

Source Server         : local3306
Source Server Version : 50622
Source Host           : localhost:3306
Source Database       : springboot_test

Target Server Type    : MYSQL
Target Server Version : 50622
File Encoding         : 65001

Date: 2019-04-14 18:39:07
*/

SET FOREIGN_KEY_CHECKS=0;

-- ----------------------------
-- Table structure for tb_user
-- ----------------------------
DROP TABLE IF EXISTS `tb_user`;
CREATE TABLE `tb_user` (
  `id` bigint(20) NOT NULL AUTO_INCREMENT,
  `user_name` varchar(100) DEFAULT NULL COMMENT '用户名',
  `password` varchar(100) DEFAULT NULL COMMENT '密码',
  `name` varchar(100) DEFAULT NULL COMMENT '姓名',
  `age` int(10) DEFAULT NULL COMMENT '年龄',
  `sex` tinyint(1) DEFAULT NULL COMMENT '性别,1男性,2女性',
  `birthday` date DEFAULT NULL COMMENT '出生日期',
  `note` varchar(255) DEFAULT NULL COMMENT '备注',
  `created` datetime DEFAULT NULL COMMENT '创建时间',
  `updated` datetime DEFAULT NULL COMMENT '更新时间',
  PRIMARY KEY (`id`),
  UNIQUE KEY `username` (`user_name`)
) ENGINE=InnoDB AUTO_INCREMENT=13 DEFAULT CHARSET=utf8;

-- ----------------------------
-- Records of tb_user
-- ----------------------------
INSERT INTO `tb_user` VALUES ('1', 'zhangsan', '123456', '张三', '30', '1', '1964-08-08', '张三同学在学Java', '2014-09-19 16:56:04', '2014-09-21 11:24:59');
INSERT INTO `tb_user` VALUES ('2', 'lisi', '123456', '李四', '21', '2', '1995-01-01', '李四同学在传智学Java', '2014-09-19 16:56:04', '2014-09-19 16:56:04');
INSERT INTO `tb_user` VALUES ('3', 'wangwu', '123456', '王五', '22', '2', '1994-01-01', '王五同学在学php', '2014-09-19 16:56:04', '2014-09-19 16:56:04');
INSERT INTO `tb_user` VALUES ('4', 'zhangliu', '123456', '张六', '20', '1', '1996-09-01', '张六同学在传智播客学Java', '2014-09-19 16:56:04', '2014-09-19 16:56:04');
INSERT INTO `tb_user` VALUES ('5', 'lina', '123456', '李娜', '28', '1', '1988-01-01', '李娜同学在传智播客学Java', '2014-09-19 16:56:04', '2014-09-19 16:56:04');
INSERT INTO `tb_user` VALUES ('6', 'lilei', '123456', '李雷', '23', '1', '1993-08-08', '李雷同学在传智播客学Java', '2014-09-20 11:41:15', '2014-09-20 11:41:15');
INSERT INTO `tb_user` VALUES ('7', 'hanmeimei', '123456', '韩梅梅', '24', '2', '1992-08-08', '韩梅梅同学在传智播客学php', '2014-09-20 11:41:15', '2014-09-20 11:41:15');
INSERT INTO `tb_user` VALUES ('8', 'itcast', '123456', '传智播客', '21', '2', '2008-07-08', '传智播客搞IT教育', '2014-09-20 11:41:15', '2014-09-20 11:41:15');
INSERT INTO `tb_user` VALUES ('9', 'heima', '123456', '黑马', '18', '2', '2012-08-08', '黑马是传智播客高端品牌', '2014-09-20 11:41:15', '2014-09-20 11:41:15');
INSERT INTO `tb_user` VALUES ('10', 'linus', '123456', '林纳斯', '45', '2', '1971-08-08', '林纳斯搞了linux又搞git', '2014-09-20 11:41:15', '2014-09-20 11:41:15');
INSERT INTO `tb_user` VALUES ('11', 'leijun', '123456', '雷布斯', '33', '2', '1983-08-08', '小爱同学;are you ok', '2014-09-20 11:41:15', '2014-09-20 11:41:15');
INSERT INTO `tb_user` VALUES ('12', 'madaye', '123456', '马大爷', '46', '2', '1980-08-08', '马大爷花呗可以不还吗', '2014-09-20 11:41:15', '2014-09-20 11:41:15');
4、编写代码
编写 user-service\src\main\java\com\itheima\user\pojo\User.java 实体类:
package com.itheima.user.pojo;

import lombok.Data;
import tk.mybatis.mapper.annotation.KeySql;
import javax.persistence.Id;
import javax.persistence.Table;
import java.util.Date;
@Table(name = "tb_user")
@Data
public class User {
    @Id
    @KeySql(useGeneratedKeys = true)
    private Long id;
    private String userName; // 用户名
    private String password; // 密码
    private String name;// 姓名
    private Integer age;// 年龄
    private Integer sex;// 性别,1男性,2女性
    private Date birthday;// 出生日期
    private Date created;// 创建时间
    private Date updated;// 更新时间
    private String note;// 备注
}
编写 user-service\src\main\java\com\itheima\user\mapper\UserMapper.java
package com.itheima.user.mapper;

import com.itheima.user.pojo.User;
import tk.mybatis.mapper.common.Mapper;
public interface UserMapper extends Mapper<User> {
}
编写 user-service\src\main\java\com\itheima\user\service\UserService.java
package com.itheima.user.service;

import com.itheima.user.pojo.User;
import com.itheima.user.mapper.UserMapper;
import org.springframework.beans.factory.annotation.Autowired;
import org.springframework.stereotype.Service;

@Service
public class UserService {

    @Autowired
    private UserMapper userMapper;

    /**
     * 根据主键查询用户
     * @param id    用户id
     * @return      用户信息
     */
    public User queryByID(Long id){
        return userMapper.selectByPrimaryKey(id);
    }
}
package com.itheima.user.controller;

import com.itheima.user.pojo.User;
import com.itheima.user.service.UserService;
import org.springframework.beans.factory.annotation.Autowired;
import org.springframework.web.bind.annotation.PathVariable;
import org.springframework.web.bind.annotation.RequestMapping;
import org.springframework.web.bind.annotation.RestController;

@RestController
@RequestMapping("/user")
public class UserController {

    @Autowired
    private UserService userService;

    @GetMapping("/{id}")  //GetMapping是RequestMapping(method=RequestMethod.GET)的缩写
    public User queryById(@PathVariable Long id){
        return userService.queryByID(id);
    }
}
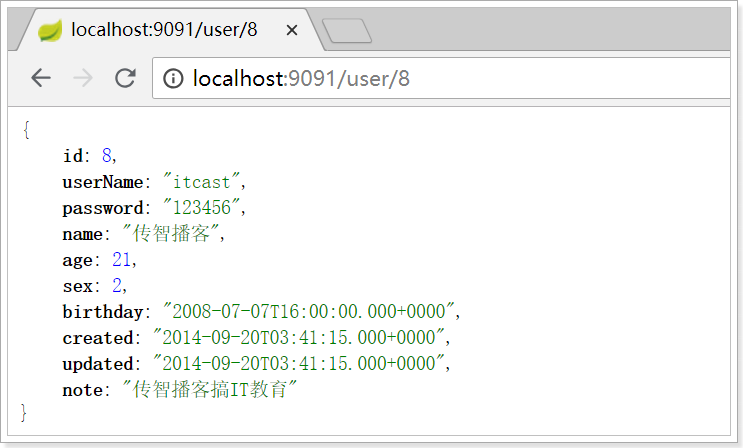
5、启动并测试
启动 user-service 项目启动类,访问接口:http://localhost:9091/user/8
如果启动失败,出现如下错误
Description:
Failed to configure a DataSource: 'url' attribute is not specified and no embedded datasource could be configured.
Reason: Failed to determine a suitable driver class
Action:
Consider the following:
    If you want an embedded database (H2, HSQL or Derby), please put it on the classpath.
    If you have database settings to be loaded from a particular profile you may need to activate it (no profiles are currently active).
pom问题导致编译时没有将配置文件生成到target目录
简单来说,就是你每次启动时,一般都会重新编译并且将文件生成到target目录,如果你在target目录没有发现配置文件,说明编译时,没有将resource目录下的配置文件编译到target目录下,因此Spring Boot无法加载配置文件。
解决办法:在pom文件中加载配置文件
    <build>
    <resources>
        <resource>
            <directory>src/main/java</directory>
            <includes>
                <include>**/*.yml</include>
                <include>**/*.properties</include>
                <include>**/*.xml</include>
            </includes>
            <filtering>false</filtering>
        </resource>
        <resource>
            <directory>src/main/resources</directory>
            <includes>
                <include>**/*.yml</include>
                <include>**/*.properties</include>
                <include>**/*.xml</include>
            </includes>
            <filtering>false</filtering>
        </resource>
    </resources>
    </build>
三、服务调用者
目标:编写测试类使用restTemplate访问user-service的路径根据id查询用户
需求:访问http://localhost:8080/consumer/8使用RestTemplate获取http://localhost:9091/user/8的数据
实现步骤:
1.添加启动器依赖
2.创建启动引导类(注册RestTemplate)和配置文件;
3.编写测试代码(ConsumerController中使用restTemplate访问服务获取数据)
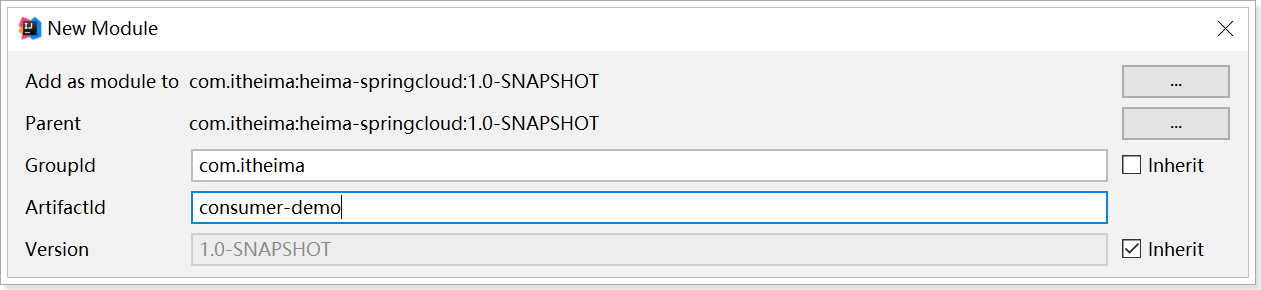
1、创建工程
与上面类似,这里不再赘述,需要注意的是,我们调用user-service的功能,因此不需要mybatis相关依赖了。

pom.xml文件内容如下:
<?xml version="1.0" encoding="UTF-8"?>
<project xmlns="http://maven.apache.org/POM/4.0.0"
         xmlns:xsi="http://www.w3.org/2001/XMLSchema-instance"
         xsi:schemaLocation="http://maven.apache.org/POM/4.0.0 http://maven.apache.org/xsd/maven-4.0.0.xsd">
    <parent>
        <artifactId>heima-springcloud</artifactId>
        <groupId>com.itheima</groupId>
        <version>1.0-SNAPSHOT</version>
    </parent>
    <modelVersion>4.0.0</modelVersion>

    <artifactId>consumer-demo</artifactId>

    <dependencies>
        <dependency>
            <groupId>org.springframework.boot</groupId>
            <artifactId>spring-boot-starter-web</artifactId>
        </dependency>
    </dependencies>

</project>
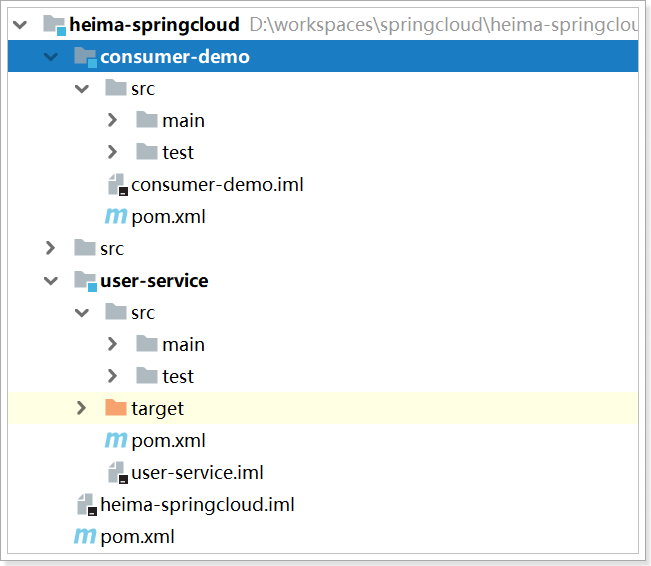
项目结构如下:
2、编写代码
编写启动类 consumer-demo\src\main\java\com\itheima\consumer\ConsumerApplication.java 并在其中注册RestTemplate 具体如下:
package com.itheima.consumer;

import org.springframework.boot.SpringApplication;
import org.springframework.boot.autoconfigure.SpringBootApplication;
import org.springframework.context.annotation.Bean;
import org.springframework.web.client.RestTemplate;

@SpringBootApplication
public class ConsumerApplication {
    public static void main(String[] args) {
        SpringApplication.run(ConsumerApplication.class, args);
    }

    @Bean
    public RestTemplate restTemplate(){
        return new RestTemplate();
    }
}
创建实体类 consumer-demo\src\main\java\com\itheima\consumer\pojo\User.java
package com.itheima.consumer.pojo;

import lombok.Data;
import java.util.Date;

@Data
public class User {
    private Long id;
    private String userName; // 用户名
    private String password; // 密码
    private String name;// 姓名
    private Integer age;// 年龄
    private Integer sex;// 性别,1男性,2女性
    private Date birthday;// 出生日期
    private Date created;// 创建时间
    private Date updated;// 更新时间
    private String note;// 备注
}
编写consumer-demo\src\main\java\com\itheima\consumer\controller\ConsumerController.java,在controller中直接调用RestTemplate,远程访问user-service的服务接口:
package com.itheima.consumer.controller;

import com.itheima.consumer.pojo.User;
import org.springframework.beans.factory.annotation.Autowired;
import org.springframework.web.bind.annotation.GetMapping;
import org.springframework.web.bind.annotation.PathVariable;
import org.springframework.web.bind.annotation.RequestMapping;
import org.springframework.web.bind.annotation.RestController;
import org.springframework.web.client.RestTemplate;

@RestController
@RequestMapping("/consumer")
public class ConsumerController {

    @Autowired
    private RestTemplate restTemplate;

    @GetMapping("/{id}")
    public User queryById(@PathVariable Long id){
        String url="http://localhost:9091/user/"+id;
        return restTemplate.getForObject(url,User.class);

    }
}
服务调用者项目结构:

3、启动测试
启动 consumer-demo引导启动类;因为 consumer-demo 项目没有配置端口,那么默认就是8080,我们访问:http://localhost:8080/consumer/8
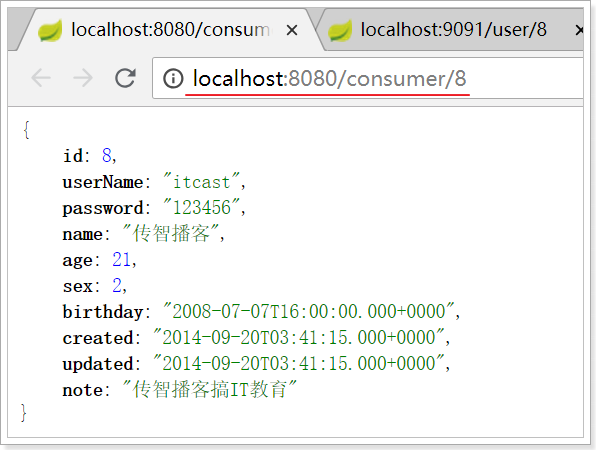
一个简单的远程服务调用案例就实现了。
四、思考问题
- 在consumer中,我们把url地址硬编码到了代码中,不方便后期维护
- consumer需要记忆user-service的地址,如果出现变更,可能得不到通知,地址将失效consumer不清楚user-service的状态,服务宕机也不知道
- user-service只有1台服务,不具备高可用性
- 即便user-service形成集群,consumer还需自己实现负载均衡
- 服务管理
-
- 如何自动注册和发现
- 如何实现状态监管
- 如何实现动态路由
- 服务如何实现负载均衡
- 服务如何解决容灾问题
- 服务如何实现统一配置

 浙公网安备 33010602011771号