SpringMVC18_Spring与Web环境集成1
一、基本三层架构环境搭建
new module->maven->create from archetype
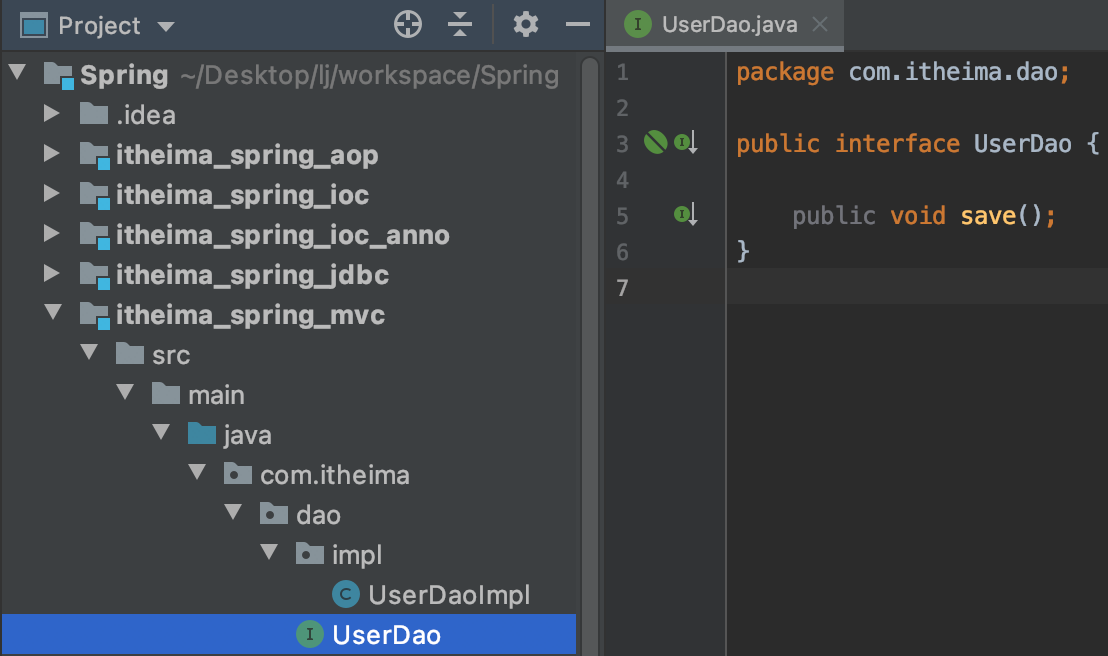
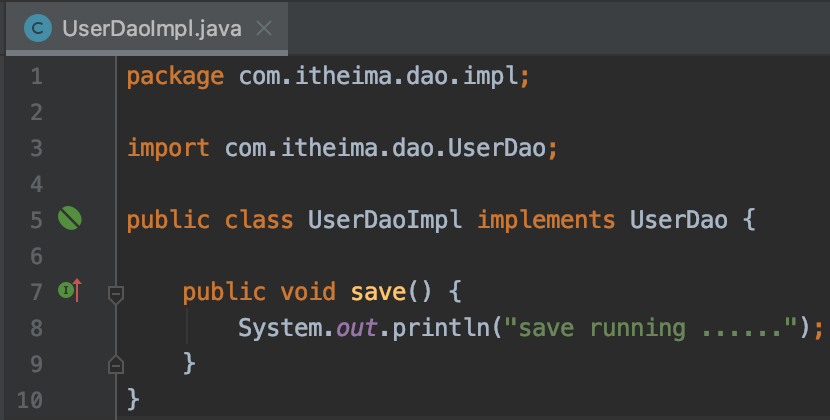
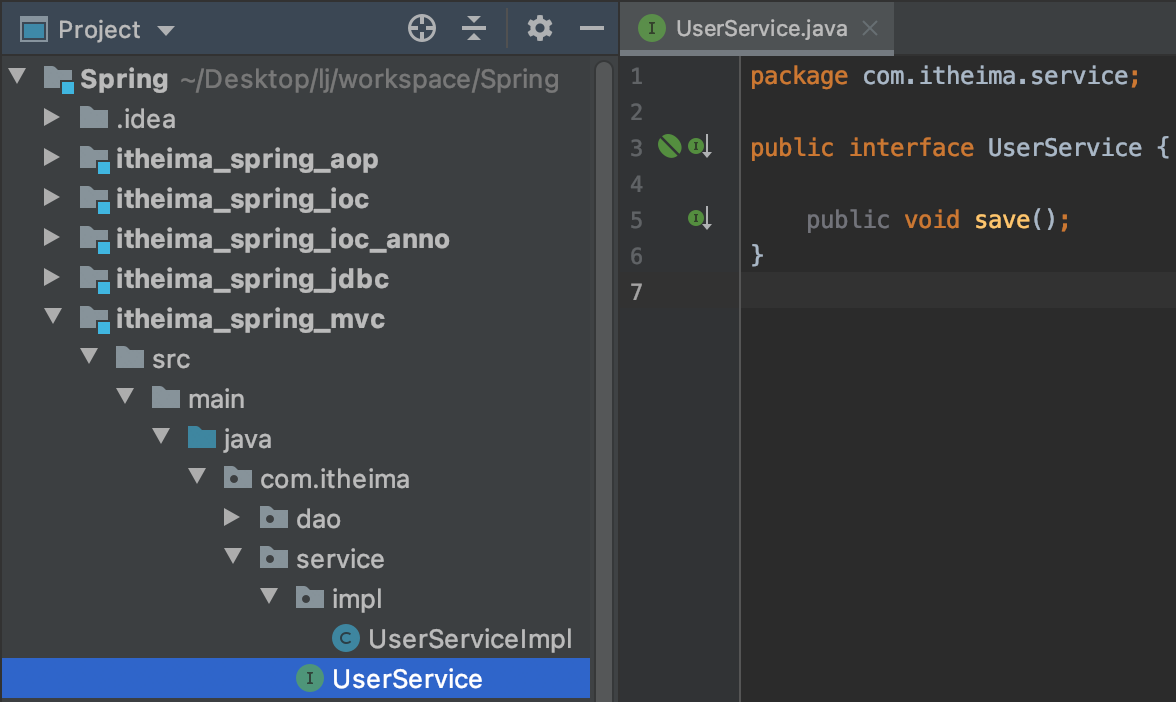
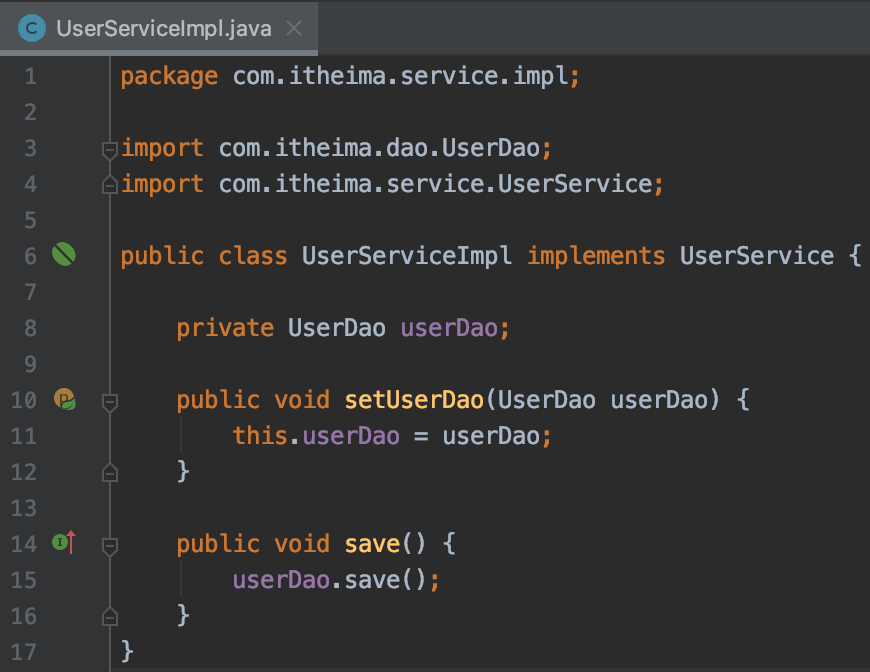


File->Project Structure->Modules->
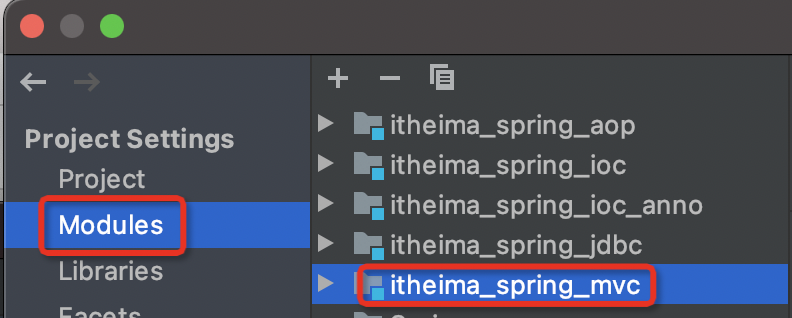
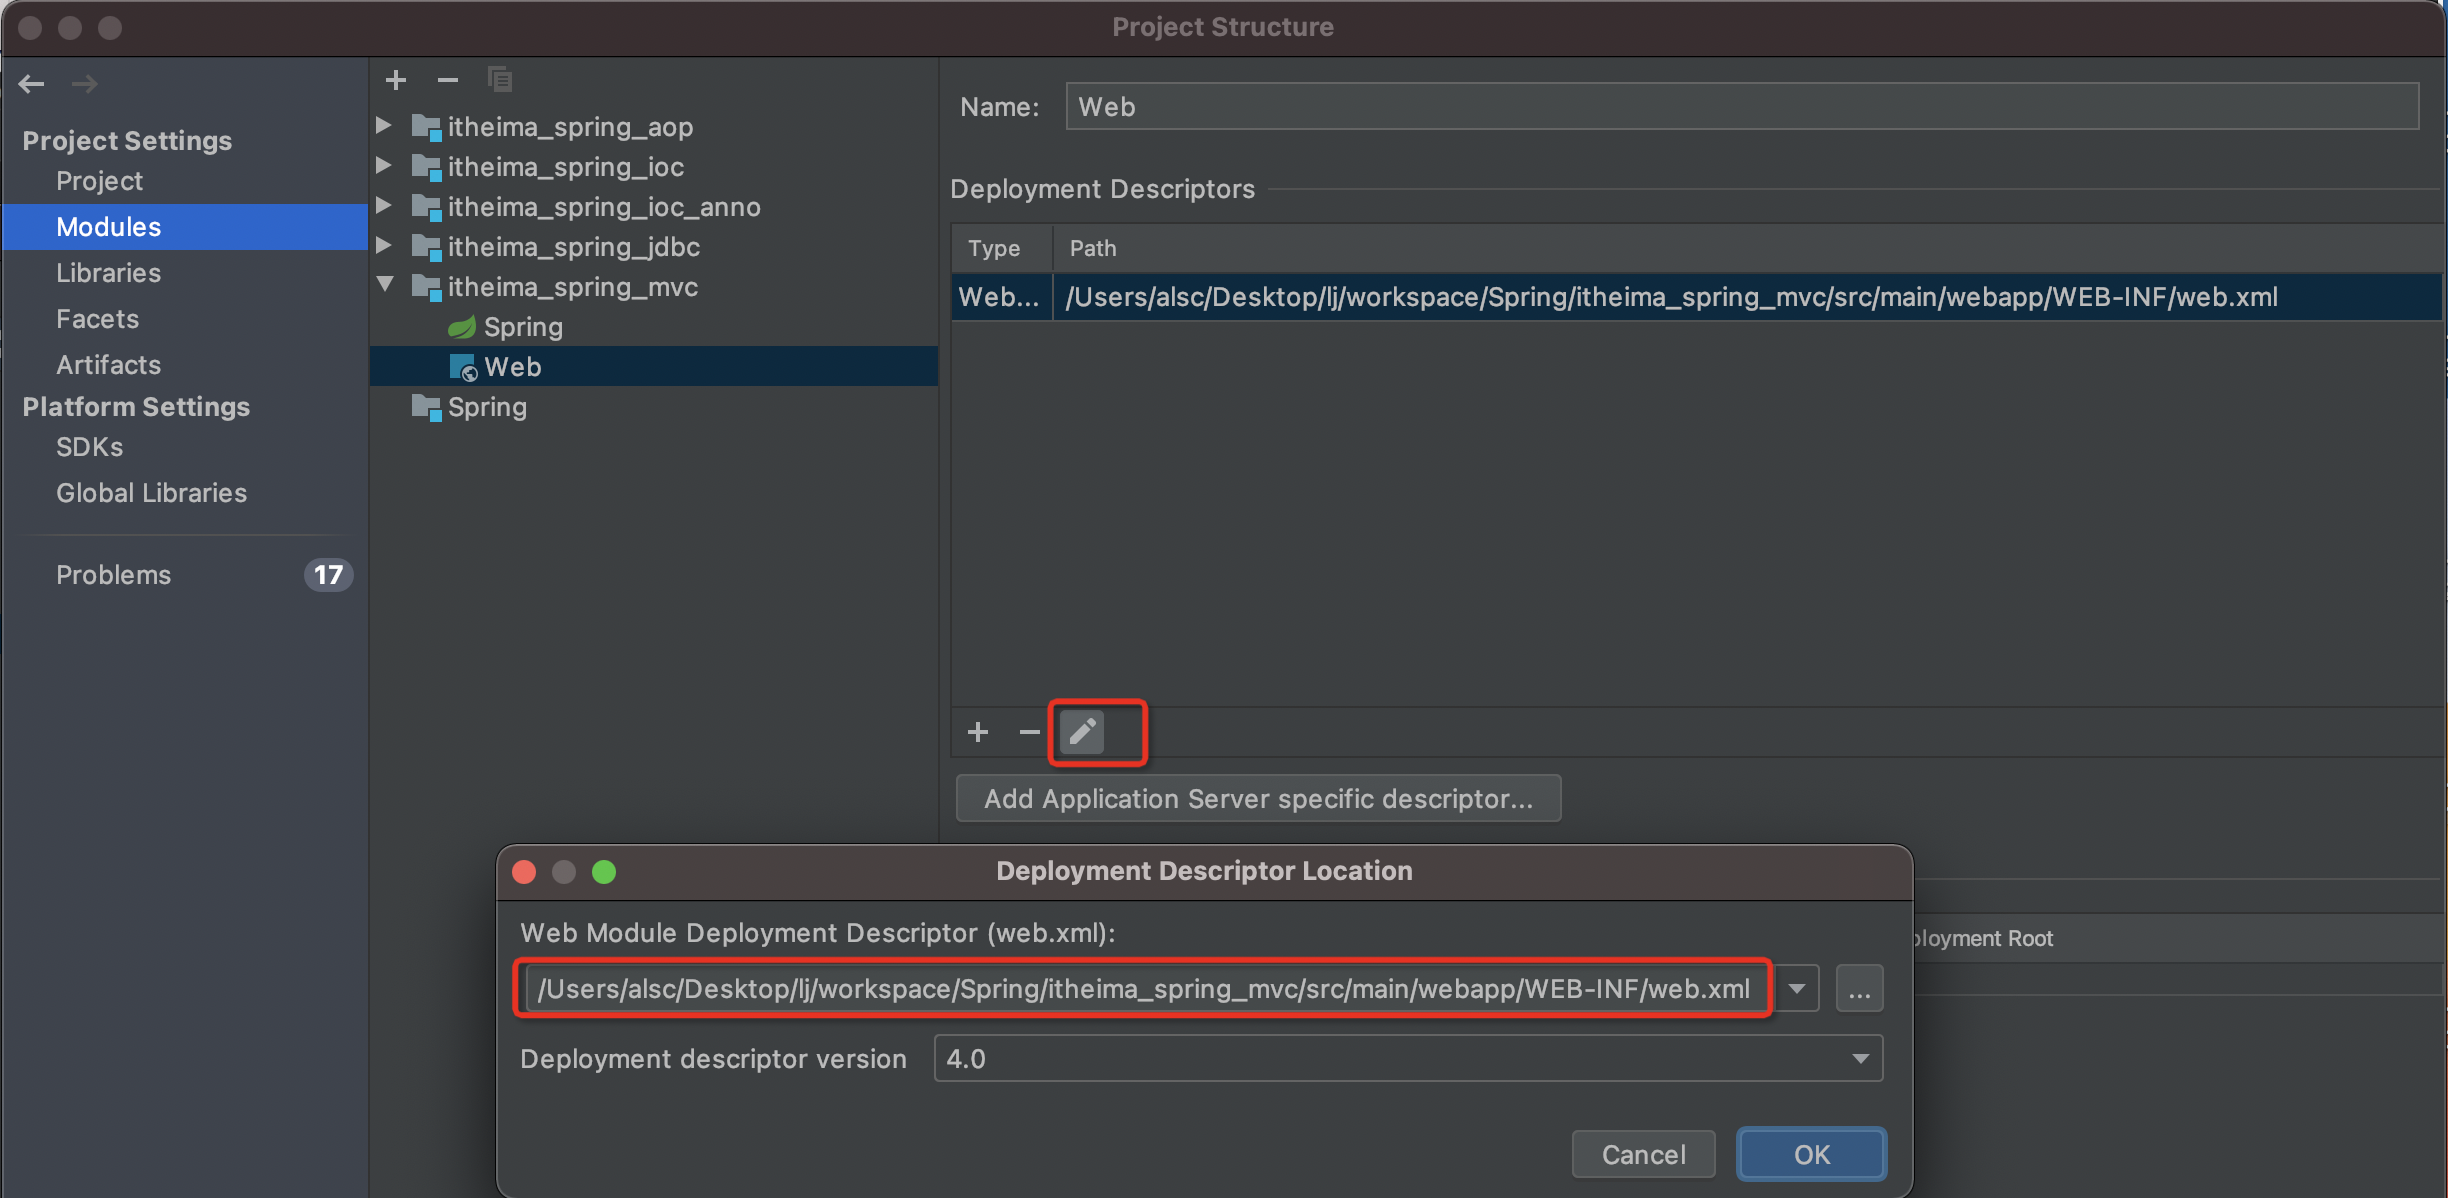


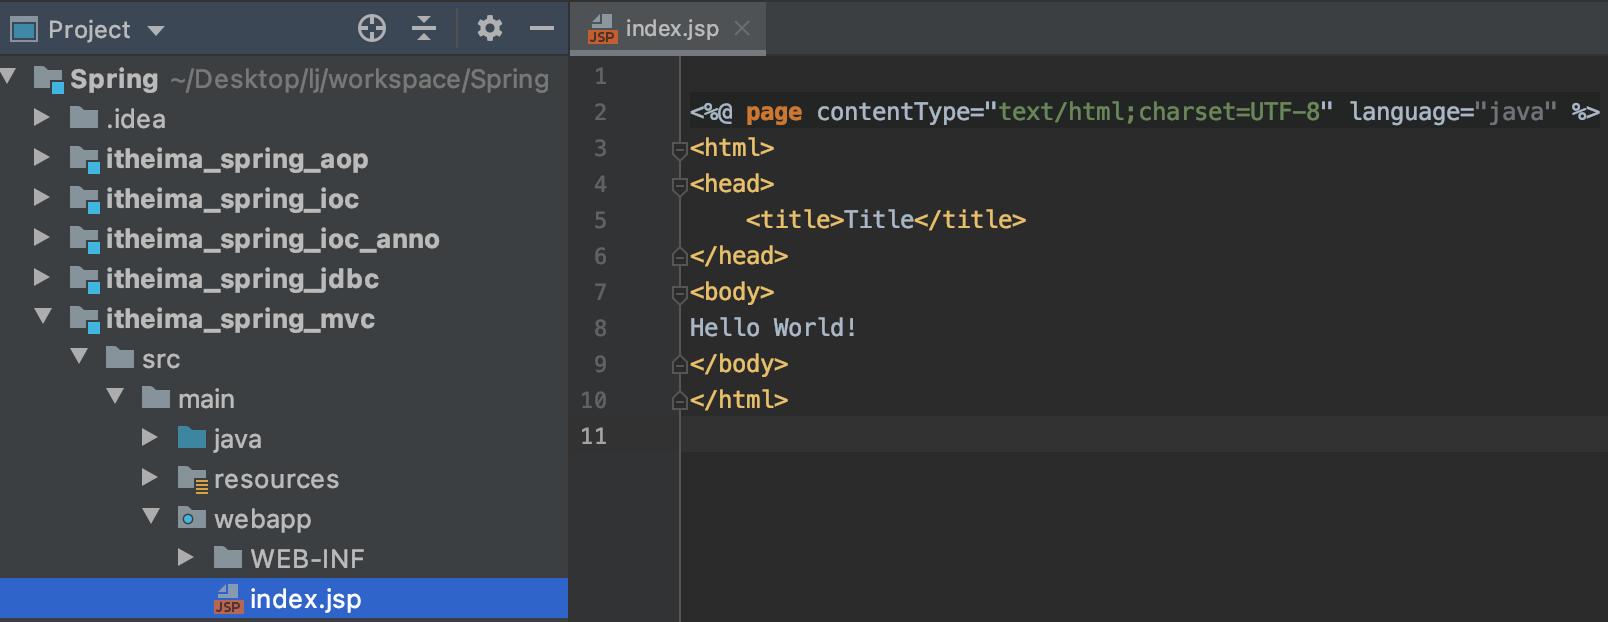
按照Tomcat&Servlet7_Tomcat2中的第6条c中的第一步先将tomcat集成到idea中,再配置部署项目
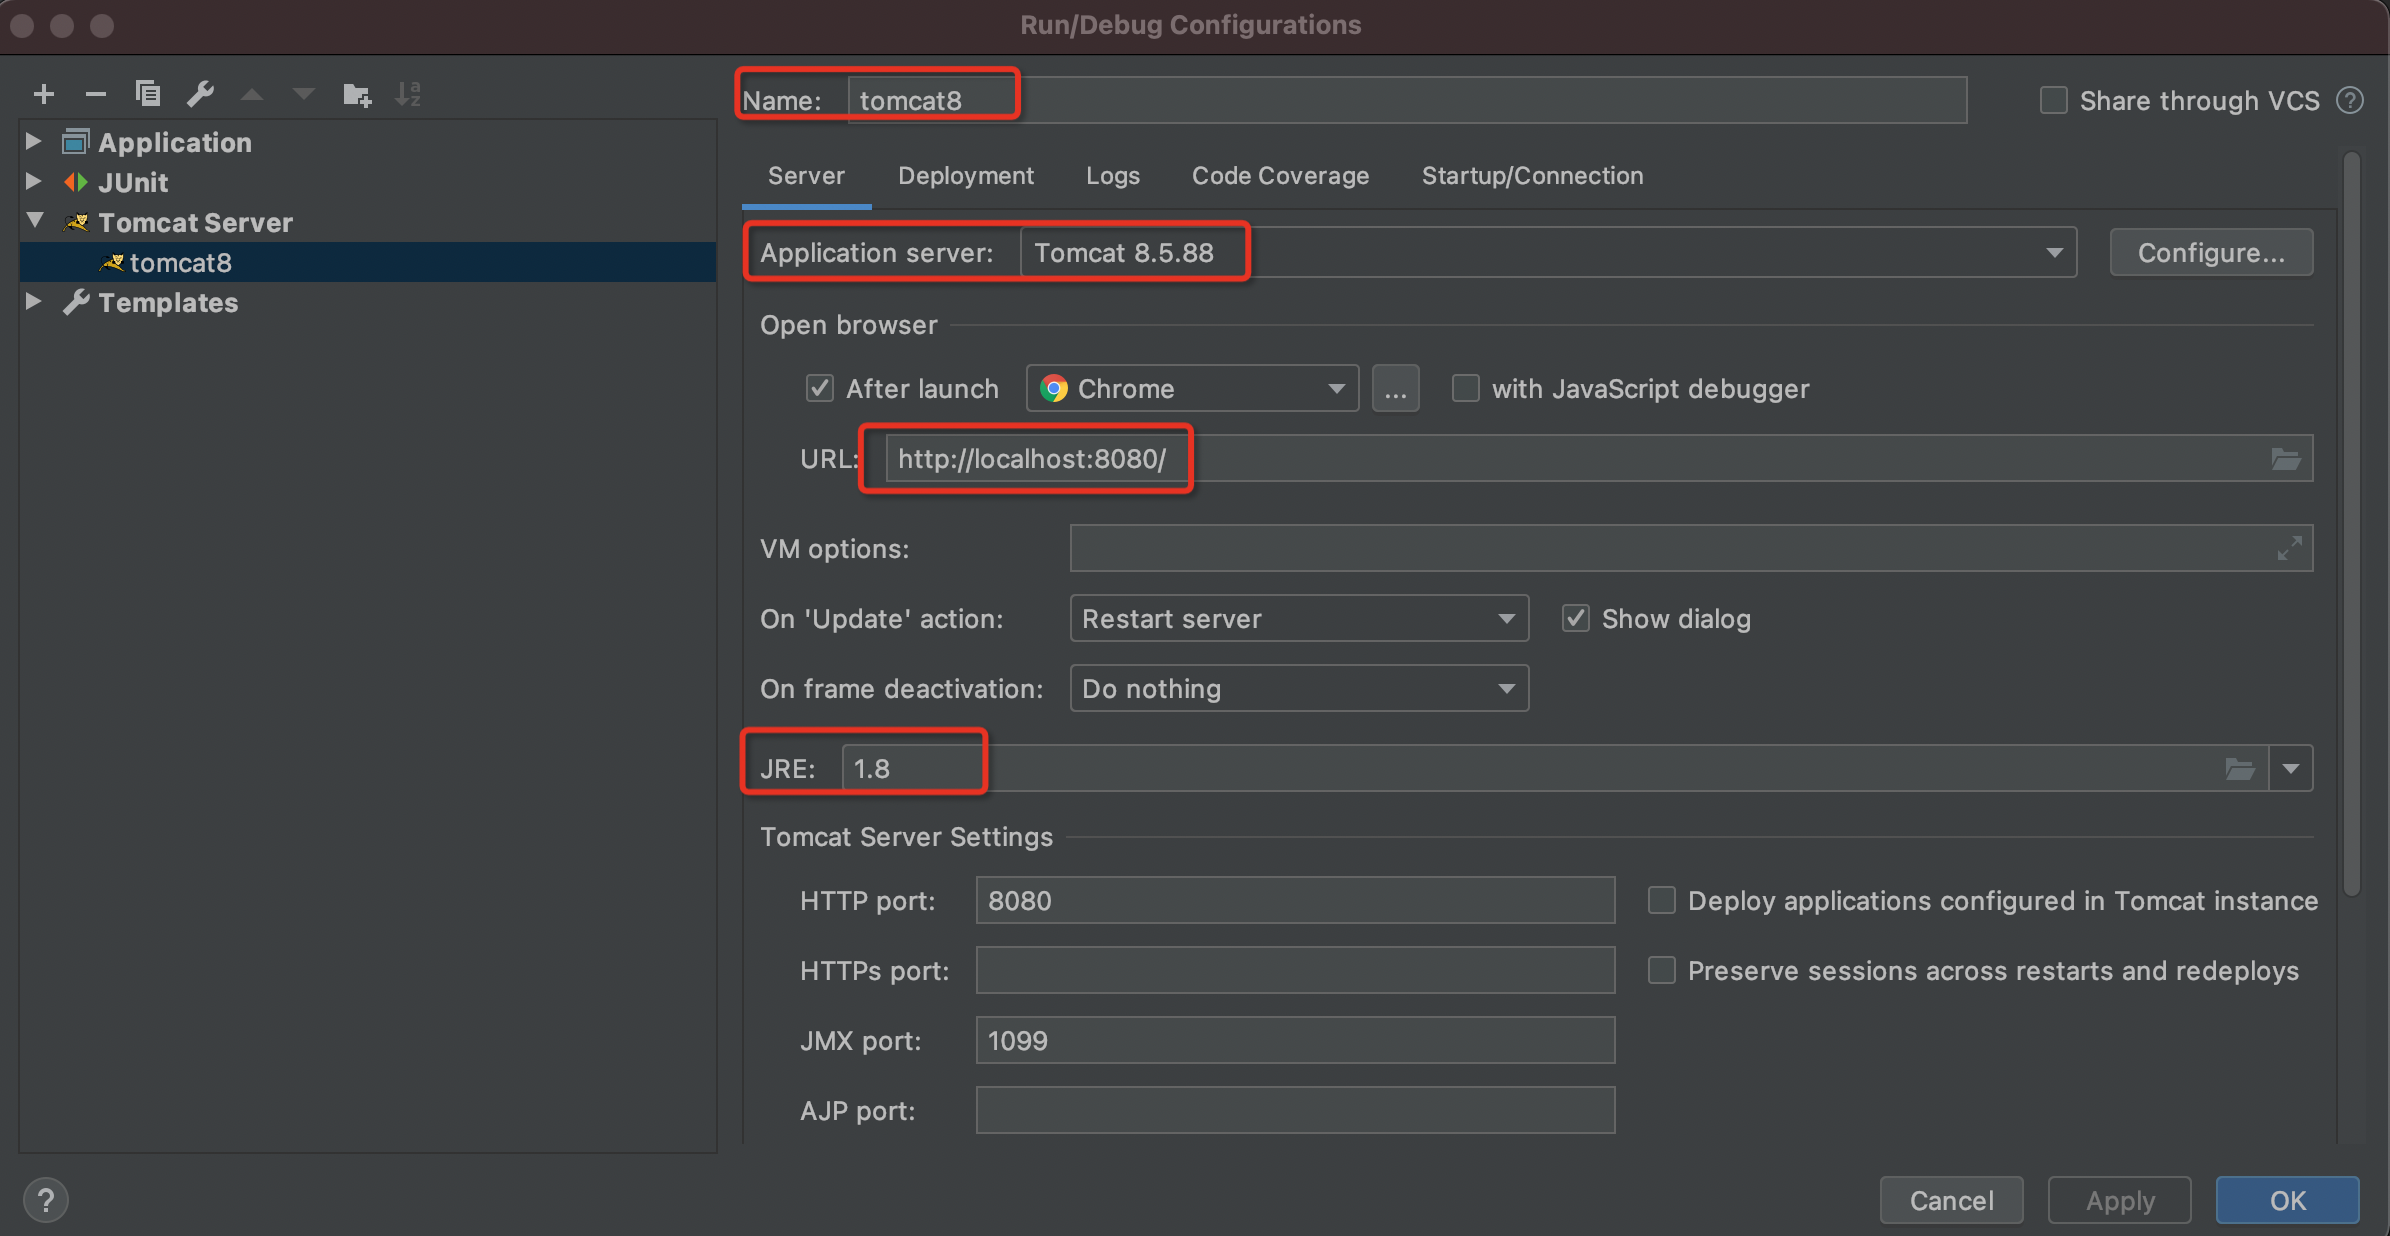
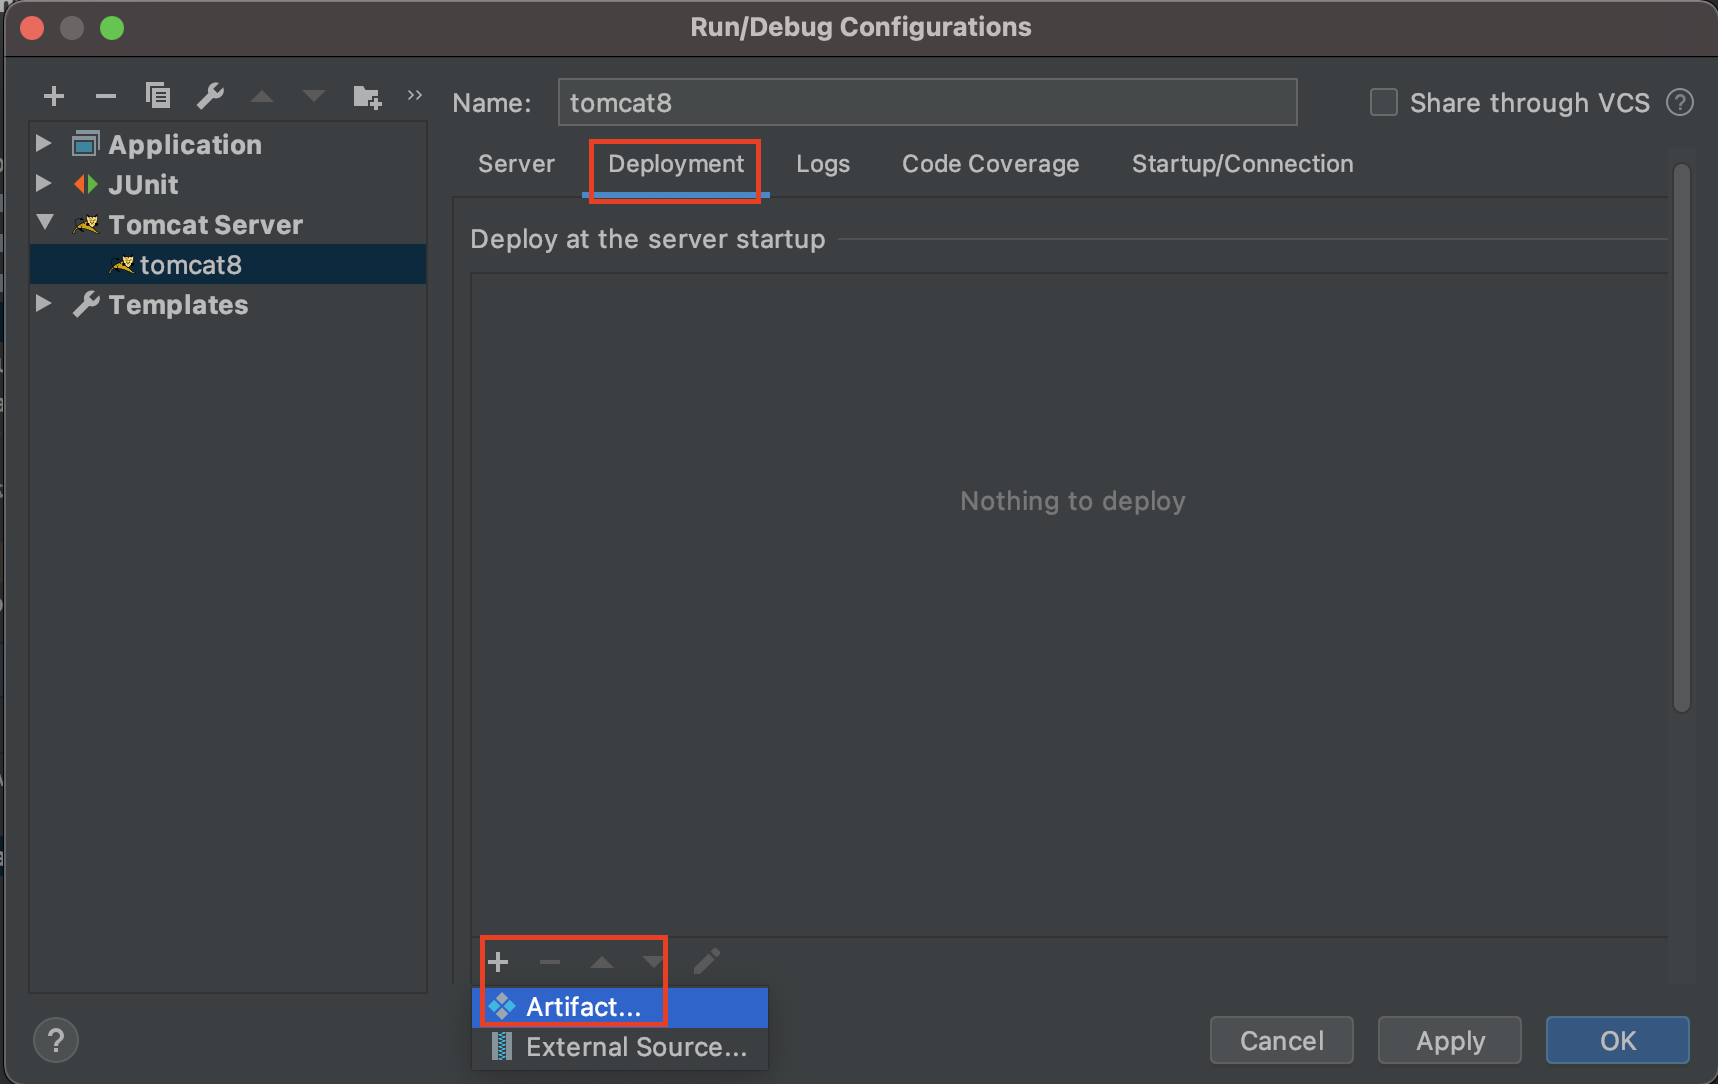
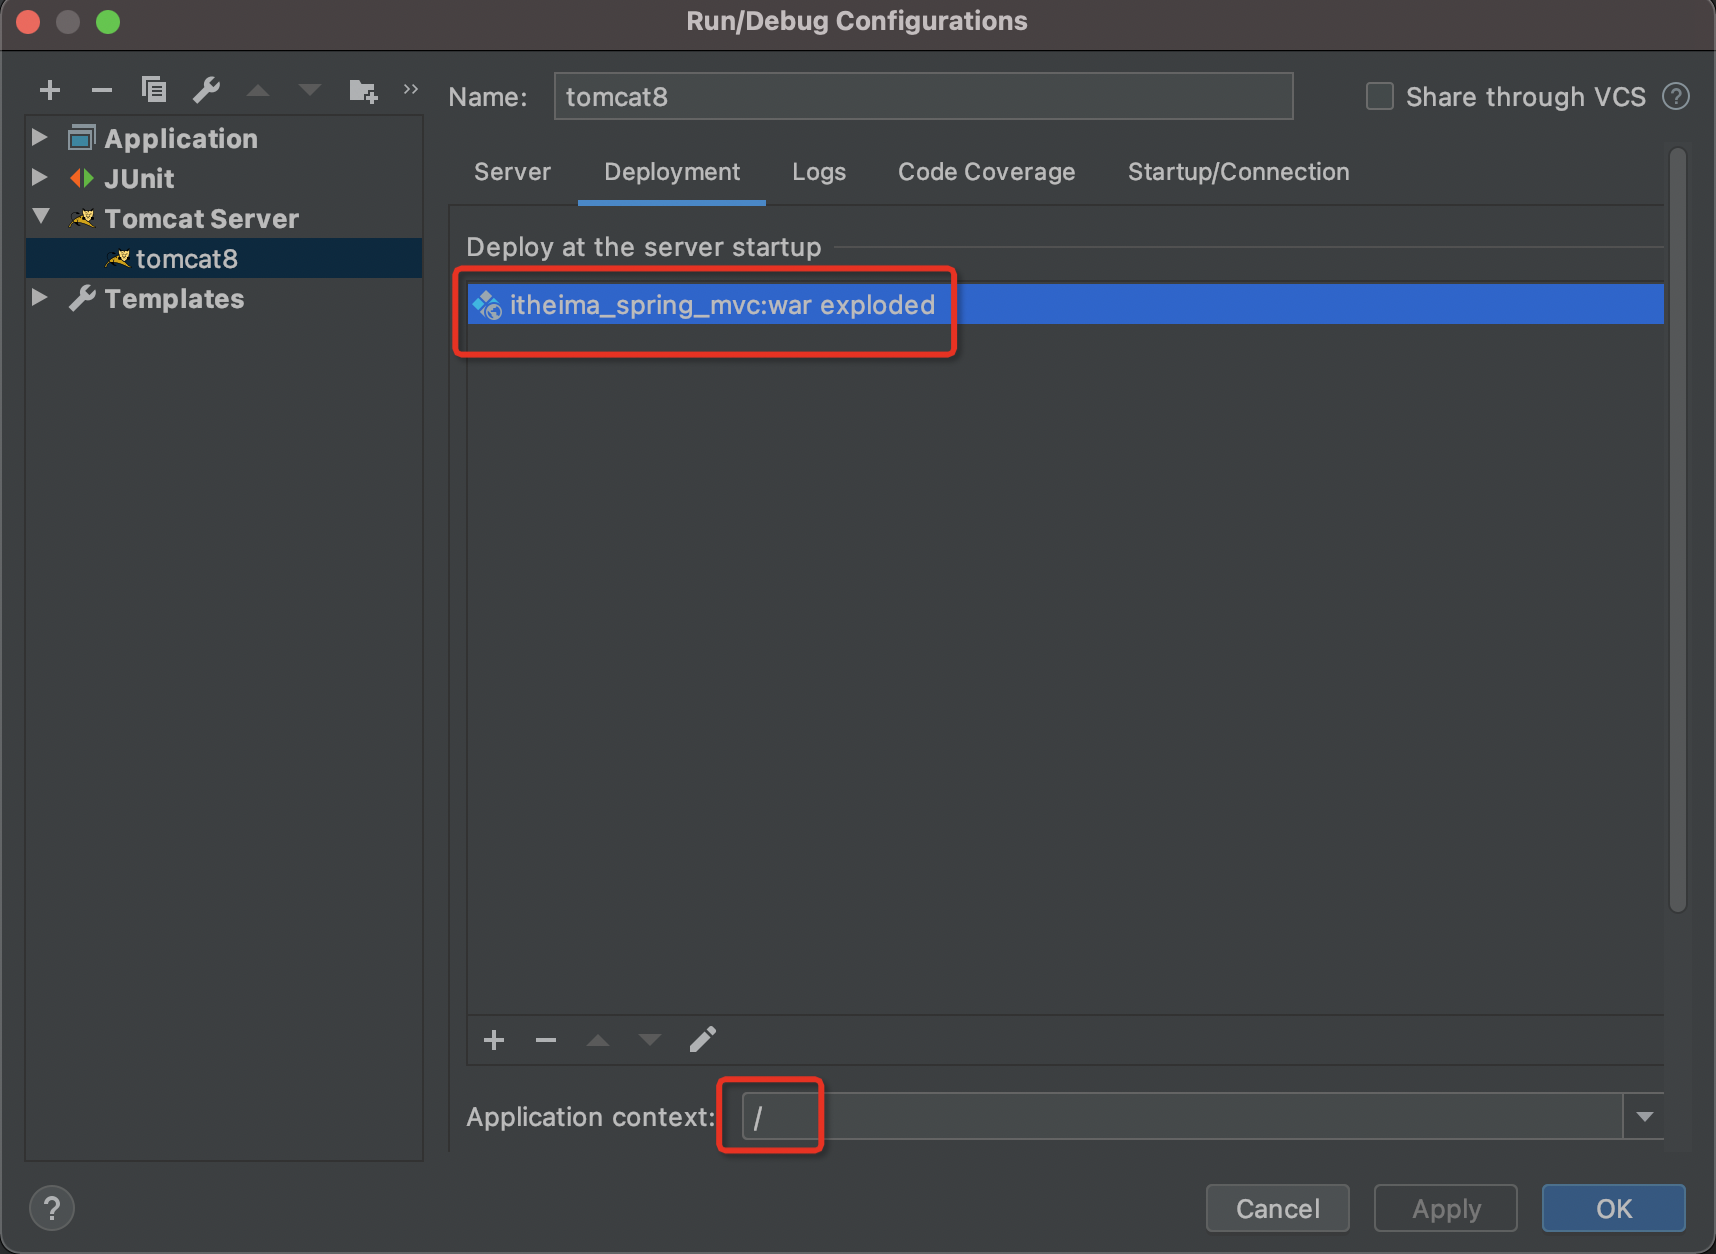
配置完成,Run tomcat8,启动成功会自动打开浏览器访问localhost:8080

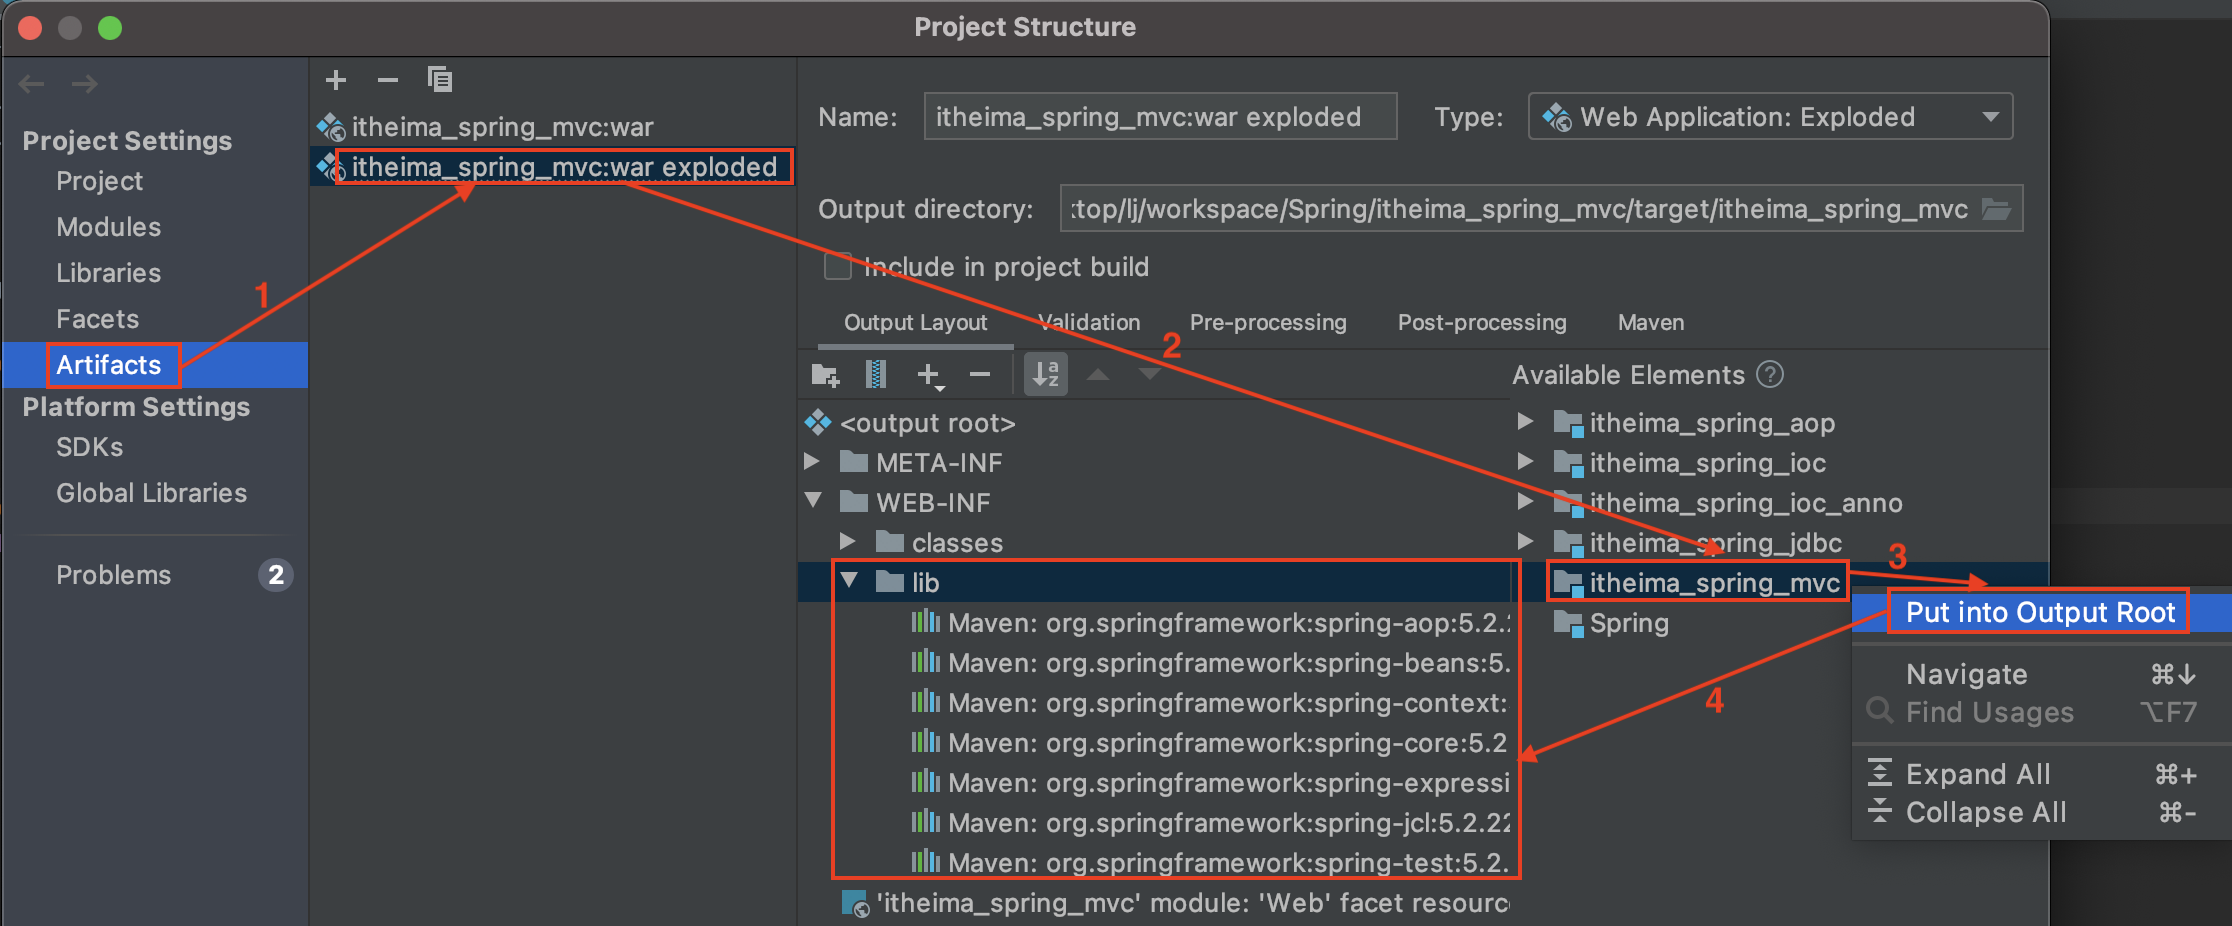
如果遇到启动tomcat报错:java.lang.ClassNotFoundException: org.springframework.context.ApplicationContext,打开Project Structure窗口,选择Artifacts,在Output Layout –> Web-INF检查是否有lib目录,没有则说明jar包未部署。解决办法如下:
浏览器访问localhost:8080/userServlet,检查控制台输出save running信息

二、ApplicationContext应用上下文获取方式
应用上下文对象是通过new ClasspathXmlApplicationContext(spring配置文件)方式获取的,但是每次从容器中获得Bean时都要编写new ClasspathXmlApplicationContext(spring配置文件) ,这样的弊端是配置文件加载多次, 应用上下文对象创建多次。
在Web项目中,可以使用ServletContextListener监听Web应用的启动,我们可以在Web应用启动时,就加载Spring的配置文件,创建应用上下文对象ApplicationContext,再将其存储到最大的域servletContext域中,这样就可以在任意位置从域中获得应用上下文ApplicationContext对象了。
代码实现:
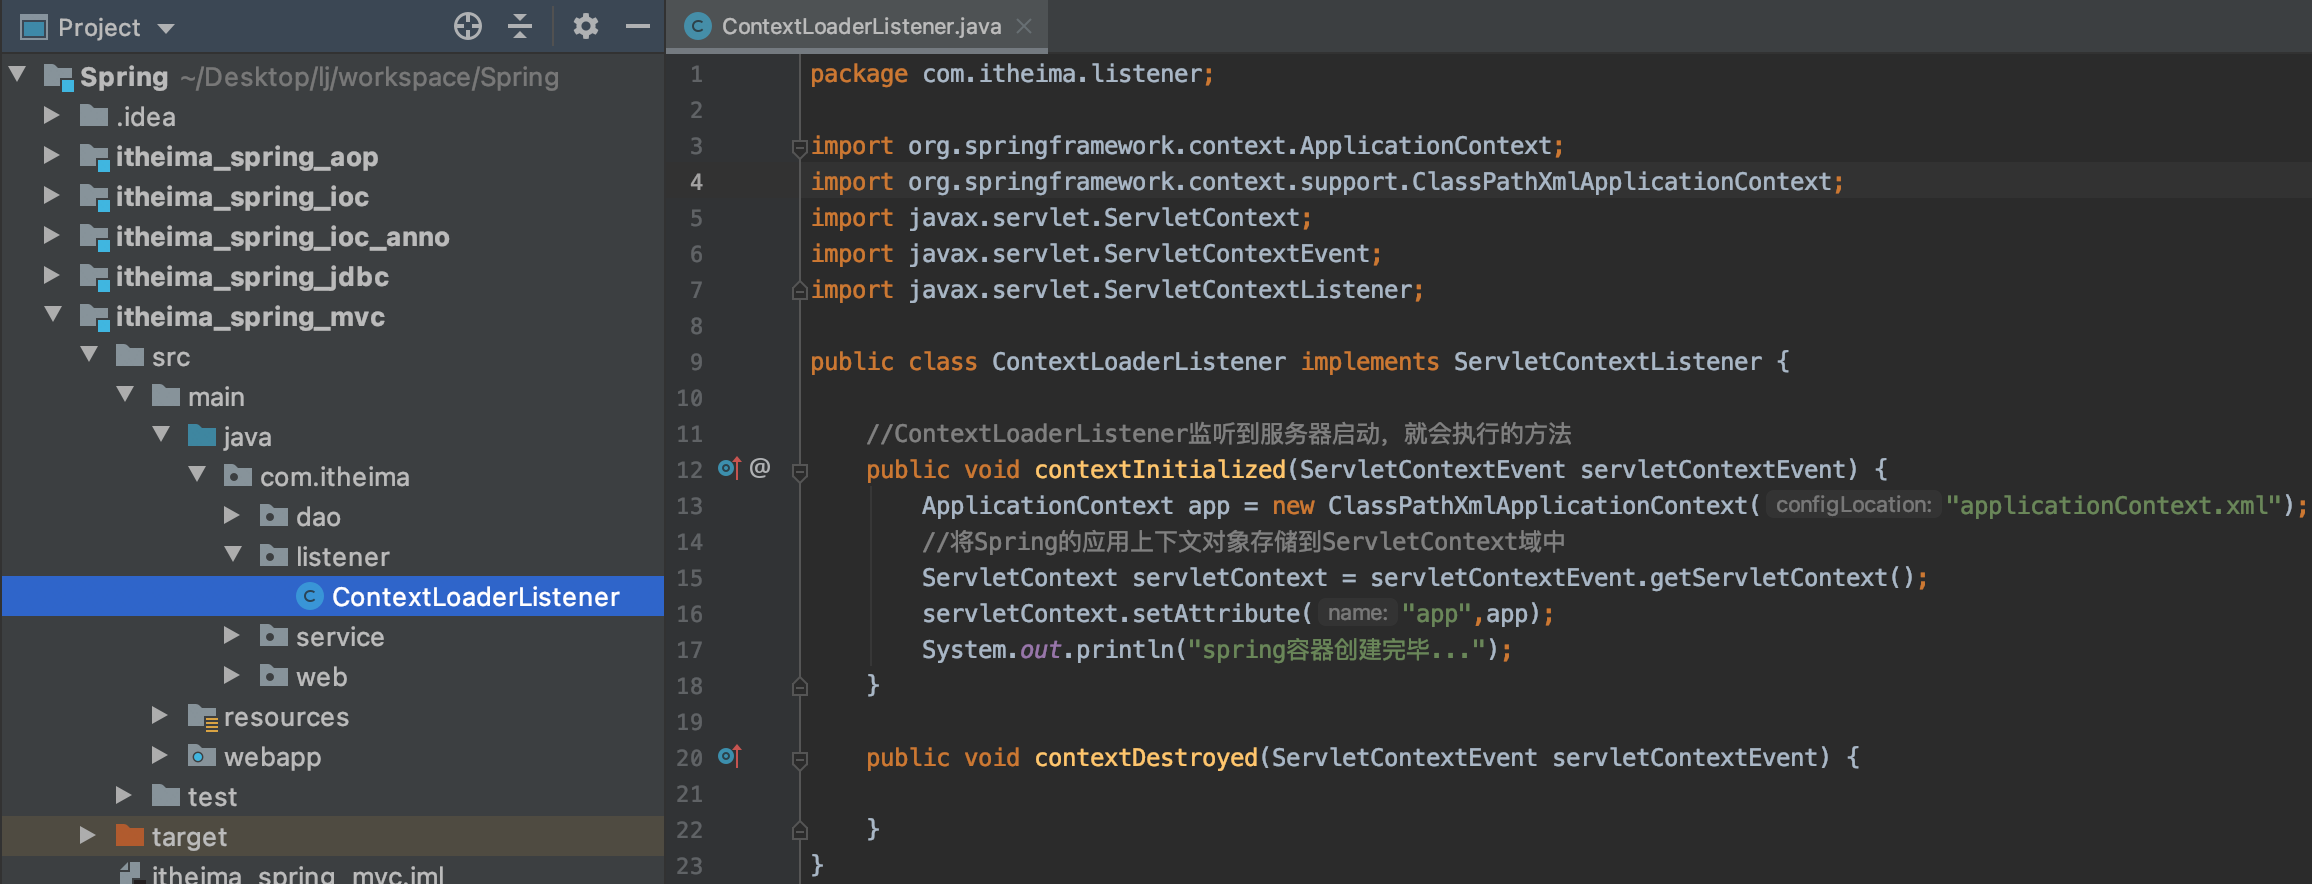
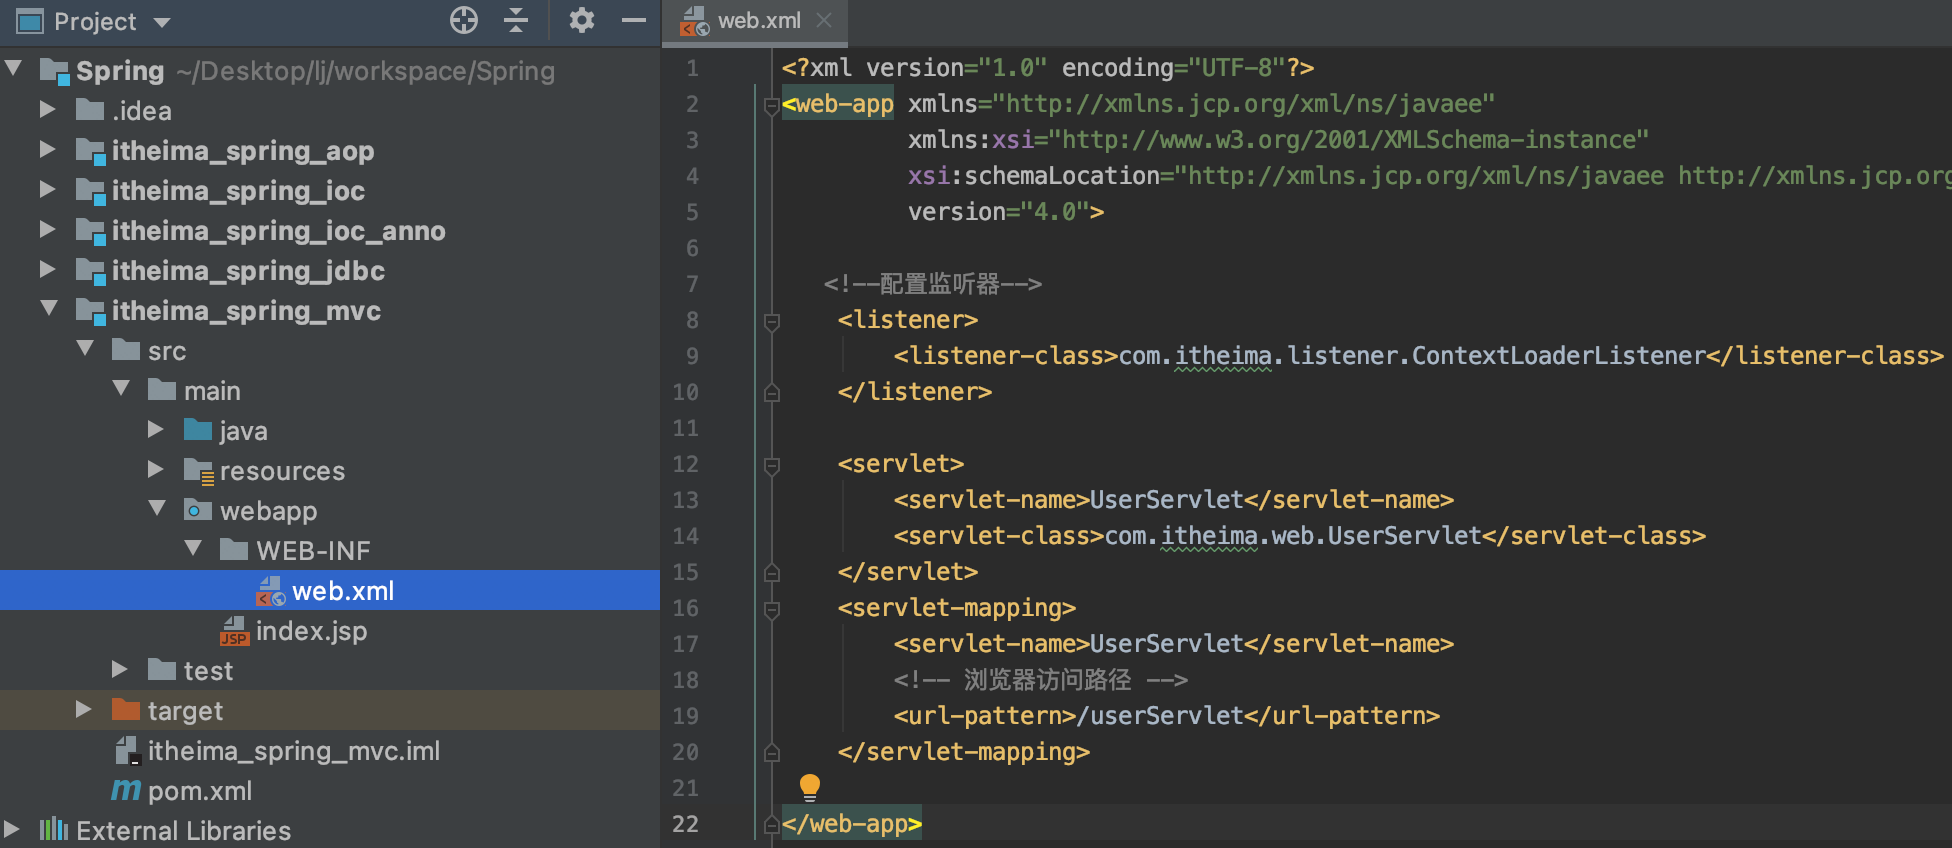
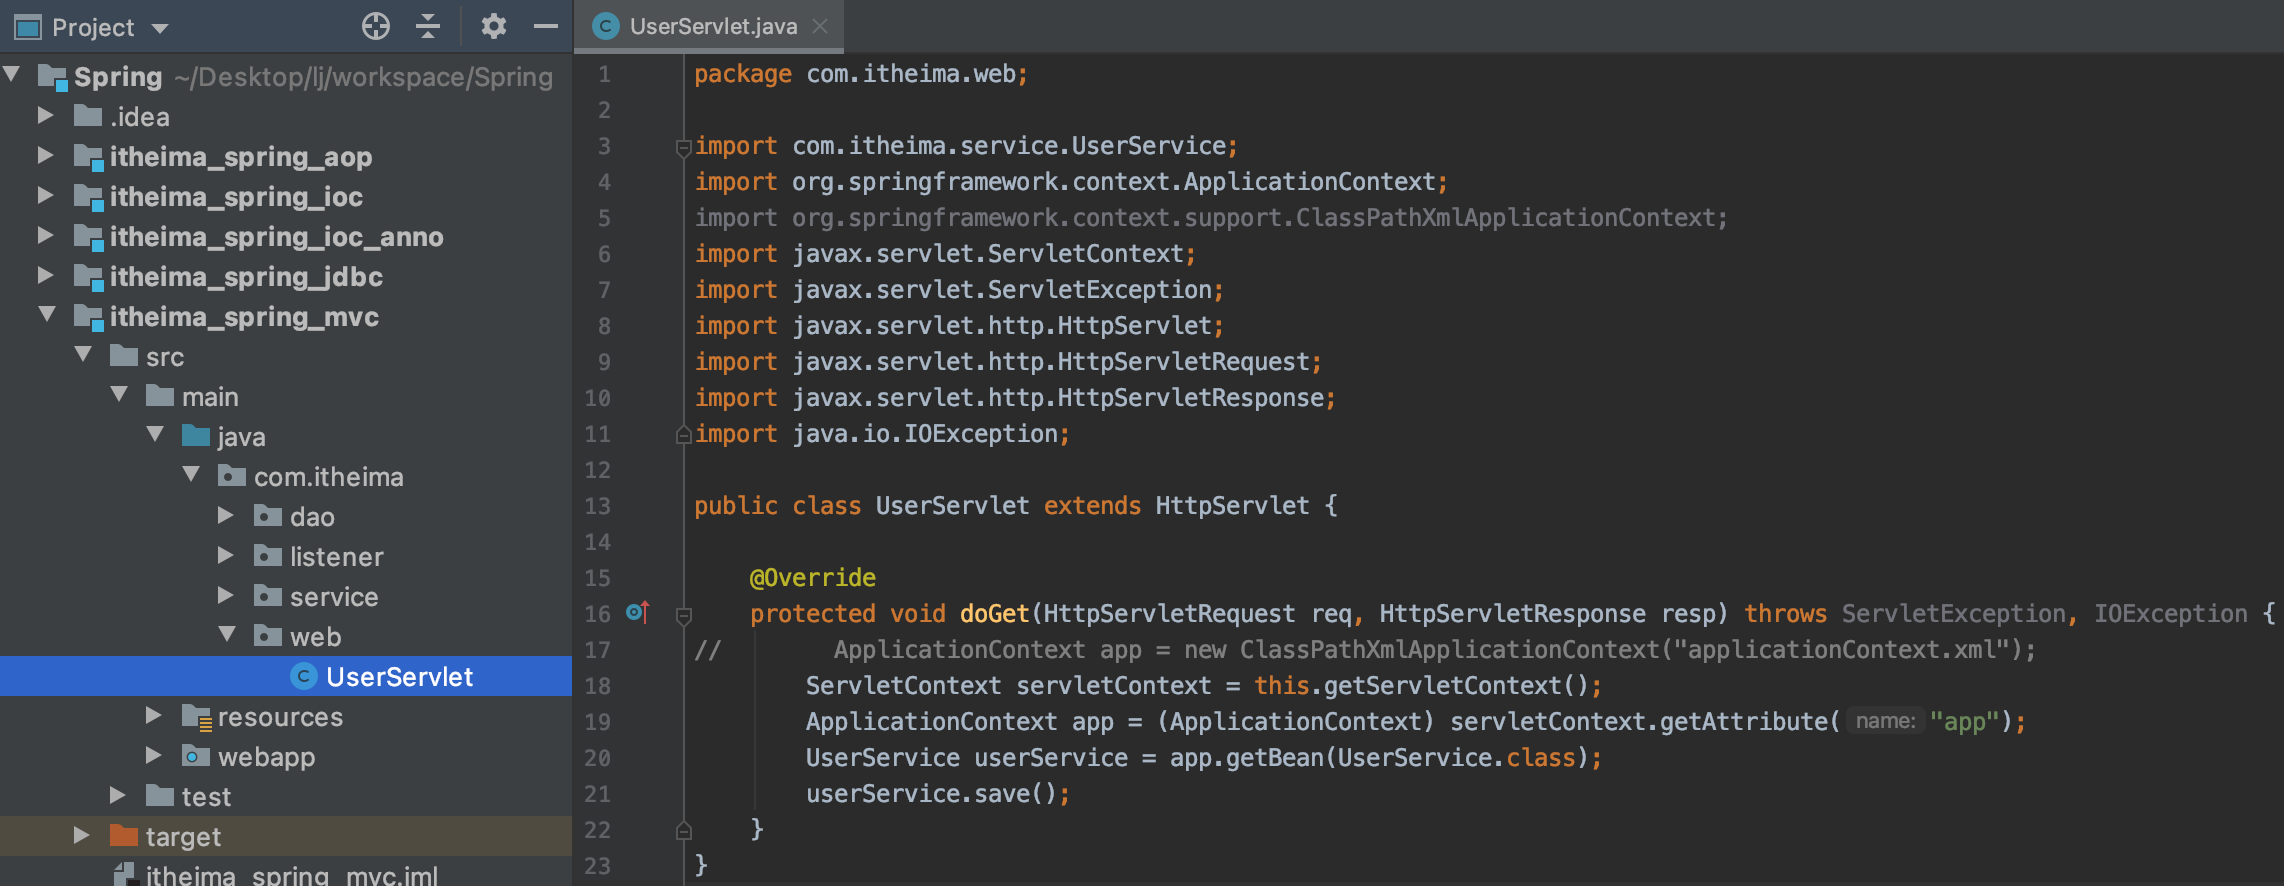
run tomcat,浏览器自动访问localhost:8080,检查控制台输出信息,表示ServletContextListener监听到应用启动后就加载了spring配置文件(创建了spring容器)。

浏览器访问localhost:8080/userServlet,检查控制台输出了save running。

代码优化1:
提取出applicationContext.xml到配置文件,后期可以到配置文件更改名称更方便。
web.xml
<?xml version="1.0" encoding="UTF-8"?>
<web-app xmlns="http://xmlns.jcp.org/xml/ns/javaee"
         xmlns:xsi="http://www.w3.org/2001/XMLSchema-instance"
         xsi:schemaLocation="http://xmlns.jcp.org/xml/ns/javaee http://xmlns.jcp.org/xml/ns/javaee/web-app_4_0.xsd"
         version="4.0">

    <!--全局初始化参数-->
    <context-param>
        <param-name>contextConfigLocation</param-name>
        <param-value>applicationContext.xml</param-value>
    </context-param>

   <!--配置监听器-->
    <listener>
        <listener-class>com.itheima.listener.ContextLoaderListener</listener-class>
    </listener>

    <servlet>
        <servlet-name>UserServlet</servlet-name>
        <servlet-class>com.itheima.web.UserServlet</servlet-class>
    </servlet>
    <servlet-mapping>
        <servlet-name>UserServlet</servlet-name>
        <!-- 浏览器访问路径 -->
        <url-pattern>/userServlet</url-pattern>
    </servlet-mapping>

</web-app>
package com.itheima.listener;

import org.springframework.context.ApplicationContext;
import org.springframework.context.support.ClassPathXmlApplicationContext;
import javax.servlet.ServletContext;
import javax.servlet.ServletContextEvent;
import javax.servlet.ServletContextListener;

public class ContextLoaderListener implements ServletContextListener {

    //ContextLoaderListener监听到服务器启动,就会执行的方法
    public void contextInitialized(ServletContextEvent servletContextEvent) {
        ServletContext servletContext = servletContextEvent.getServletContext();
        //读取web.xml中的全局参数
        String contextConfigLocation = servletContext.getInitParameter("contextConfigLocation");
        ApplicationContext app = new ClassPathXmlApplicationContext(contextConfigLocation);
        //将Spring的应用上下文对象存储到ServletContext域中
        servletContext.setAttribute("app",app);
        System.out.println("spring容器创建完毕...");
    }

    public void contextDestroyed(ServletContextEvent servletContextEvent) {

    }
}
启动tomcat,可以看到应用启动仍旧加载了配置文件。
代码优化2:
package com.itheima.listener;

import org.springframework.context.ApplicationContext;
import javax.servlet.ServletContext;

public class WebApplicationContextUtils {

    public static ApplicationContext getWebApplicationContext(ServletContext servletContext){
        return (ApplicationContext) servletContext.getAttribute("app");
    }
}
package com.itheima.web;

import com.itheima.listener.WebApplicationContextUtils;
import com.itheima.service.UserService;
import org.springframework.context.ApplicationContext;
import org.springframework.context.support.ClassPathXmlApplicationContext;
import javax.servlet.ServletContext;
import javax.servlet.ServletException;
import javax.servlet.http.HttpServlet;
import javax.servlet.http.HttpServletRequest;
import javax.servlet.http.HttpServletResponse;
import java.io.IOException;

public class UserServlet extends HttpServlet {

    @Override
    protected void doGet(HttpServletRequest req, HttpServletResponse resp) throws ServletException, IOException {
//        ApplicationContext app = new ClassPathXmlApplicationContext("applicationContext.xml");
        ServletContext servletContext = this.getServletContext();
//        ApplicationContext app = (ApplicationContext) servletContext.getAttribute("app");
        ApplicationContext app = WebApplicationContextUtils.getWebApplicationContext(servletContext);
        UserService userService = app.getBean(UserService.class);
        userService.save();
    }
}
run tomcat,可以看到应用启动仍旧加载了配置文件。
三、Spring提供获取应用上下文的工具
Spring提供了一个监听器ContextLoaderListener就是对上述功能的封装,在服务器启动时该监听器内部加载Spring配置文件(Spring配置文件默认位置和名称:/WEB-INF/applicationContext.xml,可通过上下文参数自定义Spring配置文件的位置和名称),创建应用上下文对象,并存储到ServletContext域中,提供了一个客户端工具 WebApplicationContextUtils供使用者获得应用上下文对象。
所以我们需要做的只有两件事:
A. 在web.xml中配置ContextLoaderListener监听器(导入spring-web坐标)
B. 使用WebApplicationContextUtils获得应用上下文对象ApplicationContext
1. pom.xml导入Spring集成web的坐标
        <dependency>
            <groupId>org.springframework</groupId>
            <artifactId>spring-web</artifactId>
            <version>5.2.22.RELEASE</version>
        </dependency>
2. web.xml配置ContextLoaderListener监听器
<?xml version="1.0" encoding="UTF-8"?>
<web-app xmlns="http://xmlns.jcp.org/xml/ns/javaee"
         xmlns:xsi="http://www.w3.org/2001/XMLSchema-instance"
         xsi:schemaLocation="http://xmlns.jcp.org/xml/ns/javaee http://xmlns.jcp.org/xml/ns/javaee/web-app_4_0.xsd"
         version="4.0">

    <!--全局初始化参数,自定义Spring配置文件的位置和名称-->
    <context-param>
        <param-name>contextConfigLocation</param-name>
        <param-value>classpath:applicationContext.xml</param-value>
    </context-param>

   <!--配置监听器-->
    <listener>
        <listener-class>org.springframework.web.context.ContextLoaderListener</listener-class>
    </listener>

    <servlet>
        <servlet-name>UserServlet</servlet-name>
        <servlet-class>com.itheima.web.UserServlet</servlet-class>
    </servlet>
    <servlet-mapping>
        <servlet-name>UserServlet</servlet-name>
        <url-pattern>/userServlet</url-pattern>
    </servlet-mapping>

</web-app>
3. 通过工具获得应用上下文对象
package com.itheima.web;

import com.itheima.service.UserService;
import org.springframework.web.context.WebApplicationContext;
import org.springframework.web.context.support.WebApplicationContextUtils;
import javax.servlet.ServletContext;
import javax.servlet.ServletException;
import javax.servlet.http.HttpServlet;
import javax.servlet.http.HttpServletRequest;
import javax.servlet.http.HttpServletResponse;
import java.io.IOException;

public class UserServlet extends HttpServlet {

    @Override
    protected void doGet(HttpServletRequest req, HttpServletResponse resp) throws ServletException, IOException {
        ServletContext servletContext = this.getServletContext();
        WebApplicationContext app = WebApplicationContextUtils.getWebApplicationContext(servletContext);
        UserService userService = app.getBean(UserService.class);
        userService.save();
    }
}
启动tomcat,浏览器访问localhost:8080/userServlet,可以看到控制台输出save running。
启动tomcat报错提示“Context[]启动失败”,可能是spring-web的jar包没有部署
四、知识要点
Spring集成web环境步骤:
1. 导入spring-web包
2. 配置ContextLoaderListener监听器
3. 使用WebApplicationContextUtils获得应用上下文


