第二章 spring cloud config 配置 2.1.4版本
简介
Spring Cloud Config为分布式系统中的外部化配置提供服务器和客户端支持。使用配置服务器,您可以在中心位置管理所有环境中应用程序的外部属性。服务器存储后端的默认实现使用git,因此它很容易支持配置环境的标记版本,并且可以被用于管理内容的各种工具访问。(以上摘自http://cloud.spring.io/spring-cloud-static/Edgware.SR3/single/spring-cloud.html#_spring_cloud_config);
Spring Cloud Config项目是一个解决分布式系统的配置管理方案。它包含了Client和Server两个部分,server提供配置文件的存储、以接口的形式将配置文件的内容提供出去,client通过接口获取数据、并依据此数据初始化自己的应用。这里使用默认的git配置
spring cloud config server
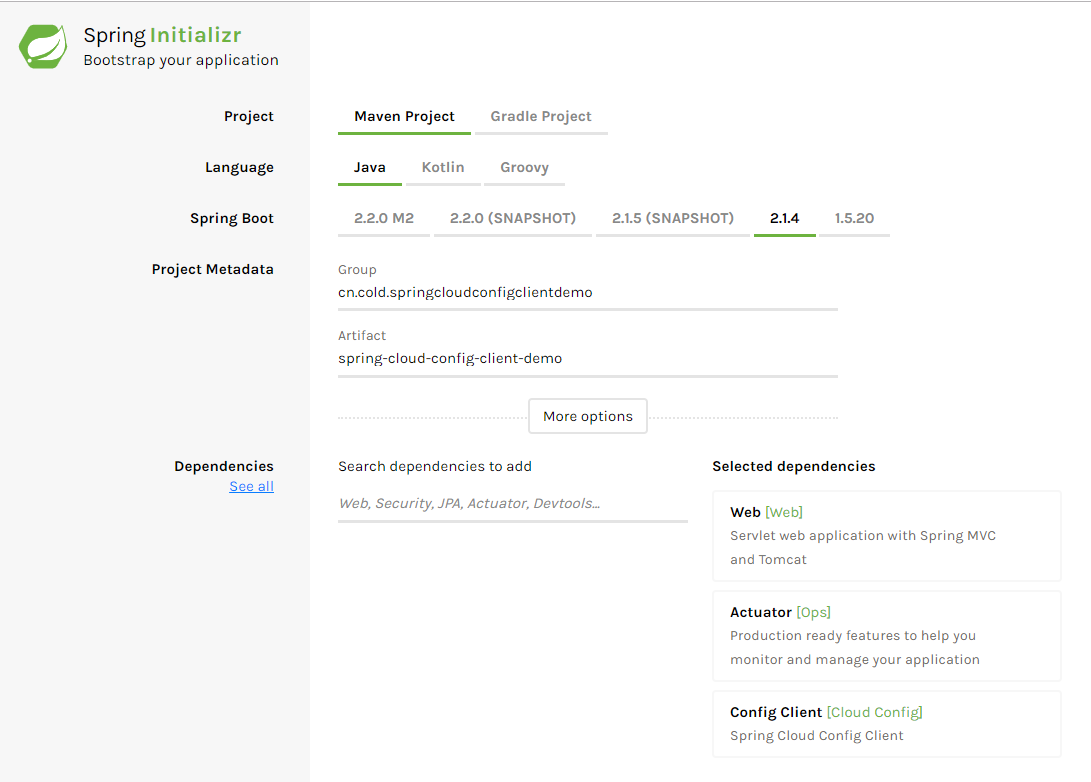
https://start.spring.io/创建项目,取名spring-cloud-config-server-demo,这里dependency选择web,config server,actuator;如图
application.properties:
1 #application.properties配置Actuator,这里可以通过http://localhost:port/actuator/beans访问当前application context中所有bean的信息
2 management.endpoints.web.exposure.include=beans
3 #如果希望放开多个权限,以逗号分隔
4 #management.endpoints.web.exposure.include=beans,env
5 #如果希望放开所有的权限
6 #management.endpoints.web.exposure.include=*
新建bootstrap.properties
1 spring.application.name=config-server
2 server.port=9090
3 #这里使用了gitee的配置
4 spring.cloud.config.server.git.uri=https://git路径/
5 spring.cloud.config.server.git.search-paths=/
6 spring.cloud.config.server.git.username=username
7 spring.cloud.config.server.git.password=password
8 #这里是配置的本地目录
9 #spring.cloud.config.server.git.uri = file:///F:/gitRepsitory
主程序入口
 1 import org.springframework.boot.SpringApplication;
 2 import org.springframework.boot.autoconfigure.SpringBootApplication;
 3 import org.springframework.cloud.config.server.EnableConfigServer;
 4
 5 @SpringBootApplication
 6 @EnableConfigServer
 7 public class SpringCloudConfigServerDemoApplication {
 8
 9     public static void main(String[] args) {    SpringApplication.run(SpringCloudConfigServerDemoApplication.class, args);
10     }
11 }
spring cloud config client
项目下载方式如上,不过config server换成config client,下载导入编辑器
application.properties:
1 management.endpoints.web.exposure.include=beans,env
2 server.port=8080
3 #举个例子,jdbc:mysql://${database.ip}:3306/test,database.ip=localhost,这样server中配置database.ip他会覆盖当前的database.ip
4 my.name = shit
新建bootstrap.properties:
1 ### bootstrap 上下文配置
2 # 配置服务器 URI
3 spring.cloud.config.uri=http://localhost:9090/
4 spring.cloud.config.name=spring-config-client
5 # profile 是激活配置
6 spring.profiles.active=prod
7 spring.cloud.config.profile=prod
8 # label 在Git中指的分支名称
9 spring.cloud.config.label=master
主程序入口:
 1 package cn.cold.springcloudconfigclientdemo;
 2
 3 import org.springframework.boot.SpringApplication;
 4 import org.springframework.boot.WebApplicationType;
 5 import org.springframework.boot.autoconfigure.SpringBootApplication;
 6 import org.springframework.cloud.bootstrap.config.PropertySourceLocator;
 7 import org.springframework.cloud.context.refresh.ContextRefresher;
 8 import org.springframework.context.annotation.Bean;
 9 import org.springframework.context.annotation.Configuration;
10 import org.springframework.core.Ordered;
11 import org.springframework.core.annotation.Order;
12 import org.springframework.core.env.Environment;
13 import org.springframework.core.env.MapPropertySource;
14 import org.springframework.core.env.PropertySource;
15 import org.springframework.scheduling.annotation.EnableScheduling;
16 import org.springframework.scheduling.annotation.Scheduled;
17
18 import java.util.HashMap;
19 import java.util.Map;
20 import java.util.Set;
21
22 @SpringBootApplication
23 @EnableScheduling
24 public class SpringCloudConfigClientDemoApplication {
25
26     public static void main(String[] args) {
27         SpringApplication application = new SpringApplication(SpringCloudConfigClientDemoApplication.class);
28         application.setWebApplicationType(WebApplicationType.SERVLET);
29         application.run(args);
30     }
31
32     private final ContextRefresher contextRefresher;
33
34     private final Environment environment;
35
36     public SpringCloudConfigClientDemoApplication(ContextRefresher contextRefresher,
37                                                   Environment environment) {
38         this.contextRefresher = contextRefresher;
39         this.environment = environment;
40     }
41
42     /**
43      * 这里设置定时刷新获取当前配置,不然只能通过重启刷新配置
44      */
45     @Scheduled(fixedRate = 5 * 1000, initialDelay = 3 * 1000)
46     public void autoRefresh() {
47         Set<String> updatedPropertyNames = contextRefresher.refresh();
48         updatedPropertyNames.forEach(propertyName ->
49                 System.err.printf("[Thread :%s] 当前配置已更新,具体 Key:%s , Value : %s \n",
50                         Thread.currentThread().getName(),
51                         propertyName,
52                         environment.getProperty(propertyName)
53                 ));
54     }
55 }
新建controller,比如我们取名为FuckController:
package cn.cold.springcloudconfigclientdemo.controller;

import org.springframework.beans.factory.annotation.Value;
import org.springframework.cloud.context.config.annotation.RefreshScope;
import org.springframework.web.bind.annotation.GetMapping;
import org.springframework.web.bind.annotation.RestController;

/*
 * @create 2019-05-05 19:36
 * @Author 江湖人称洗发水
 * @Description //TODO
 **/
@RestController
@RefreshScope  //这里是刷新my.name这个属性值
public class FuckController {

    @Value("${my.name}")
    private String myName;

    @GetMapping("/my-name")
    public String getName(){
        return myName;
    }
}
Gitee
这里上传git配置文件有四个,可以在里面输入不同的值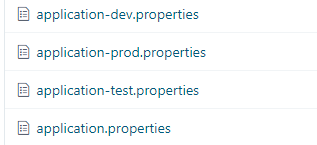
启动
两个项目启动,这里访问http://localhost:8080/my-name会返回,git中的配置文件的值那就代表获取到了;然后可以进一步http://localhost:8080/actuator/env查看spring.cloud.config.uri:这里就是config server 的地址;
通过http://localhost:8080/actuator/env查看当前配置文件信息如图
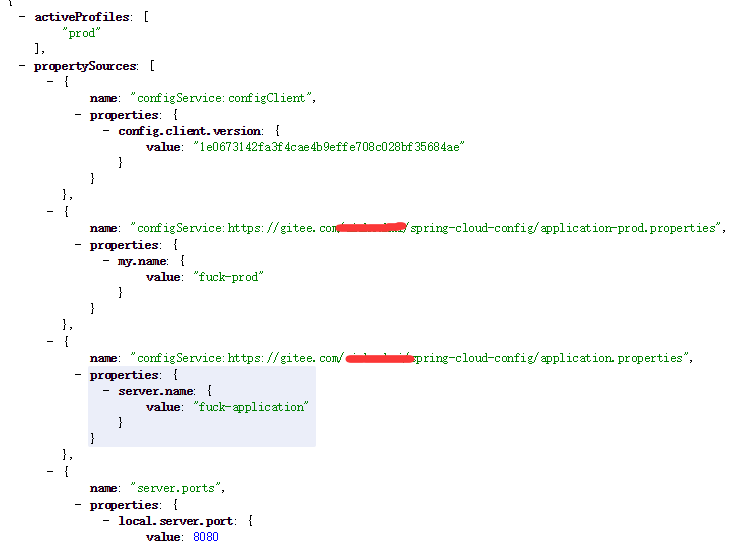
Env:参考EnvironmentEndpoint类
Environment关联多个带名称的PropertySources
参考spring 源码 AbstractRefreshableWebApplicationContext
1 protected void initPropertySources() {
2   ConfigurableEnvironment env = getEnvironment();
3   if (env instanceof ConfigurableWebEnvironment) {
4     ((ConfigurableWebEnvironment) env).initPropertySources(this.servletContext, this.servletConfig);
5   }
6 }
Environment 有两种实现方式:
普通类型:StandardEnvironment
Web类型:StandardServletEnvironment
Enviroment 关联着一个PropertySources 实例
PropertySources 关联着多个PropertySource,并且有优先级,这里可以通过url http://localhost:8080/actuator/env看到
关于 Spring Boot 优先级顺序,可以参考:https://docs.spring.io/spring-boot/docs/2.0.0.BUILD-SNAPSHOT/reference/htmlsingle/#boot-features-external-config
其他
当我们希望自己的配置不被修改,可以用spi来加载,例如my.name这里我就想指定为wuyanzu,可以添加以下代码
 1 @Configuration
 2 @Order(Ordered.HIGHEST_PRECEDENCE + 100)
 3 public static class CustomizePropertySourceLocator implements PropertySourceLocator {
 4
 5   @Override
 6    public PropertySource<?> locate(Environment environment) {
 7      Map<String, Object> source = new HashMap<>();
 8       source.put("my.name", "8081");
 9       MapPropertySource propertySource =
10                     new MapPropertySource("my-property-source", source);
11       return propertySource;
12    }
13 }

 浙公网安备 33010602011771号