【 Linux 网络虚拟化 】Netns
1.创建网络空间
ip netns add r1

ip netns add r2
2.查看网络空间
ip netns list
结果:

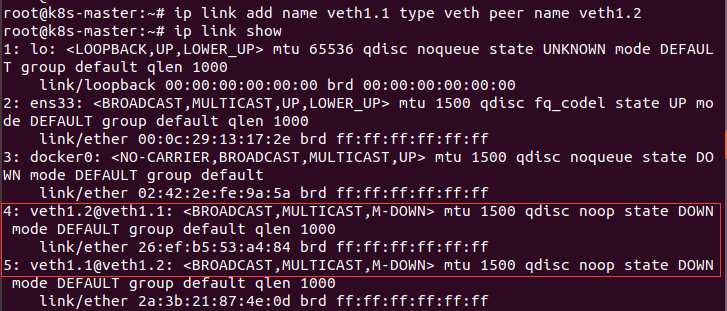
3.创建虚拟网卡,虚拟网卡分前半段和后半段
root@k8s-master:~# ip link add name veth1.1 type veth peer name veth1.2
结果:
4.剔除veth1.2虚拟网卡到r1网络空间,保留veth1.1虚拟网卡
root@k8s-master:~# ip link set dev veth1.2 netns r1
结果(r1网络空间有veth1.2虚拟网卡):
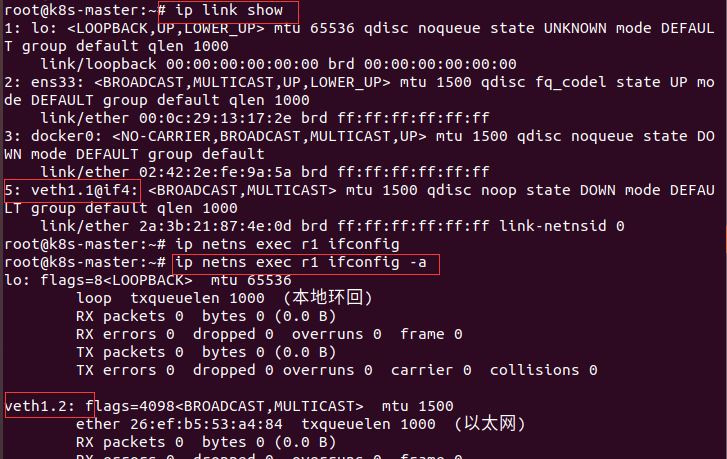
5.修改r1网络空间的虚拟网卡的名称:
root@k8s-master:~# ip netns exec r1 ip link set dev veth1.2 name eth0
结果:

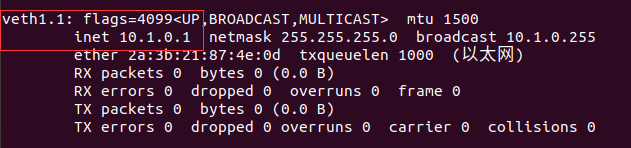
6.查看虚拟网卡
root@k8s-master:~# ifconfig veth1.1 10.1.0.1/24 up
root@k8s-master:~# ifconfig
结果:
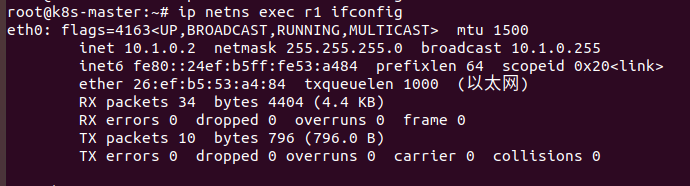
7.激活r1网络空间的虚拟网卡
root@k8s-master:~# ip netns exec r1 ifconfig eth0 10.1.0.2/24 up
结果:
8.ping r1网络空间的虚拟网卡
root@k8s-master:~# ping 10.1.0.2
PING 10.1.0.2 (10.1.0.2) 56(84) bytes of data.
64 bytes from 10.1.0.2: icmp_seq=1 ttl=64 time=0.065 ms
64 bytes from 10.1.0.2: icmp_seq=2 ttl=64 time=0.042 ms
64 bytes from 10.1.0.2: icmp_seq=3 ttl=64 time=0.042 ms
64 bytes from 10.1.0.2: icmp_seq=4 ttl=64 time=0.046 ms
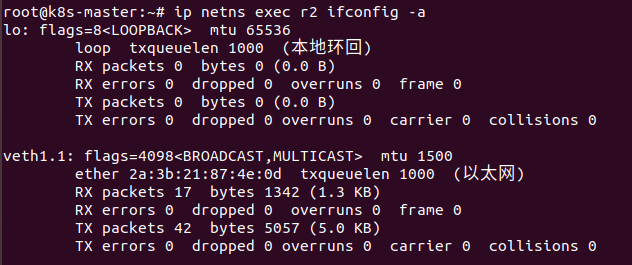
9.查看r2网络空间的虚拟网卡
root@k8s-master:~# ip netns exec r2 ifconfig -a
结果:
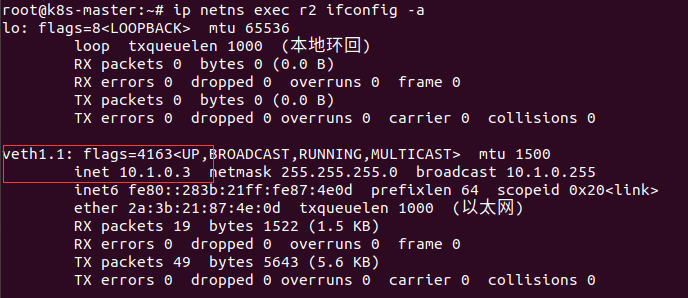
10.激活r2的虚拟网卡
root@k8s-master:~# ip netns exec r2 ifconfig veth1.1 10.1.0.3/24
结果:
11.ping r2网络空间的虚拟网卡
root@k8s-master:~# ip netns exec r2 ping 10.1.0.2
结果:
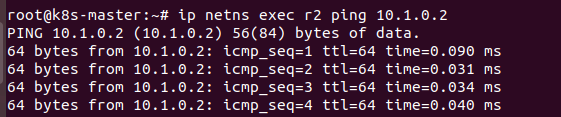
这样,就完成了在宿主机中,两个虚拟主机隔离模式的通信。

 浙公网安备 33010602011771号