Vue(一) 入门
一、简介
Vue是什么
Vue是一个当前流行的前端框架
Vue (读音 /vjuː/,类似于 view) 是一套用于构建用户界面的渐进式框架。与其它大型框架不同的是,Vue 被设计为可以自底向上逐层应用。Vue 的核心库只关注视图层,不仅易于上手,还便于与第三方库或既有项目整合。另一方面,当与现代化的工具链以及各种支持类库结合使用时,Vue 也完全能够为复杂的单页应用提供驱动。
渐进式框架
笔者理解的“渐进式框架”也非常简单,就是用你想用或者能用的功能特性,你不想用的部分功能可以先不用。VUE不强求你一次性接受并使用它的全部功能特性。
场景一:公司刚开始一个项目,技术人员对Vue的掌握也不足够。那么我们就不能使用VUE了么?当然不是,如果你只是使用VUE做些基础操作,如:页面渲染、表单处理提交功能,那还是非常简单的,成熟技术人员上手也就一两天。完全可以用它去代替jquery。并不需要你去引入其他复杂特性功能。
场景二:我们项目用了VUE,使用的效果也挺好。那么我们想逐渐实现代码组件化,实现代码的复用,或者是基于组件原型的跨项目的代码复用。那么我们就可以引入VUE的components组件特性了。
场景三:我们的项目规模逐渐的变大了,我们可能会逐渐用到前端路由、状态集中管理、并最终实现一个高度工程化的前端项目。这些功能特性我们可以逐步引入,当然不用也可以。
所以VUE的适用面很广,你可以用它代替老项目中的JQuery。也可以在新项目启动初期,有限的使用VUE的功能特性,从而降低上手的成本。
Vue开始是针对PC端,对移动端支持不好,于是很多国内团队对其移动端进行了完善。饿了么团队开发了针对移动端的组件MintUI和ElementUI,还有滴滴团队、MUI等。
PC端项目和移动端项目区别:
- 屏幕宽度 PC端: w > 992px ;移动端:w < 992px
- 操作方式 PC端:鼠标和键盘;移动端:手指
- 事件 PC端:click/blur/keyup/keydown;移动端: touchstart/touchmove/touchend/touched/tap/longtap
Vue.js优点
- 体积小
- 更高的运行效率 基于虚拟DOM
- 双向数据绑定
- 生态丰富、学习成本低
Vue特点
- 解耦视图和数据
- 可复用的组件
- 前端路由技术
- 状态管理
- 虚拟DOM
安装
方式一:直接CDN引入
对于开发环境,你可以这样使用最新版本:
<script src="https://cdn.jsdelivr.net/npm/vue/dist/vue.js"></script>
对于生产环境,我们推荐链接到一个明确的版本号和构建文件,以避免新版本造成的不可预期的破坏:
<script src="https://cdn.jsdelivr.net/npm/vue@2.6.11"></script>
方式二:下载和引入
开发环境:https://vuejs.org/js/vue.js
生成环境:https://vuejs.org/js/vue.min.js
方式三:NPM安装
# 最新稳定版
$ npm install vue
简单示例
体验一下Vue的响应式,响应式是当数据发生变化的时候,页面自动更改。
编程范式:命令式编程(Imperative)、声明式编程(Declarative)和函数式编程(Functional)
消息展示
<!DOCTYPE html>
<html>
    <head>
        <meta charset="utf-8">
        <title></title>
    </head>
    <body>
        <div id="app">
            <h2>{{message}}</h2>
            <h2>{{name}}</h2>
        </div>
        <script src="./js/vue.js"></script>
        <script>
            // var有很多缺陷,用let(变量)或const(常量)
            // 编程范式:声明式编程
            const app = new Vue({
                el:"#app", // 用于挂载要管理的数据
                data:{ // 定义数据
                    message: 'Hello World!',
                    name:'vue'
                }
            })
            // JS的做法(命令式编程)
            // 1.创建div元素,设置id属性
            // 2.定义一个变量叫message-box
            // 3.将message变量放在前面的div元素中显示
        </script>
    </body>

</html>
阅读JS代码,发现创建了一个Vue对象。创建Vue对象的时候,{}传入了一些options:
- el属性。该属性决定了这个Vue对象挂载到哪一个元素上,这里挂载到了id为app的元素上。
- data属性。该属性会存储一些数据。这些数据可用在页面中直接定义出来,如上。也可以来自网络,从服务器接收。
列表展示
展示一个数据列表
<!DOCTYPE html>
<html>
    <head>
        <meta charset="utf-8">
        <title></title>
    </head>
    <body>
        <div id="app">
            <ul>
                <li v-for="item in movies">{{item}}</li>
            </ul>
        </div>
        <script src="./js/vue.js"></script>
        <script>
            // var有很多缺陷,用let(变量)或const(常量)
            // 编程范式:声明式编程
            const app = new Vue({
                el:"#app", // 用于挂载要管理的数据
                data:{ // 定义数据
                    message: 'Hello World!',
                    movies:['星球大战', '星际穿越', '复仇者联盟', '速度与激情', '阿甘正传']
                }
            })
        </script>
    </body>
</html>
结果

计数器
实现一个计数器,点击 + 计数器加1,点击 - 计数器减1.
属性methods:用于在Vue对象中定义方法。
指令@click:用于监听某个元素的点击事件,并且需要指定当发生点击时,执行的方法(通常是methods中定义的方法)。
<!DOCTYPE html>
<html>
    <head>
        <meta charset="utf-8">
        <title></title>
    </head>
    <body>
            <body>
            <div id="app">
                <h2>当前计数:{{counter}}</h2>
                <!-- <button v-on:click="counter++">+</button>
                <button v-on:click="counter--">-</button> -->
                <button v-on:click="add">+</button>
                <button v-on:click="sub">-</button>
            </div>
            <script src="./js/vue.js"></script>
            <script>
                const app = new Vue({
                    el:"#app", // 用于挂载要管理的数据
                    data:{ // 定义数据
                        counter: 0,
                    },
                    methods:{
                        add:function(){
                            console.log('add被执行');
                            this.counter++;
                        },
                        sub: function(){
                            console.log('add被执行');
                            this.counter--;
                        }
                    }
                })

            </script>
    </body>
</html>
Vue中的MVVM
View层
视图层,通常就是DOM层,主要的作用是给用户展示信息。
Model层
数据层,数据可能是我们固定的数据,更多的是来自服务器,从网络上请求下来的数据。
VueModel层
视图模型层,是View和Model沟通的桥梁。一方面实现了Data Binding,也就是数据绑定,将Model的改变实时的反应到View中。另一方面实现了DOM Listener,也就是DOM监听,当DOM发生一些事件(点击、滚动、touch等)时,可用监听到,并在需要的情况下改变对应的Data。
视图模型是mvvm模式的核心,它是连接view和model的桥梁。它有两个方向:一是将模型转化成视图,即将后端传递的数据转化成所看到的页面。实现的方式是:数据绑定。二是将视图转化成模型,即将所看到的页面转化成后端的数据。实现的方式是:DOM 事件监听。这两个方向都实现的,我们称之为数据的双向绑定。总结:在MVVM的框架下视图和模型是不能直接通信的。它们通过ViewModel来通信,ViewModel通常要实现一个observer观察者,当数据发生变化,ViewModel能够监听到数据的这种变化,然后通知到对应的视图做自动更新,而当用户操作视图,ViewModel也能监听到视图的变化,然后通知数据做改动,这实际上就实现了数据的双向绑定。


MVVM - Model View ViewModel,数据,视图,视图模型
- 三者与
Vue的对应:view对应template,vm对应new Vue({…}),model对应data - 三者的关系:
view可以通过事件绑定的方式影响model,model可以通过数据绑定的形式影响到view,viewModel是把model和view连起来的连接器
options
el
-
类型:
string | Element -
限制:只在用
new创建实例时生效。 -
详细:
提供一个在页面上已存在的 DOM 元素作为 Vue 实例的挂载目标。可以是 CSS 选择器,也可以是一个 HTMLElement 实例。
在实例挂载之后,元素可以用
vm.$el访问。如果在实例化时存在这个选项,实例将立即进入编译过程,否则,需要显式调用
vm.$mount()手动开启编译。
data
-
类型:
Object | Function -
限制:组件的定义只接受
function。 -
详细:
Vue 实例的数据对象。Vue 将会递归将 data 的属性转换为 getter/setter,从而让 data 的属性能够响应数据变化。对象必须是纯粹的对象 (含有零个或多个的 key/value 对):浏览器 API 创建的原生对象,原型上的属性会被忽略。大概来说,data 应该只能是数据 - 不推荐观察拥有状态行为的对象。
一旦观察过,你就无法在根数据对象上添加响应式属性。因此推荐在创建实例之前,就声明所有的根级响应式属性。
实例创建之后,可以通过
vm.$data访问原始数据对象。Vue 实例也代理了 data 对象上所有的属性,因此访问vm.a等价于访问vm.$data.a。以
_或$开头的属性 不会 被 Vue 实例代理,因为它们可能和 Vue 内置的属性、API 方法冲突。你可以使用例如vm.$data._property的方式访问这些属性。当一个组件被定义,
data必须声明为返回一个初始数据对象的函数,因为组件可能被用来创建多个实例。如果data仍然是一个纯粹的对象,则所有的实例将共享引用同一个数据对象!通过提供data函数,每次创建一个新实例后,我们能够调用data函数,从而返回初始数据的一个全新副本数据对象。如果需要,可以通过将
vm.$data传入JSON.parse(JSON.stringify(...))得到深拷贝的原始数据对象。
var data = { a: 1 }

// 直接创建一个实例
var vm = new Vue({
  data: data
})
vm.a // => 1
vm.$data === data // => true

// Vue.extend() 中 data 必须是函数
var Component = Vue.extend({
  data: function () {
    return { a: 1 }
  }
})
注意,如果你为 data 属性使用了箭头函数,则 this 不会指向这个组件的实例,不过你仍然可以将其实例作为函数的第一个参数来访问。
data: vm => ({ a: vm.myProp })
methods
-
类型:
{ [key: string]: Function } -
详细:
methods 将被混入到 Vue 实例中。可以直接通过 VM 实例访问这些方法,或者在指令表达式中使用。方法中的
this自动绑定为 Vue 实例。
var vm = new Vue({
  data: { a: 1 },
  methods: {
    plus: function () {
      this.a++
    }
  }
})
vm.plus()
vm.a // 2
生命周期
这里说的 Vue 的生命周期指的是 Vue 组件的生命周期
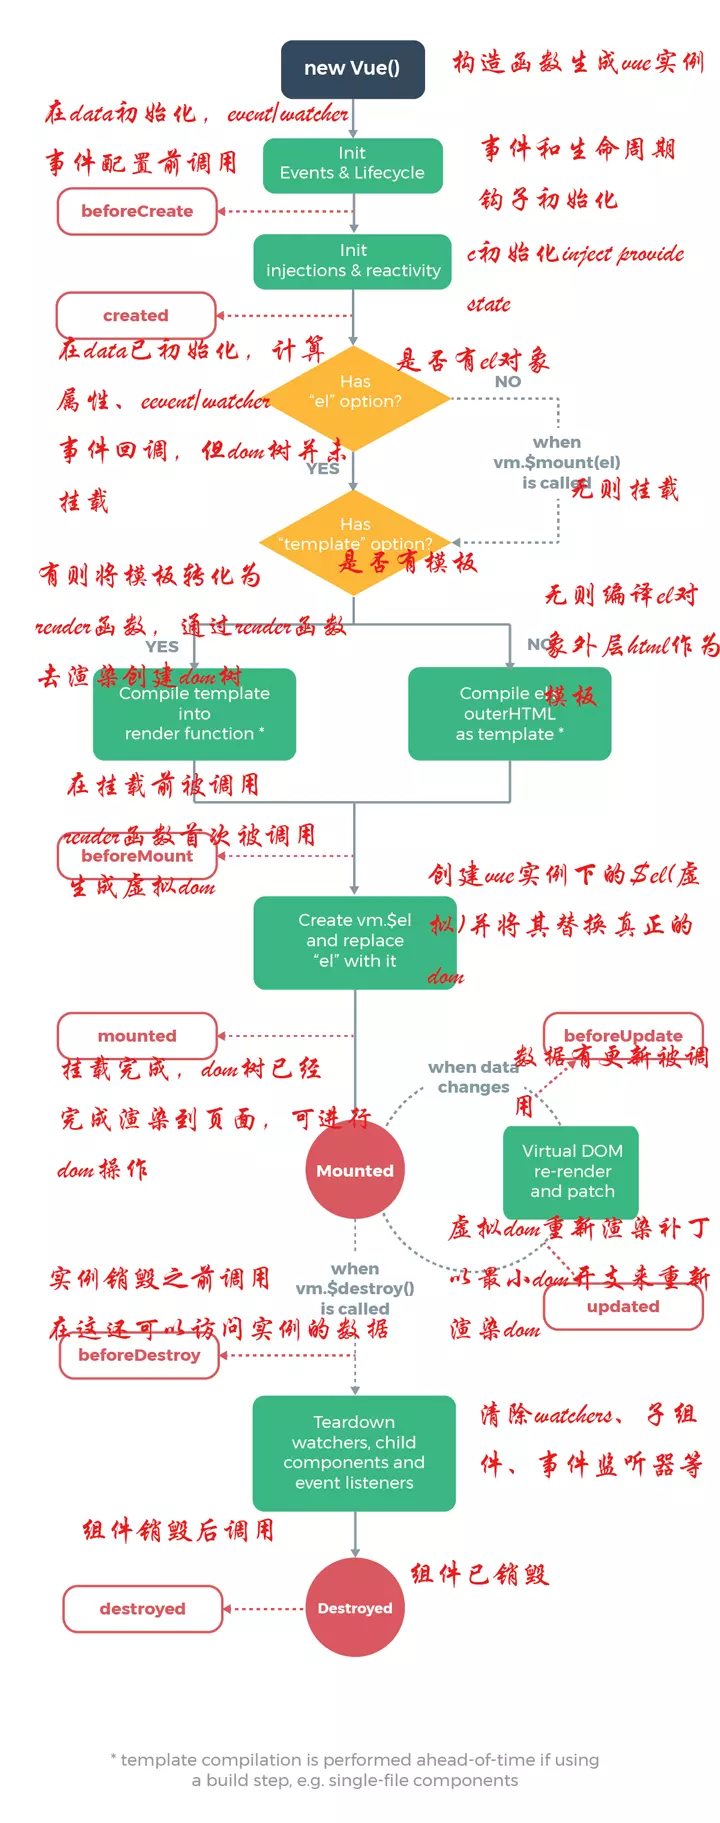
总的来说 Vue 的生命周期包括四个状态
1、creating 状态--vue 实例被创建的过程
2、mounting 状态--挂到到真实的 DOM 节点
3、updating 状态--如果 data 中的数据改变就会触发对应组件的重新渲染
4、destroying 状态--实例销毁
上面个四个状态对应 8 个方法
| 方法名 | 状态 | 含义 |
|---|---|---|
| beforeCreate | creating 状态 | 实例创建之前调用 |
| created | creating 状态 | 实例创建成功,此时 data 中的数据显示出来了 |
| beforeMount | mounting 状态 | 数据中的 data 在模版中先占一个位置 |
| mounted | mounting 状态 | 模版中的 data 数据直接显示出来了 |
| beforeUpdate | updating 状态 | 当 data 数据发生变化调用,发生在虚拟 DOM 重新渲染和打补丁之前 |
| updated | updating 状态 | 数据更改导致的虚拟 DOM 重新渲染和打补丁 |
| beforeDestroy | destroying 状态 | 在 vue 实例销毁之前调用,此时实例任然可用 |
| destroyed | destroying 状态 | 在 vue 实例销毁之后调用,vue 实例指示的所有东西都会解绑定,所有的事件监听器会被移除,所有的子实例也会被销毁 |
Vue CLI
Node 版本要求
Vue CLI 需要 Node.js 8.9 或更高版本 (推荐 8.11.0+)。你可以使用 nvm 或 nvm-windows 在同一台电脑中管理多个 Node 版本。
npm install -g @vue/cli
# OR
yarn global add @vue/cli
npm install -g @vue/cli-service-global
E:\code\web\vuedemo>vue create vue-begin
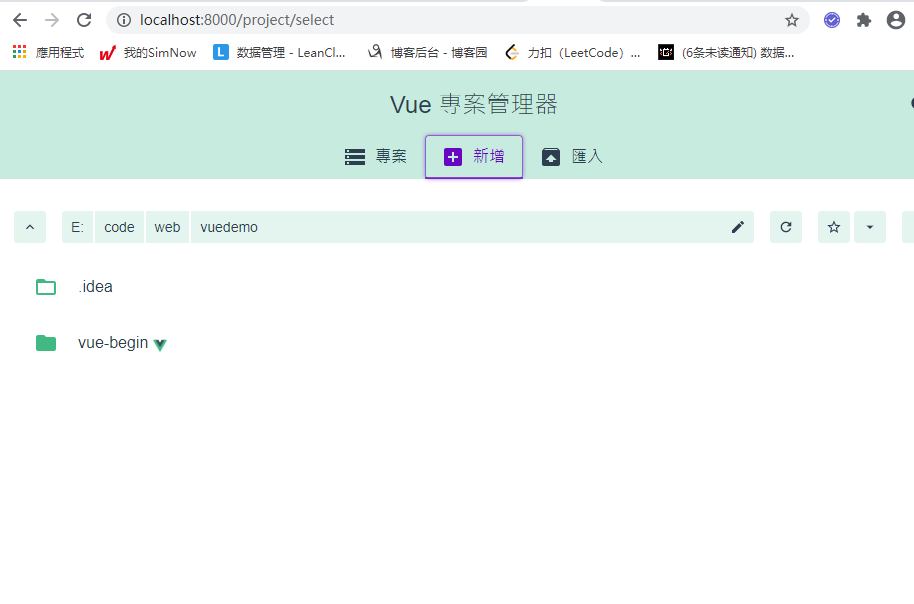
E:\code\web\vuedemo>vue ui
�  Starting GUI...
�  Ready on http://localhost:8000
vue inspect > output.js
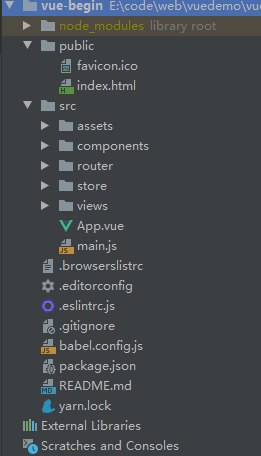
package.json 管理依赖
babel.config.js 配置es6的语法
eslintrc.js eslint扩展的语法

二、模板语法
Vue.js 使用了基于 HTML 的模板语法,允许开发者声明式地将 DOM 绑定至底层 Vue 实例的数据。所有 Vue.js 的模板都是合法的 HTML ,所以能被遵循规范的浏览器和 HTML 解析器解析。
在底层的实现上,Vue 将模板编译成虚拟 DOM 渲染函数。结合响应系统,Vue 能够智能地计算出最少需要重新渲染多少组件,并把 DOM 操作次数减到最少。
如果你熟悉虚拟 DOM 并且偏爱 JavaScript 的原始力量,你也可以不用模板,直接写渲染 (render) 函数,使用可选的 JSX 语法。
插值操作
文本
数据绑定最常见的形式就是使用“Mustache”语法 (双大括号) 的文本插值:
<span>Message: {{ msg }}</span>
Mustache 标签将会被替代为对应数据对象上 msg 属性的值。无论何时,绑定的数据对象上 msg 属性发生了改变,插值处的内容都会更新。
通过使用 v-once 指令,你也能执行一次性地插值,当数据改变时,插值处的内容不会更新。但请留心这会影响到该节点上的其它数据绑定:
<span v-once>这个将不会改变: {{ msg }}</span>
原始 HTML
双大括号会将数据解释为普通文本,而非 HTML 代码。为了输出真正的 HTML,你需要使用 v-html 指令:
<p>Using mustaches: {{ rawHtml }}</p>
<p>Using v-html directive: <span v-html="rawHtml"></span></p>
Using mustaches: <span style="color: red">This should be red.</span>
Using v-html directive: This should be red.
这个 span 的内容将会被替换成为属性值 rawHtml,直接作为 HTML——会忽略解析属性值中的数据绑定。注意,你不能使用 v-html 来复合局部模板,因为 Vue 不是基于字符串的模板引擎。反之,对于用户界面 (UI),组件更适合作为可重用和可组合的基本单位。
你的站点上动态渲染的任意 HTML 可能会非常危险,因为它很容易导致 XSS 攻击。请只对可信内容使用 HTML 插值,绝不要对用户提供的内容使用插值。
Attribute
Mustache 语法不能作用在 HTML attribute 上,遇到这种情况应该使用 v-bind 指令:
<div v-bind:id="dynamicId"></div>
对于布尔 attribute (它们只要存在就意味着值为 true),v-bind 工作起来略有不同,在这个例子中:
<button v-bind:disabled="isButtonDisabled">Button</button>
如果 isButtonDisabled 的值是 null、undefined 或 false,则 disabled attribute 甚至不会被包含在渲染出来的 <button> 元素中。
使用 JavaScript 表达式
迄今为止,在我们的模板中,我们一直都只绑定简单的属性键值。但实际上,对于所有的数据绑定,Vue.js 都提供了完全的 JavaScript 表达式支持。
{{ number + 1 }}

{{ ok ? 'YES' : 'NO' }}

{{ message.split('').reverse().join('') }}

<div v-bind:id="'list-' + id"></div>
这些表达式会在所属 Vue 实例的数据作用域下作为 JavaScript 被解析。有个限制就是,每个绑定都只能包含单个表达式,所以下面的例子都不会生效。
<!-- 这是语句,不是表达式 -->
{{ var a = 1 }}

<!-- 流控制也不会生效,请使用三元表达式 -->
{{ if (ok) { return message } }}
指令
指令 (Directives) 是带有 v- 前缀的特殊 attribute。指令 attribute 的值预期是单个 JavaScript 表达式 (v-for 是例外情况,稍后我们再讨论)。指令的职责是,当表达式的值改变时,将其产生的连带影响,响应式地作用于 DOM。回顾我们在介绍中看到的例子:
<p v-if="seen">现在你看到我了</p>
这里,v-if 指令将根据表达式 seen 的值的真假来插入/移除 <p> 元素。
v-once
-
不需要表达式
-
详细:
只渲染元素和组件一次。随后的重新渲染,元素/组件及其所有的子节点将被视为静态内容并跳过。这可以用于优化更新性能。
<!-- 单个元素 -->
<span v-once>This will never change: {{msg}}</span>
<!-- 有子元素 -->
<div v-once>
  <h1>comment</h1>
  <p>{{msg}}</p>
</div>
<!-- 组件 -->
<my-component v-once :comment="msg"></my-component>
<!-- `v-for` 指令-->
<ul>
  <li v-for="i in list" v-once>{{i}}</li>
</ul>
-
参考:
v-html
-
预期:
string -
详细:
更新元素的
innerHTML。注意:内容按普通 HTML 插入 - 不会作为 Vue 模板进行编译 。如果试图使用v-html组合模板,可以重新考虑是否通过使用组件来替代。在网站上动态渲染任意 HTML 是非常危险的,因为容易导致 XSS 攻击。只在可信内容上使用
v-html,永不用在用户提交的内容上。 -
示例:
<div v-html="html"></div> // 指令后面的往往跟一个string类型,会将string的html解析出来并渲染
- html是data中的html属性
-
参考:数据绑定语法 - 插值
<!DOCTYPE html>
<html lang="en">
    <head>
        <meta charset="UTF-8">
        <title>Title</title>
        <script src="../vuejs/vue.js"></script>
    </head>
    <body>

        <div id="app">
            <h2 v-html="url"></h2>
        </div>


        <script>
            const app = new Vue({
                el: '#app',
                data: {

                    url: '<a href="http://www.baidu.com">百度一下</a>'
                }
            })
        </script>
    </body>
</html>
v-text
-
预期:
string -
详细:
更新元素的
textContent。如果要更新部分的textContent,需要使用{{ Mustache }}插值。 -
示例:
<span v-text="msg"></span>
<!-- 和下面的一样 -->
<span>{{msg}}</span>
用的少,不够灵活。
v-pre
-
不需要表达式
-
用法:
跳过这个元素和它的子元素的编译过程。可以用来显示原始 Mustache 标签。跳过大量没有指令的节点会加快编译。
-
示例:
<h2 v-pre>{{message}}</h2>
会直接显示 {{message}}
v-cloak
-
不需要表达式
-
用法:
这个指令保持在元素上直到关联实例结束编译。和 CSS 规则如
[v-cloak] { display: none }一起用时,这个指令可以隐藏未编译的 Mustache 标签直到实例准备完毕。 -
示例:
[v-cloak] {
  display: none;
}
<div v-cloak>
  {{ message }}
</div>
不会显示,直到编译结束。
也就是说,有时候如果还没编译完就显示的话,会显示原始字符串{{message}}。在vue解析之前,div的v-cloak是存在的,当vue解析之后,v-cloak属性就没有了,以此判断是否编译。因此,CSS设置有v-cloak属性的时候display为none。
前面的指令主要作用是将值插入到模板的内容中。但是,除了内容需要动态来决定外,某些属性也想要动态绑定。使用v-bind。
v-bind
动态绑定属性
-
缩写:
: -
预期:
any (with argument) | Object (without argument) -
参数:
attrOrProp (optional) -
修饰符:
.prop- 作为一个 DOM property 绑定而不是作为 attribute 绑定。(差别在哪里?).camel- (2.1.0+) 将 kebab-case 特性名转换为 camelCase. (从 2.1.0 开始支持).sync(2.3.0+) 语法糖,会扩展成一个更新父组件绑定值的v-on侦听器。
-
用法:
动态地绑定一个或多个特性,或一个组件 prop 到表达式。
在绑定
class或style特性时,支持其它类型的值,如数组或对象。可以通过下面的教程链接查看详情。在绑定 prop 时,prop 必须在子组件中声明。可以用修饰符指定不同的绑定类型。
没有参数时,可以绑定到一个包含键值对的对象。注意此时
class和style绑定不支持数组和对象。 -
示例:
<!-- 绑定一个属性 -->
<img v-bind:src="imageSrc">

<!-- 动态特性名 (2.6.0+) -->
<button v-bind:[key]="value"></button>

<!-- 缩写 -->
<img :src="imageSrc">

<!-- 动态特性名缩写 (2.6.0+) -->
<button :[key]="value"></button>

<!-- 内联字符串拼接 -->
<img :src="'/path/to/images/' + fileName">

<!-- class 绑定 -->
<div :class="{ red: isRed }"></div>
<div :class="[classA, classB]"></div>
<div :class="[classA, { classB: isB, classC: isC }]">

<!-- style 绑定 -->
<div :style="{ fontSize: size + 'px' }"></div>
<div :style="[styleObjectA, styleObjectB]"></div>

<!-- 绑定一个有属性的对象 -->
<div v-bind="{ id: someProp, 'other-attr': otherProp }"></div>

<!-- 通过 prop 修饰符绑定 DOM 属性 -->
<div v-bind:text-content.prop="text"></div>

<!-- prop 绑定。“prop”必须在 my-component 中声明。-->
<my-component :prop="someThing"></my-component>

<!-- 通过 $props 将父组件的 props 一起传给子组件 -->
<child-component v-bind="$props"></child-component>

<!-- XLink -->
<svg><a :xlink:special="foo"></a></svg>
.camel修饰符允许在使用 DOM 模板时将v-bind属性名称驼峰化,例如 SVG 的viewBox属性:<svg :view-box.camel="viewBox"></svg>
在使用字符串模板或通过
vue-loader/vueify编译时,无需使用.camel。
<!DOCTYPE html>
<html lang="en">
    <head>
        <meta charset="UTF-8">
        <title>Title</title>
        <script src="../vuejs/vue.js"></script>
    </head>
    <style>
        .active{
            color: red;

        }
    </style>
    <body>
        <!-- 动态绑定属性 -->

        <div id="app" >
            <!-- 基本使用 -->
            <!-- 想要动态绑定哪个,就在前面加v-bind -->
            <img v-bind:src="imgUrl" alt="">
            <!-- 语法糖 b-bind 提供了简写,: -->
            <img :src="imgUrl" alt="">

            <!-- class属性(对象语法) -->
            <!-- 使用对象:{class名: 布尔值} -->
            <h2 :class="{active: isActive, line: isLine}">{{msg}}</h2>

            <!-- 如果属性过于复杂,特别长,不好写在标签中,可以放在methods或计算属性中 -->
            <h2 :class="getClasses()">Hello World!</h2>

            <!-- 数组语法,用的较少 -->
            <!-- 有引号,是固定值 -->
            <h2 :class="['active', 'line']">{{msg}}</h2>
            <!-- 相当于 -->
            <h2 class="active line">{{msg}}</h2> <!-- 看上去不如直接这样写 -->
            <!-- 没有引号,是变量 -->
            <h2 :class="[active, line]">{{msg}}</h2>
            <!-- 要从data里取变量值,相当于 -->
            <h2 class="aaa bbb">{{msg}}</h2>
            <!-- 也可以放到methods中 -->
            <h2 :class="getClassesArray()">Hello World!</h2>


            <!-- style绑定 -->
            <!-- 对象语法
              :style="{key(属性名): value(属性值)}"
            -->
            <!-- 下面的10px需要引号,否则被当成变量 -->
            <h2 :style="{fontSize: '10px', color: 'red'}">{{msg}}</h2>
            <h2 :style="{fontSize: fontSize, color: 'red'}">{{msg}}</h2>
            <!-- 数组语法,用的较少 -->

            <!-- 上面都是属性值动态绑定,属性名也可以 -->
            <a :[yourname]='url'>百度一下</a>

        </div>


        <script>
            const app = new Vue({
                el: '#app',
                data: {
                    msg: 'hello world!',
                    imgUrl: 'https://timgsa.baidu.com/timg?image&quality=80&size=b9999_10000&sec=1605579606738&di=aecb480ed0cd41d879ad98071303d27c&imgtype=0&src=http%3A%2F%2Ffile.itpub.net%2Fforum%2F201703%2F31%2F093051b449lcckglrcg9g0.png',
                    isActive: true,
                    isLine: true,
                    // 没有引号是变量
                    active: 'aaa',
                    line: 'bbb',
                    fontSize: '10px',
                    yourname: 'href',
                    url: 'http://www.baidu.com'
                },
                methods: {
                    getClasses:  function(){
                        // 需要使用this
                        return {active: this.isActive, line: this.isLine};
                    },
                    getClassesArray: function(){
                        return [this.active, this.line];
                    }
                }
            })
        </script>
    </body>
</html>
想动态修改class
普通语法
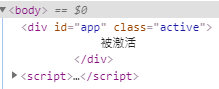
直接添加v-bind:或直接用 :
<!DOCTYPE html>
<html lang="en">
    <head>
        <meta charset="UTF-8">
        <title>Title</title>
        <script src="../vuejs/vue.js"></script>
    </head>
    <style>
        .active{
            color: red;
        }
    </style>
    <body>

        <div id="app" v-bind:class="active">
            被激活
        </div>


        <script>
            const app = new Vue({
                el: '#app',
                data: {
                    active: 'active'
                }
            })
        </script>
    </body>
</html>
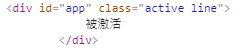
对象语法
可以给class传对象,{class1: 布尔值, class2: 布尔值},布尔值为true时,class可以取得该值
    <style>
        .active{
            color: red;
        }
    </style>
    <body>

        <div id="app" v-bind:class="{active: isActvie, 'line': isLine}">
            被激活
        </div>


        <script>
            const app = new Vue({
                el: '#app',
                data: {
                    active: 'active',
                    isActvie: true,
                    isLine: false
                }
            })
        </script>
key可以不加单引号,可以当作字符串,value不加单引号会当成变量
如果太长可以用method
method中需要使用this
    <style>
        .active{
            color: red;
        }
    </style>
    <body>

        <div id="app" v-bind:class="getClass()">
            被激活
        </div>


        <script>
            const app = new Vue({
                el: '#app',
                data: {
                    isActvie: true,
                    isLine: true
                },
                methods: {
                    getClass: function() {
                        return {active: this.isActvie, line: this.isLine}
                    }
                }
            })
        </script>
    </body>
数组语法
用的少
        <div id="app" :class="['active', 'line']">
            被激活
        </div>
样式动态绑定
对象语法
        <div id="app" >
            <h2 :style="{fontSize: '100px', color: fontColor}">被激活</h2>
        </div>


        <script>
            const app = new Vue({
                el: '#app',
                data: {
                    fontColor: 'red'
                },
            })
        </script>
数组语法
        <div id="app" >
            <h2 :style="[fontSize, fontColor]">被激活</h2>
        </div>


        <script>
            const app = new Vue({
                el: '#app',
                data: {
                    fontColor: {color: 'red', background: 'blue'},
                    fontSize: {fontSize: '100px'}
                },
            })
        </script>
参数
一些指令能够接收一个“参数”,在指令名称之后以冒号表示。例如,v-bind 指令可以用于响应式地更新 HTML attribute:
<a v-bind:href="url">...</a>
在这里 href 是参数,告知 v-bind 指令将该元素的 href attribute 与表达式 url 的值绑定。
另一个例子是 v-on 指令,它用于监听 DOM 事件:
<a v-on:click="doSomething">...</a>
在这里参数是监听的事件名。我们也会更详细地讨论事件处理。
动态参数
2.6.0 新增
从 2.6.0 开始,可以用方括号括起来的 JavaScript 表达式作为一个指令的参数:
<!--
注意,参数表达式的写法存在一些约束,如之后的“对动态参数表达式的约束”章节所述。
-->
<a v-bind:[attributeName]="url"> ... </a>
这里的 attributeName 会被作为一个 JavaScript 表达式进行动态求值,求得的值将会作为最终的参数来使用。例如,如果你的 Vue 实例有一个 data 属性 attributeName,其值为 "href",那么这个绑定将等价于 v-bind:href。
同样地,你可以使用动态参数为一个动态的事件名绑定处理函数:
<a v-on:[eventName]="doSomething"> ... </a>
在这个示例中,当 eventName 的值为 "focus" 时,v-on:[eventName] 将等价于 v-on:focus。
对动态参数的值的约束
动态参数预期会求出一个字符串,异常情况下值为 null。这个特殊的 null 值可以被显性地用于移除绑定。任何其它非字符串类型的值都将会触发一个警告。
对动态参数表达式的约束
动态参数表达式有一些语法约束,因为某些字符,如空格和引号,放在 HTML attribute 名里是无效的。例如:
<!-- 这会触发一个编译警告 -->
<a v-bind:['foo' + bar]="value"> ... </a>
变通的办法是使用没有空格或引号的表达式,或用计算属性替代这种复杂表达式。
在 DOM 中使用模板时 (直接在一个 HTML 文件里撰写模板),还需要避免使用大写字符来命名键名,因为浏览器会把 attribute 名全部强制转为小写:
<!--
在 DOM 中使用模板时这段代码会被转换为 `v-bind:[someattr]`。
除非在实例中有一个名为“someattr”的 property,否则代码不会工作。
-->
<a v-bind:[someAttr]="value"> ... </a>
修饰符
修饰符 (modifier) 是以半角句号 . 指明的特殊后缀,用于指出一个指令应该以特殊方式绑定。例如,.prevent 修饰符告诉 v-on 指令对于触发的事件调用 event.preventDefault():
<form v-on:submit.prevent="onSubmit">...</form>
在接下来对 v-on 和 v-for 等功能的探索中,你会看到修饰符的其它例子。
缩写
v- 前缀作为一种视觉提示,用来识别模板中 Vue 特定的 attribute。当你在使用 Vue.js 为现有标签添加动态行为 (dynamic behavior) 时,v- 前缀很有帮助,然而,对于一些频繁用到的指令来说,就会感到使用繁琐。同时,在构建由 Vue 管理所有模板的单页面应用程序 (SPA - single page application) 时,v- 前缀也变得没那么重要了。因此,Vue 为 v-bind 和 v-on 这两个最常用的指令,提供了特定简写:
v-bind 缩写
<!-- 完整语法 -->
<a v-bind:href="url">...</a>

<!-- 缩写 -->
<a :href="url">...</a>
v-on 缩写
<!-- 完整语法 -->
<a v-on:click="doSomething">...</a>

<!-- 缩写 -->
<a @click="doSomething">...</a>
它们看起来可能与普通的 HTML 略有不同,但 : 与 @ 对于 attribute 名来说都是合法字符,在所有支持 Vue 的浏览器都能被正确地解析。而且,它们不会出现在最终渲染的标记中。缩写语法是完全可选的,但随着你更深入地了解它们的作用,你会庆幸拥有它们。
三、常用特性
计算属性
拼接data中的属性
<!DOCTYPE html>
<html>
    <head>
        <meta charset="utf-8">
        <title></title>
    </head>
    <body>
            <body>
            <div id="app">
                <h2>{{firstName}} {{lastName}}</h2>
                <h2>{{firstName}} {{lastName}}</h2>
            </div>
            <script src="./js/vue.js"></script>
            <script>
                const app = new Vue({
                    el:"#app", // 用于挂载要管理的数据
                    data:{ // 定义数据
                        firstName: 'Hellen',
                        lastName: 'Keller'
                    },
                    methods:{

                    }
                })

            </script>
    </body>
</html>
结果:

不推荐,可以改为使用方法:
<!DOCTYPE html>
<html>
    <head>
        <meta charset="utf-8">
        <title></title>
    </head>
    <body>
            <body>
            <div id="app">
                <h2>{{getFullName()}}</h2>
                <h2>{{firstName}} {{lastName}}</h2>
            </div>
            <script src="./js/vue.js"></script>
            <script>
                const app = new Vue({
                    el:"#app", // 用于挂载要管理的数据
                    data:{ // 定义数据
                        firstName: 'Hellen',
                        lastName: 'Keller'
                    },
                    methods:{
                        getFullName(){
                            return this.firstName + ' ' + this.lastName;
                        }
                    }
                })

            </script>
    </body>
</html>
结果:

虽然简洁了写,但最好的方式是使用计算属性
计算属性实质上是属性
<!DOCTYPE html>
<html>
    <head>
        <meta charset="utf-8">
        <title></title>
    </head>
    <body>
            <body>
            <div id="app">
                <h2>{{getFullName()}}</h2>
                <h2>{{firstName}} {{lastName}}</h2>
                <h2>{{fullName}}</h2>
            </div>
            <script src="./js/vue.js"></script>
            <script>
                const app = new Vue({
                    el:"#app", // 用于挂载要管理的数据
                    data:{ // 定义数据
                        firstName: 'Hellen',
                        lastName: 'Keller'
                    },
                    computed:{
                        fullName:function(){
                            return this.firstName + ' ' + this.lastName;
                        }
                    },
                    methods:{
                        getFullName(){
                            return this.firstName + ' ' + this.lastName;
                        }
                    }
                })

            </script>
    </body>
结果:

更复杂一些的例子
<!DOCTYPE html>
<html>
    <head>
        <meta charset="utf-8">
        <title></title>
    </head>
    <body>
            <body>
            <div id="app">
                <h2>{{totalPrice}}</h2>
            </div>
            <script src="./js/vue.js"></script>
            <script>
                const app = new Vue({
                    el:"#app", // 用于挂载要管理的数据
                    data:{ // 定义数据
                        books: [{id:1, name:'Unix编程艺术', price: 80},
                                {id:2, name:'代码大全', price: 120},
                                {id:3, name:'深入理解计算机原理', price: 100},
                                {id:4, name:'现代操作系统', price: 60},
                                ]
                    },
                    computed:{
                        totalPrice:function(){
                            let totalPrice = 0;
                            for (let i=0; i<this.books.length; i++) {
                                totalPrice += this.books[i].price;
                            }
                            return totalPrice;
                        }
                    }
                })

            </script>
    </body>
</html>
模板内的表达式非常便利,但是设计它们的初衷是用于简单运算的。在模板中放入太多的逻辑会让模板过重且难以维护。例如:
<div id="example">
  {{ message.split('').reverse().join('') }}
</div>
在这个地方,模板不再是简单的声明式逻辑。你必须看一段时间才能意识到,这里是想要显示变量 message 的翻转字符串。当你想要在模板中多次引用此处的翻转字符串时,就会更加难以处理。
所以,对于任何复杂逻辑,你都应当使用计算属性。
基础例子
<div id="example">
  <p>Original message: "{{ message }}"</p>
  <p>Computed reversed message: "{{ reversedMessage }}"</p>
</div>
var vm = new Vue({
  el: '#example',
  data: {
    message: 'Hello'
  },
  computed: {
    // 计算属性的 getter
    reversedMessage: function () {
      // `this` 指向 vm 实例
      return this.message.split('').reverse().join('')
    }
  }
})
相当于
  computed: {
    // 计算属性的 getter
    reversedMessage: {
        get: function () {
            // `this` 指向 vm 实例
             return this.message.split('').reverse().join('')
        }
    }
 }
结果:
Original message: "Hello"
Computed reversed message: "olleH"
这里我们声明了一个计算属性 reversedMessage。我们提供的函数将用作属性 vm.reversedMessage 的 getter 函数:
console.log(vm.reversedMessage) // => 'olleH'
vm.message = 'Goodbye'
console.log(vm.reversedMessage) // => 'eybdooG'
你可以打开浏览器的控制台,自行修改例子中的 vm。vm.reversedMessage 的值始终取决于 vm.message 的值。
你可以像绑定普通属性一样在模板中绑定计算属性。Vue 知道 vm.reversedMessage 依赖于 vm.message,因此当 vm.message 发生改变时,所有依赖 vm.reversedMessage 的绑定也会更新。而且最妙的是我们已经以声明的方式创建了这种依赖关系:计算属性的 getter 函数是没有副作用 (side effect) 的,这使它更易于测试和理解。
computed setter
computed 属性默认只有 getter ,不过在需要时你也可以提供一个 setter :
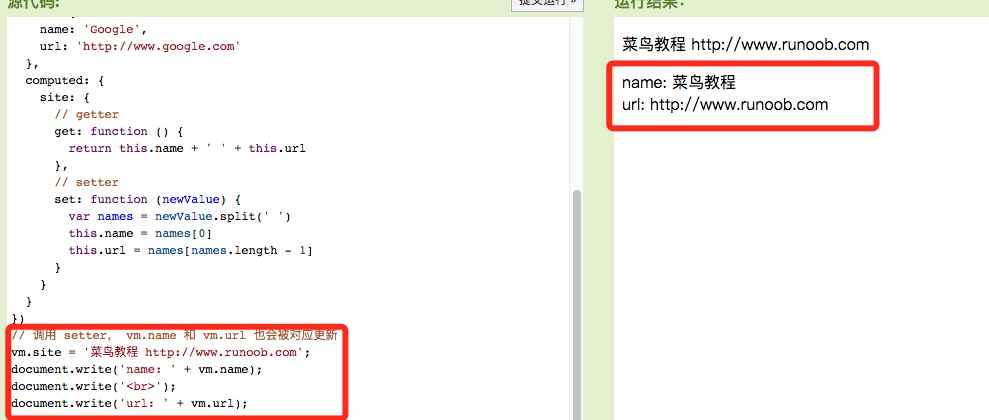
var vm = new Vue({
  el: '#app',
  data: {
    name: 'Google',
    url: 'http://www.google.com'
  },
  computed: {
    site: {
      // getter
      get: function () {
        return this.name + ' ' + this.url
      },
      // setter
      set: function (newValue) {
        var names = newValue.split(' ')
        this.name = names[0]
        this.url = names[names.length - 1]
      }
    }
  }
})
// 调用 setter, vm.name 和 vm.url 也会被对应更新
vm.site = '菜鸟教程 http://www.runoob.com';
document.write('name: ' + vm.name);
document.write('<br>');
document.write('url: ' + vm.url);
从实例运行结果看在运行 vm.site = '菜鸟教程 http://www.runoob.com'; 时,setter 会被调用, vm.name 和 vm.url 也会被对应更新。
计算属性缓存 vs 方法
你可能已经注意到我们可以通过在表达式中调用方法来达到同样的效果:
<p>Reversed message: "{{ reversedMessage() }}"</p>
// 在组件中
methods: {
  reversedMessage: function () {
    return this.message.split('').reverse().join('')
  }
}
我们可以将同一函数定义为一个方法而不是一个计算属性。两种方式的最终结果确实是完全相同的。然而,不同的是计算属性是基于它们的响应式依赖进行缓存的。只在相关响应式依赖发生改变时它们才会重新求值。这就意味着只要 message 还没有发生改变,多次访问 reversedMessage 计算属性会立即返回之前的计算结果,而不必再次执行函数。
这也同样意味着下面的计算属性将不再更新,因为 Date.now() 不是响应式依赖:
computed: {
  now: function () {
    return Date.now()
  }
}
相比之下,每当触发重新渲染时,调用方法将总会再次执行函数。
我们为什么需要缓存?假设我们有一个性能开销比较大的计算属性 A,它需要遍历一个巨大的数组并做大量的计算。然后我们可能有其他的计算属性依赖于 A 。如果没有缓存,我们将不可避免的多次执行 A 的 getter!如果你不希望有缓存,请用方法来替代。
计算属性 vs 侦听属性
Vue 提供了一种更通用的方式来观察和响应 Vue 实例上的数据变动:侦听属性。当你有一些数据需要随着其它数据变动而变动时,你很容易滥用 watch——特别是如果你之前使用过 AngularJS。然而,通常更好的做法是使用计算属性而不是命令式的 watch 回调。细想一下这个例子:
<div id="demo">{{ fullName }}</div>
var vm = new Vue({
  el: '#demo',
  data: {
    firstName: 'Foo',
    lastName: 'Bar',
    fullName: 'Foo Bar'
  },
  watch: {
    firstName: function (val) {
      this.fullName = val + ' ' + this.lastName
    },
    lastName: function (val) {
      this.fullName = this.firstName + ' ' + val
    }
  }
})
上面代码是命令式且重复的。将它与计算属性的版本进行比较:
var vm = new Vue({
  el: '#demo',
  data: {
    firstName: 'Foo',
    lastName: 'Bar'
  },
  computed: {
    fullName: function () {
      return this.firstName + ' ' + this.lastName
    }
  }
})
好得多了,不是吗?
侦听器
虽然计算属性在大多数情况下更合适,但有时也需要一个自定义的侦听器。这就是为什么 Vue 通过 watch 选项提供了一个更通用的方法,来响应数据的变化。当需要在数据变化时执行异步或开销较大的操作时,这个方式是最有用的。
例如:
<div id="watch-example">
  <p>
    Ask a yes/no question:
    <input v-model="question">
  </p>
  <p>{{ answer }}</p>
</div>
<!-- 因为 AJAX 库和通用工具的生态已经相当丰富,Vue 核心代码没有重复 -->
<!-- 提供这些功能以保持精简。这也可以让你自由选择自己更熟悉的工具。 -->
<script src="https://cdn.jsdelivr.net/npm/axios@0.12.0/dist/axios.min.js"></script>
<script src="https://cdn.jsdelivr.net/npm/lodash@4.13.1/lodash.min.js"></script>
<script>
var watchExampleVM = new Vue({
  el: '#watch-example',
  data: {
    question: '',
    answer: 'I cannot give you an answer until you ask a question!'
  },
  watch: {
    // 如果 `question` 发生改变,这个函数就会运行
    question: function (newQuestion, oldQuestion) {
      this.answer = 'Waiting for you to stop typing...'
      this.debouncedGetAnswer()
    }
  },
  created: function () {
    // `_.debounce` 是一个通过 Lodash 限制操作频率的函数。
    // 在这个例子中,我们希望限制访问 yesno.wtf/api 的频率
    // AJAX 请求直到用户输入完毕才会发出。想要了解更多关于
    // `_.debounce` 函数 (及其近亲 `_.throttle`) 的知识,
    // 请参考:https://lodash.com/docs#debounce
    this.debouncedGetAnswer = _.debounce(this.getAnswer, 500)
  },
  methods: {
    getAnswer: function () {
      if (this.question.indexOf('?') === -1) {
        this.answer = 'Questions usually contain a question mark. ;-)'
        return
      }
      this.answer = 'Thinking...'
      var vm = this
      axios.get('https://yesno.wtf/api')
        .then(function (response) {
          vm.answer = _.capitalize(response.data.answer)
        })
        .catch(function (error) {
          vm.answer = 'Error! Could not reach the API. ' + error
        })
    }
  }
})
</script>
结果:
Ask a yes/no question:
I cannot give you an answer until you ask a question!
在这个示例中,使用 watch 选项允许我们执行异步操作 (访问一个 API),限制我们执行该操作的频率,并在我们得到最终结果前,设置中间状态。这些都是计算属性无法做到的。
除了 watch 选项之外,您还可以使用命令式的 vm.$watch API。
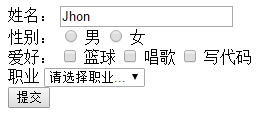
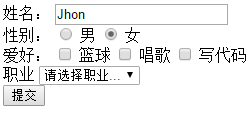
表单操作
<div id="app">
    <form>
        <div>
            <span>姓名:</span>
            <span>
                <input type="text" />
            </span>
        </div>
        <div>
            <span>性别:</span>
            <span>
                <input type="radio" id="male"/>
                <label for="male">男</label>
                <input type="radio" id="female"/>
                <label for="female">女</label>
            </span>
        </div>
        <div>
            <span>爱好:</span>
            <input type="checkbox" id="ball"/>
            <label for="ball">篮球</label>
            <input type="checkbox" id="sing" />
            <label for="sing">唱歌</label>
            <input type="checkbox" id="code" />
            <label for="code">写代码</label>
        </div>
        <div>
            <span>职业</span>
            <select>
                <option>请选择职业...</option>
                <option>教师</option>
                <option>码农</option>
                <option>律师</option>
            </select>
        </div>
    </form>

</div>

input单行文本
input标签中 v-mode 绑定属性
<div  >
    <span >姓名:</span>
    <span>
        <input type="text" v-model="uname"/>
    </span>
</div>
在data中给出该属性
            var vm = new Vue({
                el:"#app", // 用于挂载要管理的数据
                data:{ // 定义数据
                    uname: 'Jhon'
                }
            })
添加提交标签
<div>
    <input type="submit" value="提交" @click.prevent="handle"/>
</div>
@click.prevent 阻止事件的默认行为,即阻止提交,并调用handle方法。
<input type="button" /> 这就是一个按钮。如果你不写javascript 的话,按下去什么也不会发生。
<input type="submit" /> 这样的按钮用户点击之后会自动提交 form,除非你写了javascript 阻止它。
<button> 这个按钮放在 form 中也会点击自动提交,比前两个的优点是按钮的内容不光可以有文字,还可以有图片等多媒体内容。(当然,前两个用图片背景也可以做到)。它的缺点是不同的浏览器得到的 value 值不同;可能还有其他的浏览器兼容问题。其他标签,例如 a, img, span, div,然后用图片把它伪装成一个按钮。
radio单选框
添加value属性,使用v-mode绑定属性
<div>
    <span>性别:</span>
    <span>
        <input type="radio" id="male" value="1" v-model="gender"/>
        <label for="male">男</label>
        <input type="radio" id="female" value="2" v-model="gender"/>
        <label for="female">女</label>
    </span>
</div>
data中添加gender属性
var vm = new Vue({
    el:"#app", // 用于挂载要管理的数据
    data:{ // 定义数据
        uname: 'Jhon',
        gender: 2
    },
    methods:{
                 handle: function(){
            console.log(this.uname);
        }
    }
})
gender默认值是2
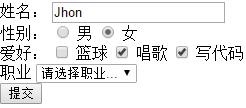
 checkbox多选框
添加value属性,使用v-model绑定属性
<div>
    <span>爱好:</span>
    <input type="checkbox" id="ball" value="1" v-model="hobby"/>
    <label for="ball" >篮球</label>
    <input type="checkbox" id="sing" value="2" v-model="hobby"/>
    <label for="sing">唱歌</label>
    <input type="checkbox" id="code" value="3" v-model="hobby"/>
    <label for="code">写代码</label>
</div>
data中添加hobby属性和默认值
var vm = new Vue({
    el:"#app", // 用于挂载要管理的数据
    data:{ // 定义数据
        uname: 'Jhon',
        gender: 2,
        hobby: ['2', '3']
    },
    methods:{
        handle: function(){
            console.log(this.uname);
        }
    }
})
select下拉选项
option添加value属性,select使用v-model绑定属性
<div>
    <span>职业</span>
    <select v-model="job">
        <option value="0">请选择职业...</option>
        <option value="1" >教师</option>
        <option value="2" >码农</option>
        <option value="3" >律师</option>
    </select>
</div>
data中添加job属性,可以设置默认值
var vm = new Vue({
    el:"#app", // 用于挂载要管理的数据
    data:{ // 定义数据
        uname: 'Jhon',
        gender: 2,
        hobby: ['2', '3'],
        job: 1
    },
    methods:{
        handle: function(){
            // console.log(this.uname);
            // console.log(this.gender);
            // console.log(this.hobby);
            console.log(this.job);
        }
    }
})

可以选择多行,此时select需要设置multiple属性
<div>
    <span>职业</span>
    <select v-model="job" multiple=true>
        <option value="0">请选择职业...</option>
        <option value="1" >教师</option>
        <option value="2" >码农</option>
        <option value="3" >律师</option>
    </select>
</div>
data中的属性值要设为数组
var vm = new Vue({
    el:"#app", // 用于挂载要管理的数据
    data:{ // 定义数据
        uname: 'Jhon',
        gender: 2,
        hobby: ['2', '3'],
        job: ['1']
    },
    methods:{
        handle: function(){
            // console.log(this.uname);
            // console.log(this.gender);
            // console.log(this.hobby);
            console.log(this.job);
        }
    }
})
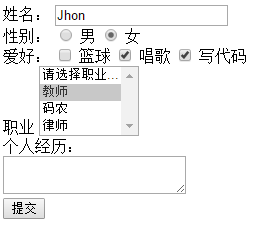
textarea多行文本
v-model绑定属性
<div>
    <span>个人经历:</span>
    <br>
    <textarea v-model="desc"></textarea>
</div>
data中添加和属性及其默认值
var vm = new Vue({
    el:"#app", // 用于挂载要管理的数据
    data:{ // 定义数据
        uname: 'Jhon',
        gender: 2,
        hobby: ['2', '3'],
        job: ['1'],
        desc: '请填写个人经历'
    },
    methods:{
        handle: function(){
            // console.log(this.uname);
            // console.log(this.gender);
            // console.log(this.hobby);
            // console.log(this.job);
            console.log(this.desc)
        }
    }
})

表单域修饰符
trim
去掉开始和结尾的空格,中间的去不掉
<!DOCTYPE html>
<html>
    <head>
        <meta charset="utf-8">
        <title></title>
    </head>
    <body>
        <div id="app">
            <input type="text" v-model.number="age"/>
            <input type="text" v-model.trim="name"/>
            <button @click="handle">点击</button>
        </div>
        <script src="./js/vue.js"></script>
        <script>
            const app = new Vue({
                el:"#app", // 用于挂载要管理的数据
                data:{ // 定义数据
                    age:'',
                    name:''
                },
                methods:{
                    handle:function(){
                        console.log(this.age + 12);
                        console.log(this.name)
                    }
                }
            })

        </script>
    </body>
</html>
lazy
将input事件切换为change事件
默认是input即只要变化就会触发
<!DOCTYPE html>
<html>
    <head>
        <meta charset="utf-8">
        <title></title>
    </head>
    <body>
        <div id="app">
            <input type="text" v-model="msg"/>
            <div>{{msg}}</div>
        </div>
        <script></script>
        <script src="./js/vue.js"></script>
        <script>
            const app = new Vue({
                el: '#app',
                data:{
                    msg:''
                }
            })

        </script>
    </body>
</html>

只要输入,下面就变化
change事件只有在失去焦点的时候才触发
<!DOCTYPE html>
<html>
    <head>
        <meta charset="utf-8">
        <title></title>
    </head>
    <body>
        <div id="app">
            <input type="text" v-model.lazy="msg"/>
            <div>{{msg}}</div>
        </div>
        <script></script>
        <script src="./js/vue.js"></script>
        <script>
            const app = new Vue({
                el: '#app',
                data:{
                    msg:''
                }
            })

        </script>
    </body>
</html>
当输入完毕,光标从输入框中出来选定其他地方的时候才显示

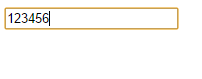
number
转为数值
<!DOCTYPE html>
<html>
    <head>
        <meta charset="utf-8">
        <title></title>
    </head>
    <body>
        <div id="app">
            <input type="text" v-model="age"/>
            <button @click="handle">点击</button>
        </div>
        <script src="./js/vue.js"></script>
        <script>
            const app = new Vue({
                el:"#app", // 用于挂载要管理的数据
                data:{ // 定义数据
                    age:''
                },
                methods:{
                    handle:function(){
                        console.log(this.age + 12);
                    }
                }
            })

        </script>
    </body>
</html>

点击,此时控制台输出1212,即字符串
可以让其转为数字
<div id="app">
    <input type="text" v-model.number="age"/>
    <button @click="handle">点击</button>
</div>
自定义指令
内置指令不满足需求
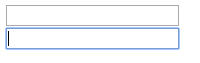
除了核心功能默认内置的指令 (v-model 和 v-show),Vue 也允许注册自定义指令。注意,在 Vue2.0 中,代码复用和抽象的主要形式是组件。然而,有的情况下,你仍然需要对普通 DOM 元素进行底层操作,这时候就会用到自定义指令。举个聚焦输入框的例子,如下:
当页面加载时,该元素将获得焦点 (注意:autofocus 在移动版 Safari 上不工作)。事实上,只要你在打开这个页面后还没点击过任何内容,这个输入框就应当还是处于聚焦状态。现在让我们用指令来实现这个功能:
// 注册一个全局自定义指令 `v-focus`
Vue.directive('focus', {
  // 当被绑定的元素插入到 DOM 中时……
  inserted: function (el) {
    // 聚焦元素
    el.focus()
  }
})
如果想注册局部指令,组件中也接受一个 directives 的选项:
directives: {
  focus: {
    // 指令的定义
    inserted: function (el) {
      el.focus()
    }
  }
}
然后你可以在模板中任何元素上使用新的 v-focus 属性,如下:
<input v-focus>
代码
<!DOCTYPE html>
<html>
    <head>
        <meta charset="utf-8">
        <title></title>
    </head>
    <body>
        <input type="text">
        <div id="app">
            <input type="text" v-focus/>
        </div>

        <script src="./js/vue.js"></script>
        <script>
            // 注册一个全局自定义指令 `v-focus`
            Vue.directive('focus', {
            // 当被绑定的元素插入到 DOM 中时……
                inserted: function (el) {
                // 聚焦元素 el 元素
                el.focus()
                }
            });
            const app = new Vue({
                el:"#app",
            })
        </script>
    </body>
</html>
打开后,聚焦在第二个有v-focus指令的标签上
带参数的自定义指令
<!DOCTYPE html>
<html>
    <head>
        <meta charset="utf-8">
        <title></title>
    </head>
    <body>
        <div id="app">
            <input type="text" v-color='{color:"orange"}'/>
        </div>
        <script src="./js/vue.js"></script>
        <script>

            Vue.directive('color', {
            // 当被绑定的元素插入到 DOM 中时……
                inserted: function (el, binding) {
                el.style.backgroundColor = binding.value.color;
                }
            });
            const app = new Vue({
                el:"#app",
            })
        </script>
    </body>
</html>

<!DOCTYPE html>
<html>
    <head>
        <meta charset="utf-8">
        <title></title>
    </head>
    <body>
        <div id="app">
            <input type="text" v-color='msg'/>
        </div>
        <script src="./js/vue.js"></script>
        <script>
            Vue.directive('color', {
            // 当被绑定的元素插入到 DOM 中时……
                inserted: function (el, binding) {
                el.style.backgroundColor = binding.value.color;
                }
            });
            const app = new Vue({
                el:"#app",
                data:{
                    msg: {
                        color: 'blue'
                    }
                }
            })
        </script>
    </body>
</html>
也可以使用bind
<!DOCTYPE html>
<html>
    <head>
        <meta charset="utf-8">
        <title></title>
    </head>
    <body>
        <div id="app">
            <input type="text" v-color='msg'/>
        </div>
        <script src="./js/vue.js"></script>
        <script>
                        // 注册一个全局自定义指令 `v-focus`
            Vue.directive('color', {
                bind: function (el, binding) {
                el.style.backgroundColor = binding.value.color;
                }
            });
            const app = new Vue({
                el:"#app",
                data:{
                    msg: {
                        color: 'blue'
                    }
                }
            })
        </script>
一个指令定义对象可以提供如下几个钩子函数 (均为可选):
-
bind:只调用一次,指令第一次绑定到元素时调用。在这里可以进行一次性的初始化设置。 -
inserted:被绑定元素插入父节点时调用 (仅保证父节点存在,但不一定已被插入文档中)。 -
update:所在组件的 VNode 更新时调用,但是可能发生在其子 VNode 更新之前。指令的值可能发生了改变,也可能没有。但是你可以通过比较更新前后的值来忽略不必要的模板更新 (详细的钩子函数参数见下)。
指令钩子函数会被传入以下参数:
el:指令所绑定的元素,可以用来直接操作 DOM 。binding:一个对象,包含以下属性:name:指令名,不包括v-前缀。value:指令的绑定值,例如:v-my-directive="1 + 1"中,绑定值为2。oldValue:指令绑定的前一个值,仅在update和componentUpdated钩子中可用。无论值是否改变都可用。expression:字符串形式的指令表达式。例如v-my-directive="1 + 1"中,表达式为"1 + 1"。arg:传给指令的参数,可选。例如v-my-directive:foo中,参数为"foo"。modifiers:一个包含修饰符的对象。例如:v-my-directive.foo.bar中,修饰符对象为{ foo: true, bar: true }。
局部指令
<!DOCTYPE html>
<html>
    <head>
        <meta charset="utf-8">
        <title></title>
    </head>
    <body>
        <div id="app">
            <input type="text" v-color='msg' v-focus/>
        </div>
        <script src="./js/vue.js"></script>
        <script>
            const app = new Vue({
                el:"#app",
                data:{
                    msg: {
                        color: 'yellow'
                    }
                },
                directives:{
                    color: {
                        bind: function (el, binding) {
                        el.style.backgroundColor = binding.value.color;
                        }
                    },
                    focus: {
                        inserted: function(el){
                            el.focus();
                        }
                    },
                }
            })
        </script>
    </body>
</html>
过滤器
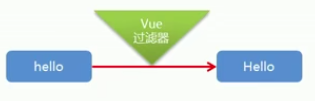
自定义过滤器
Vue.filter('过滤器名称', function(value){
    // 过滤器业务逻辑
})
使用
<div>{{msg | 过滤器名}}</div>
<div>{{msg | 过滤器名 | 过滤器名}}</div>
<div v-bind:id="id | formatId"></div>
实例
<!DOCTYPE html>
<html>
    <head>
        <meta charset="utf-8">
        <title></title>
    </head>
    <body>
        <div id="app">
            <input type="text" v-model="msg"/>
            <div>{{msg | upper}}</div>
            <div>{{msg | upper | lower}}</div>
            <div>{{msg | sayHello}}</div>
            <div :abc='msg | upper'>属性值是msg且首字母变大写了哦</div>

        </div>

        <script src="./js/vue.js"></script>
        <script>
            Vue.filter('upper', function(val){
                return val.charAt(0).toUpperCase() + val.slice(1);
            });
            Vue.filter('lower', function(val){
                return val.charAt(0).toLowerCase() + val.slice(1);
            });
            const app = new Vue({
                el:"#app",
                data:{
                    msg: ''
                },
                // 局部过滤器
                filters:{
                    sayHello: function(val){
                        return 'hello';
                    }
                }
            })
        </script>
    </body>
</html>

带参数的过滤器
Vue.filter('format', function(value, arg1){
    // value就是过滤器传递过来的参数
})
过滤器的使用
<div>{{date | format('yyyy-MM-dd')}}</div>
实例
格式化日期

yyyy-MM-dd
<!DOCTYPE html>
<html>
    <head>
        <meta charset="utf-8">
        <title></title>
    </head>
    <body>
        <div id="app">
            <div>{{date | format('yyyy-MM-dd')}}</div>
        </div>

        <script src="./js/vue.js"></script>
        <script>
            Vue.filter('format', function(val, arg){
                if(arg == 'yyyy-MM-dd'){
                    var ret = '';
                    ret += val.getFullYear() + '-' + (val.getMonth() + 1) + '-' + val.getDate();
                    return ret;
                }
                return val;
            });
            const app = new Vue({
                el:"#app",
                data:{
                    date: new Date()
                }
            })
        </script>
    </body>
</html>
四、组件
组件化开发思想
- 标准
- 分治
- 重用
- 组合
组件化规范:Web Components
我们希望尽可能多的重用代码,但自定义组件的方式不太容易,多次使用组件可能导致冲突。
Web Components通过创建封装好功能的定制元素解决上述问题。
Vue部分实现了上述规范
组件化是指将页面的功能模块进行拆分,封装。组件代码包含了组件所有的功能代码与样式。
组件化的作用是复用、高可维护。
组件化不局限于前端代码,而是一种设计思想。
任何的应用都会被抽象成一棵组件树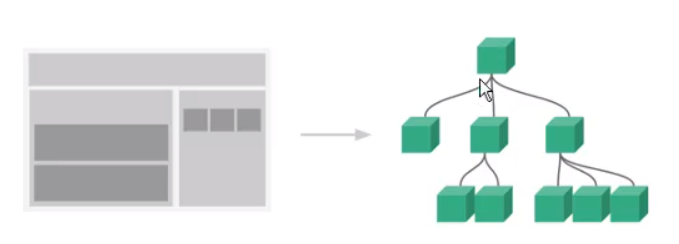
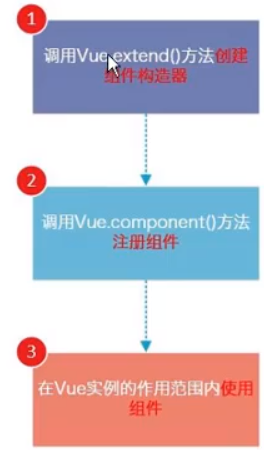
组件使用的三个步骤:
- 创建组件构造器
- 注册组件
- 使用组件
如果不用组件,想复用一段代码,需要多次复制:
        <div id="app" >
            <h2>我是标题</h2>
            <p>我是内容啦啦啦</p>
            <p>我是内容哈哈哈</p>

            <h2>我是标题</h2>
            <p>我是内容啦啦啦</p>
            <p>我是内容哈哈哈</p>

            <h2>我是标题</h2>
            <p>我是内容啦啦啦</p>
            <p>我是内容哈哈哈</p>

            <h2>我是标题</h2>
            <p>我是内容啦啦啦</p>
            <p>我是内容哈哈哈</p>
        </div>
可以使用组件
<!DOCTYPE html>
<html lang="en">
    <head>
        <meta charset="UTF-8">
        <title>Title</title>
        <script src="../vuejs/vue.js"></script>
    </head>
    <style>
        .active{
            color: red;

        }
    </style>
    <body>

        <div id="app" >
            <my-cpn></my-cpn>
        </div>


        <script>
            // 1.创建组件构造器对象
            const cpnC = Vue.extend({
                template: `<div>
                                <h2>我是标题</h2>
                                <p>我是内容啦啦啦</p>
                                <p>我是内容哈哈哈</p>
                            </div> `
            })
            // 2.注册组件 第一个参数是组件标签,第二个参数是上面的构造器对象
            Vue.component('my-cpn', cpnC)

            const app = new Vue({
                el: '#app',
                data: {

                },
            })
        </script>
    </body>
</html>
抽出的组件甚至可以在另一个项目中使用

组件的注册
分为全局注册和局部注册
全局注册组件语法
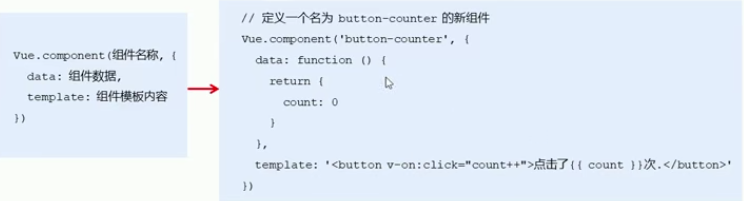
实例
<!DOCTYPE html>
<html>
    <head>
        <meta charset="utf-8">
        <title></title>
    </head>
    <body>
        <div id="app">
            <button-counter></button-counter>
            <button-counter></button-counter>
            <button-counter></button-counter>
        </div>
        <script type="text/javascript" src="./js/vue.js"></script>
        <script>
            Vue.component('button-counter', {
                data: function(){
                    return {
                        count: 0
                    }
                },
                template: '<button @click="handle">点击了{{count}}次</button>',
                methods: {
                    handle: function(){
                        this.count += 2;
                    }
                }
            })
            var vm = new Vue({
                el: '#app',
                data: {

                }
            })
        </script>
    </body>
</html>
可重用,相互不影响

注意:
- data必须是一个函数
- 组件模板内容必须是单个根元素
比如 '<button @click="handle">点击了{{count}}次</button>' ,写为
'<button @click="handle">点击了{{count}}次</button><button>测试</button>'
会报错,因为两个button兄弟元素,没有单个根元素,可写为
'<div><button @click="handle">点击了{{count}}次</button><button>测试</button></div>'
- 组件模板内容可以是模板字符串
组件命名方式
- 驼峰式命名,只能在字符串模板中使用,但在普通的标签模板中,要使用短横线的方式使用组件
- 短横线命名

局部组件注册
局部组件只能在父组件中使用,不能在其他组件中使用

<!DOCTYPE html>
<html>
    <head>
        <meta charset="utf-8">
        <title></title>
    </head>
    <body>
        <div id="app">
            <button-counter></button-counter>
            <button-counter></button-counter>
            <button-counter></button-counter>
        </div>
        <script type="text/javascript" src="./js/vue.js"></script>
        <script>
            var bc = {
                data: function(){
                    return {
                        count: 0
                    }
                },
                template: '<button @click="handle">点击了{{count}}次</button>',
                methods: {
                    handle: function(){
                        this.count += 2;
                    }
                }
            }
            var vm = new Vue({
                el: '#app',
                data: {

                },
                components:{
                    'button-counter': bc
                }
            })
        </script>
    </body>
</html>
局部组件使用较多
语法糖
将 template 直接放在component中,实际还是调用了Vue.extend()
        <script>
            // 1.创建组件构造器对象
            // const cpnC1 = Vue.extend({
            //     template: `<div>
            //                     <h2>我是标题1</h2>
            //                     <p>我是内容哈哈哈</p>
            //                 </div> `
            // })


            // 2.注册组件 第一个参数是组件标签,第二个参数是上面的构造器对象
            Vue.component('my-cpn', {
                template: `<div>
                                <h2>我是标题1</h2>
                                <p>我是内容哈哈哈</p>
                            </div> `
            })

            const app = new Vue({
                el: '#app',
                data: {

                },
            })
        </script>
也可以局部注册
        <script>
            // 1.创建组件构造器对象
            // const cpnC1 = Vue.extend({
            //     template: `<div>
            //                     <h2>我是标题1</h2>
            //                     <p>我是内容哈哈哈</p>
            //                 </div> `
            // })

            // const cpnC2 = Vue.extend({
            //     template: `<div>
            //                     <cpn1></cpn1>
            //                     <h2>我是标题2</h2>
            //                     <p>我是内容啦啦啦</p>
            //                 </div> `,
            //     components: {
            //         cpn1: cpnC1
            //     }
            // })


            // 2.注册组件 第一个参数是组件标签,第二个参数是上面的构造器对象
            // Vue.component('my-cpn', {
            //     template: `<div>
            //                     <h2>我是标题1</h2>
            //                     <p>我是内容哈哈哈</p>
            //                 </div> `
            // })

            // 局部注册
            const app = new Vue({
                el: '#app',
                data: {

                },
                components:{
                    'my-cpn':{
                            template: `
                            <div>
                                <h2>我是标题1</h2>
                                <p>我是内容哈哈哈</p>
                            </div> `
                           }
                }
            })
        </script>
组件模板抽离
1.使用script标签
<!DOCTYPE html>
<html lang="en">
    <head>
        <meta charset="UTF-8">
        <title>Title</title>
        <script src="../vuejs/vue.js"></script>
    </head>
    <style>
        .active{
            color: red;

        }
    </style>
    <body>

        <div id="app" >
            <my-cpn></my-cpn>
        </div>

        <!--  需要一个id,从而可以被vue获取 -->
        <script type="text/x-template" id="cpn">
            <div>
                <h2>我是标题1</h2>
                <p>我是内容哈哈哈</p>
            </div>
        </script>

        <script>

            // 局部注册
            const app = new Vue({
                el: '#app',
                data: {

                },
                components:{
                    'my-cpn': {
                        template: '#cpn'
                    }
                }
            })
        </script>
    </body>
</html>
2.使用template标签
    <body>

        <div id="app" >
            <my-cpn></my-cpn>
        </div>

        <template id="cpn1">
            <div>
                <h2>我是标题6</h2>
                <p>我是内容哈哈哈</p>
            </div>
        </template>

        <script>

            // 局部注册
            const app = new Vue({
                el: '#app',
                data: {

                },
                components:{
                    'my-cpn': {
                        template: '#cpn1'
                    }
                }
            })
        </script>
    </body>
组件不可以访问Vues实例中的数据
下面是获取不了的
    <body>

        <div id="app" >
            <my-cpn></my-cpn>
        </div>

        <template id="cpn1">
            <div>
                <h2>{{msg}}</h2>
                <p>我是内容哈哈哈</p>
            </div>
        </template>


        <script>

            // 局部注册
            const app = new Vue({
                el: '#app',
                data: {
                  msg: "标题"
                },
                components:{
                    'my-cpn': {
                        template: '#cpn1'
                    }
                }
            })
        </script>
    </body>
vue对象的data中保存的是属于顶层的
模块应该有属于自己的数据data
模块中的data是个函数,且返回对象
    <body>

        <div id="app" >
            <my-cpn></my-cpn>
        </div>

        <template id="cpn1">
            <div>
                <h2>{{msg}}</h2>
                <p>我是内容哈哈哈</p>
            </div>
        </template>

        <!--  需要一个id,从而可以被vue获取 -->
        <script type="text/x-template" id="cpn">
            <div>
                <h2>我是标题1</h2>
                <p>我是内容哈哈哈</p>
            </div>
        </script>

        <script>

            // 局部注册
            const app = new Vue({
                el: '#app',
                data: {
                  // msg: "标题"
                },
                components:{
                    'my-cpn': {
                        template: '#cpn1',
                        data: function(){
                            return {msg: "模块的数据"}
                        }
                    }
                }
            })
        </script>
    </body>
或
            // 局部注册
            const app = new Vue({
                el: '#app',
                data: {
                  // msg: "标题"
                },
                components:{
                    'my-cpn': {
                        template: '#cpn1',
                        data(){
                            return {msg: "模块的数据"}
                        }
                    }
                }
            })
模块中的data为什么要设置成函数呢?
写成函数是为了返回对象,模块要复用,被复用的模块应该互不打扰,如果写成属性,由于双向绑定,不同模块修改都会导致该属性变化。因此,应该各自使用各自的对象实例。
组件间的数据交互方式
父组件和子组件
在组件构造器中注册组件,形成父子关系,在父组件的template中使用子组件
            // 1.创建组件构造器对象
            const cpnC1 = Vue.extend({
                template: `<div>
                                <h2>我是标题1</h2>
                                <p>我是内容哈哈哈</p>
                            </div> `
            })

            const cpnC2 = Vue.extend({
                template: `<div>
                                <cpn1></cpn1>
                                <h2>我是标题2</h2>
                                <p>我是内容啦啦啦</p>
                            </div> `,
                components: {
                    cpn1: cpnC1 // 子组件构造器的注册
                }
            })


            // 2.注册组件 第一个参数是组件标签,第二个参数是上面的构造器对象
            Vue.component('my-cpn', cpnC2)
vue实例也可以看成顶层组件,即root组件
父组件向子组件传值
一个页面可能有很多组件,每个组件又可能嵌套子组件
每个组件都可能需要数据,是每个组件都向后端发起请求吗
并不是,一般是顶层的组件发送请求
这就需要父组件向子组件传送数据了
从上面的内容我们又知道,组件不能从vue实例或父组件的data中获取数据
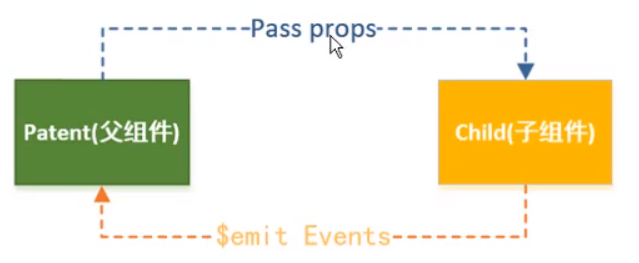
Vue进行父子组件通信:
- 通过props向子组件传递数据
- 通过事件向副组件发送消息 自定义事件,emit
在组件中,使用选项props来声明需要从父级接收到的数据
props的值有两种:
- 字符串数组,数组中的字符串就是传递时的名称
- 对象,对象可以设置传递时的类型,也可以设置默认值等
例子:
vue实例相当于父组件
必须使用v-bind
 <body>

        <div id="app" >
            <cpn v-bind:cmovies='movies' :cmsg='msg'></cpn>
        </div>

        <template id="cpn">
            <div>
                <h2>{{cmsg}}</h2>
                <p>{{cmovies}}</p>
            </div>
        </template>

        <script>

            const cpn = {
                template: '#cpn',
                // 使用数组的形式
                props: ['cmovies', 'cmsg'],
                data(){
                    return{}
                },
                methods:{

                }
            }

            // 局部注册
            const app = new Vue({
                el: '#app',
                data: {
                  msg: "你好啊",
                  movies: ['星际迷航', '星球大战', '流浪地球']
                },
                components:{
                    cpn // 增强写法,相当于 cpn: cpn
                }
            })
        </script>
    </body>
上面使用数组,数组中的变量让人感觉是字符串
还可以使用对象,使用对象可以限制变量的类型
<body>

        <div id="app" >
            <cpn v-bind:cmovies='movies' :cmsg='msg'></cpn>
        </div>

        <template id="cpn">
            <div>
                <h2>{{cmsg}}</h2>
                <p>{{cmovies}}</p>
            </div>
        </template>

        <script>

            const cpn = {
                template: '#cpn',
                // 使用数组的形式
                //props: ['cmovies', 'cmsg'],
                props: {
                    cmovies: Array,
                    cmsg: String
                }
            }

            // 局部注册
            const app = new Vue({
                el: '#app',
                data: {
                  msg: "你好啊",
                  movies: ['星际迷航', '星球大战', '流浪地球']
                },
                components:{
                    cpn // 增强写法,相当于 cpn: cpn
                }
            })
        </script>
    </body>
props属性值类型
- 字符串String
- 数值Number
- 布尔值Boolean
- 数值Array
- 对象Object
通过对象还可以设置默认值
    <body>

        <div id="app" >
            <cpn v-bind:cmovies='movies'></cpn>
        </div>

        <template id="cpn">
            <div>
                <h2>{{cmsg}}</h2>
                <p>{{cmovies}}</p>
            </div>
        </template>

        <script>

            const cpn = {
                template: '#cpn',
                // 使用数组的形式
                //props: ['cmovies', 'cmsg'],
                props: {
                    cmsg: {
                        type: String,
                        default: 'aaaaa'
                    },
                    cmovies: Array
                }
            }

            // 局部注册
            const app = new Vue({
                el: '#app',
                data: {
                  msg: "你好啊",
                  movies: ['星际迷航', '星球大战', '流浪地球']
                },
                components:{
                    cpn // 增强写法,相当于 cpn: cpn
                }
            })
        </script>
    </body>
类型是对象或数组是,默认值必须是一个函数
            const cpn = {
                template: '#cpn',
                // 使用数组的形式
                //props: ['cmovies', 'cmsg'],
                props: {
                    cmsg: {
                        type: String,
                        default: 'aaaaa',
                        required: true
                    },
                    cmovies: {
                        type: Array,
                        default(){
                            return []
                        }
                    }
                }
            }
还可以更多限制
            const cpn = {
                template: '#cpn',
                // 使用数组的形式
                //props: ['cmovies', 'cmsg'],
                props: {
                    cmsg: {
                        type: String,
                        default: 'aaaaa',
                        required: true
                    },
                    cmovies: Array
                }
            }
除了required还有验证

props驼峰
- 在props中使用驼峰形式,模板中需要使用短横线形式
    <body>

        <div id="app" >
            <cpn v-bind:cmovies='movies' :c-msg='msg'></cpn>
        </div>

        <template id="cpn">
            <div>
                <h2>{{cMsg}}</h2>
                <p>{{cmovies}}</p>
            </div>
        </template>

        <script>

            const cpn = {
                template: '#cpn',
                // 使用数组的形式
                //props: ['cmovies', 'cmsg'],
                props: {
                    cMsg: {
                        type: String,
                        default: 'aaaaa',
                        required: true
                    },
                    cmovies: {
                        type: Array,
                        default(){
                            return []
                        }
                    }
                }
            }

            // 局部注册
            const app = new Vue({
                el: '#app',
                data: {
                  msg: "你好啊",
                  movies: ['星际迷航', '星球大战', '流浪地球']
                },
                components:{
                    cpn // 增强写法,相当于 cpn: cpn
                }
            })
        </script>
    </body>
子组件向父组件传值
<body>

        <!-- 父组件 -->
        <div id="app" >
            <cpn></cpn>
        </div>

        <!-- 子组件 -->
        <template id="cpn">
            <div>
                <button v-for="item in categories">{{item.name}}</button>
            </div>
        </template>

        <script>

            const cpn = {
                template: '#cpn',
                data:  function(){
                    return {categories:
                       [{id: "aaa", name: "热门推荐"},
                        {id: "bbb", name: "食品"},
                        {id: "ccc", name: "书籍"}]
                    }
                }
            }

            // 局部注册
            const app = new Vue({
                el: '#app',
                data: {
                  msg: "你好啊",
                  movies: ['星际迷航', '星球大战', '流浪地球']
                },
                components:{
                    cpn // 增强写法,相当于 cpn: cpn
                }
            })
        </script>
    </body>
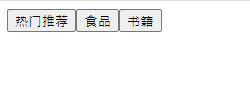
点击按钮后向父组件传递消息
需要自定义事件
    <body>

        <!-- 父组件 -->
        <div id="app" >

            <!-- childclick是自定义事件,这里进行监听,触发pclick -->
            <cpn @childclick="pclick"></cpn>
        </div>

        <!-- 子组件 -->
        <template id="cpn">
            <div>
                <button v-for="item in categories" @click="btnclick">{{item.name}}</button>
            </div>
        </template>

        <script>

            const cpn = {
                template: '#cpn',
                data:  function(){
                    return {categories:
                       [{id: "aaa", name: "热门推荐"},
                        {id: "bbb", name: "食品"},
                        {id: "ccc", name: "书籍"}]
                    }
                },
                methods: {
                    // 参数是发生的事件,这里是MouseEvent
                    btnclick: function(event){
                        // 第一个参数是自定义事件,第二个参数是要传递的数据
                        // 自定义事件要绑定在父组件中
                        this.$emit("childclick", event)
                    }
                }
            }

            // 局部注册
            const app = new Vue({
                el: '#app',
                data: {
                  msg: "你好啊",
                  movies: ['星际迷航', '星球大战', '流浪地球']
                },
                components:{
                    cpn // 增强写法,相当于 cpn: cpn
                },
                methods:{
                    // 监听子组件,自定义事件会触发下面函数
                    pclick: function (event) {
                        alert(event.target.childNodes[0].data)
                        console.log(event)
                    }
                }
            })
        </script>
    </body>
自定义事件流程:
- 在子组件中,通过\$emit()来触发事件
- 在父组件中,通过v-on来监听子组件事件
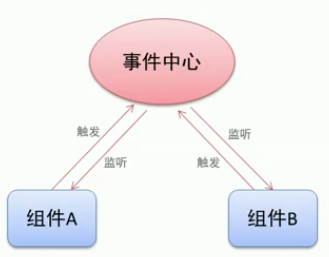
非父子组件传值
单独的事件中心管理组件间的通信
var eventHub = new Vue()
监听事件与销毁事件
eventHub.$on('add-todo', addTodo)
eventHub.$off('add-todo')
触发事件
eventHub.$emit('add-todo', id)
两个按钮

实现点击Jerry,Tom增加,点击Tom,Jerry增加。
<!DOCTYPE html>
<html>
    <head>
        <meta charset="utf-8">
        <title></title>
    </head>
    <body>
        <div id="app">
            <div>父组件</div>
            <div>
                <button @click="handle">销毁事件</button>
            </div>
            <test-tom></test-tom>
            <test-jerry></test-jerry>
        </div>
        <script type="text/javascript" src="./js/vue.js"></script>
        <script>
            var hub = new Vue();

            Vue.component('test-tom', {
                data: function(){
                    return {
                        num: 0
                    }
                },
                template:`
                <div>
                    <div>Tom:{{num}}</div>
                    <div>
                        <button @click='handle'>点击</button>
                    </div>
                </div>
                `,
                methods: {
                    handle: function(){
                        // 触发兄弟组件的事件
                        hub.$emit('jerry-event', 2);
                    }
                },
                mounted: function(){
                    // 监听事件
                    hub.$on('tom-event', (val)=>{
                        this.num += val;
                    });
                }
            });
            Vue.component('test-jerry', {
                data: function(){
                    return {
                        num: 0
                    }
                },
                template:`
                <div>
                    <div>Jerry:{{num}}</div>
                    <div>
                        <button @click='handle'>点击</button>
                    </div>
                </div>
                `,
                methods: {
                    handle: function(){
                        // 触发兄弟组件的事件
                        hub.$emit('tom-event', 2);
                    }
                },
                mounted: function() {
                    // 监听事件
                    hub.$on('jerry-event', (val)=>{
                        this.num += val;
                    });
                }
            });
            var vm = new Vue({
                el: '#app',
                data: {
                    pmsg: '父组件中内容',
                    parr: ['apple', 'orange', 'banana'],
                    fontSize: 10
                },
                methods: {
                    handle: function(val){
                        hub.$off('jerry-event');
                        hub.$off('tom-event');
                    }
                }
            })
        </script>
    </body>
</html>
通过\$refs获取子组件中的东西
<body>

        <div id="app" >
            <cpn ref="aaa"></cpn>
            <!-- 从父组件中取到子组件 -->
            <button @click="btnclick">获取子组件的name</button>
        </div>

        <template id="cpn">
            <div>
                <h2>{{name}}</h2>
            </div>
        </template>

        <script>

            const cpn = {
                template: '#cpn',
                data(){
                        return {name: "子组件的name"}
                    }
            }

            // 局部注册
            const app = new Vue({
                el: '#app',
                data: {

                },
                methods: {
                    btnclick: function(){
                        // $refs对象类型,默认是一个空对象,需要ref属性
                        console.log(this.$refs.aaa.name)
                    }
                },
                components:{
                    cpn // 增强写法,相当于 cpn: cpn

                }
            })
        </script>
    </body>
组件插槽的用法
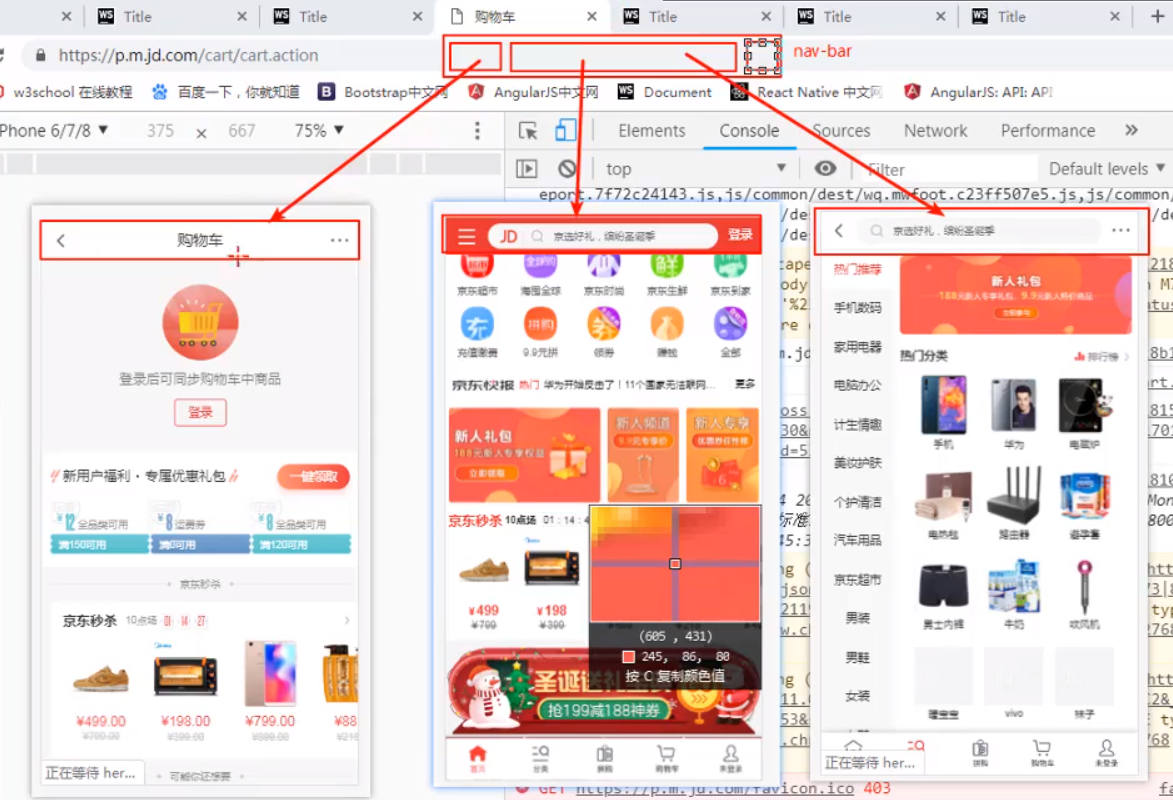
我们的组件往往不能是写死的,比如上面的导航条,不同页面样式是不一样的
上面的导航条可以设置三个插槽
 <body>

        <div id="app" >
            <!-- 组件标签中的内容将会占据组件slot的位置 -->
            <!--
                相当于

                <h2>这是标题</h2>
                <p>我是内容哈哈哈</p>
                <button>按钮</button>

            -->
            <my-cpn><button>按钮</button></my-cpn>
            <!--
                相当于

                <h2>这是标题</h2>
                <p>我是内容哈哈哈</p>
                <a href="http://www.baidu.com">百度一下</a>

            -->
            <my-cpn><a href="http://www.baidu.com">百度一下</a></my-cpn>
        </div>

        <template id="cpn1">
            <div>
                <h2>这是标题</h2>
                <p>我是内容哈哈哈</p>
                <!-- 插槽,里面可以添加内容作为默认值 -->
                <slot></slot>
            </div>
        </template>

        <script>
            // 局部注册
            const app = new Vue({
                el: '#app',
                components:{
                    'my-cpn': {
                        template: '#cpn1',
                    }
                }
            })
        </script>
    </body>
父组件向子组件传递内容,标签里的东西
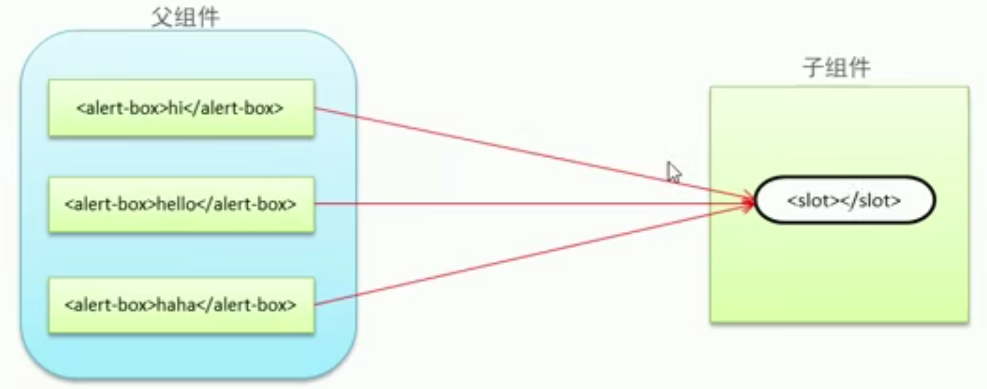
插槽位置
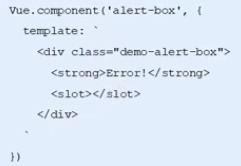
插槽内容

<!DOCTYPE html>
<html>
    <head>
        <meta charset="utf-8">
        <title></title>
    </head>
    <body>
        <div id="app">
            <div>父组件</div>
            <alert-box>有bug发生</alert-box>
            <alert-box>内存不足</alert-box>

        </div>
        <script type="text/javascript" src="./js/vue.js"></script>
        <script>
            var hub = new Vue();

            Vue.component('alert-box', {
                template:`
                <div>
                    <strong>Error:</strong>
                    <slot></slot>
                </div>
                `,
                methods: {
                    handle: function(){
                        // 触发兄弟组件的事件
                        hub.$emit('jerry-event', 2);
                    }
                },
                mounted: function(){
                    // 监听事件
                    hub.$on('tom-event', (val)=>{
                        this.num += val;
                    });
                }
            });
            var vm = new Vue({
                el: '#app',
                data: {

                }
            })
        </script>
    </body>
</html>

slot标签可以添加默认内容,此时若父组件的标签中没有内容则显示该默认内容。
<slot>默认内容</slot>
具名插槽
上面都是一个插槽,所以不会引起混乱
像导航条,需要多个插槽,每个插槽应设置不同的东西
必须给插槽起名字,使用name属性
插槽定义

插槽内容
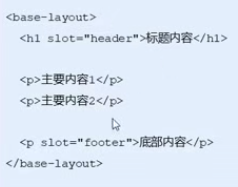
<!DOCTYPE html>
<html>
    <head>
        <meta charset="utf-8">
        <title></title>
    </head>
    <body>
        <div id="app">
            <base-layout>
                <p slot="header">标题信息</p>
                <p >主要内容1</p>
                <p >主要内容2</p>
                <p slot="footer">底部信息</p>
            </base-layout>
            <base-layout> 包裹多个标签
                <template slot="header">
                    <p>标题信息</p>
                    <p>标题信息</p>
                </template>
                <p >主要内容1</p>
                <p >主要内容2</p>
                <template slot="footer">
                    <p>标题信息</p>
                    <p>标题信息</p>
                </template>
            </base-layout>
        </div>
        <script type="text/javascript" src="./js/vue.js"></script>
        <script>
            var hub = new Vue();

            Vue.component('base-layout', {
                template:`
                <div>
                    <header>
                        <slot name='header'></slot>
                    </header>
                    <main>
                        <slot></slot>
                    </main>
                    <footer>
                        <slot name='footer'></slot>
                    </footer>
                </div>
                `,
                methods: {
                    handle: function(){
                        // 触发兄弟组件的事件
                        hub.$emit('jerry-event', 2);
                    }
                },
                mounted: function(){
                    // 监听事件
                    hub.$on('tom-event', (val)=>{
                        this.num += val;
                    });
                }
            });
            var vm = new Vue({
                el: '#app',
                data: {

                }
            })
        </script>
    </body>
</html>
效果

作用域插槽
父组件替换插槽的标签,但是内容由子组件来提供。
应用场景:父组件对子组件的内容进行加工处理
插槽定义
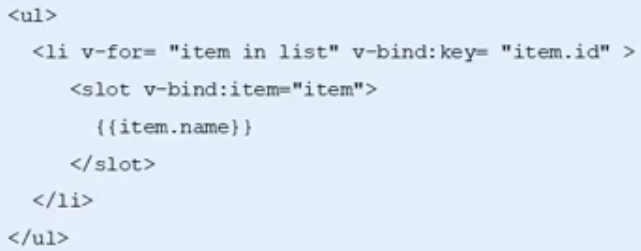
插槽内容

<!DOCTYPE html>
<html>
    <head>
        <meta charset="utf-8">
        <title></title>
        <style>
            .current{
                color: orange;
            }
        </style>
    </head>
    <body>
        <div id="app">
            <fruit-list :list='list'>
                <template slot-scope='slotProps'>
                    <strong v-if="slotProps.info.id==2" class='current'>{{slotProps.info.name}}</strong>
                    <span v-else>{{slotProps.info.name}}</span>
                </template>
            </fruit-list>
        </div>
        <script type="text/javascript" src="./js/vue.js"></script>
        <script>
            var hub = new Vue();

            Vue.component('fruit-list', {
                props: ['list'],
                template:`
                <div>
                    <li :key='item.id' v-for='item in list'>
                        <slot :info='item'>{{item.name}}</slot>
                    </li>
                </div>
                `
            });
            var vm = new Vue({
                el: '#app',
                data: {
                    list: [{
                        id: 1,
                        name: 'apple'
                    }, {
                        id: 2,
                        name: 'orange'
                    },{
                        id: 3,
                        name:'banana'
                    }]
                }
            })
        </script>
    </body>
</html>
webpack
前端代码复杂带来的问题
小明
a.js
function sum(n1, n2){
    return n1 + n2
}

var flag = true

if(flag){
    console.log(sum(1, 2))
}
小红
b.js中也定义了flag
var flag = false

console.log("I am XIAOHONG.")
小明不知道小红做了什么,想复用自己的flag,打印吹牛的话
c.js
if(flag){
    console.log("小明是天才。")
}
html
<!DOCTYPE html>
<html lang="en">
    <head>
        <meta charset="UTF-8">
        <title>Title</title>
    </head>
    <body>

        <script src="a.js"></script>
        <script src="b.js"></script>
        <script src="c.js"></script>

    </body>
</html>
由于b.js排在c.js前面,小明的阴谋不能得逞
总结:多人开发js时,很容易产生变量冲突问题。对js文件的依赖顺序几乎是强制性的,当js文件过多时,比如几十个的时候,弄清楚它们的顺序非常困难。
改进:使用匿名函数
a.js
(function(){
    function sum(n1, n2){
        return n1 + n2
    }

    var flag = true

    if(flag){
        console.log(sum(1, 2))
    }
})()
b.js
;(function(){
    var flag = false
    console.log("I am XIAOHONG.")
})()
小明和小红的代码不再冲突了
但是,问题又来了,小明也没法复用flag了,作用域被限制在了a.js中
解决办法:导出对象,使用模块作为出口
ES5没有模块化
// 现在moduleA是全局的了
var moduleA = (function(){
    var obj = {}
    function sum(n1, n2){
        return n1 + n2
    }

    var flag = true

    if(flag){
        console.log(sum(1, 2))
    }

    obj.flag = flag
    obj.sum = sum

    return obj
})()
c.js中可以使用flag了
;(function(){
    if(moduleA.flag){
        console.log("小明是天才。")
    }
    moduleA.sum(2, 5)
})()
常见模块化规范:
- commonjs
- AMD
- CMD
- ES6的Modules
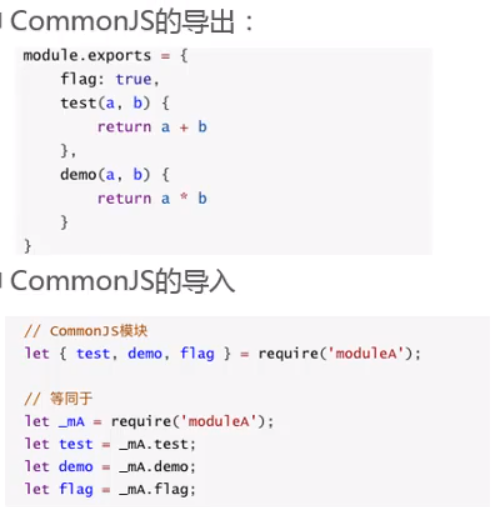
CommonJS
node环境中使用,比如后面的webpack
ES6模块化
export和import
a.js
var flag = true
function sum(n1, n2){
    return n1 + n2
}

if(flag){
    console.log(sum(1, 2))
}

export{
    flag, sum
}
c.js
import {flag, sum} from "./a.js"
if(flag){
    console.log("小明是天才。")
    console.log(sum(5, 5))
}
html中引入各个js文件时,要使用type="module"
<!DOCTYPE html>
<html lang="en">
    <head>
        <meta charset="UTF-8">
        <title>Title</title>
    </head>
    <style>
        .active{
            color: red;

        }
    </style>
    <body>

        <script src="a.js" type="module"></script>
        <script src="b.js" type="module"></script>
        <script src="c.js" type="module"></script>

    </body>
</html>
如果是在chrome中运行会报错
Access to script at 'file:///E:/code/web/vuedemo/%E6%A8%A1%E5%9D%97%E5%8C%96%E5%BC%80%E5%8F%91/a.js'
from origin 'null' has been blocked by CORS policy: Cross origin requests are only
supported for protocol schemes: http, data, chrome, chrome-extension, chrome-untrusted,
https.
需要搭一个server
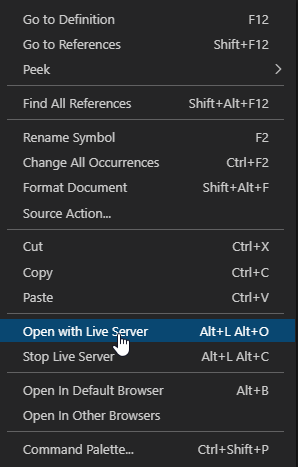
vscode中安装插件 Live Server,点击右下角的它让其运行
右键
可以在定义时导出
export var flag = true
也可以导出函数和类
export function sum(n1, n2){
    return n1 + n2
}
export default
某些情况下,一个模块包含某个功能,我们并不希望给这个功能命名,而且导入者可以自己来命名
这个时候可以使用 export default
只能有一个default
a.js
const address = "sd"
export default address
导入的时候,你就可以任意起名了
import myadd from "./a.js"
全部导入
import * as aa from "a.js"

console.log(aa.flag)
webpack简介
模块化和打包
依赖nodejs安装
安装webpack
npm install webpack@3.6.0 -g
c
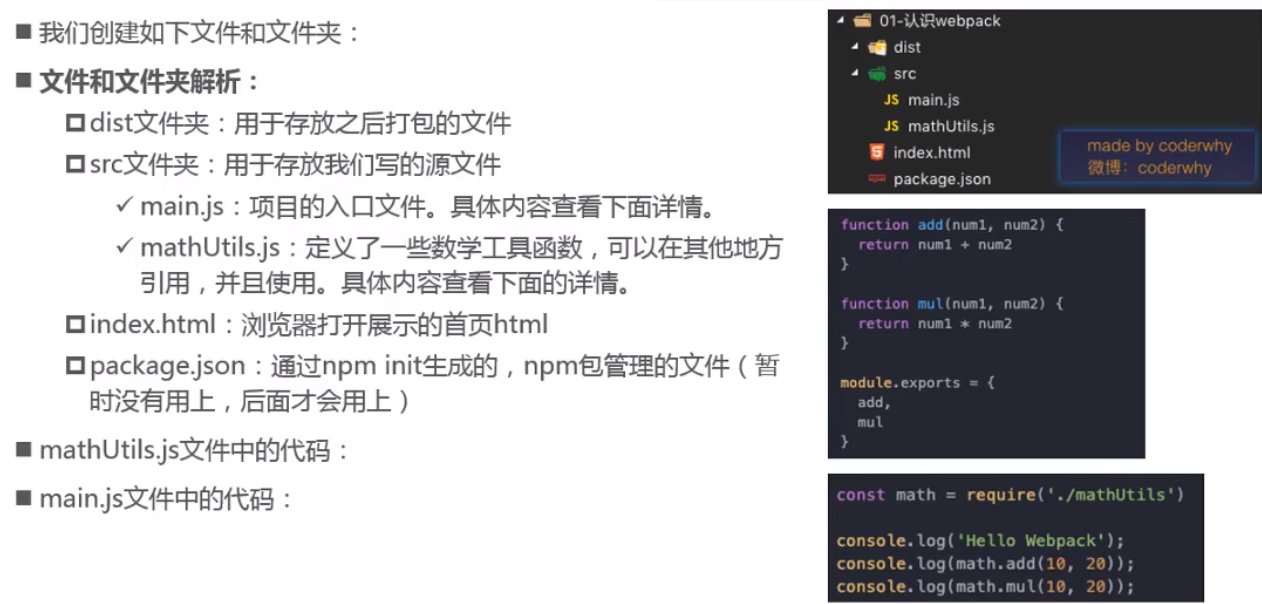
使用CommonJS导入导出模块
main.js
const {add, mul} = require('./mathUtils.js')

console.log(add(1,2))
console.log(mul(6, 6))
mathUtils.js
function add(n1, n2){
    return n1 + n2
}

function mul(n1, n2){
    return n1*n2
}

module.exports = {
    sum,
    mul
}
index.html
<!DOCTYPE html>
<html lang="en">
    <head>
        <meta charset="UTF-8">
        <title>Title</title>
    </head>

    <body>

        <script src="src/main.js" type="module"></script>

    </body>
</html>
这样是无法正常运行的,因为浏览器不认识CommonJS语法
webpack则可以把js文件打包,生成浏览器可以认识的文件
webpack 目标文件 输出文件
PS E:\code\webpack\webpack1> webpack ./src/main.js ./dist/bundle.js
Hash: 024206816b459edcd2b0
Version: webpack 3.6.0
Time: 92ms
    Asset     Size  Chunks             Chunk Names
bundle.js  3.49 kB       0  [emitted]  main
   [0] ./src/main.js 93 bytes {0} [built]
   [1] ./src/mathUtils.js 133 bytes {0} [built]
   [2] (webpack)/buildin/module.js 517 bytes {0} [built]
只需在index.html中引入bundle.js文件即可
<!DOCTYPE html>
<html lang="en">
    <head>
        <meta charset="UTF-8">
        <title>Title</title>
    </head>

    <body>

        <script src="dist/bundle.js" type="module"></script>

    </body>
</html>
你会发现webpack很方便,你只需要指定入口文件main.js,它会自动帮你引入各个js文件
AMD、CMD、EM6,webpack都支持
可以使用配置文件对webpack进行配置
文件名称固定为 webpack.config.js
比如,下面配置入口和输出
module.exports = {
    entry: './src/main.js',
    output: {
        path: './dist',
        filename: 'bundle.js'
    }
}
会报错
Invalid configuration object. Webpack has been initialised using a configuration object that does not match the API schema.
 - configuration.output.path: The provided value "./dist" is not an absolute path!
使用绝对路径,当不建议写死,应该动态获取
需要用到nodejs中的path包
使用命令
npm init
生成了package.json文件,npm包管理的文件,如果依赖包时就应创建该文件
const path = require('path') // 从node包里找

// 动态获取dist路径
module.exports = {
    entry: './src/main.js',
    output: {
        path: path.resolve(__dirname, 'dist'), // __dirname在node上下文中,获取当前路径
        filename: 'bundle.js'
    }
}
配置完后,webpack命令不再用输入入口和输出了
PS E:\code\webpack\webpack2> webpack
Hash: c52e87f3f24cff2a920f
Version: webpack 3.6.0
Time: 75ms
    Asset     Size  Chunks             Chunk Names
bundle.js  2.78 kB       0  [emitted]  main
   [0] ./src/main.js 94 bytes {0} [built]
   [1] ./src/mathUtils.js 134 bytes {0} [built]
和 npm run build 映射起来
取package.json中配置脚本
{
  "name": "webpack2",
  "version": "1.0.0",
  "description": "",
  "main": "webpack.config.js",
  "scripts": {
    "test": "echo \"Error: no test specified\" && exit 1",
    "build": "webpack"
  },
  "author": "",
  "license": "ISC"
}
执行 npm run build结果
PS E:\code\webpack\webpack2> npm run build

> webpack2@1.0.0 build E:\code\webpack\webpack2
> webpack

Hash: c52e87f3f24cff2a920f
Version: webpack 3.6.0
Time: 87ms
    Asset     Size  Chunks             Chunk Names
bundle.js  2.78 kB       0  [emitted]  main
   [0] ./src/main.js 94 bytes {0} [built]
   [1] ./src/mathUtils.js 134 bytes {0} [built]
一般都需要本地安装webpack
npm install webpack@3.6.0 --save-dev
package.json 文件多了
{
  "name": "webpack2",
  "version": "1.0.0",
  "description": "",
  "main": "webpack.config.js",
  "scripts": {
    "test": "echo \"Error: no test specified\" && exit 1",
    "build": "webpack"
  },
  "author": "",
  "license": "ISC",
  "devDependencies": {
    "webpack": "^3.6.0"
  }
}
且本地目录多了一个文件夹
上面在package.json文件中添加了build的脚本,其对应webpack命令,在package.json中配置的命令会优先在本地找
如果你在命令行使用webpack,优先使用全局
这也是配置package.json的一个原因
使用css文件的配置
不仅有js文件,还有css、图片文件,将scss、less转成css,将.vue转成js文件等等
webpack本身不支持这些,需要扩展对应的loader
loader使用步骤:
- 通过npm安装需要使用的loader
- 在webpack.config.js中的modules关键字下进行配置
各种loader可以去官网查看
css使用css-loader进行加载
style-loader将样式添加到DOM中
安装
npm install --save-dev css-loader
npm install --save-dev style-loader
在webpack.config.js中配置
const path = require('path') // 从node包里找

// 动态获取dist路径
module.exports = {
    entry: './src/main.js',
    output: {
        path: path.resolve(__dirname, 'dist'), // __dirname在node上下文中,获取当前路径
        filename: 'bundle.js'
    },
    module: {
        rules: [
          {
            test: /\.css$/i,
            use: ["style-loader", "css-loader"],
          },
        ],
      },
}
loader是从右向左读的
将css文件导入到入口文件mian.js中
const math = require('./js/mathUtils')


console.log(math.add(1,2))
console.log(math.mul(6, 6))

require('./css/normal.css')
执行npm run build
如果报错
(node:16216) UnhandledPromiseRejectionWarning: TypeError: this.getResolve is not a function
    at Object.loader (E:\code\webpack\webpack2\node_modules\css-loader\dist\index.js:62:27)
    at LOADER_EXECUTION (E:\code\webpack\webpack2\node_modules\loader-runner\lib\LoaderRunner.js:119:14)
    at runSyncOrAsync (E:\code\webpack\webpack2\node_modules\loader-runner\lib\LoaderRunner.js:120:4)
    at iterateNormalLoaders (E:\code\webpack\webpack2\node_modules\loader-runner\lib\LoaderRunner.js:232:2)
    at Array.<anonymous> (E:\code\webpack\webpack2\node_modules\loader-runner\lib\LoaderRunner.js:205:4)
    at Storage.finished (E:\code\webpack\webpack2\node_modules\enhanced-resolve\lib\CachedInputFileSystem.js:40:15)
    at E:\code\webpack\webpack2\node_modules\enhanced-resolve\lib\CachedInputFileSystem.js:77:9
    at E:\code\webpack\webpack2\node_modules\graceful-fs\graceful-fs.js:123:16
    at FSReqWrap.readFileAfterClose [as oncomplete] (internal/fs/read_file_context.js:53:3)
原因是 css-loader 和 style-loader 版本过高
配置版本
package.json
{
  "name": "webpack2",
  "version": "1.0.0",
  "description": "",
  "main": "webpack.config.js",
  "scripts": {
    "test": "echo \"Error: no test specified\" && exit 1",
    "build": "webpack"
  },
  "author": "",
  "license": "ISC",
  "devDependencies": {
    "css-loader": "^3.3.1",
    "style-loader": "^1.0.0",
    "webpack": "^3.6.0"
  }
}
执行
npm install
npm dev
重新打包
处理less
创建less文件
@fontSize: 50px;
@fontColor: orange;

body{
    font-size: @fontSize;
    color: @fontColor;
}
引入到main.js
const math = require('./js/mathUtils')


console.log(math.add(1,2))
console.log(math.mul(6, 6))

require('./css/normal.css')
require('./css/special.less')
安装loader
npm install --save-dev less-loader less
添加配置
const path = require('path') // 从node包里找

// 动态获取dist路径
module.exports = {
    entry: './src/main.js',
    output: {
        path: path.resolve(__dirname, 'dist'), // __dirname在node上下文中,获取当前路径
        filename: 'bundle.js'
    },
    module: {
        rules: [
          {
            test: /\.css$/i,
            use: ["style-loader", "css-loader"],
          },
          {
            test: /\.less$/i,
            use: [
              "style-loader",
              {
                loader: "css-loader",
                options: {
                  sourceMap: true,
                },
              },
              {
                loader: "less-loader",
                options: {
                  sourceMap: true,
                },
              },
            ],
          },
        ],
      },
}
npm run build
图片文件
url-loader
npm install url-loader@0.6.2 --save-dev
配置文件
const path = require('path') // 从node包里找

// 动态获取dist路径
module.exports = {
    entry: './src/main.js',
    output: {
        path: path.resolve(__dirname, 'dist'), // __dirname在node上下文中,获取当前路径
        filename: 'bundle.js'
    },
    module: {
        rules: [
          {
            test: /\.css$/i,
            use: ["style-loader", "css-loader"],
          },
          {
            test: /\.less$/i,
            use: [
              "style-loader",
              {
                loader: "css-loader",
                options: {
                  sourceMap: true,
                },
              },
              {
                loader: "less-loader",
                options: {
                  sourceMap: true,
                },
              },
            ],
          },
          {
            test: /\.(png|jpg|gif)$/i,
            use: [
              {
                loader: 'url-loader',
                options: {
                  limit: 819200,
                },
              },
            ],
          },
        ],
      },
}
当图片小于limit时会使用base64字符串,大于limit时会使用fileloader
安装fileloader
npm install file-loader --save-dev
不用配置fileloader,但要配置publicPath
normal.css
body{
    background: url(../img/5.jpg);
}
你会发现,打包的文件是ES6的语法,一些浏览器可能不支持
转成ES5,使用babel
npm install babel-loader@7 babel-core babel-preset-es2015
配置文件
const path = require('path') // 从node包里找

// 动态获取dist路径
module.exports = {
    entry: './src/main.js',
    output: {
        path: path.resolve(__dirname, 'dist'), // __dirname在node上下文中,获取当前路径
        filename: 'bundle.js'
    },
    module: {
        rules: [
          {
            test: /\.css$/i,
            use: ["style-loader", "css-loader"],
          },
          {
            test: /\.less$/i,
            use: [
              "style-loader",
              {
                loader: "css-loader",
                options: {
                  sourceMap: true,
                },
              },
              {
                loader: "less-loader",
                options: {
                  sourceMap: true,
                },
              },
            ],
          },
          {
            test: /\.(png|jpg|gif)$/i,
            use: [
              {
                loader: 'url-loader',
                options: {
                  limit: 819200,
                },
              },
            ],
          },
          {
            test: /\.m?js$/,
            exclude: /(node_modules|bower_components)/,
            use: {
              loader: 'babel-loader',
              options: {
                presets: ['es2015']
              }
            }
          }
        ],
      },
}
配置Vue
安装vue,不只开发时运行时也需要,不用--save-dev
npm install vue --save
plugin使用步骤:
- 通过npm安装需要使用的plugin
- 在webpack.config.js中配置
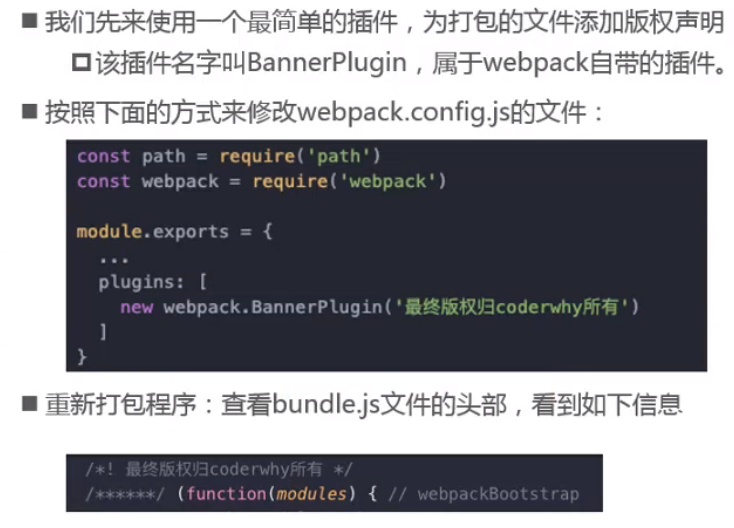
添加版权的plugin
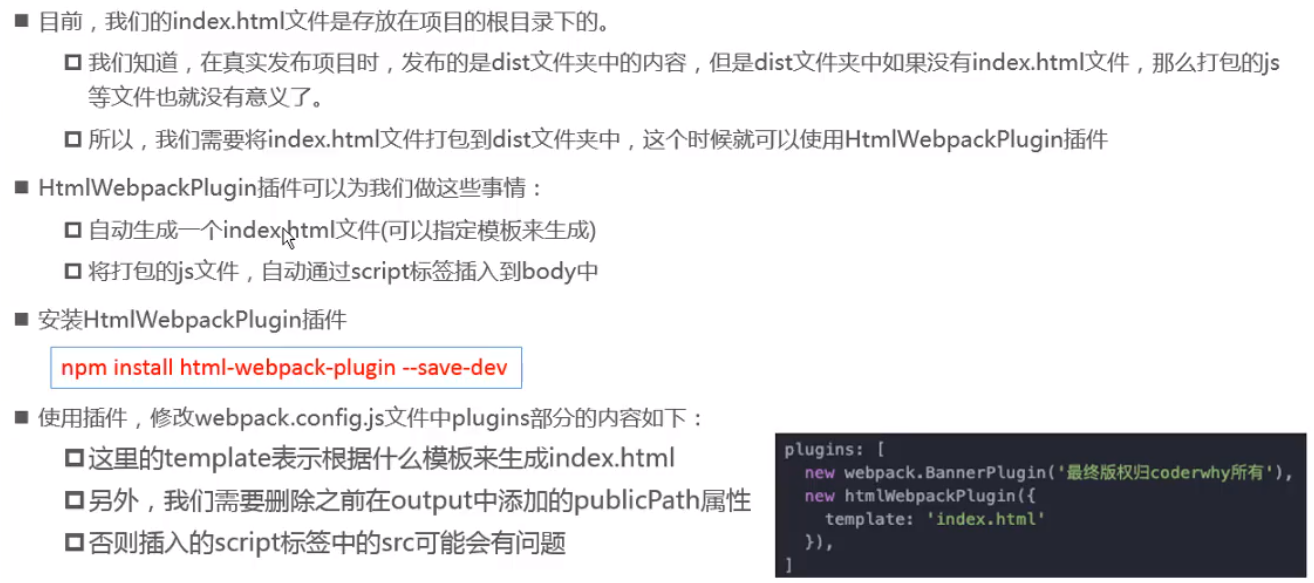
html打包
js压缩

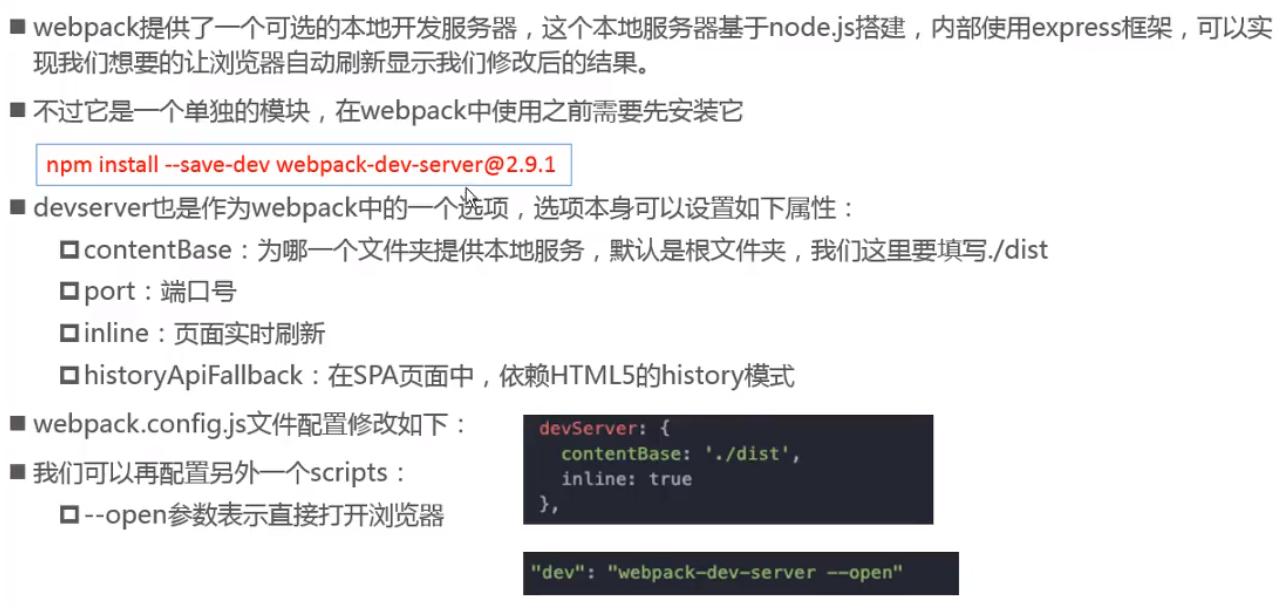
搭建本地服务
Vue CLI
如果只是简单写几个Vue的Demo程序,那么你不需要vue CLI
如果你在开发大型项目,必然需要使用Vue CLIC
使用Vue.js开发大型应用时,需要考虑代码目录结构、项目结构和部署、热加载、代码单元测试等事情。
如果每个项目都要手动完成这些工作,那么无疑效率比较低,需要脚手架来帮助完成这些事情。
Command-Line Interface,翻译为命令行界面,俗称脚手架。
Vue CLI是官方发布vue.js项目脚手架
使用vue-cli可以快速搭建Vue开发环境以及对应的webpack配置
CLI服务是一个开发环境依赖。他是一个npm包,本地安装到@vue/cli创建的每个项目中。CLI服务是构建于webpack和webpack-dev-server之上的,包含了:
- 加载其他CLI插件的核心服务
- 一个为绝大部分应用优化过的内部webpack配置
- 项目内部的vue-cli-service命令,包含基本的serve、build和inspect命令
Vue-CLI2
npm install -g @vue/cli
安装的是脚手架3,可以拉一个2的模板,因此不用安装脚手架2
npm install @vue/cli-init -g
Vue CLI2初始化
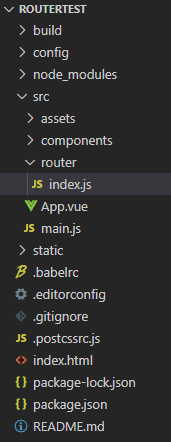
vue init webpack my-project
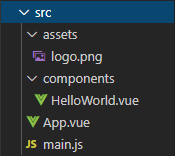
生成了

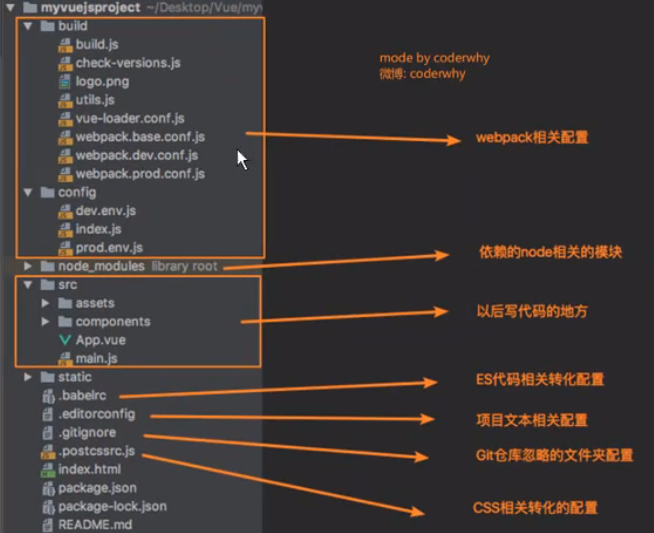
研究下目录
运行项目时使用
npm run build/env
那就先看下package.json中的脚本命令
  "scripts": {
    "dev": "webpack-dev-server --inline --progress --config build/webpack.dev.conf.js",
    "start": "npm run dev",
    "lint": "eslint --ext .js,.vue src",
    "build": "node build/build.js"
  },
打包命令 npm run build,会用node执行build目录下的build.js文件
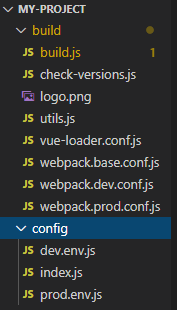
build目录和config目录都是webpack的配置文件目录
build.js
'use strict'
require('./check-versions')()

process.env.NODE_ENV = 'production'

const ora = require('ora')
const rm = require('rimraf')
const path = require('path')
const chalk = require('chalk')
const webpack = require('webpack')
const config = require('../config')
const webpackConfig = require('./webpack.prod.conf')

const spinner = ora('building for production...')
spinner.start()

rm(path.join(config.build.assetsRoot, config.build.assetsSubDirectory), err => {
  if (err) throw err
  webpack(webpackConfig, (err, stats) => {
    spinner.stop()
    if (err) throw err
    process.stdout.write(stats.toString({
      colors: true,
      modules: false,
      children: false, // If you are using ts-loader, setting this to true will make TypeScript errors show up during build.
      chunks: false,
      chunkModules: false
    }) + '\n\n')

    if (stats.hasErrors()) {
      console.log(chalk.red('  Build failed with errors.\n'))
      process.exit(1)
    }

    console.log(chalk.cyan('  Build complete.\n'))
    console.log(chalk.yellow(
      '  Tip: built files are meant to be served over an HTTP server.\n' +
      '  Opening index.html over file:// won\'t work.\n'
    ))
  })
})
加载的配置文件是build目录下的 webpack.prod.conf
webpack.prod.conf
'use strict'
const path = require('path')
const utils = require('./utils')
const webpack = require('webpack')
const config = require('../config')
const merge = require('webpack-merge')
const baseWebpackConfig = require('./webpack.base.conf')
const CopyWebpackPlugin = require('copy-webpack-plugin')
const HtmlWebpackPlugin = require('html-webpack-plugin')
const ExtractTextPlugin = require('extract-text-webpack-plugin')
const OptimizeCSSPlugin = require('optimize-css-assets-webpack-plugin')
const UglifyJsPlugin = require('uglifyjs-webpack-plugin')

const env = require('../config/prod.env')

const webpackConfig = merge(baseWebpackConfig, {
  module: {
    rules: utils.styleLoaders({
      sourceMap: config.build.productionSourceMap,
      extract: true,
      usePostCSS: true
    })
  },
  devtool: config.build.productionSourceMap ? config.build.devtool : false,
  output: {
    path: config.build.assetsRoot,
    filename: utils.assetsPath('js/[name].[chunkhash].js'),
    chunkFilename: utils.assetsPath('js/[id].[chunkhash].js')
  },
  plugins: [
    // http://vuejs.github.io/vue-loader/en/workflow/production.html
    new webpack.DefinePlugin({
      'process.env': env
    }),
    new UglifyJsPlugin({
      uglifyOptions: {
        compress: {
          warnings: false
        }
      },
      sourceMap: config.build.productionSourceMap,
      parallel: true
    }),
    // extract css into its own file
    new ExtractTextPlugin({
      filename: utils.assetsPath('css/[name].[contenthash].css'),
      // Setting the following option to `false` will not extract CSS from codesplit chunks.
      // Their CSS will instead be inserted dynamically with style-loader when the codesplit chunk has been loaded by webpack.
      // It's currently set to `true` because we are seeing that sourcemaps are included in the codesplit bundle as well when it's `false`,
      // increasing file size: https://github.com/vuejs-templates/webpack/issues/1110
      allChunks: true,
    }),
    // Compress extracted CSS. We are using this plugin so that possible
    // duplicated CSS from different components can be deduped.
    new OptimizeCSSPlugin({
      cssProcessorOptions: config.build.productionSourceMap
        ? { safe: true, map: { inline: false } }
        : { safe: true }
    }),
    // generate dist index.html with correct asset hash for caching.
    // you can customize output by editing /index.html
    // see https://github.com/ampedandwired/html-webpack-plugin
    new HtmlWebpackPlugin({
      filename: config.build.index,
      template: 'index.html',
      inject: true,
      minify: {
        removeComments: true,
        collapseWhitespace: true,
        removeAttributeQuotes: true
        // more options:
        // https://github.com/kangax/html-minifier#options-quick-reference
      },
      // necessary to consistently work with multiple chunks via CommonsChunkPlugin
      chunksSortMode: 'dependency'
    }),
    // keep module.id stable when vendor modules does not change
    new webpack.HashedModuleIdsPlugin(),
    // enable scope hoisting
    new webpack.optimize.ModuleConcatenationPlugin(),
    // split vendor js into its own file
    new webpack.optimize.CommonsChunkPlugin({
      name: 'vendor',
      minChunks (module) {
        // any required modules inside node_modules are extracted to vendor
        return (
          module.resource &&
          /\.js$/.test(module.resource) &&
          module.resource.indexOf(
            path.join(__dirname, '../node_modules')
          ) === 0
        )
      }
    }),
    // extract webpack runtime and module manifest to its own file in order to
    // prevent vendor hash from being updated whenever app bundle is updated
    new webpack.optimize.CommonsChunkPlugin({
      name: 'manifest',
      minChunks: Infinity
    }),
    // This instance extracts shared chunks from code splitted chunks and bundles them
    // in a separate chunk, similar to the vendor chunk
    // see: https://webpack.js.org/plugins/commons-chunk-plugin/#extra-async-commons-chunk
    new webpack.optimize.CommonsChunkPlugin({
      name: 'app',
      async: 'vendor-async',
      children: true,
      minChunks: 3
    }),

    // copy custom static assets
    new CopyWebpackPlugin([
      {
        from: path.resolve(__dirname, '../static'),
        to: config.build.assetsSubDirectory,
        ignore: ['.*']
      }
    ])
  ]
})

if (config.build.productionGzip) {
  const CompressionWebpackPlugin = require('compression-webpack-plugin')

  webpackConfig.plugins.push(
    new CompressionWebpackPlugin({
      asset: '[path].gz[query]',
      algorithm: 'gzip',
      test: new RegExp(
        '\\.(' +
        config.build.productionGzipExtensions.join('|') +
        ')$'
      ),
      threshold: 10240,
      minRatio: 0.8
    })
  )
}

if (config.build.bundleAnalyzerReport) {
  const BundleAnalyzerPlugin = require('webpack-bundle-analyzer').BundleAnalyzerPlugin
  webpackConfig.plugins.push(new BundleAnalyzerPlugin())
}

module.exports = webpackConfig
它又合并的webpack.base.conf
npm run dev
webpack-dev-server --inline --progress --config build/webpack.dev.conf.js
搭建本地服务器 webpack-dev-server
使用配置文件build目录下的webpack.dev.conf.js,也合并那个base配置文件
congifg目录下的配置文件很简单,大多是定义了一些变量
src目录下是要编写的源代码
static目录下的资源会原封不动的复制到dist目录,src下的图片等是根据limit,可能base64或作为file等,还会修改名字
回到项目创建 vue init webpack my-project
其中,有个选择
? Vue build
> Runtime + Compiler: recommended for most users
  Runtime-only: about 6KB lighter min+gzip, but templates (or any Vue-specific HTML) are ONLY allowed in .vue files - re
nder functions are required elsewhere
对比
两者的差距只在main.js文件中
runtime-compiler
import Vue from 'vue'
import App from './App'

Vue.config.productionTip = false

/* eslint-disable no-new */
new Vue({
  el: '#app',
  components: { App },
  template: '<App/>'
})
runtime-only
import Vue from 'vue'
import App from './App'

Vue.config.productionTip = false

/* eslint-disable no-new */
new Vue({
  el: '#app',
  render: h => h(App)
})
h 是 cretateElement函数
runtime-compiler
- template -> ast ->render->vdom->UI
runtime-only
- render->vdom->UI
Vue CLI3
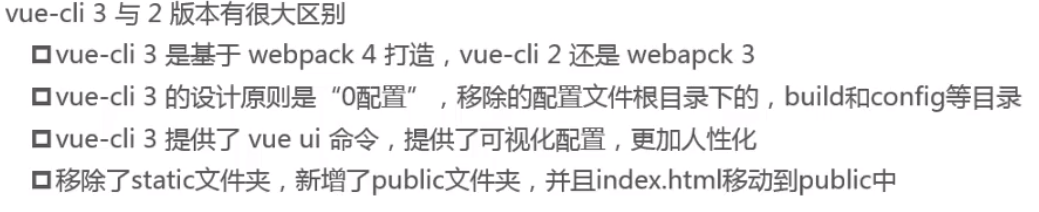
build和config目录找不到了
创建项目
vue create my-project

空格选择
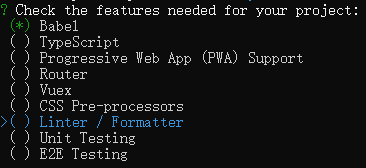

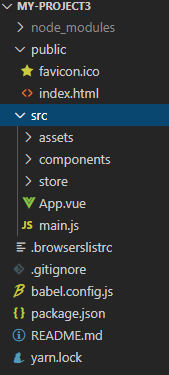
生成的项目目录
箭头函数和this
Vue-Router
SPA单页面富应用,整个网站只有一个html页面
说白了,就是在前后端分离的基础上增加了前端路由
点某个url不是往服务器发请求,而是根据前端路由从js文件中拉取组件
如何实现url改变却不向服务器请求资源呢?
两种
- hash location.hash="xxx"
- HTML5的history模式:pushState history.pushState({}, '', 'xxx') 压入到栈, history.back() 等价于history.go(-1),history.forward()等价于history.go(1)
replaceState
CLI2新建项目
清空router目录的index.js文件,我们从头写
安装和使用vue-router
- 安装 npm install vue-router --save
- 在模块化工程中使用
- 导入路由对象,并调用Vue.user(VueRouter)
- 创建路由实例,并且传入路由映射器
- 在Vue实例中挂载创建的路由实例
index.js
// 导入vue
import Vue from 'vue'
// 导入路由
import Router from 'vue-router'
import HelloWorld from '@/components/HelloWorld'

// 1.传入路由对象 Vue.use(插件)
Vue.use(Router)

// 2.创建vuerouter对象
const routers = [

]

const router = new Router({
  // 配置路由和组件之间的映射关系
  routers
})


// 3.将router对象传入到Vue实例
// 此处导出,main.js中导入
export default router
main.js
import Vue from 'vue'
import App from './App'
import router from './router'

Vue.config.productionTip = false

/* eslint-disable no-new */
new Vue({
  el: '#app',
  router,
  render: h => h(App)
})
使用vue-router的步骤
- 创建路由组件
- 配置路由组件和路径映射关系
- 使用路由: <router-link>和<router-view>
创建两个组件
home.vue
<template>
  <div>
      <h2>我是首页</h2>
  </div>
</template>

<script>
export default {
  name: 'Home'
}
</script>

<style scoped>

</style>
about.vue
<template>
  <div>
      <h2>我是关于</h2>
  </div>
</template>

<script>
export default {
  name: 'About'
}
</script>

<style scoped>

</style>
index.js
// 导入vue
import Vue from 'vue'
// 导入路由
import Router from 'vue-router'
//import HelloWorld from '@/components/HelloWorld'
import Home from '@/components/home'
import About from '@/components/about'

// 1.传入路由对象 Vue.use(插件)
Vue.use(Router)

// 2.创建vuerouter对象,一个映射关系就是一个对象
const routers = [
  {
    path: '/home',
    component: Home
  },
  {
    path: '/about',
    component: About
  }
]

const router = new Router({
  // 配置路由和组件之间的映射关系
  routers
})


// 3.将router对象传入到Vue实例
// 此处导出,main.js中导入
export default router
main.js
import Vue from 'vue'
import App from './App'
import router from './router'

Vue.config.productionTip = false

/* eslint-disable no-new */
new Vue({
  el: '#app',
  router,
  render: h => h(App)
})
App.vue
<template>
  <div id="app">
    <router-link to="/home">首页</router-link>
    <router-link to="/about">关于</router-link>
    <!-- router-view相当于占位 -->
    <router-view></router-view>
  </div>
</template>

<script>
export default {
  name: 'App'
}
</script>

<style>
#app {
  font-family: 'Avenir', Helvetica, Arial, sans-serif;
  -webkit-font-smoothing: antialiased;
  -moz-osx-font-smoothing: grayscale;
  text-align: center;
  color: #2c3e50;
  margin-top: 60px;
}
</style>
运行
npm run dev
不幸的的是,路由view死活不显示
vue2.0之vue-router的神坑 router-view不显示
因为上面的一个词写错了
index.js中
const routes = [
  {
    path: '/home',
    component: Home
  },
  {
    path: '/about',
    component: About
  }
]

const router = new Router({
  // 配置路由和组件之间的映射关系
  routes
})
是routes不是routers
那个首页点击才显示,我们想默认显示,使用重定向
index.js
const routes = [
  {
    path: '',
    redirect: '/home'
  },
  {
    path: '/home',
    component: Home
  },
  {
    path: '/about',
    component: About
  }
]
默认hash模式,改为history
index.js
const router = new Router({
  // 配置路由和组件之间的映射关系
  routes,
  mode: 'history'
})
router-link 属性
to 属性
默认会被渲染成a标签,想渲染成其他标签用tag
App.vue
<template>
  <div id="app">
    <router-link to="/home">首页</router-link>
    <router-link to="/about" tag="button">关于</router-link>
    <!-- router-view相当于占位 -->
    <router-view></router-view>
  </div>
</template>
replace属性,不会留下history
<template>
  <div id="app">
    <router-link to="/home" replace>首页</router-link>
    <router-link to="/about" tag="button">关于</router-link>
    <!-- router-view相当于占位 -->
    <router-view></router-view>
  </div>
</template>
active-class属性
被点击的标签如按钮,默认会有个 router-link-active属性,不喜欢这个名字可以用active属性修改
<template>
  <div id="app">
    <router-link to="/home" replace active-class="active">首页</router-link>
    <router-link to="/about" tag="button">关于</router-link>
    <!-- router-view相当于占位 -->
    <router-view></router-view>
  </div>
</template>
通过代码实现路由
每个vue组件都有\$router属性
export default {
  name: 'App',
  methods: {
    homeClick(){
      this.$router.push('/home')

    },
    aboutClick(){
      this.$router.push('/about')


    }
  }
}
动态路由
配置路由
// 导入vue
import Vue from 'vue'
// 导入路由
import Router from 'vue-router'
//import HelloWorld from '@/components/HelloWorld'
import Home from '../components/Home'
import About from '../components/About'
import User from '@/components/User'

// 1.传入路由对象 Vue.use(插件)
Vue.use(Router)

// 2.创建vuerouter对象,一个映射关系就是一个对象
const routes = [
  {
    path: '',
    redirect: '/home'
  },
  {
    path: '/home',
    component: Home
  },
  {
    path: '/about',
    component: About
  },
  {
    path: '/user/:userId',
    component: User
  }
]

const router = new Router({
  // 配置路由和组件之间的映射关系
  routes,
  mode: 'history'
})


// 3.将router对象传入到Vue实例
// 此处导出,main.js中导入
export default router
App.vue
<template>
  <div id="app">
    <router-link to="/home" >首页</router-link>
    <router-link to="/about">关于</router-link>
    <router-link v-bind:to="'/user/' + userId">用户</router-link>

    <!-- router-view相当于占位 -->
    <router-view></router-view>
  </div>
</template>

<script>
export default {
  name: 'App',
  data(){
    return {userId: 'zhangsan'}
  }
}
</script>

<style>

</style>
User组件
<template>
  <div>
      <h2>我是用户界面</h2>
      <h2>用户id:{{userId}}</h2>
  </div>
</template>

<script>
export default {
  name: 'User',
  computed: {
      userId(){
          return this.$route.params.userId
      }
  }
}
</script>

<style scoped>

</style>
懒加载
打包的时候,并非所有js都在一个文件中,而是进行了分包
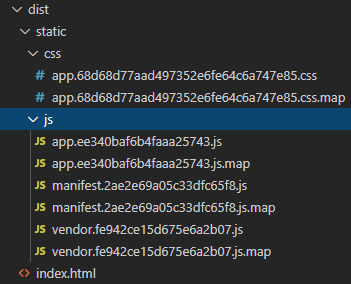
app开头的js文件中是业务代码
vendor开头的js文件中是第三方代码
manifest开头的js文件为了打包的代码做底层支持
随着业务发展,app文件越来越大,如果一次请求过来可能会导致用户浏览器短暂时间的空白
一般会把不同路由对应的组件分割成不同的代码块,然后当路由被访问的时候才加载对应的组件
路由懒加载的主要作用就是将路由对应的组件打包成一个个js代码块,只有在这个路由被访问的时候,才加载对应的组件
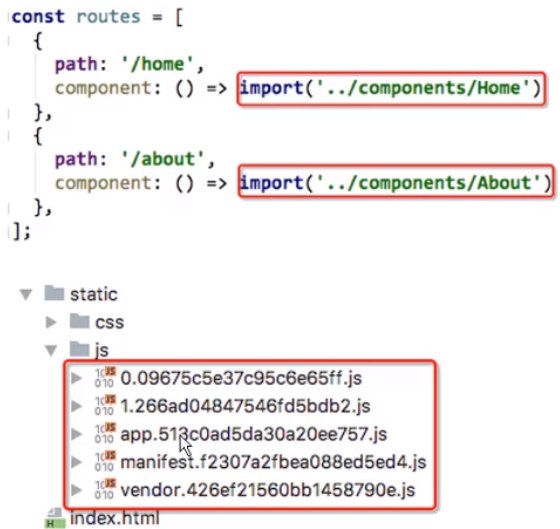
如上图,home和about两个组件形成了两个js文件,只有真正使用的时候才加载
懒加载的方式
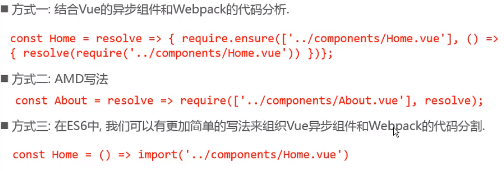
index.js
// 导入vue
import Vue from 'vue'
// 导入路由
import Router from 'vue-router'
//import HelloWorld from '@/components/HelloWorld'
// import Home from '../components/Home'
// import About from '../components/About'
// import User from '@/components/User'

// 1.传入路由对象 Vue.use(插件)
Vue.use(Router)

// 懒加载
const Home =  () => import('../components/Home')
const About = () => import('../components/About')
const User = () => import('../components/User')

// 2.创建vuerouter对象,一个映射关系就是一个对象
const routes = [
  {
    path: '',
    redirect: '/home'
  },
  {
    path: '/home',
    component: Home
  },
  {
    path: '/about',
    component: About
  },
  {
    path: '/user/:userId',
    component: User
  }
]

const router = new Router({
  // 配置路由和组件之间的映射关系
  routes,
  mode: 'history'
})


// 3.将router对象传入到Vue实例
// 此处导出,main.js中导入
export default router
嵌套路由
home页面中希望通过/home/news和/home/message访问一些内容
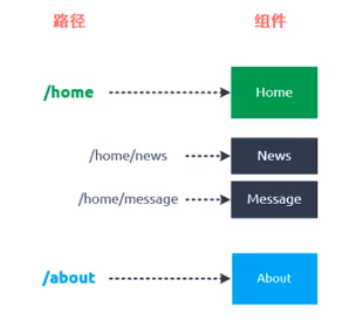
实现嵌套路由的两个步骤:
- 创建对应的子组件,并且在路由映射中配置对应的子路由
- 在组件内部使用<router-view>标签
创建两个组件
HomeNws
<template>
  <div>
      <ul>
          <li>新闻一</li>
          <li>新闻二</li>
          <li>新闻三</li>
          <li>新闻四</li>
          <li>新闻五</li>
      </ul>
  </div>
</template>

<script>
export default {
  name: 'HomeNews'
}
</script>

<style scoped>

</style>
HomeMessage
<template>
  <div>
      <ul>
          <li>消息一</li>
          <li>消息二</li>
          <li>消息三</li>
          <li>消息四</li>
          <li>消息五</li>
      </ul>
  </div>
</template>

<script>
export default {
  name: 'HomeMessage'
}
</script>

<style scoped>

</style>
配置路由
// 导入vue
import Vue from 'vue'
// 导入路由
import Router from 'vue-router'
//import HelloWorld from '@/components/HelloWorld'
// import Home from '../components/Home'
// import About from '../components/About'
// import User from '@/components/User'

// 1.传入路由对象 Vue.use(插件)
Vue.use(Router)

// 懒加载
const Home =  () => import('../components/Home')
const About = () => import('../components/About')
const User = () => import('../components/User')

// 记载子组件
const HomeNews =  () => import('../components/HomeNews')
const HomeMessage = () => import('../components/HomeMessage')

// 2.创建vuerouter对象,一个映射关系就是一个对象
const routes = [
  {
    path: '',
    redirect: '/home'
  },
  {
    path: '/home',
    component: Home,
    children: [
      {
        path: '',
        redirect: 'news'
      },
      {
        path: 'news',
        component: HomeNews
      },
      {
        path: 'message',
        component: HomeMessage
      }
    ]
  },
  {
    path: '/about',
    component: About
  },
  {
    path: '/user/:userId',
    component: User
  }
]

const router = new Router({
  // 配置路由和组件之间的映射关系
  routes,
  mode: 'history'
})


// 3.将router对象传入到Vue实例
// 此处导出,main.js中导入
export default router
子路由显示位置
在Home.vue中配置
<template>
  <div>
      <h2>我是首页</h2>
      <router-link to="/home/news">新闻</router-link>
      <router-link to="/home/message">消息</router-link>
      <router-view></router-view>
  </div>
</template>

<script>
export default {
  name: 'Home'
}
</script>

<style scoped>

</style>
参数传递
传递参数的两种方式
params的类型,前面已经说过
- 配置路由格式:/router/:id
- 传递的方式:在path后面跟上对应的值
- 传递后形成的路径:/router/123,/router/abc
query类型
- 配置路由格式:/router,也就是普通配置
- 传递的方式:对象中使用query的key作为传递方式
- 传递形成的路径:/router?id=123, /router?id=abc
创建组件Profile.vue
<template>
  <div>
      <h2>我是档案</h2>
      <h2>用户名称:{{$route.query.name}}</h2>
      <h2>用户年龄:{{$route.query.age}}</h2>
  </div>
</template>

<script>
export default {
  name: 'User'
}
</script>

<style scoped>

</style>
路由index.js
  {
    path: '/profile',
    component: Profile
  }
App.vue
<template>
  <div id="app">
    <router-link to="/home" >首页</router-link>
    <router-link to="/about">关于</router-link>
    <router-link v-bind:to="'/user/' + userId">用户</router-link>
    <router-link :to="{path: '/profile', query: {name: 'why', age: 18}}" >档案</router-link>
    <!-- router-view相当于占位 -->
    <router-view></router-view>
  </div>
</template>

<script>
export default {
  name: 'App',
  data(){
    return {userId: 'zhangsan'}
  }
}
</script>

<style>

</style>
通过代码
App.vue
<template>
  <div id="app">
    <router-link to="/home" >首页</router-link>
    <router-link to="/about">关于</router-link>
    <!-- <router-link v-bind:to="'/user/' + userId">用户</router-link>
    <router-link :to="{path: '/profile', query: {name: 'why', age: 18}}" >档案</router-link> -->
    <button @click="userClick">用户</button>
    <button @click="profileClick">档案</button>
    <!-- router-view相当于占位 -->
    <router-view></router-view>
  </div>
</template>

<script>
export default {
  name: 'App',
  data(){
    return {userId: 'zhangsan'}
  },
  methods: {
    userClick(){
      this.$router.push('/user/' + this.userId)
    },
    profileClick(){
      this.$router.push({
        path: '/profile',
        query: {name: 'why', age: 18}
      })
    }
  }
}
</script>

<style>

</style>
router和route

全局导航守卫
对路由跳转进行监听,从而在跳转时做些什么
需求:实现窗口标题随着路由变化而变化

![]()
通过 router对象,使用前置钩子:
NavigationGuard
export type NavigationGuard = (
  to: Route,
  from: Route,
  next: (to?: RawLocation | false | ((vm: Vue) => any) | void) => void
) => any
所以,beforeEach需要传入一个函数,参数是to、from、next,next又是一个函数
路由对象都添加meta对象属性,meta中添加标题,到时候去meta里找标题就好了
// 导入vue
import Vue from 'vue'
// 导入路由
import Router from 'vue-router'

// 1.传入路由对象 Vue.use(插件)
Vue.use(Router)

// 懒加载
const Home =  () => import('../components/Home')
const About = () => import('../components/About')
const User = () => import('../components/User')
const Profile = () => import('../components/Profile')

// 记载子组件
const HomeNews =  () => import('../components/HomeNews')
const HomeMessage = () => import('../components/HomeMessage')

// 2.创建vuerouter对象,一个映射关系就是一个对象
const routes = [
  {
    path: '',
    redirect: '/home',
  },
  {
    path: '/home',
    component: Home,
    meta: {
      title: '首页'
    },
    children: [
      {
        path: '',
        redirect: 'news'
      },
      {
        path: 'news',
        component: HomeNews,
      },
      {
        path: 'message',
        component: HomeMessage,
      }
    ]
  },
  {
    path: '/about',
    component: About,
    meta: {
      title: '关于'
    }
  },
  {
    path: '/profile',
    component: Profile,
    meta: {
      title: '档案'
    }
  },
  {
    path: '/user/:userId',
    component: User,
    meta: {
      title: '用户'
    }
  }
]

const router = new Router({
  // 配置路由和组件之间的映射关系
  routes,
  mode: 'history'
})

// 路由守卫
router.beforeEach((to, from, next) => {

  document.title = to.matched[0].meta.title
  next()
})


// 3.将router对象传入到Vue实例
// 此处导出,main.js中导入
export default router
使用matche是为了防止路由嵌套,路由嵌套时,直接用meta取不到,需要matched中的meta
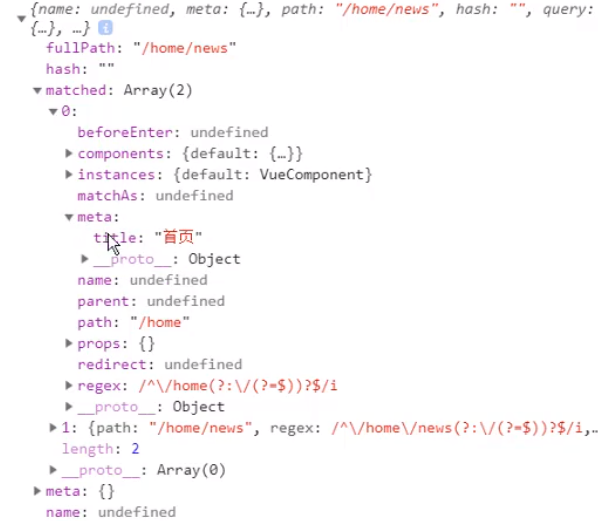
后置钩子 afterEach
// 导入vue
import Vue from 'vue'
// 导入路由
import Router from 'vue-router'

// 1.传入路由对象 Vue.use(插件)
Vue.use(Router)

// 懒加载
const Home =  () => import('../components/Home')
const About = () => import('../components/About')
const User = () => import('../components/User')
const Profile = () => import('../components/Profile')

// 记载子组件
const HomeNews =  () => import('../components/HomeNews')
const HomeMessage = () => import('../components/HomeMessage')

// 2.创建vuerouter对象,一个映射关系就是一个对象
const routes = [
  {
    path: '',
    redirect: '/home',
  },
  {
    path: '/home',
    component: Home,
    meta: {
      title: '首页'
    },
    children: [
      {
        path: '',
        redirect: 'news'
      },
      {
        path: 'news',
        component: HomeNews,
      },
      {
        path: 'message',
        component: HomeMessage,
      }
    ]
  },
  {
    path: '/about',
    component: About,
    meta: {
      title: '关于'
    }
  },
  {
    path: '/profile',
    component: Profile,
    meta: {
      title: '档案'
    }
  },
  {
    path: '/user/:userId',
    component: User,
    meta: {
      title: '用户'
    }
  }
]

const router = new Router({
  // 配置路由和组件之间的映射关系
  routes,
  mode: 'history'
})

// 路由守卫
router.beforeEach((to, from, next) => {

  document.title = to.matched[0].meta.title
  next()
})

// 后置狗子
// 不需要主动调用next
router.afterEach((to, from) => {

  console.log('after')
})

// 3.将router对象传入到Vue实例
// 此处导出,main.js中导入
export default router
上面的前置守卫和后置钩子都是全局守卫
还有:
- 路由独享守卫
- 组件守卫
keep-alive
每次不同路由,组件都是重新渲染的
如果不想重新渲染,使用缓存,可以用keep-alive提高性能
App.vue
<template>
  <div id="app">
    <router-link to="/home" >首页</router-link>
    <router-link to="/about">关于</router-link>
    <!-- <router-link v-bind:to="'/user/' + userId">用户</router-link>
    <router-link :to="{path: '/profile', query: {name: 'why', age: 18}}" >档案</router-link> -->
    <button @click="userClick">用户</button>
    <button @click="profileClick">档案</button>

    <keep-alive>
      <router-view/>
    </keep-alive>

  </div>
</template>

<script>
export default {
  name: 'App',
  data(){
    return {userId: 'zhangsan'}
  },
  methods: {
    userClick(){
      this.$router.push('/user/' + this.userId)
    },
    profileClick(){
      this.$router.push({
        path: '/profile',
        query: {name: 'why', age: 18}
      })
    }
  }
}
</script>

<style>

</style>
属性
- include
- exclude
五、前后端交互
Vue前端交互模式
- 原生ajax
- 基于jQuery的ajax
- fetch
- axios

URL地址格式
- 传统的形式的URL

- Restful形式的URL
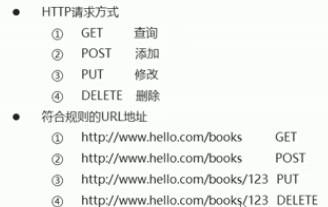
Promise用法
js运行机制 http://www.ruanyifeng.com/blog/2014/10/event-loop.html
Promise 是ES6中一个非常重要和好用的特性,是异步编程的一种解决方案。
什么时候会处理异步事件呢?
常见场景是网络请求,封装一个网络请求的函数,会传入另一个函数,在请求成功时,将数据通过传入的函数回调出去。
如果网络请求非常复杂,出现回调地狱。
Promise可以优雅地解决问题
用链式编程的方式来解决回调地狱的问题
异步调用
异步效果
- 定时任务
- Ajax
- 事件函数
多次异步调用依赖分析
- 多次异步调用的结果顺序不确定
- 异步调用结果如果存在依赖需要嵌套 回调地狱问题
Promise概述
异步编程的一种解决方案,从语法上讲,Promise是一个对象,从它可以获取异步操作的消息。
三种状态:
- pending - 进行中
- fulfilled - 成功
- rejected - 失败
好处:
- 避免多层异步调用嵌套问题(回调地狱)
- Promise对象提供了简洁的API,使得控制异步操作更加容易
基本用法
实例化Promise对象,构造函数中传递函数,该函数中用于处理异步任务
resolve和reject两个参数用于处理成功和失败两种情况,并通过p.then获取处理结果

定时的异步任务
        <script type="text/javascript" src="./js/vue.js"></script>
        <script>
            // Promise基本使用
            // console.log(typeof Promise)
            // console.dir(Promise)
            var p = new Promise(function(resolve, reject){
                // 这里用于实现异步任务
                setTimeout(function(){
                    var flag = false;
                    if(flag){
                        // 正常情况
                        resolve('hello');
                    }else{
                        reject('出错了');
                    }
                }, 100);
            });
            p.then(function(data){
                console.log(data);
            }, function(info){
                console.log(info);
            });
        </script>
promise中不负责处理数据,只是负责发起请求等,真正的数据处理在then中
resolve()的参数会传到then中function中参数去
reject()也可以用catch
p.then(function(data){
  console.log(data);
}).catch(err => {
  console.log(err);
})
链式调用
情况一
then中返回Promise对象,且该对象中仍有异步任务
  <script>
       new Promise((resolve, reject) =>{
          // 这里用于实现异步任务
          setTimeout(function(){
            var flag = true;
            if(flag){
              // 正常情况
              resolve('hello');
            }else{
              reject('出错了');
            }
          }, 100);
        }).then(data => {
          console.log(data + "111111");

          return new Promise((resolve, reject) => {
              setTimeout(()=>{
                  resolve()
              }, 100)
          })
        }).then( () => {
          console.log(222222);

          return new Promise((resolve, reject) => {
              setTimeout(()=>{
                  resolve()
              }, 100)
          })
        }).then( () => {
          console.log(333333);

          return new Promise((resolve, reject) => {
              setTimeout(()=>{
                  resolve()
              }, 100)
          })
        })
  </script>
情况二
没有异步任务,只是简单的处理语句
  <script>
    new Promise((resolve, reject) =>{
          // 这里用于实现异步任务
          setTimeout(function(){
            var flag = true;
            if(flag){
              // 正常情况
              resolve('hello');
            }else{
              reject('出错了');
            }
          }, 100);
        }).then(data => {
          console.log(data + "111111");

          return new Promise((resolve) => {
              resolve('处理1' + data)
          })
        }).then( (data) => {
          console.log(data);

          return new Promise((resolve) => {data
              resolve('处理2' + data)
          })
        }).then( (data) => {
          console.log(data);
        }).catch(err => {
            console.log(err)
        })
  </script>
这种情况是可以简写的
  <script>
    new Promise((resolve, reject) =>{
          // 这里用于实现异步任务
          setTimeout(function(){
            var flag = true;
            if(flag){
              // 正常情况
              resolve('hello');
            }else{
              reject('出错了');
            }
          }, 100);
        }).then(data => {
          console.log(data + "111111");

          return Promise.resolve('处理1' + data)

        }).then( (data) => {
          console.log(data);

          return Promise.resolve('处理2' + data)

        }).then( (data) => {
          console.log(data);
        }).catch(err => {
            console.log(err)
        })
  </script>
可以进一步简写
  <script>
    new Promise((resolve, reject) =>{
          // 这里用于实现异步任务
          setTimeout(function(){
            var flag = true;
            if(flag){
              // 正常情况
              resolve('hello');
            }else{
              reject('出错了');
            }
          }, 100);
        }).then(data => {
          console.log(data + "111111");

          return '处理1' + data

        }).then( (data) => {
          console.log(data);

          return '处理2' + data

        }).then( (data) => {
          console.log(data);
        }).catch(err => {
            console.log(err)
        })
  </script>
Promis.all()
Promise.all([axios1,axios2,axios3]) ,用于将多个Promise实例,包装成一个新的Promise实例。接收的参数是一个数组,axios1、axios2、axios3都是Promise对象。此时Promise.all的状态取决于它的参数。
分两种情况:
axios1、axios2、axios3的状态都是resolve的时候,Promise.all的状态才会变成resolve;- 只要
axios1、axios2、axios3中有一个的状态为reject,那么Promise.all的状态就会变成reject;
所以我们可以用Promise.all()来解决多个异步依赖调用。
function getUserPromise(promiseX, promiseY){
 return Promise.all([promiseX, promiseY])
 .then(values =>
 // 返回的values由 promiseX 与 promiseY返回的值所构成的数组。
  values
 )
}
function login(){
 let data = 1001;
 return new Promise((resolve, reject) => {
  axios.get(url).then(res => {
      resolve(res.data);
    }).catch(err =>{
      reject(err.data)
    })
 })
}
function getUser(){
 let data = {
     id:1001,
     username: 'superman',
     gender: 'male'
 }
 return new Promise((resolve, reject) => {
  axios.post(url, qs.stringify({id:1001}))
    .then(res => {
      resolve(res.data);
    })
    .catch(err =>{
      reject(err.data)
    })
 })
}
getUserPromise(login(), getUser())
.then(data => {
 // 这里的data就是包含了login和 getUser返回值所组成的数组
 console.log(data); // [ 1001, { id: 1001, username: 'LiLin', gender: 'male' } ]
 })
基于Promise处理Ajax请求
处理原生Ajax
发送多次Ajax请求
使用fetch进行接口调用
使用axios进行接口调用
使用async/await方式调用接口
Vuex
状态管理?
简而言之,有时候一些组件需要共享变量,这个变量放在在哪个组件都不是很合适,于是用vuex来管理,vuex实现响应式。
管理什么状态?
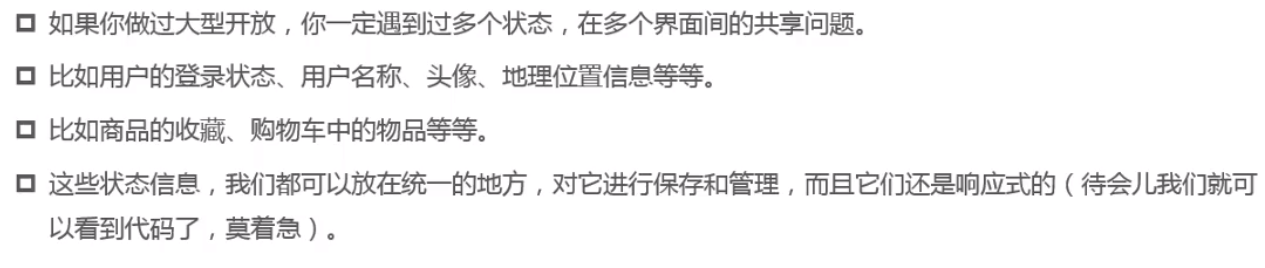
安装
npm install vuex --save
这里使用CLI4新建项目
vue create my-project-3
发现建完的项目中已经安装了vuex
{
  "name": "my-project-3",
  "version": "0.1.0",
  "private": true,
  "scripts": {
    "serve": "vue-cli-service serve",
    "build": "vue-cli-service build"
  },
  "dependencies": {
    "core-js": "^3.6.5",
    "vue": "^2.6.11",
    "vuex": "^3.4.0"
  },
  "devDependencies": {
    "@vue/cli-plugin-babel": "~4.5.0",
    "@vue/cli-plugin-vuex": "~4.5.0",
    "@vue/cli-service": "~4.5.0",
    "vue-template-compiler": "^2.6.11"
  }
}
且已经有store目录index.js
import Vue from 'vue'
import Vuex from 'vuex'

Vue.use(Vuex)

export default new Vuex.Store({
  state: {
  },
  mutations: {
  },
  actions: {
  },
  modules: {
  }
})
单界面到多界面状态管理切换
App.vue
为了方便演示,使用了子组件
<template>
  <div id="app">
    <h2>{{message}}</h2>
    <h2>{{counter}}</h2>
    <button @click="counter++">+</button>
    <button @click="counter--">-</button>
    <hello></hello>
  </div>
</template>

<script>
import Hello from '@/components/HelloWorld'
import HelloWorld from './components/HelloWorld.vue'

export default {
  name: 'App',
  components: {
    Hello
  },
  data(){
    return {message: '在下是个msg', counter: 0}
  }
}
</script>

<style>

</style>
我们想在下面的组件中使用counter
父子组件不用vuex,这里为了演示使用vuex
<template>
  <div class="hello">
    <h2>我是Hello组件</h2>
    <h1>{{ counter }}</h1>

  </div>
</template>

<script>
export default {
  name: 'Hello',

}
</script>


<style>

</style>
store的index.js中配置vuex
import Vue from 'vue'
import Vuex from 'vuex'

Vue.use(Vuex)

export default new Vuex.Store({
  state: {
    counter: 100
  },
  mutations: {
  },
  actions: {
  },
  modules: {
  }
})
于是在App.vue中可以使用该counter
<template>
  <div id="app">
    <h2>{{message}}</h2>
    <h2>{{$store.state.counter}}</h2>
    <button @click="$store.state.counter++">+</button>
    <button @click="$store.state.counter--">-</button>
    <hello></hello>
  </div>
</template>

<script>
import Hello from '@/components/HelloWorld'
import HelloWorld from './components/HelloWorld.vue'

export default {
  name: 'App',
  components: {
    Hello
  },
  data(){
    return {message: '在下是个msg'}
  }
}
</script>

<style>

</style>
Hello
<template>
  <div class="hello">
    <h2>我是Hello组件</h2>
    <h1>{{$store.state.counter}}</h1>

  </div>
</template>

<script>
export default {
  name: 'Hello',

}
</script>


<style>

</style>
main.js需要将vuex配置到vue中去,CLI4已经为我们做好了这些工作
import Vue from 'vue'
import App from './App.vue'
import store from './store'


Vue.config.productionTip = false

new Vue({
  store,
  render: h => h(App)
}).$mount('#app')
上面修改counter的方法并不规范
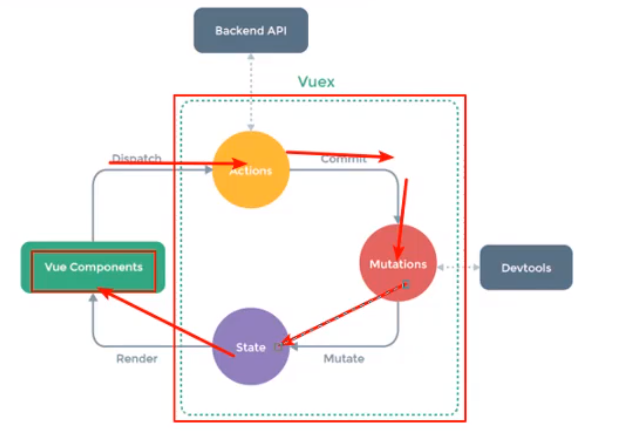
插件Devtools插件可以记录每次规范的state修改
规范方法使用mutation
index.js
import Vue from 'vue'
import Vuex from 'vuex'

Vue.use(Vuex)

export default new Vuex.Store({
  state: {
    counter: 100
  },
  mutations: {
    // 方法,自动包含state
    increment(state){
      state.counter++
    },
    decrement(state){
      state.counter--
    }
  },
  actions: {
  },
  modules: {
  }
})
App.vue
<template>
  <div id="app">
    <h2>{{message}}</h2>
    <h2>{{$store.state.counter}}</h2>
    <button @click="addition">+</button>
    <button @click="subtraction">-</button>
    <hello></hello>
  </div>
</template>

<script>
import Hello from '@/components/HelloWorld'
import HelloWorld from './components/HelloWorld.vue'

export default {
  name: 'App',
  components: {
    Hello
  },
  data(){
    return {message: '在下是个msg'}
  },
  methods: {
    addition(){
      this.$store.commit('increment')
    },
    subtraction(){
      this.$store.commit('decrement')
    }
  }
}
</script>
你会发现插件里也进行了记录

getters
相当于store的计算属性
index.js
import Vue from 'vue'
import Vuex from 'vuex'

Vue.use(Vuex)

export default new Vuex.Store({
  state: {
    counter: 100,
    students: [
      {id: 110, name: 'a', age: 20},
      {id: 111, name: 'b', age: 26},
      {id: 112, name: 'c', age: 31},
      {id: 113, name: 'd', age: 18}
    ]
  },
  mutations: {
    // 方法,自动包含state
    increment(state){
      state.counter++
    },
    decrement(state){
      state.counter--
    }
  },
  actions: {
  },
  getters: {
    morethan20s(state){
      return state.students.filter(s => s.age > 20)
    }
  },
  modules: {
  }
})
组件Hello中使用,App.vue中同样用法
<template>
  <div class="hello">
    <h2>我是Hello组件</h2>
    <h1>{{$store.state.counter}}</h1>
    <h2>大于20岁: {{$store.getters.morethan20s}}</h2>

  </div>
</template>

<script>
export default {
  name: 'Hello',

}
</script>


<style>

</style>
getter本身可以作为参数,且是第二个参数
大于20岁的人数
import Vue from 'vue'
import Vuex from 'vuex'

Vue.use(Vuex)

export default new Vuex.Store({
  state: {
    counter: 100,
    students: [
      {id: 110, name: 'a', age: 20},
      {id: 111, name: 'b', age: 26},
      {id: 112, name: 'c', age: 31},
      {id: 113, name: 'd', age: 18}
    ]
  },
  mutations: {
    // 方法,自动包含state
    increment(state){
      state.counter++
    },
    decrement(state){
      state.counter--
    }
  },
  actions: {
  },
  getters: {
    morethan20s(state){
      return state.students.filter(s => s.age > 20)
    },
    morethan20sLength(state, getters){
      // 上面的形参getters可以随便起名,不管叫什么都是getters
      return getters.morethan20s.length
    }
  },
  modules: {
  }
})
Hello
<template>
  <div class="hello">
    <h2>我是Hello组件</h2>
    <h1>{{$store.state.counter}}</h1>
    <h2>大于20岁: {{$store.getters.morethan20s}}</h2>
    <h2>传参:大于20岁人数 {{$store.getters.morethan20sLength}}</h2>
  </div>
</template>

<script>
export default {
  name: 'Hello',

}
</script>


<style>

</style>
传参数
Hello
<template>
  <div class="hello">
    <h2>我是Hello组件</h2>
    <h1>{{$store.state.counter}}</h1>
    <h2>大于20岁: {{$store.getters.morethan20s}}</h2>
    <h2>传参:大于20岁人数 {{$store.getters.morethan20sLength}}</h2>
    <h2>传参:大于特定岁人数 {{$store.getters.morethanAge(26)}}</h2>

  </div>
</template>

<script>
export default {
  name: 'Hello',

}
</script>


<style>

</style>
index.js
import Vue from 'vue'
import Vuex from 'vuex'

Vue.use(Vuex)

export default new Vuex.Store({
  state: {
    counter: 100,
    students: [
      {id: 110, name: 'a', age: 20},
      {id: 111, name: 'b', age: 26},
      {id: 112, name: 'c', age: 31},
      {id: 113, name: 'd', age: 18}
    ]
  },
  mutations: {
    // 方法,自动包含state
    increment(state){
      state.counter++
    },
    decrement(state){
      state.counter--
    }
  },
  actions: {
  },
  getters: {
    morethan20s(state){
      return state.students.filter(s => s.age > 20)
    },
    morethan20sLength(state, getters){
      // 上面的形参getters可以随便起名,不管叫什么都是getters
      return getters.morethan20s.length
    },
    morethanAge(state){
      return function(age){
        return state.students.filter(s => s.age > age)
      }
    }
  },
  modules: {
  }
})
mutations携带参数
参数被称为payload
vuex的store状态的更新唯一方式:提交mutation
Mutation主要包括两个部分:
- 字符串的事件类型(type)
- 一个回调函数(handler),该回调函数的第一个参数就是state
index.js
import Vue from 'vue'
import Vuex from 'vuex'

Vue.use(Vuex)

export default new Vuex.Store({
  state: {
    counter: 100,
    students: [
      {id: 110, name: 'a', age: 20},
      {id: 111, name: 'b', age: 26},
      {id: 112, name: 'c', age: 31},
      {id: 113, name: 'd', age: 18}
    ]
  },
  mutations: {
    // 方法,自动包含state
    increment(state){
      state.counter++
    },
    decrement(state){
      state.counter--
    },
    addCount(state, count){
      state.counter += count
    }
  },
  actions: {
  },
  getters: {
    morethan20s(state){
      return state.students.filter(s => s.age > 20)
    },
    morethan20sLength(state, getters){
      // 上面的形参getters可以随便起名,不管叫什么都是getters
      return getters.morethan20s.length
    },
    morethanAge(state){
      return function(age){
        return state.students.filter(s => s.age > age)
      }
    }
  },
  modules: {
  }
})
App.vue
<template>
  <div id="app">
    <h2>{{message}}</h2>
    <h2>{{$store.state.counter}}</h2>
    <button @click="addition">+</button>
    <button @click="subtraction">-</button>
    <button @click="addCount(5)">+5</button>
    <hello></hello>
  </div>
</template>

<script>
import Hello from '@/components/HelloWorld'
import HelloWorld from './components/HelloWorld.vue'

export default {
  name: 'App',
  components: {
    Hello
  },
  data(){
    return {message: '在下是个msg'}
  },
  methods: {
    addition(){
      this.$store.commit('increment')
    },
    subtraction(){
      this.$store.commit('decrement')
    },
    addCount(count){
      this.$store.commit('addCount', count)
    }
  }
}
</script>

<style>

</style>
另一种提交风格
以对象的方式提交,第一参数是type,第二个参数是参数
addCount(count){
this.$store.commit({
type: 'addCount',
count
})
但是,mutation中的方法接受的不再是传参,而是这个提交的对象
下面的payload相当于 { type: 'addCount', count }
addCount(state, payload){
state.counter += payload.count
}
数据的响应式原理
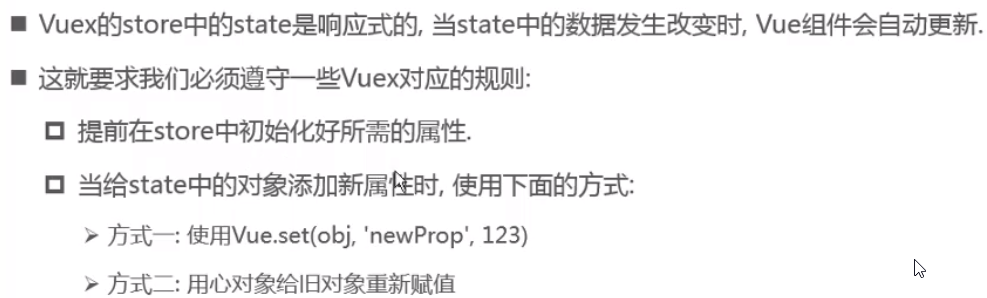
常量
store目录下新建mutations-types.js
export const INCREMENT = 'increment'
App.vue
<template>
<div id="app">
<h2>{{message}}</h2>
<h2>{{$store.state.counter}}</h2>
<button @click="addition">+</button>
<button @click="subtraction">-</button>
<button @click="addCount(5)">+5</button>
<hello></hello>
</div>
</template>
<script>
import Hello from '@/components/HelloWorld'
import HelloWorld from './components/HelloWorld.vue'
import {
INCREMENT
} from './store/mutations-types'
export default {
name: 'App',
components: {
Hello
},
data(){
return {message: '在下是个msg'}
},
methods: {
addition(){
this.$store.commit(INCREMENT)
},
subtraction(){
this.$store.commit('decrement')
},
// addCount(count){
// this.$store.commit('addCount', count)
// },
addCount(count){
this.$store.commit({
type: 'addCount',
count
})
}
}
}
</script>
<style>
</style>
index.js
import Vue from 'vue' import Vuex from 'vuex' import { INCREMENT } from './mutations-types' Vue.use(Vuex) export default new Vuex.Store({ state: { counter: 100, students: [ {id: 110, name: 'a', age: 20}, {id: 111, name: 'b', age: 26}, {id: 112, name: 'c', age: 31}, {id: 113, name: 'd', age: 18} ] }, mutations: { // 方法,自动包含state [INCREMENT](state){ state.counter++ }, decrement(state){ state.counter-- }, // addCount(state, count){ // state.counter += count // } addCount(state, payload){ state.counter += payload.count } }, actions: { }, getters: { morethan20s(state){ return state.students.filter(s => s.age > 20) }, morethan20sLength(state, getters){ // 上面的形参getters可以随便起名,不管叫什么都是getters return getters.morethan20s.length }, morethanAge(state){ return function(age){ return state.students.filter(s => s.age > age) } } }, modules: { } })
actions
Mutation中的方法是同步的

异步操作放在Actions中
modules
防止臃肿,分模块
modules: {
a: {
state: {},
mutations: {},
actions: {},
getters: {}
},
b: {
state: {},
mutations: {},
actions: {},
getters: {}
}
}
axios
vue网络请求最佳选择

安装框架
npm install axios --save
main.js
import Vue from 'vue' import App from './App.vue' import router from './router' import store from './store' import axios from 'axios' Vue.config.productionTip = false new Vue({ router, store, render: h => h(App) }).$mount('#app') // 支持promise,可以使用then axios({ url: 'http://123.207.32.32:8000/home/multidata' }).then(res => { console.log(res) })
查看浏览器

data是服务器发送的数据,其他是axios添加的
参数可以放在url中(get),或对象中
axios({ url: 'http://123.207.32.32:8000/home/data', method: 'get', params: { type: 'pop', page: 1 } }).then(res => { console.log(res) })
发送并发请求
// 多个请求 axios.all([ axios.get('http://123.207.32.32:8000/category'), axios.get('http://123.207.32.32:8000/home/data', {params: {type: 'pop', page: 1}}) ]) .then(results => { console.log(results[0]) console.log(results[1]) })
可以使用 axios.spread
axios.all([ axios.get('http://123.207.32.32:8000/category'), axios.get('http://123.207.32.32:8000/home/data', {params: {type: 'pop', page: 1}}) ]) .then(axios.spread((res1, res2) => { console.log(res1) console.log(res2) }))
全局配置
一些参数是固定的,可以进行抽取对axios进行全局配置 axios.default
axios.defaults.baseURL = 'http://123.207.32.32:8000' axios.defaults.timeout = 5000 axios.defaults.headers.post['content-Type'] = 'application/x-www-urlencoded' // 多个请求 axios.all([ axios.get('/category'), axios.get('/home/data', {params: {type: 'pop', page: 1}}) ]) .then(axios.spread((res1, res2) => { console.log(res1) console.log(res2) }))
常见配置选项
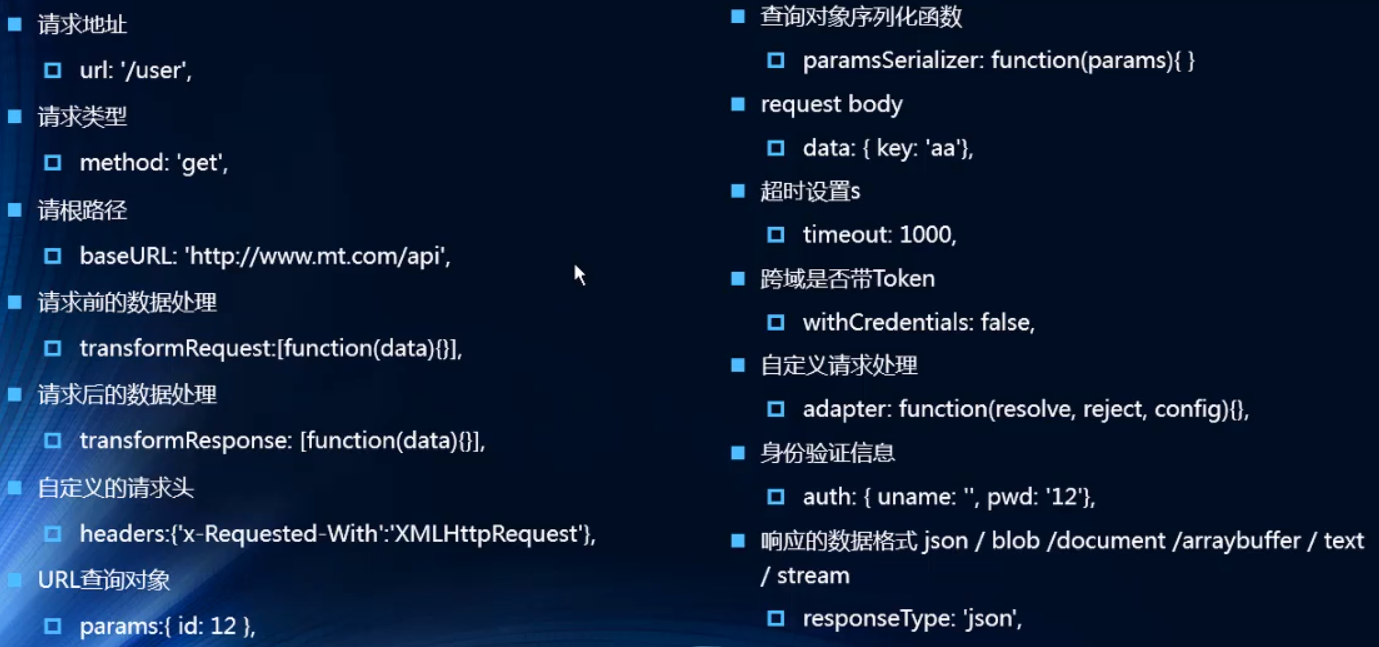
axios实例
当有多个请求接口时,全局配置并不合适,使用实例
// 创建axios实例 const instance = axios.create({ baseURL: 'http://222.111.22.22:8080', timeout: 5000 }) instance({ usr: '/home/data' }).then(res => { console.log(res) })
模块封装
export function request(url, config, success, failure){ // 1.创建axios实例 const instance = axios.create({ baseURL: url, timeout: 5000 }) // 发送网络请求 instance(config) .then(res => { console.log(res) success(res) }) .catch(err => { console.log(err) failure(err) }) }
mian.js
import Vue from 'vue' import App from './App.vue' import router from './router' import store from './store' import axios from 'axios' import {request} from './network/request' Vue.config.productionTip = false new Vue({ router, store, render: h => h(App) }).$mount('#app') const config = { url: '/home/data' } function success(data){ console.log(data) } function failure(){ console.log('出错了') } request('http://123.207.32.32:8000', config, success, failure)
或直接使用对象作为参数
export function request(config){ // 1.创建axios实例 const instance = axios.create({ baseURL: config.url, timeout: 5000 }) // 发送网络请求 instance(config.baseconfig) .then(res => { console.log(res) config.success(res) }) .catch(err => { console.log(err) config.failure(err) }) }
可以直接使用Promise
export function request(config){ return new Promise((resolve, reject) => { // 1.创建axios实例 const instance = axios.create({ baseURL: config.url, timeout: 5000 }) // 发送网络请求 instance(config.baseconfig) .then(res => { resolve(res) }) .catch(err => { reject(err) }) }) }
使用
instance(config.baseconfig) .then(res => { resolve(res) }) .catch(err => { reject(err) }) }) }
最终方案,没必要使用Promise
export function request(config){ // 创建axios实例 const instance = axios.create({ baseURL: config.url, timeout: 5000 }) // 发送网络请求 return instance(config.baseconfig) }
拦截器
在每次发送请求或得到响应后,进行对应的处理
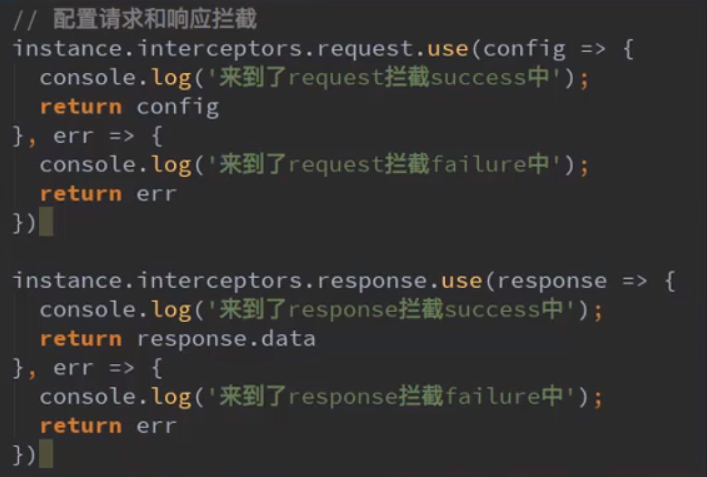
export function request(config){ // 创建axios实例 const instance = axios.create({ baseURL: config.url, timeout: 5000 }) // 拦截器 instance.interceptors.request.use(config => { // 拦截成功处理config // 拦截后要返回,否则就没有了,无法请求 return config }, err => { }) instance.interceptors.response.use(res => { console.log(res) // 拦截后要返回 return res.data }, err => { console.log(err) }) // 发送网络请求 return instance(config.baseconfig) }
<!DOCTYPE html>
<html>
<head>
<meta charset="utf-8">
<title>$emit 和 $on 的用法</title>
</head>
<body>
<div id="root">
<button @click="boost">触发事件</button>
</div>
<script src="https://cdn.jsdelivr.net/npm/vue@2.6.11"></script>
<script>
// var有很多缺陷,用let(变量)或const(常量)
// 编程范式:声明式编程
const app = new Vue({
el:"#root", // 用于挂载要管理的数据
data(){ // 定义数据
return {
message: 'hello vue'
}
},
created(){
this.$on('my_events', this.handleEvents) // 定义my_events事件,指定事件的执行函数 handleEvents
},
methods:{
handleEvents(e) {
console.log(this.message, e)
},
boost(){
this.$emit('my_events', 'my params')
}
}
})
</script>
</body>
</html>
将事件的定义和事件的消费分开

$on源码
function eventsMixin (Vue) { var hookRE = /^hook:/; Vue.prototype.$on = function (event, fn) { // 事件名称event,处理方法fn var vm = this;
// 判断是否是数组 if (Array.isArray(event)) {
// 如果是数组,通过循环的方式来进行复制 for (var i = 0, l = event.length; i < l; i++) { vm.$on(event[i], fn); } } else {
// _events 下面是否包含 event 属性,不包含则创建空数组,将新建的处理函数push进event,可绑定多个方法 (vm._events[event] || (vm._events[event] = [])).push(fn); // optimize hook:event cost by using a boolean flag marked at registration // instead of a hash lookup if (hookRE.test(event)) { vm._hasHookEvent = true; } } return vm };
$emit源码
Vue.prototype.$emit = function (event) { var vm = this; { var lowerCaseEvent = event.toLowerCase(); if (lowerCaseEvent !== event && vm._events[lowerCaseEvent]) { tip( "Event \"" + lowerCaseEvent + "\" is emitted in component " + (formatComponentName(vm)) + " but the handler is registered for \"" + event + "\". " + "Note that HTML attributes are case-insensitive and you cannot use " + "v-on to listen to camelCase events when using in-DOM templates. " + "You should probably use \"" + (hyphenate(event)) + "\" instead of \"" + event + "\"." ); } }
// 找到方法 var cbs = vm._events[event]; if (cbs) {
// 数组,有可能有多个处理函数 cbs = cbs.length > 1 ? toArray(cbs) : cbs; var args = toArray(arguments, 1); var info = "event handler for \"" + event + "\""; for (var i = 0, l = cbs.length; i < l; i++) { invokeWithErrorHandling(cbs[i], vm, args, vm, info); } } return vm };
vm.$emit( event, arg ) //触发当前实例上的事件
vm.$on( event, fn );//监听event事件后运行 fn;
Vue.directive( id, [definition] )
-
参数:
{string} id{Function | Object} [definition]
-
用法:
注册或获取全局指令。
// 注册 Vue.directive('my-directive', { bind: function () {}, inserted: function () {}, update: function () {}, componentUpdated: function () {}, unbind: function () {} }) // 注册 (指令函数) Vue.directive('my-directive', function () { // 这里将会被 `bind` 和 `update` 调用 }) // getter,返回已注册的指令 var myDirective = Vue.directive('my-directive')
<!DOCTYPE html> <html> <head> <meta charset="utf-8"> <title>directive 用法</title> <script src="https://cdn.jsdelivr.net/npm/vue/dist/vue.js"></script> </head> <body> <div id="root"> <!-- 绑定了指令v-loading,是自定义的 绑定状态isLoading,但isLoading为true,显示加载状态 --> <div v-loading="isLoading">{{data}}</div> <button @click="update">触发事件</button> </div> <script> Vue.directive('loading', { update(el, binding, vnode){ console.log(el, binding, vnode) if (binding.value){ // 动态创建div const div = document.createElement('div') div.innerText = '加载中...' div.setAttribute('id', 'loading') div.style.position = 'fixed' div.style.left = 0 div.style.top = 0 // 布满全屏 div.style.width = '100%' div.style.height = '100%' div.style.display = 'flex' div.style.justifyContent = 'center' div.style.alignItems = 'center' div.style.color = 'white' div.style.background = 'rgba(0, 0, 0, .7)' // 插入 document.body.append(div) }else { document.body.removeChild(document.getElementById('loading')) } } }) new Vue({ el: '#root', data(){ return{ isLoading: false, data: '' } }, methods: { update() { // 修改isLoading this.isLoading = true // 3秒后修改isLoading和data setTimeout(() => { this.data = '用户数据' this.isLoading = false }, 3000) } } }) </script> </body> </html>
点击按钮会修改isLoading
Vue.component( id, [definition] )
-
参数:
{string} id{Function | Object} [definition]
-
用法:
注册或获取全局组件。注册还会自动使用给定的
id设置组件的名称// 注册组件,传入一个扩展过的构造器 Vue.component('my-component', Vue.extend({ /* ... */ })) // 注册组件,传入一个选项对象 (自动调用 Vue.extend) Vue.component('my-component', { /* ... */ }) // 获取注册的组件 (始终返回构造器) var MyComponent = Vue.component('my-component')
<!DOCTYPE html> <html> <head> <meta charset="utf-8"> <title>Vue.component 用法</title> <script src="https://cdn.jsdelivr.net/npm/vue/dist/vue.js"></script> </head> <body> <div id="root"> <!-- 使用组件,message是data里的message --> <Test :msg="message"></Test> </div> <script> // 参数为 组件名称, 组件对象 Vue.component('Test', { template: '<div>{{msg}}</div>', // 组件的dom结构 props:{ // 通过副组件传入的参数 msg:{ type: String, default: 'default message' } } }) new Vue({ el: '#root', data(){ return{ message: "Test Component" } } }) </script> </body> </html>
Vue.extend( options )
主要用途:生成组件的构造函数
-
参数:
{Object} options
-
用法:
使用基础 Vue 构造器,创建一个“子类”。参数是一个包含组件选项的对象。
data选项是特例,需要注意 - 在Vue.extend()中它必须是函数
<div id="mount-point"></div>
// 创建构造器 var Profile = Vue.extend({ template: '<p>{{firstName}} {{lastName}} aka {{alias}}</p>', data: function () { return { firstName: 'Walter', lastName: 'White', alias: 'Heisenberg' } } }) // 创建 Profile 实例,并挂载到一个元素上。 new Profile().$mount('#mount-point')
结果如下:
<p>Walter White aka Heisenberg</p>
<!DOCTYPE html> <html> <head> <meta charset="utf-8"> <title>Vue.component 用法</title> <script src="https://cdn.jsdelivr.net/npm/vue/dist/vue.js"></script> </head> <body> <div id="root"> <!-- 使用组件,message是data里的message --> <Test :msg="message"></Test> </div> <script> // 参数为 组件名称, 组件对象 const component = Vue.extend({ template: '<div>{{msg}}</div>', // 组件的dom结构 props:{ // 通过副组件传入的参数 msg:{ type: String, default: 'default message' } } }) Vue.component('Test', component) new Vue({ el: '#root', data(){ return{ message: "Test Component" } } }) </script> </body> </html>
<!DOCTYPE html> <html> <head> <meta charset="utf-8"> <title>Vue.extend 进阶用法</title> <script src="https://cdn.jsdelivr.net/npm/vue/dist/vue.js"></script> <style> #loading-wrapper{ position: fixed; top: 0; left: 0; display: flex; justify-content: center; align-items: center; width: 100%; height: 100%; background: rgba(0, 0, 0, .7); color: #fff; } </style> </head> <body> <div id="root"> <button @click="showLoading">显示Loading</button> </div> <script> const LoadingComponent = Vue.extend({ template: '<div id="loading-wrapper">{{msg}}</div>', props:{ msg:{ type: String, default: 'loading...' } } }, 'LoadingComponent') // 组件名称 // 定义loading方法 function Loading(msg){ const div = document.createElement('div') div.setAttribute('id', 'loading-wrapper') document.body.append(div) new LoadingComponent({ props: { msg: { type: String, default: msg } } }).$mount('#loading-wrapper') return () => { document.body.removeChild(document.getElementById('loading-wrapper')) } } Vue.prototype.$loading = Loading new Vue({ el: '#root', methods: { showLoading(){ const hide = this.$loading('正在加载,请稍等...') setTimeout(() =>{ hide() }, 2000) } } }) </script> </body> </html>
Vue.use( plugin )
-
参数:
{Object | Function} plugin
-
用法:
安装 Vue.js 插件。如果插件是一个对象,必须提供
install方法。如果插件是一个函数,它会被作为 install 方法。install 方法调用时,会将 Vue 作为参数传入。该方法需要在调用
new Vue()之前被调用。当 install 方法被同一个插件多次调用,插件将只会被安装一次。
provide和inject
<!DOCTYPE html> <html> <head> <meta charset="utf-8"> <title>Vue.extend 进阶用法</title> <script src="https://cdn.jsdelivr.net/npm/vue/dist/vue.js"></script> <style> #loading-wrapper{ position: fixed; top: 0; left: 0; display: flex; justify-content: center; align-items: center; width: 100%; height: 100%; background: rgba(0, 0, 0, .7); color: #fff; } </style> </head> <body> <div id="root"> <Test></Test> </div> <script> function registerPlugin() { Vue.component('Test', { template: '<div>{{message}}<Test2 /></div>', provide(){ return{ elTest: this } }, // function 的用途是为了获取运行时环境,否则this将指向window data(){ // 最开始是的默认值 return{ message: 'message from Test' } }, methods:{ // change方法用来更改message change(component){ this.message = 'message from ' + component } } }) Vue.component('Test2', { template: '<Test3 />' }) Vue.component('Test3', { // 调用changeMessage组件,该组件会调用副组件 template: '<button @click="changeMessage">change</button>', // 数组,需要引入的副组件的实例 inject: ['elTest'], methods:{ changeMessage(){ this.elTest.change(this.$options._componentTag) } } }) } Vue.use(registerPlugin) new Vue({ el: '#root' }) </script> </body> </html>
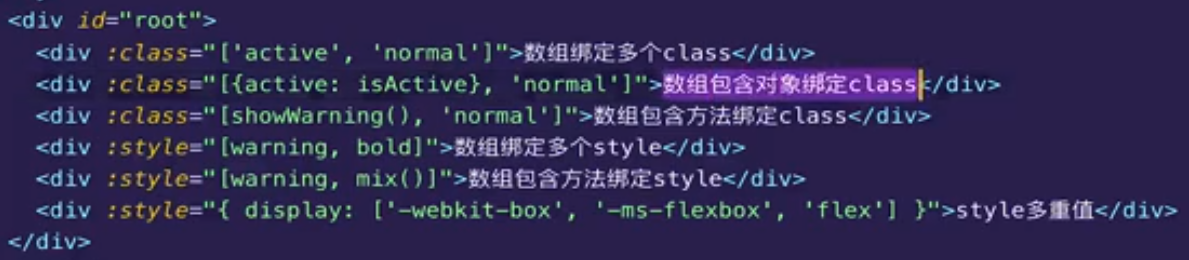
Vue.observable( object )
2.6.0 新增
-
参数:
{Object} object
用法:
让一个对象可响应。Vue 内部会用它来处理 data 函数返回的对象。
返回的对象可以直接用于渲染函数和计算属性内,并且会在发生变更时触发相应的更新。也可以作为最小化的跨组件状态存储器,用于简单的场景:
const state = Vue.observable({ count: 0 })
const Demo = {
render(h) {
return h('button', {
on: { click: () => { state.count++ }}
}, `count is: ${state.count}`)
}
}
Element-ui
初始化项目
vue create element-test
安装
npm i element-ui -S
Vue插件
main.js中添加
import ElementUI from 'element-ui'
Vue.use(ElementUI)
引用样式
mian.js中添加
import 'element-ui/lib/theme-chalk/index.css'
按需加载
对项目进行构建
npm run build
这是全量引入,体积较大
2020/08/19 21:32 848,581 chunk-vendors.021b397a.js
2020/08/19 21:32 3,379,276 chunk-vendors.021b397a.js.map
按需加载:
1.安装babel-plugin-component
npm install babel-plugin-component -D
修改babel.config.js
module.exports = { presets: [ '@vue/cli-plugin-babel/preset' ], plugins: [ [ 'component', { libraryName: 'element-ui', styleLibraryName: 'theme-chalk' // 样式库 } ] ] }
main.js
import Vue from 'vue' import App from './App.vue' import router from './router' import store from './store' import { Button, Message } from 'element-ui' import 'element-ui/lib/theme-chalk/index.css' Vue.component(Button.name, Button) // 组件名称 构造函数 Vue.prototype.$message = Message Vue.config.productionTip = false new Vue({ router, store, render: h => h(App) }).$mount('#app')
体积明显缩小
2020/08/20 05:07 161,258 chunk-vendors.600f9523.js
2020/08/20 05:07 768,585 chunk-vendors.600f9523.js.map
插件引用
创建新项目
vue create element-ui-test2
可以通过element插件快速集成element-ui
vue add element
? How do you want to import Element? Fully import ? Do you wish to overwrite Element's SCSS variables? No ? Choose the locale you want to load (Use arrow keys) ? Choose the locale you want to load zh-CN
表单的基本用法
1.el-form容器,通过model绑定数据
2.el-form-item容器,通过label绑定标签
3.表单组件通过v-model绑定model中的数据
App.vue
<template>
<div id="app">
<el-form inline :model="data">
<el-form-item label="审批人">
<el-input v-model="data.user" placeholder="审批人"></el-input>
</el-form-item>
<el-form-item label="活动区域">
<el-select v-model="data.region" placeholder="活动区域">
<el-option label="区域一" value="shanghai"></el-option>
<el-option label="区域二" value="beijing"></el-option>
</el-select>
</el-form-item>
<el-form-item>
<el-button type="primary" @click="onSumbit">查询</el-button>
</el-form-item>
</el-form>
</div>
</template>
<script>
export default {
name: 'app',
data () {
return {
data: {
user: 'sam',
region: '区域二'
}
}
},
methods: {
onSumbit () {
console.log(this.data)
}
}
}
</script>
表单校验
定义校验规则,可以绑定到el-form或el-form-item
<template>
<div id="app">
<!-- rules属性绑定到rules -->
<el-form inline :model="data" :rules="rules" ref="form">
<el-form-item label="审批人" prop="user">
<!-- 往el-input中输入任何信息时,信息会存入data下面的user -->
<el-input v-model="data.user" placeholder="审批人"></el-input>
</el-form-item>
<el-form-item label="活动区域">
<el-select v-model="data.region" placeholder="活动区域">
<el-option label="区域一" value="shanghai"></el-option>
<el-option label="区域二" value="beijing"></el-option>
</el-select>
</el-form-item>
<el-form-item>
<el-button type="primary" @click="onSumbit">查询</el-button>
</el-form-item>
</el-form>
</div>
</template>
<script>
export default {
name: 'app',
data () {
// 三个参数:当前校验规则,输入值,callback
const userValidator = (rule, value, callback) => {
if (value.length > 3) {
// 通过
callback()
} else {
callback(new Error('用户长度必须大于3'))
}
}
return {
// 表单的数据源
data: {
user: '',
region: '区域二'
},
// usr和html中el-form-item的prop属性是一一对应的
rules: {
user: [
// required 必需的,trigger 变化时触发, message 错误信息提示
{ required: true, trigger: 'change', message: '用户名必须录入' },
// 手动校验的validator,绑定到方法userValidator
{ validator: userValidator, trigger: 'change' }
]
}
}
},
methods: {
// 想要提交的时候也校验,在el-form中增加ref
onSumbit () {
this.$refs.form.validate((isValid, errors) => {
console.log(isValid, errors)
})
}
}
}
</script>
表单校验高级用法
动态改变校验规则
<template>
<div id="app">
<!-- rules属性绑定到rules -->
<!-- validate-on-rule-change 发生变化时会立刻校验 -->
<el-form inline :model="data" :rules="rules" ref="form"
:validate-on-rule-change="false" >
<el-form-item label="审批人" prop="user">
<!-- 往el-input中输入任何信息时,信息会存入data下面的user -->
<el-input v-model="data.user" placeholder="审批人"></el-input>
</el-form-item>
<el-form-item label="活动区域">
<el-select v-model="data.region" placeholder="活动区域">
<el-option label="区域一" value="shanghai"></el-option>
<el-option label="区域二" value="beijing"></el-option>
</el-select>
</el-form-item>
<el-form-item>
<el-button type="primary" @click="onSumbit">查询</el-button>
<el-button type="primary" @click="addRule">添加校验规则</el-button>
</el-form-item>
</el-form>
</div>
</template>
<script>
export default {
name: 'app',
data () {
// 三个参数:当前校验规则,输入值,callback
const userValidator = (rule, value, callback) => {
if (value.length > 3) {
callback()
} else {
callback(new Error('用户长度必须大于3'))
}
}
return {
// 表单的数据源
data: {
user: '',
region: '区域二'
},
// usr和html中el-form-item的prop属性是一一对应的
rules: {
user: [
// required 必需的,trigger 变化时触发, message 错误信息提示
{ required: true, trigger: 'change', message: '用户名必须录入' },
// 手动校验的validator,绑定到方法userValidator
{ validator: userValidator, trigger: 'change' }
]
}
}
},
methods: {
// 想要提交的时候也校验,在el-form中增加ref
onSumbit () {
this.$refs.form.validate((isValid, errors) => {
console.log(isValid, errors)
})
},
addRule () {
const userValidator = (rule, value, callback) => {
if (value.length > 5) {
callback()
} else {
callback(new Error('用户长度必须大于5'))
}
}
// 点击后,会将两个校验规则动态的拼接起来
const newRule = [
this.rules.user,
{ validator: userValidator, trigger: 'change' }
]
// 重新生成新的对象,将新的对象复制给rules
// Object.assign() 方法用于将所有可枚举属性的值从一个或多个源对象复制到目标对象。它将返回目标对象。
// Object.assign(target, ...sources)
this.rules = Object.assign({}, this.rules, { user: newRule })
}
}
}
</script>
手动控制校验状态
validate-status,校验状态,枚举值,共四种:
success,验证成功
error:验证失败
validating:验证中
(空):未验证
error:自定义错误提示
设置el-form-item属性
<el-form-item label="审批人" prop="user" :validate-status="status" :error="error">
自定义status和error
<template>
<div id="app">
<!-- rules属性绑定到rules -->
<!-- validate-on-rule-change 发生变化时会立刻校验 -->
<el-form inline :model="data" :rules="rules" ref="form"
:validate-on-rule-change="false" status-icon >
<el-form-item label="审批人" prop="user" :validate-status="status" :error="error">
<!-- 往el-input中输入任何信息时,信息会存入data下面的user -->
<el-input v-model="data.user" placeholder="审批人"></el-input>
</el-form-item>
<el-form-item label="活动区域">
<el-select v-model="data.region" placeholder="活动区域">
<el-option label="区域一" value="shanghai"></el-option>
<el-option label="区域二" value="beijing"></el-option>
</el-select>
</el-form-item>
<el-form-item>
<el-button type="primary" @click="onSumbit">查询</el-button>
<el-button type="primary" @click="addRule">添加校验规则</el-button>
<el-button type="success" @click="showSuccess">成功校验</el-button>
<el-button type="danger" @click="showError">失败校验</el-button>
<el-button type="warning" @click="showValidating">校验中</el-button>
</el-form-item>
</el-form>
</div>
</template>
<script>
export default {
name: 'app',
data () {
// 三个参数:当前校验规则,输入值,callback
const userValidator = (rule, value, callback) => {
if (value.length > 3) {
callback()
} else {
callback(new Error('用户长度必须大于3'))
}
}
return {
error: '这是一个自定义的错误',
status: 'error',
// 表单的数据源
data: {
user: '',
region: ''
},
// usr和html中el-form-item的prop属性是一一对应的
rules: {
user: [
// required 必需的,trigger 变化时触发, message 错误信息提示
{ required: true, trigger: 'change', message: '用户名必须录入' },
// 手动校验的validator,绑定到方法userValidator
{ validator: userValidator, trigger: 'change' }
]
}
}
},
methods: {
// 想要提交的时候也校验,在el-form中增加ref
onSumbit () {
this.$refs.form.validate((isValid, errors) => {
console.log(isValid, errors)
})
},
addRule () {
const userValidator = (rule, value, callback) => {
if (value.length > 5) {
callback()
} else {
callback(new Error('用户长度必须大于5'))
}
}
// 点击后,会将两个校验规则动态的拼接起来
const newRule = [
this.rules.user,
{ validator: userValidator, trigger: 'change' }
]
// 重新生成新的对象,将新的对象复制给rules
// Object.assign() 方法用于将所有可枚举属性的值从一个或多个源对象复制到目标对象。它将返回目标对象。
// Object.assign(target, ...sources)
this.rules = Object.assign({}, this.rules, { user: newRule })
},
showSuccess () {
this.status = 'success'
this.error = ''
},
showError () {
this.status = 'error'
this.error = '用户名输入有误'
},
showValidating () {
this.status = 'validating'
this.error = ''
}
}
}
</script>
表单常见属性解析
<el-form>标签中
label-position:标签位置,枚举值,left和top
label-width:标签宽度
label-suffix:标签后缀
inline:行内表单
disabled:设置整个form中的表单组件全部disabled,优先级低于表单组件自身的disabled
<el-form style="width: 500px" :inline="false" :model="data" :rules="rules" ref="form"
:validate-on-rule-change="false" status-icon label-position="top" label-suffix=": ">
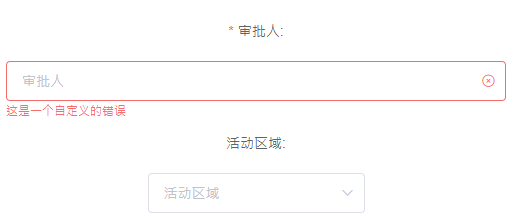
Vuex
使用Vue实例管理状态
Vuex 可以帮助我们管理共享状态,并附带了更多的概念和框架。这需要对短期和长期效益进行权衡。
如果您不打算开发大型单页应用,使用 Vuex 可能是繁琐冗余的。确实是如此——如果您的应用够简单,您最好不要使用 Vuex。一个简单的 store 模式就足够您所需了。但是,如果您需要构建一个中大型单页应用,您很可能会考虑如何更好地在组件外部管理状态,Vuex 将会成为自然而然的选择。
<!DOCTYPE html>
<html lang="en">
<head>
<meta charset="utf-8">
<meta http-equiv="X-UA-Compatible" content="IE=edge">
<meta name="viewport" content="width=device-width,initial-scale=1.0">
<link rel="icon" href="<%= BASE_URL %>favicon.ico">
<title><%= htmlWebpackPlugin.options.title %></title>
</head>
<body>
<noscript>
<strong>We're sorry but <%= htmlWebpackPlugin.options.title %> doesn't work properly without JavaScript enabled. Please enable it to continue.</strong>
</noscript>
<div id="root">{{data}}</div>
<div id="root2">{{data2}}</div>
<div id="root3">{{data}}
<button @click="change">change</button>
</div>
</body>
<script src="https://cdn.jsdelivr.net/npm/vue/dist/vue.js"></script>
<script>
function registerPlugin(Vue) {
const vuex = {}
// 没绑定任何dom,就是vm实例
vuex._vm = new Vue({
data: {
message: 'hello vue.js'
}
})
vuex.state = vuex._vm
vuex.mutations = {
setMessage(value) {
vuex.state.message = value
}
}
function init() {
this.$store = vuex
}
Vue.mixin({
beforeCreate: init
})
}
Vue.use(registerPlugin)
new Vue({
el: '#root',
computed: {
data() {
return this.$store.state.message
}
}
})
new Vue({
el: '#root2',
computed: {
data2() {
return this.$store.state.message
}
}
})
new Vue({
el: '#root3',
methods: {
change() {
const newValue = this.$store.state.message + '.'
this.$store.mutations.setMessage(newValue)
}
}
})
</script>
</html>
vue-router实例化时会初始化this.history,不同mode对应不同的history
安装
npm i -S vue-router
src下创建router.js
import Vue from 'vue' import Route from 'vue-router' import HelloWorld from './components/HelloWorld' Vue.use(Route) const routes = [ { path: '/hello-world', component: HelloWorld } ] const router = new Route({ routes }) export default router
mian.js中应用router,并加入vue实例:
import Vue from 'vue' import App from './App.vue' import router from './router' Vue.config.productionTip = false new Vue({ router, render: h => h(App) }).$mount('#app')
添加组件A.vue
<template> <div>Component A</div> </template>
添加路由
import Vue from 'vue' import Route from 'vue-router' import HelloWorld from './components/HelloWorld' import A from './components/A' Vue.use(Route) const routes = [ { path: '/a', component: A }, { path: '/hello-world', component: HelloWorld } ] const router = new Route({ routes }) export default router
全局守卫
每个路由都会触发

import Vue from 'vue' import Route from 'vue-router' import HelloWorld from './components/HelloWorld' import A from './components/A' Vue.use(Route) const routes = [ { path: '/a', component: A }, { path: '/hello-world', component: HelloWorld } ] const router = new Route({ routes }) // to到哪里去,from之前从哪个路由来,next router.beforeEach((to, from, next) => { console.log('beforeEach', to, from) next() }) router.beforeResolve((to, from, next) => { console.log('beforeResolve', to, from) next() }) router.afterEach((to, from) => { console.log('afterEach', to, from) }) export default router
路由元信息
标题动态变更
import Vue from 'vue' import Route from 'vue-router' import HelloWorld from './components/HelloWorld' import A from './components/A' import B from './components/B' Vue.use(Route) const routes = [ { path: '/a', component: A, meta: { title: 'A' } }, { path: '/b', component: B }, { path: '/hello-world', component: HelloWorld, meta: { title: 'Hello-World' } } ] const router = new Route({ routes }) // to到哪里去,from之前从哪个路由来,next router.beforeEach((to, from, next) => { console.log('beforeEach', to, from) next() }) router.beforeResolve((to, from, next) => { console.log('beforeResolve', to, from) if (to.meta.title) { document.title = to.meta.title } else { document.title = 'ch1' } next() }) router.afterEach((to, from) => { console.log('afterEach', to, from) }) export default router
或使用Vue.mixin
import Vue from 'vue' import Route from 'vue-router' import HelloWorld from './components/HelloWorld' import A from './components/A' import B from './components/B' Vue.use(Route) const routes = [ { path: '/a', component: A, meta: { title: 'A' } }, { path: '/b', component: B }, { path: '/hello-world', component: HelloWorld, meta: { title: 'Hello-World' } } ] const router = new Route({ routes }) Vue.mixin({ beforeCreate () { if (this.$route.meta.title) { document.title = this.$route.meta.title } else { document.title = 'ch1' } } }) // to到哪里去,from之前从哪个路由来,next router.beforeEach((to, from, next) => { console.log('beforeEach', to, from) next() }) router.beforeResolve((to, from, next) => { console.log('beforeResolve', to, from) next() }) router.afterEach((to, from) => { console.log('afterEach', to, from) }) export default router
Vue.mixin( mixin )
参数:
{Object} mixin用法:
全局注册一个混入,影响注册之后所有创建的每个 Vue 实例。插件作者可以使用混入,向组件注入自定义的行为。不推荐在应用代码中使用。
路由API
router.addRoutes动态添加路由
如,左侧菜单,管理员进去可以看到全部菜单,普通人进去只能看到部分菜单
router.js中去掉b的路由
import Vue from 'vue' import Route from 'vue-router' import HelloWorld from './components/HelloWorld' import A from './components/A' Vue.use(Route) const routes = [ { path: '/a', component: A, meta: { title: 'A' } }, { path: '/hello-world', component: HelloWorld, meta: { title: 'Hello-World' } } ] const router = new Route({ routes }) Vue.mixin({ beforeCreate () { if (this.$route.meta.title) { document.title = this.$route.meta.title } else { document.title = 'ch1' } } }) // to到哪里去,from之前从哪个路由来,next router.beforeEach((to, from, next) => { console.log('beforeEach', to, from) next() }) router.beforeResolve((to, from, next) => { console.log('beforeResolve', to, from) next() }) router.afterEach((to, from) => { console.log('afterEach', to, from) }) export default router
A.vue中添加动态路由按钮,点击按钮后,就会添加/b路由到组件B
<template> <div> Component A <button @click="addRoute">AddRoute</button> <router-link to="/b">to Component B</router-link> </div> </template> <script> import B from './B' export default { methods: { addRoute () { this.$router.addRoutes([ { path: '/b', component: B } ]) } } } </script>
前端框架搭建
vue-element-admin
项目精简
views下只保留

对src/router/index进行相应修改
import Vue from 'vue' import Router from 'vue-router' Vue.use(Router) /* Layout */ import Layout from '@/layout' /** * Note: sub-menu only appear when route children.length >= 1 * Detail see: https://panjiachen.github.io/vue-element-admin-site/guide/essentials/router-and-nav.html * * hidden: true if set true, item will not show in the sidebar(default is false) * alwaysShow: true if set true, will always show the root menu * if not set alwaysShow, when item has more than one children route, * it will becomes nested mode, otherwise not show the root menu * redirect: noRedirect if set noRedirect will no redirect in the breadcrumb * name:'router-name' the name is used by <keep-alive> (must set!!!) * meta : { roles: ['admin','editor'] control the page roles (you can set multiple roles) title: 'title' the name show in sidebar and breadcrumb (recommend set) icon: 'svg-name'/'el-icon-x' the icon show in the sidebar noCache: true if set true, the page will no be cached(default is false) affix: true if set true, the tag will affix in the tags-view breadcrumb: false if set false, the item will hidden in breadcrumb(default is true) activeMenu: '/example/list' if set path, the sidebar will highlight the path you set } */ /** * constantRoutes * a base page that does not have permission requirements * all roles can be accessed */ export const constantRoutes = [ { path: '/redirect', component: Layout, hidden: true, children: [ { path: '/redirect/:path(.*)', component: () => import('@/views/redirect/index') } ] }, { path: '/login', component: () => import('@/views/login/index'), hidden: true }, { path: '/auth-redirect', component: () => import('@/views/login/auth-redirect'), hidden: true }, { path: '/404', component: () => import('@/views/error-page/404'), hidden: true }, { path: '/401', component: () => import('@/views/error-page/401'), hidden: true }, { path: '/', component: Layout, redirect: '/dashboard', children: [ { path: 'dashboard', component: () => import('@/views/dashboard/index'), name: 'Dashboard', meta: { title: 'Dashboard', icon: 'dashboard', affix: true } } ] } ] /** * asyncRoutes * the routes that need to be dynamically loaded based on user roles */ export const asyncRoutes = [// 404 page must be placed at the end !!! { path: '*', redirect: '/404', hidden: true } ] const createRouter = () => new Router({ // mode: 'history', // require service support scrollBehavior: () => ({ y: 0 }), routes: constantRoutes }) const router = createRouter() // Detail see: https://github.com/vuejs/vue-router/issues/1234#issuecomment-357941465 export function resetRouter() { const newRouter = createRouter() router.matcher = newRouter.matcher // reset router } export default router
删除router下modules文件夹
删除src/vendor文件夹
项目配置
settings.js中可以修改一些配置
项目结构
api 项目使用到的接口
assets 一些静态文件
components 通用组件
directives 自定义指令
filters 自定义过滤器
icons 图标
layout 全局框架组件
node和express
express是一个轻量级的Node Web服务端框架
项目初始化
E:\code\vueadmin>mkdir admin-imooc-node E:\code\vueadmin>cd admin-imooc-node E:\code\vueadmin\admin-imooc-node>npm init -y Wrote to E:\code\vueadmin\admin-imooc-node\package.json: { "name": "admin-imooc-node", "version": "1.0.0", "description": "", "main": "index.js", "scripts": { "test": "echo \"Error: no test specified\" && exit 1" }, "keywords": [], "author": "", "license": "ISC" } E:\code\vueadmin\admin-imooc-node>npm i -S express npm notice created a lockfile as package-lock.json. You should commit this file. npm WARN admin-imooc-node@1.0.0 No description npm WARN admin-imooc-node@1.0.0 No repository field. + express@4.17.1 added 50 packages from 37 contributors in 2.478s
用ide打开项目
创建全局入口文件,app.js
const express = require('express')
const app = express()
app.get('/', function (req, res) {
res.send('hello node')
})
const server = app.listen(5000, function () {
const { address, port } = server.address()
console.log('Http Server is running on http://%s:%s', address, port)
})
启动
E:\code\vueadmin\admin-imooc-node>node app.js Http Server is running on http://:::5000
Express三大基础概念
中间件
一个回调函数,在请求和响应周期中被顺序调用
const express = require('express')
const app = express()
// 中间件是一个函数
// 三个参数在回调的时候被注入
function myLogger(req, res, next){
console.log('myLogger')
// 必须调用next ,否则不会向下执行
next()
}
// 使用中间件
app.use(myLogger)
// 中间件一定要在请求之前,请求发起后,中间件执行不到
app.get('/', function (req, res) {
res.send('hello node')
})
const server = app.listen(5000, function () {
const { address, port } = server.address()
console.log('Http Server is running on http://%s:%s', address, port)
})
路由
如何响应请求的规则
响应/路径的get请求
响应/路径的post请求
const express = require('express')
const app = express()
// 中间件是一个函数
// 三个参数在回调的时候被注入
function myLogger(req, res, next){
console.log('myLogger')
// 必须调用next ,否则不会向下执行
next()
}
// 使用中间件
app.use(myLogger)
// 中间件一定要在请求之前,请求发起后,中间件执行不到
// 路由
app.get('/', function (req, res) {
res.send('hello node')
})
// 路由
app.post('/user', function (req, res) {
res.json('user...')
})
const server = app.listen(5000, function () {
const { address, port } = server.address()
console.log('Http Server is running on http://%s:%s', address, port)
})
规则主要分两部分:
- 请求方法:get、post...
- 请求的路径:/、/user、/。*fly$/ ...
异常处理
const express = require('express')
const app = express()
// 中间件一定要在请求之前,请求发起后,中间件执行不到
// 路由
app.get('/', function (req, res) {
throw new Error('error...')
})
// 异常处理,后置
// 参数不可少,即使不使用
function errorHandler(err, req, res, next) {
console.log(err)
res.status(500).json({
error: -1,
msg: err.toString()
})
}
app.use(errorHandler)
const server = app.listen(5000, function () {
const { address, port } = server.address()
console.log('Http Server is running on http://%s:%s', address, port)
})
- 是一个特殊的中间件
- 参数一个不能少,否则为普通中间件
- 中间件需要在请求之后引用
项目框架优化
安装boom
npm i -S boom
创建router文件夹,创建router/index.js
const express = require('express')
const boom = require('boom')
const userRouter = require('./user')
const {
CODE_ERROR
} = require('../utils/constant')
// 注册路由
const router = express.Router()
router.get('/', function (req, res) {
res.send('欢迎学习小木读书管理后台')
})
// /usre前缀,/info后缀
router.use('/user', userRouter)
// 集中处理404请求的中间件
// 注意:该中间件必须放在正常处理流程之后
// 否则,会拦截正常请求
router.use((req, res, next) => {
next(boom.notFound('接口不存在'))
})
// 自定义路由异常处理中间件
// 注意两点:
// 第一,方法的参数不能减少
// 第二,方法必须放在路由最后
router.use((err, req, res, next) => {
const msg = (err && err.message) || '系统错误'
const statusCode = (err.output && err.output.statusCode) || 500;
const errorMsg = (err.output && err.output.payload && err.output.payload.error) || err.message
res.status(statusCode).json({
code: CODE_ERROR,
msg,
error: statusCode,
errorMsg
})
})
// 处理路由的监听
module.exports = router
router/user.js
const express = require('express')
const router = express.Router()
router.get('/info', function (req, res, next) {
res.json('user info...')
})
module.exports = router
utils/constant
module.exports = { CODE_ERROR: -1 }
项目需求分析
小木读书管理后台,管理电子书
技术难点
- 登录
- 电子书上传
- 电子书解析
- 电子书增删改
epub电子书
一种电子书格式
本质是一个zip压缩包


 浙公网安备 33010602011771号