swagger2的使用
一、前言
经历了几个不同的项目,在前后端分离的过程中,接口文档的重要性不言而喻,但是如何保持一个文档的最新和代码的一致性一直是一个问题,有时候定义了文档,代码中修改了一点小的东西,总会忘记同步修改文档,时间长了,自己都比较蒙,还需要看一下代码才能发现问题。
二、经历的阶段
第一次使用是阿里开源的RAP,但是领导说字段的顺序跟他添加时不一致,他看到对应的文档不好理业务,就直接放弃了这个工具(不知道后面的RAP2有没有这个问题了),然后回归了他熟悉的Word文档的模式,每次入参,说明含义,是否必需的,出参一大批,每次都要这么搞,虽然后期代码的明细很详细,但是耗费的时间还是很长的,好不夸张的说,40%的时间都是在写文档,最后敏捷开发快速迭代的时候,根本不敢以文档说话了。
三、新工具的使用-swagger2
第一次接触到这个工具,只是听别人说,不知道怎么使用,所以才有这个篇文档,记录一下自己的学习过程。
3.1、引入对应到jar包
在pom文件中添加swagger2的包,引入相关的依赖,相关的pom文件可以在mvnrepository中搜索相关的包。
    <!--swagger2的jar包-->
        <dependency>
            <groupId>io.springfox</groupId>
            <artifactId>springfox-swagger2</artifactId>
            <version>2.9.2</version>
        </dependency>
        <!--引入视觉的样式的UI-->
        <dependency>
            <groupId>io.springfox</groupId>
            <artifactId>springfox-swagger-ui</artifactId>
            <version>2.9.2</version>
        </dependency>
3.2、swagger2的配置文件
@Configuration
@EnableSwagger2
public class SwaggerConfig {
    @Bean
    public Docket createRestApi() {
        return new Docket(DocumentationType.SWAGGER_2)
                .useDefaultResponseMessages(false)
                .apiInfo(apiInfo())
                .select()
                .apis(RequestHandlerSelectors.withClassAnnotation(Api.class))
                .paths(PathSelectors.any())
                .build();
    }
    private ApiInfo apiInfo() {
        return new ApiInfoBuilder()
                .title("利用swagger构建api文档")
                .description("简单使用swagger2")
                .version("1.0")
                .build();
    }
}
四、swagger的基础注解介绍
swagger通过注解生成接口文档,包括接口名、请求方法、参数、返回信息的等等。
- @Api:修饰整个类,描述Controller的作用
- @ApiOperation:描述一个类的一个方法,或者说一个接口
- @ApiParam:单个参数描述
- @ApiModel:用对象实体来作为入参
- @ApiProperty:用对象接实体收参数时,描述对象的一个字段
- @ApiResponse:HTTP响应其中1个描述
- @ApiResponses:HTTP响应整体描述
- @ApiIgnore:使用该注解忽略这个API
- @ApiError :发生错误返回的信息
- @ApiImplicitParam:一个请求参数
- @ApiImplicitParams: 多个请求参数
4.1、@Api修饰整个类,描述Controller的作用
4.2、@ApiOperation
用于描述一个方法或者接口
可以添加的参数形式:@ApiOperation(value = “接口说明”, httpMethod = “接口请求方式”, response = “接口返回参数类型”, notes = “接口发布说明”)
4.3、@ApiParam单个参数描述
@ApiParam(required = “是否必须参数”, name = “参数名称”, value = “参数具体描述”,dateType="变量类型”,paramType="请求方式”)
4.4、@ApiImplicitParam 一个请求参数
@ApiImplicitParam(required = “是否必须参数”, name = “参数名称”, value = “参数具体描述”,dateType="变量类型”,paramType="请求方式”)
@ApiOperation(value = "根据用户名获取用户的信息",notes = "查询数据库中的记录",httpMethod = "POST",response = String.class)
@ApiImplicitParam(name = "userName",value = "用户名",required = true,dataType = "String",paramType = "query")
4.5、@ApiImplicitParams 多个请求参数
参数和@ApiImplicitParam一致,只是这个注解可以添加多个参数而已
@ApiImplicitParams({
            @ApiImplicitParam(name = "nickName",value = "用户的昵称",paramType = "query",dataType = "String",required = true),
            @ApiImplicitParam(name = "id",value = "用户的ID",paramType = "query",dataType = "Integer",required = true)
    })
    public String getUserInfoByNickName(String nickName, Integer id) {
        return "1234";
    }
其余的都类似。
整个controller的代码如下
@RestController
@RequestMapping("/swagger")
@Api(value = "swagger2的demo例子")
public class SwaggerController {
    @RequestMapping("/swagger")
    @ResponseBody
    @ApiOperation(value = "根据用户名获取用户的信息",notes = "查询数据库中的记录",httpMethod = "POST",response = String.class)
    @ApiImplicitParam(name = "userName",value = "用户名",required = true,dataType = "String",paramType = "query")
    public String getUserInfo(String userName) {
        return "1234";
    }
    @RequestMapping(value = "/getuserinfobynickname",method = {RequestMethod.GET,RequestMethod.POST})
    @ResponseBody
    @ApiOperation(value = "根据用户昵称获取用户信息",notes = "查询数据库中的记录")
    @ApiImplicitParams({
            @ApiImplicitParam(name = "nickName",value = "用户的昵称",paramType = "query",dataType = "String",required = true),
            @ApiImplicitParam(name = "id",value = "用户的ID",paramType = "query",dataType = "Integer",required = true)
    })
    public String getUserInfoByNickName(String nickName, Integer id) {
        return "1234";
    }
    @RequestMapping(value = "/getuserinfobyid",method = {RequestMethod.GET,RequestMethod.POST})
    @ResponseBody
    @ApiOperation(value = "根据用户id获取用户信息",notes = "查询数据库中的记录",httpMethod = "POST")
    public String getUserInfoById(@ApiParam(name = "nickName",value = "用户的昵称",required = true,defaultValue = "123-默认值")
                                          String nickName,@ApiParam(name = "id",value = "用户ID",required = true) Integer id) {
        return "1234";
    }
    @RequestMapping(value = "/userregister",method = {RequestMethod.GET,RequestMethod.POST})
    @ResponseBody
    @ApiOperation(value = "register",notes = "注册的实体类")
    public Register userRegister(Register register) {
        return register;
    }
}
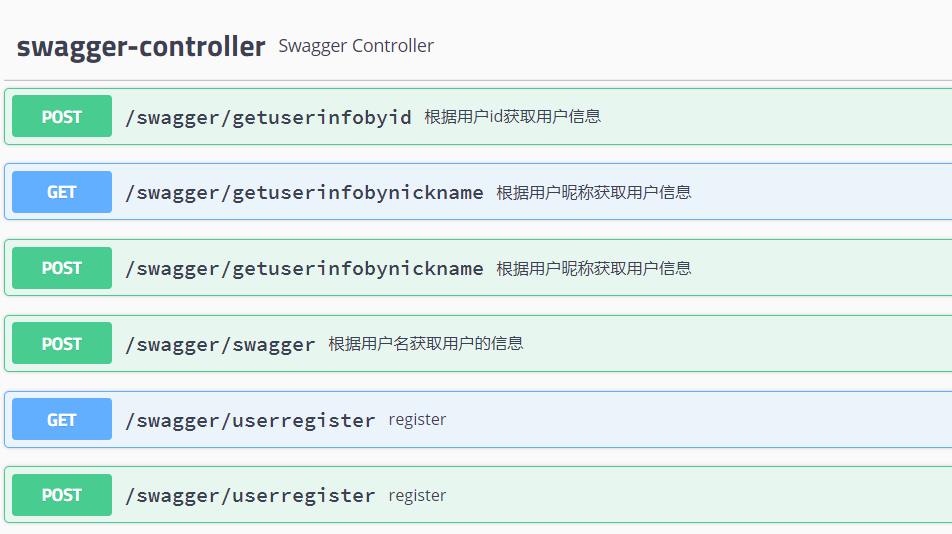
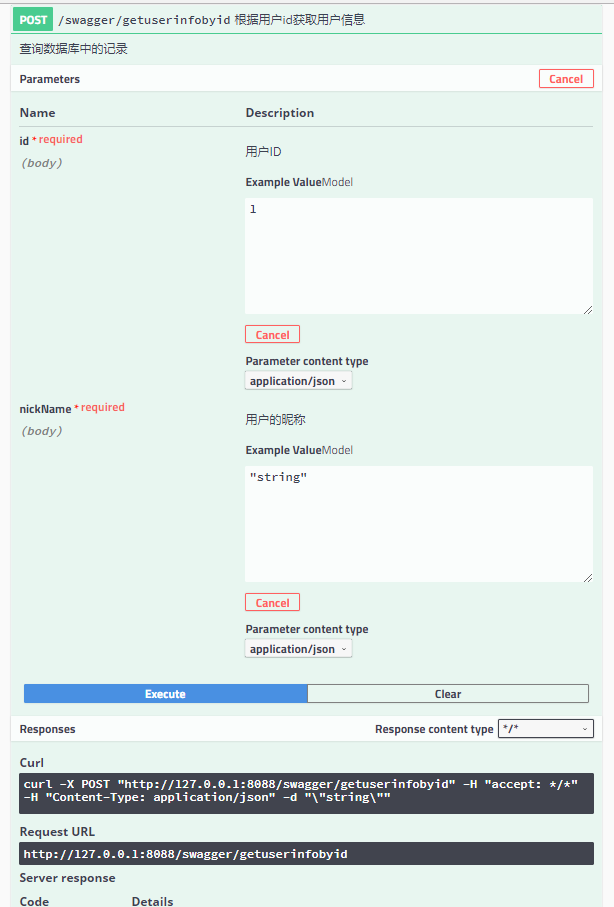
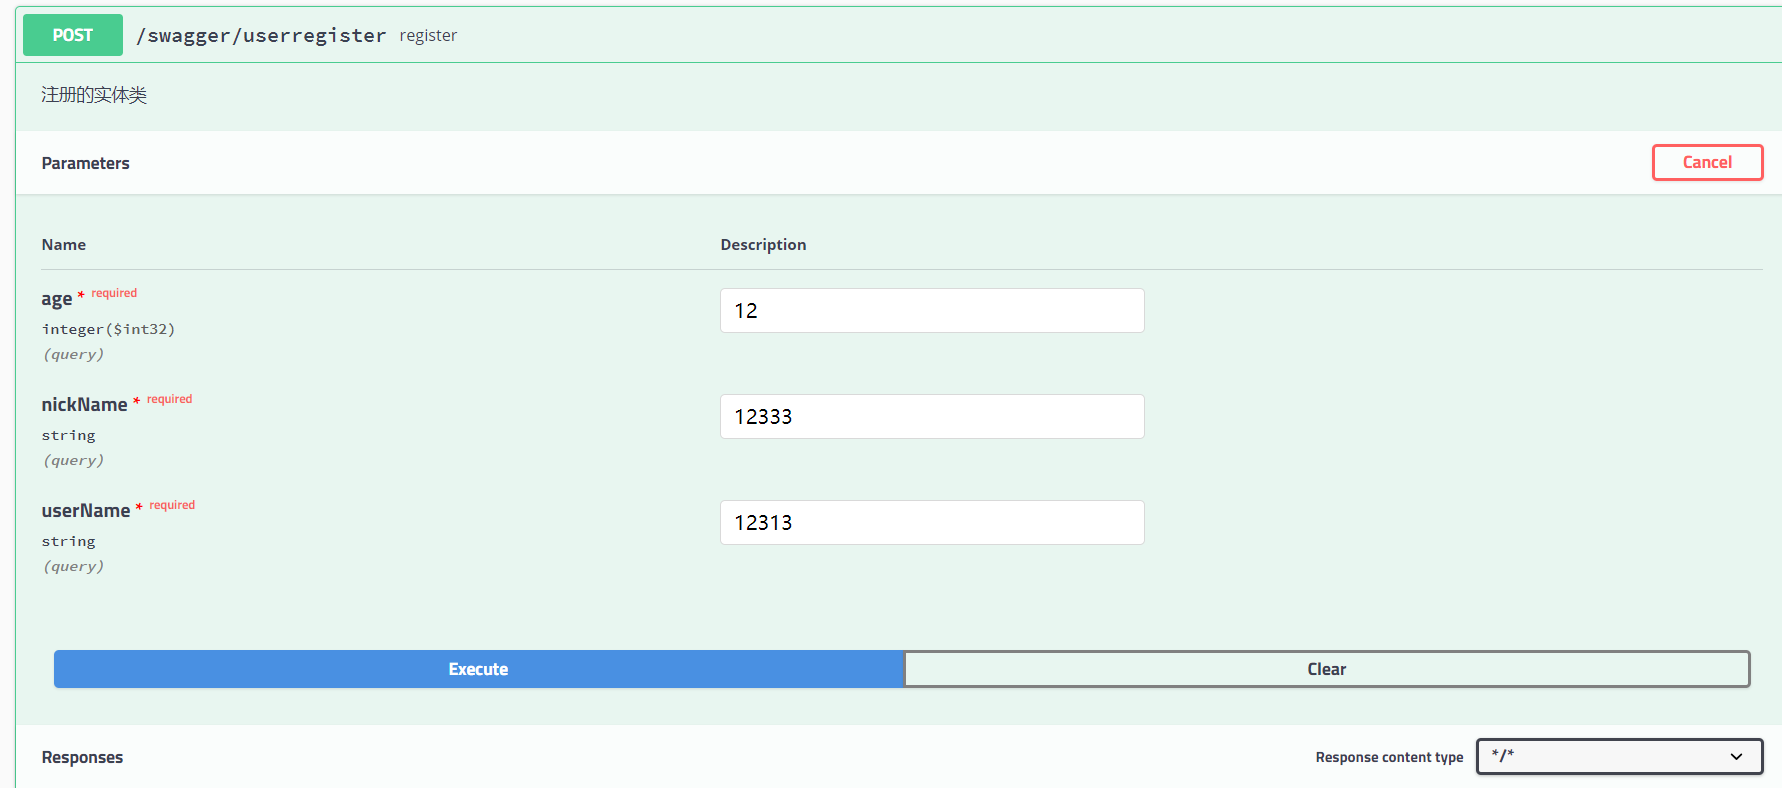
相对应的接口文档如下:

可以直接进行测试


对应的实体说明:
@ApiModel(value = "用户注册的实体")
public class Register {
    @ApiModelProperty(name = "userName",notes = "用户名",dataType = "String",required = true)
    private String userName;

    @ApiModelProperty(name = "nickName",notes = "用户昵称",dataType = "String",required = true)
    private String nickName;

    @ApiModelProperty(name = "age",notes = "用户年龄",dataType = "int",required = true)
    private int age;
    public String getUserName() {
        return userName;
    }

    public void setUserName(String userName) {
        this.userName = userName;
    }

    public String getNickName() {
        return nickName;
    }

    public void setNickName(String nickName) {
        this.nickName = nickName;
    }

    public int getAge() {
        return age;
    }

    public void setAge(int age) {
        this.age = age;
    }
    @Override
    public String toString() {
        return "Register{" +
                "userName='" + userName + '\'' +
                ", nickName='" + nickName + '\'' +
                ", age=" + age +
                '}';
    }
}
五、总结
学习过程就是一个熟悉的过程
自勉:
接触新事物,学习的过程就是自己的积攒过程,可能简单或者有错误,但是谁不是一个学习积攒的过程那,没有所谓的天才,只有拼搏和努力,只要肯积攒,总有变大神的一天。


