架构师的成长之路初片~iptables-上
irewall —(调用)—> iptables —(调用)—> netfilter(内核中数据包过滤的机制)
firewalld和iptables是Linux的两个防火墙的工具。真正能够实现过滤机制的是内核中的netfilter。

表的作用:存放不同的链
链的作用:存放一条一条的防火墙的规则(处理数据的时机不同)
IPtables基本用法
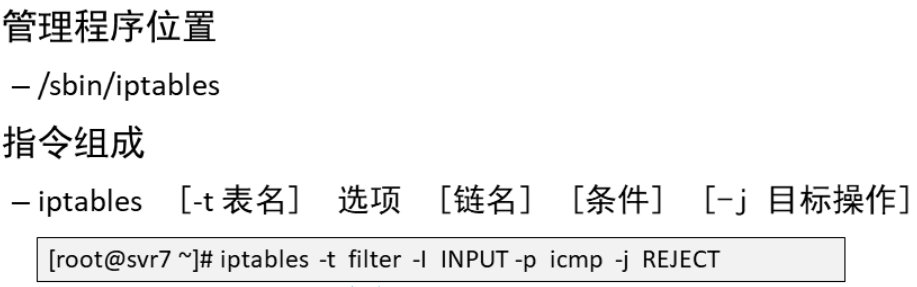
IPtables选项

filter表
INPUT链(入站链):处理流入的数据包
OUTPUT链(出站链):处理流出的数据包
FORWARD链:转发数据包
准备三台主机:
client  4.10
proxy   4.5   2.5
web1    2.100
步骤一:关闭firewalld,启动iptables服务
1)关闭firewalld服务器
[root@proxy ~]# systemctl stop firewalld.service
[root@proxy ~]# systemctl disable firewalld.service
按顺序匹配,匹配即停止
拒绝4.0访问本机
允许4.1访问本机
允许4.1访问本机
拒绝4.2访问本机
[root@client ~]# ping 192.168.4.5(在client主机上ping 192.168.2.5主机,然后在2.5主机上执行防火墙规则。随时关注ping的状态。)
[root@proxy ~]#iptables -F //清空所有规则
[root@proxy ~]# iptables -t filter -I INPUT -p icmp -j REJECT //在filter表的INPUT链中添加一条规则 条件匹配协议icmp。
[root@proxy ~]#iptables -nL //查看防火墙规则
(这个时候client主机无法ping通proxy。因为proxy主机的防火墙规则做了限制。)
[root@proxy ~]#iptables -t filter -I INPUT -p icmp -j ACCETP
[root@proxy ~]#iptables -nL
(这个时候client主机能正常ping通proxy。因为这次插入的防火墙规则的顺序在拒绝的规则前面,按照防火墙的规则顺序匹配,第一个ACCEPT的规则被匹配,故通过。)
[root@proxy ~]#iptables -I INPUT -p icmp -j REJECT
(这个时候client主机无法ping通proxy。)
[root@proxy ~]#iptables -nL
创建规则的案例
[root@proxy ~]# iptables -F           #清空所有规则
[root@proxy ~]# iptables  -t  filter  -A  INPUT  -p tcp  -j  ACCEPT
#追加规则至filter表中的INPUT链的末尾,允许任何人使用TCP协议访问本机

[root@proxy ~]# iptables  -I  INPUT  -p  udp  -j  ACCEPT
#插入规则至filter表中的INPUT链的开头,允许任何人使用UDP协议访问本机

[root@proxy ~]# iptables  -I  INPUT 2  -p  icmp  -j  ACCEPT
#插入规则至filter表中的INPUT链的第2行,允许任何人使用ICMP协议访问本机

[root@proxy ~]# iptables -nL --line-numbers
#查看规则,显示行号
查看iptables防火墙规则
[root@proxy ~]# iptables -nL        #查看INPUT链的规则(默认filter表)
[root@proxy ~]# iptables -nL INPUT  #仅查看INPUT链的规则(默认filter表)
[root@proxy ~]# iptables -t filter  -nL INPUT   #仅查看INPUT链的规则
[root@proxy ~]# iptables -t filter  -nL INPUT  --line-numbers #查看规则,显示行号
删除规则,清空所有规则
[root@proxy ~]# iptables  -D INPUT 3
#删除filter表中INPUT链的第3条规则
[root@proxy ~]# iptables -t filter  -nL INPUT  --line-numbers
#查看规则,确认是否删除

[root@proxy ~]# iptables  -F
#清空filter表中所有链的防火墙规则(没有用-t指定表名,默认是filter表。)
[root@proxy ~]# iptables  -F  INPUT
#清空filter表中INPUT链的防火墙规则
[root@proxy ~]# iptables -t nat -F
#清空nat表中所有链的防火墙规则
[root@proxy ~]# iptables -t mangle -F
#清空mangle表中所有链的防火墙规则
[root@proxy ~]# iptables -t raw -F
#清空raw表中所有链的防火墙规则
设置防火墙默认规则
[root@proxy ~]# iptables  -t  filter  -P  INPUT  DROP
#设置INPUT链默认规则为DROP(这时候远程连接会断开)

以下需要在虚拟机里完成:
[root@proxy ~]# iptables  -nL
Chain INPUT (policy DROP)
… …
[root@proxy ~]# iptables  -t  filter  -P  INPUT  ACCEPT
#设置INPUT链默认规则为ACCEPT
二:filter过滤和转发控制
根据防火墙保护的对象不同,防火墙可以分为主机型防火墙与网络型防火墙。
主机型防火墙,主要保护的是服务器本机(过滤威胁本机的数据包)。
网络防火墙,主要保护的是防火墙后面的其他服务器,如web服务器、FTP服务器等。


1、
确保在proxy主机中有网站服务。
[root@client ~]# curl http://192.168.4.5
123
[root@proxy ~]# iptables -I INPUT -p tcp --dport 80 -j REJECT
#插入规则至filter表中的INPUT链的开头,不允许任何人使用TCP协议访问本机的80端口。
[root@client ~]# curl 192.168.4.5
curl: (7) Failed connect to 192.168.4.5:80; Connection refused
注意:只有访问80端口受限制,访问proxy主机的其他服务依然正常。
2、
[root@proxy ~]# iptables -F
[root@proxy ~]# iptables -I INPUT -s 192.168.4.10 -j REJECT
#插入规则至filter表中的INPUT链的开头,不允许192.168.4.10主机访问本机。
注意:除了192.168.4.10主机之外,其他主机访问proxy主机的任何服务依然正常。
3、
[root@proxy ~]# iptables -F
[root@proxy ~]# iptables -I INPUT -d 192.168.4.5 -p tcp --dport 80 -j REJECT
#插入规则至filter表中的INPUT链的开头,不允许任何人使用TCP协议访问本机192.168.4.5IP的80端口。
注意:在proxy上有两个IP。访问proxy的192.168.4.5IP无法访问,但是访问proxy的192.168.2.5的IP是可以访问到的。
4
[root@proxy ~]# iptables -F
[root@proxy ~]# iptables -I INPUT -i ens192 -p tcp --dport 80 -j REJECT
#插入规则至filter表中的INPUT链的开头,不允许任何人使用TCP协议访问本机ens192网卡的80端口。
5
[root@proxy ~]# iptables -F
[root@proxy ~]# iptables -A INPUT -s 192.168.2.0/24 -j DROP
#丢弃192.168.2.0/24网络中所有主机发送给本机的所有数据包
6、
[root@proxy ~]# iptables -F
[root@proxy ~]# iptables -A INPUT -s 114.212.33.12 -p tcp --dport 22 -j REJECT
#拒绝114.212.33.12使用tcp协议远程连接本机ssh(22端口)

 浙公网安备 33010602011771号