UiAutomator2.0 简介
一 、什么是 Uiautomator?
Ui Automator 是一个 UI 测试框架,适用于整个系统上以及多个应用间的跨应用功能 Ui 测试。
Uiautomator 测试框架提供了一组 API,用户构建在用户应用和系统应用上执行交互的界面测试。通过这些 API,可以在测试设备中执行用户操作,如滑动,点击,返回等。Ui automator 测试框架非常适合黑盒式自动化测试,因为它的测试代码不依赖于目标应用的内部实现细节。
注意:Uiautomator 框架需要 Android 4.3(API 级别 18)或更高版本
二、Uiautomator 2.0和1.0的区别
Uiautomator 目前分为1.0和2.0两个版本,2.0丰富了一些 API,以及修补了一些缺陷(例如不支持中文)
两者的主要区别如下:
- 2.0 基于 Junit4,测试用例无需继承任何父类,方法名没有限制,使用注解进行,1.0 基于 Junit3,即需要继承 UiAutomatorTestCase,测试方法需要以 test 开头
- 构建方式不同,2.0采用 gradle 进行构建,1.0 使用 Maven 或 Ant
- 2.0新增 UiObject2,Until,By等 API
- 日志输出不同,2.0默认输出到 Logcat,1.0 可以使用 System.out.println输出流回显至控制台
- 2.0 注入到设备上是以 apk,1.0 输出为 jar
- 2.0 基于 Instrumentation,可以获取应用 Context,可以使用 Android 服务及接口
三、项目工程
1. 创建项目

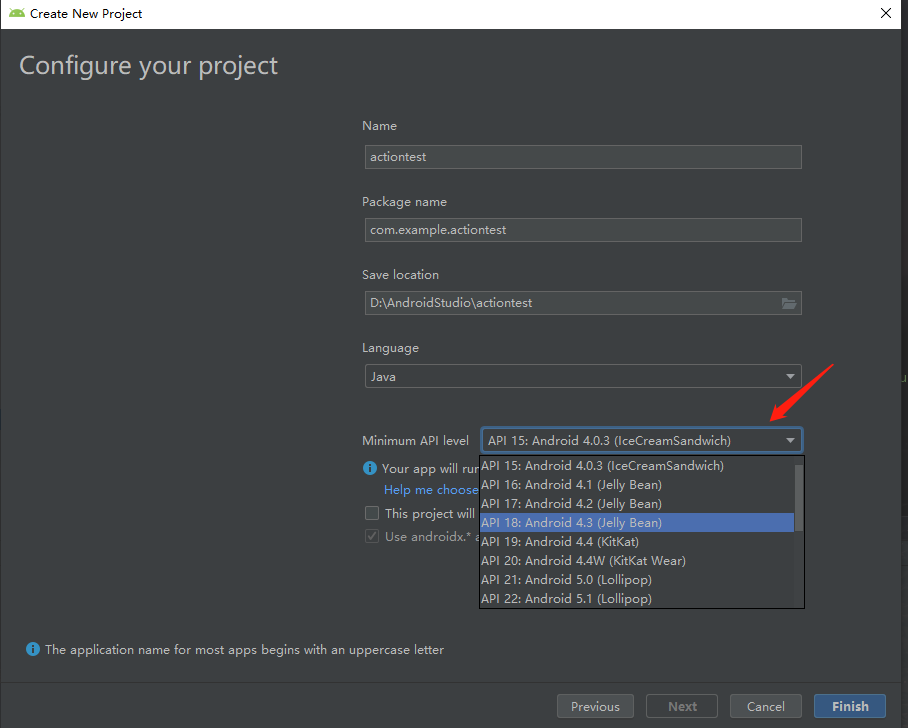
图中标识位置需要选择API版本,注意不能低于18
2. 添加 uiautomator2.0依赖
androidTestImplementation 'com.android.support.test.uiautomator:uiautomator-v18:2.1.3'

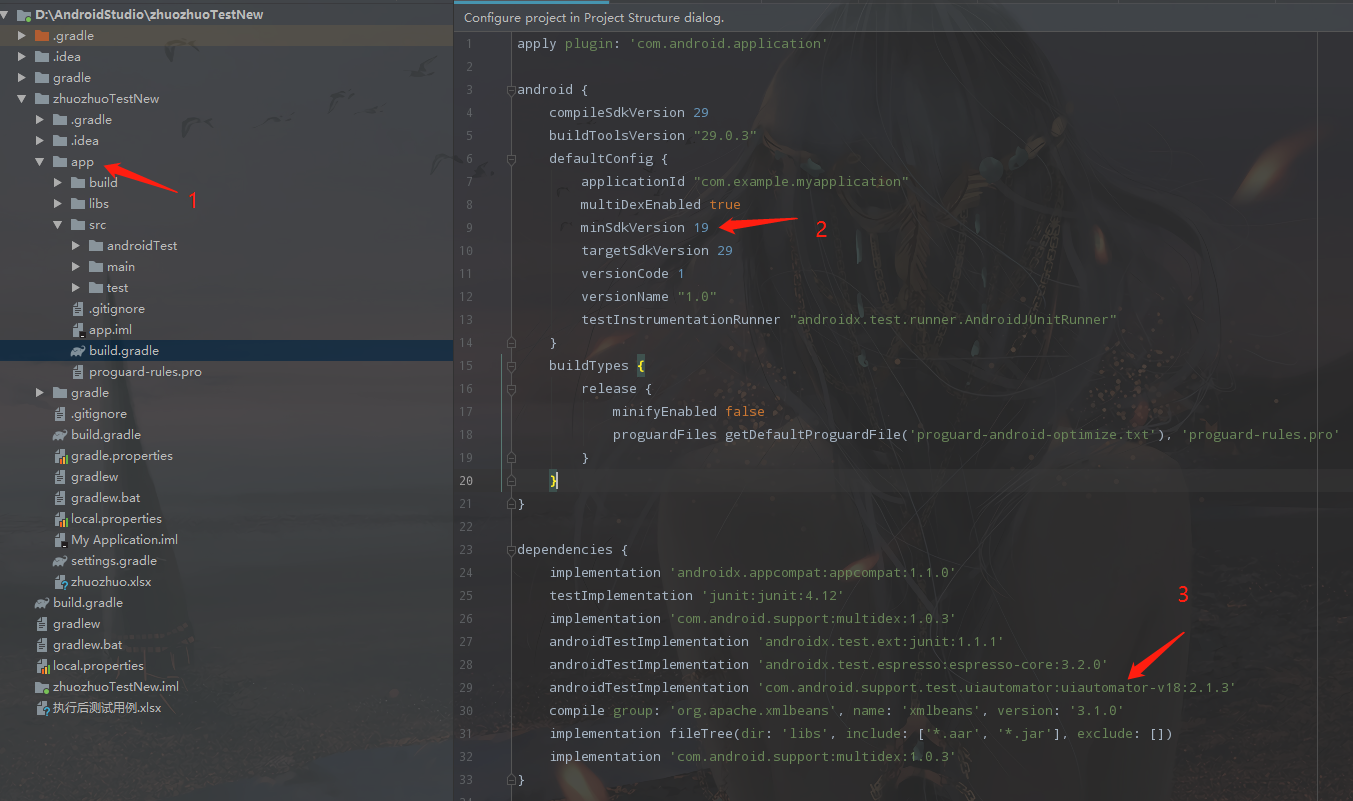
在图中1的 build.gradle 文件中添加依赖至图中3的位置,如果创建时的 API 低于 18,可以在图中2的位置上修改
从图中我们可以看出添加的依赖有四种形式
- implementation 包名
- testImplementation 包名
- androidTestImplementation 包名
- compile 包名
这四种形式分别表明了导入包的作用范围
- implementation '包名'只能在Android产品代码区使用
- testImplementation '包名'可以在“普通单元测试区”和“Android单元测试区”使用
- androidTestImplementation '包名'只能在Android单元测试区使用
- 如果你使用的是Android Studio 2.X版本,这里的Implementation都要改为Compile,即androidTestCompile '包名'、testCompile '包名'、compile '包名',Android Studio 3.0版本以上的都不用该
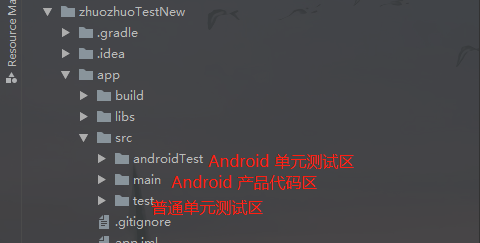
说到这里,那什么又是Android产品代码区,普通单元测试区和Android单元测试区呢?
3. Uiautomator2.0 code 位置

因为 UiAutomator 是属于Android 单元测试,所有 code 放在 androidTest 文件下
4. 示例
拿QQ简单示例下,这里仅仅只展示启动和关闭QQ
第一步:手机使用数据线连接电脑(手机已经开启开发者模式)
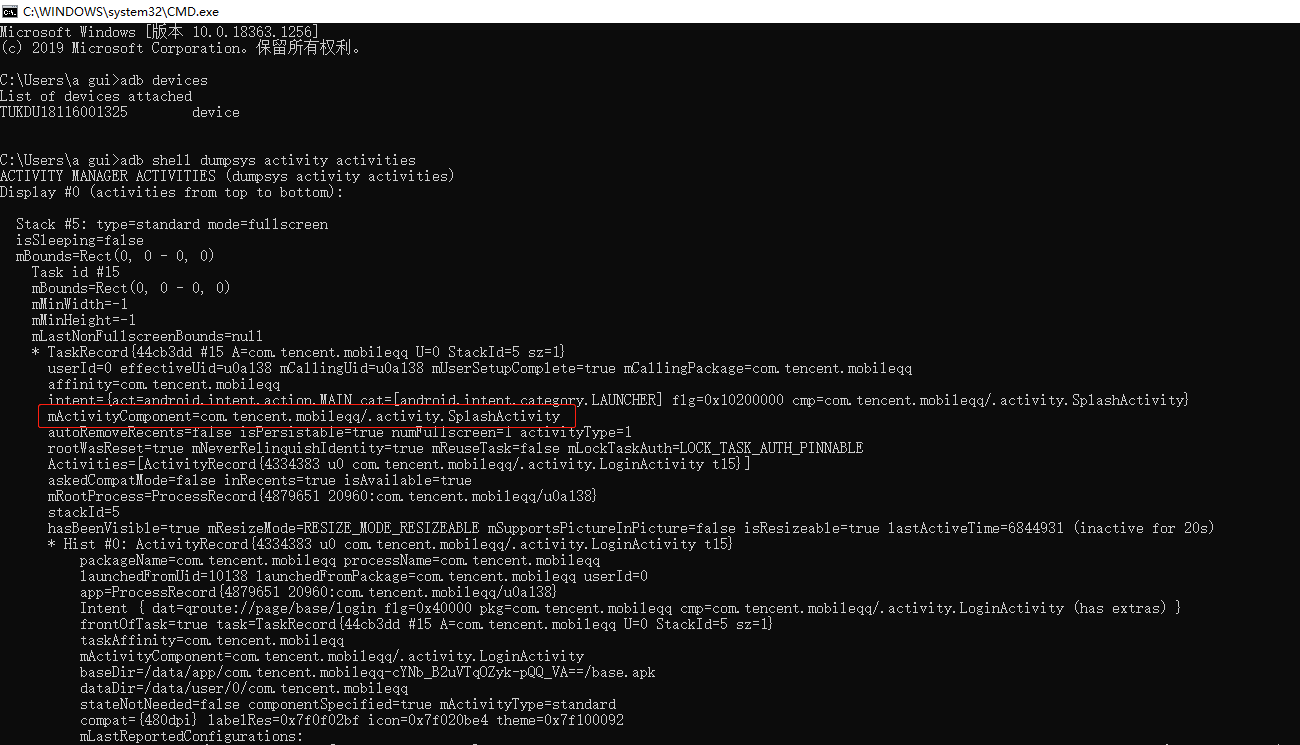
使用 adb devices 命令判断是否连接成功,如下结果即表示连接成功

第二步:清除应用,打开QQ,在命令窗口输入 adb shell dumpsys activity activities,查看 QQ 的启动包名

第三步:编写测试脚本
创建 Action 类,该类主要是对应用的一些操作,如此次的启动 app 和关闭 app
import androidx.test.platform.app.InstrumentationRegistry;
import androidx.test.uiautomator.UiDevice;
import java.io.IOException;

public class Action {

    private static UiDevice uiDevice = UiDevice.getInstance(InstrumentationRegistry.getInstrumentation());

    //应用包名
    private String packageName;
    public Action(){}

    //启动应用
    public void startApp(String packageName) throws IOException {
        uiDevice.executeShellCommand("am start -n " + packageName + "/.activity.SplashActivity");
        uiDevice.waitForIdle(6000);
    }

    //关闭应用
    public void closeApp(String packageName) throws IOException, InterruptedException {
        uiDevice.executeShellCommand("am force-stop " + packageName );
    }
}
再创建一个 Excute 类,该类主要是执行测试方法
import androidx.test.ext.junit.runners.AndroidJUnit4;
import org.junit.After;
import org.junit.Before;
import org.junit.Test;
import org.junit.runner.RunWith;
import java.io.IOException;

//通过声明@RunWith(AndroidJUnit4.class),来表示该类为一个测试集合。
@RunWith(AndroidJUnit4.class)
public class Excute {

    Action action = new Action();
    private String packageName = "com.tencent.mobileqq";

    @Before
    public void beforeTest() throws IOException, InterruptedException {
        action.startApp(packageName);
        System.out.println("QQ启动成功");
    }

    @Test
    public void execute() throws InterruptedException {
        System.out.println("这是测试方法");
    }

    @After
    public void afterTest() throws IOException, InterruptedException {
        action.closeApp(packageName);
        System.out.println("QQ关闭成功");
    }
}
第四步:执行 Excut 类中的 execute 方法,Android studio 结果如下显示

表示运行成功,而且手机上会安装一个以当前项目命名的 apk。
四、总结
上面我简单描述了如何创建一个 uiautomator 项目。虽然内容写的不是很好,但相信你们按照这个来搭建,也会很快的完成自己第一个 uiautomator 项目。我后面也会陆续更新 uiautomator 2.0 的 api,除此之外也会总结一篇 adb 命令,uiautomator 测试报告,多 case 的执行以及脱机运行,还请大家稍等一些时间。


 浙公网安备 33010602011771号