Unity 游戏场景控制Scene Manager
-
引言
游戏基本架构大致分为介绍界面(introduction),主菜单界面(Menu),游戏界面(Game),设置界面(Setting),排行榜(high score)。
在很多开发引擎中都结合以上架构存在类似的概念。安卓的活动(Activity),视图(View)等。在Unity中更是有场景(Scene)这一个概念。
Scene就是一组相关联的游戏对象的一个集合,通常每个集合就是一个场景,但是也有可能只是一个场景的一部分!
那么怎么管理游戏场景及游戏关卡是很重要的一个问题。其中涉及到场景跳转,场景加载等。如下介绍一款插件:Scene Manager。
提供官网地址。其中有DEMO,Tutorials,documentation,support。可供学习。

也可在unity 资源商店导入。

上该篇讲述后的工程视频:
http://v.youku.com/v_show/id_XNjY2NzA5NDY0.html
-
Unity实现过程
介绍:一个菜单界面,点击进入游戏关卡一,点击进入游戏关卡二,点击回到菜单界面。
新建一个Unity工程,命名为SceneManagerTest.
保存场景为MyMainMenu.新建2个场景(游戏关卡一,二)为MyLevel1,MyLevel2.
导入插件包。其中插件包中的实例就不说了,直接进入简单的应用开发吧。
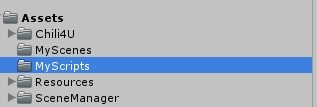
在工程视图中新建"Resources"、"MyScenes"、"MyScripts"、三个文件夹。
复制SceneManagerDemo中的SMGameEnvironment.cs脚本到MyScripts文件夹中,复制Transitions文件夹到新建的Resources下,删除SceneManagerDemo.

在Resources文件夹下新建"MyConfig"文件夹,选中Assets点击工程视图中的Create,点击选择“SceneConfiguration”,在MyConfig文件夹中可以看到"SMSceneConfiguration.cs".
选中“SMSceneConfiguration”,在检视面板中可以看到之前我们新建的三个场景,点击Activate按钮

在见识面板中的"AvaliableScenes"中选择场景,点击对应的功能按钮(Level、Screen等)如下图示:

在MyMainMenu场景中新建一个空物体,命名为MyMenuController,新建ShowGame.cs脚本如下:并将脚本挂在MyMenuController物体上。
 1 using UnityEngine;
 2 using System.Collections;
 3
 4 //我自定义啦。。
 5
 6
 7 public class ShowGame : MonoBehaviour {
 8
 9     private SMSceneManager mSMSceneManager;
10     private SMILevelProgress mLevelProgress;
11     // Use this for initialization
12     void Start () {
13      mSMSceneManager = SMGameEnvironment.Instance.SceneManager;
14     mLevelProgress = mSMSceneManager.UnmodifiableLevelProgress;
15     }
16
17     // Update is called once per frame
18     void Update () {
19
20     }
21
22     void OnGUI(){
23         //if(!mLevelProgress.HasPlayed){
24             if(GUI.Button(new Rect(200,200,200,200),"MenuScene")){
25                 mSMSceneManager.LoadFirstLevel();
26                 }
27                 //}
28         }
29 }
分别在MyLevel1,MyLevel2场景中新建空物体为MyLevel1Controller,MyLevel2Controller,新建ShowNextLevel.cs脚本一并挂于空物体MyLevel1Controller,MyLevel2Controller上、
 1 using UnityEngine;
 2 using System.Collections;
 3
 4 //我自定义啦。。
 5
 6
 7 public class ShowNextLevel : MonoBehaviour {
 8
 9
10     // Use this for initialization
11     void Start () {
12
13     }
14
15     // Update is called once per frame
16     void Update () {
17
18     }
19
20
21     void OnGUI(){
22         if(GUI.Button(new Rect(200,200,200,200),this.name)){
23             SMGameEnvironment.Instance.SceneManager.LoadNextLevel();
24             }}
25 }
注意:记得将SMGameEnvironment.cs中的23行中的DemoConfig改为MyConfig
其中SMGameEnvironment.cs脚本如下:
 1 using UnityEngine;
 2 using System.Collections;
 3
 4 public class SMGameEnvironment {
 5     private static SMGameEnvironment instance;
 6     private SMSceneManager sceneManager;
 7     public static SMGameEnvironment Instance {
 8         get {
 9             if (instance == null) {
10                 instance = new SMGameEnvironment();
11             }
12             return instance;
13         }
14     }
15
16    public SMSceneManager SceneManager {
17        get {
18            return sceneManager;
19        }
20    }
21
22    public SMGameEnvironment() {
23        sceneManager = new SMSceneManager(SMSceneConfigurationLoader.LoadActiveConfiguration("MyConfig"));
24        sceneManager.LevelProgress = new SMLevelProgress(sceneManager.ConfigurationName);
25         // Comment this in to enable the blinds transition type
26         // sceneManager.TransitionPrefab = "Transitions/MyTransition";
27    }
28 }

 浙公网安备 33010602011771号