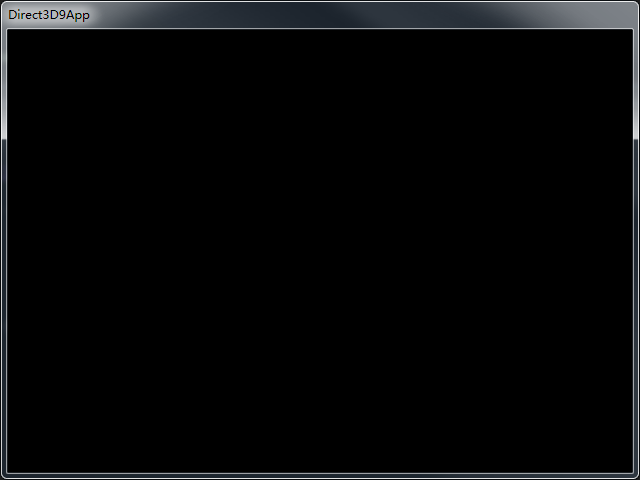
Dx9 样例运行
参考链接:https://blog.csdn.net/sinat_24998369/article/details/78941477
关于vs2017 配置和运行龙书DX9样例
配置环境:
- 下载DXSDK_Jun10.exe,安装后会有一个文件夹:Microsoft DirectX SDK (June 2010)(我的默认路径是C:\Program Files (x86)\Microsoft DirectX SDK (June 2010))
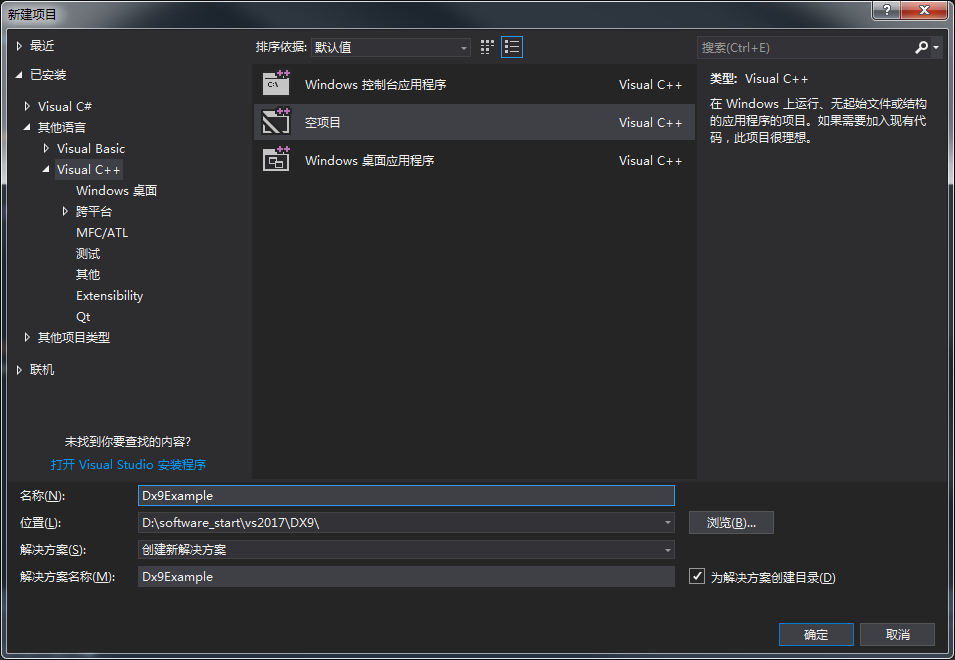
- 打开vs2017,Visual C++ 新建新项目,如图:
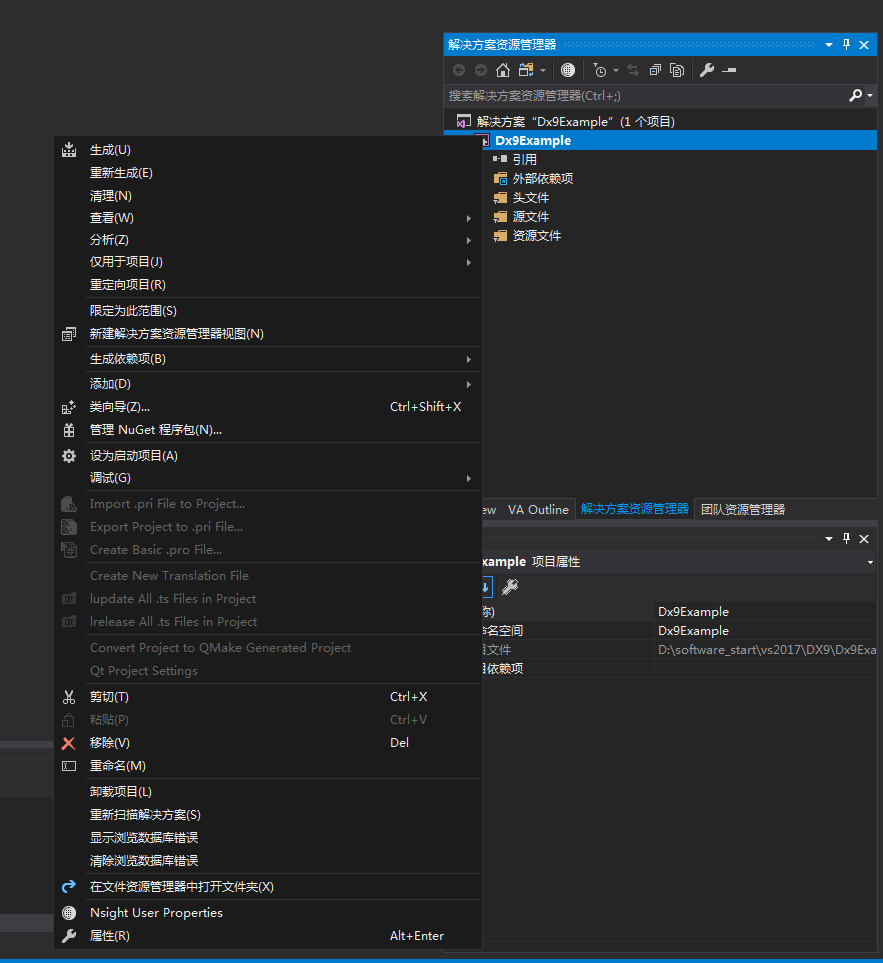
- 创建项目完成后,右键项目选择属性。
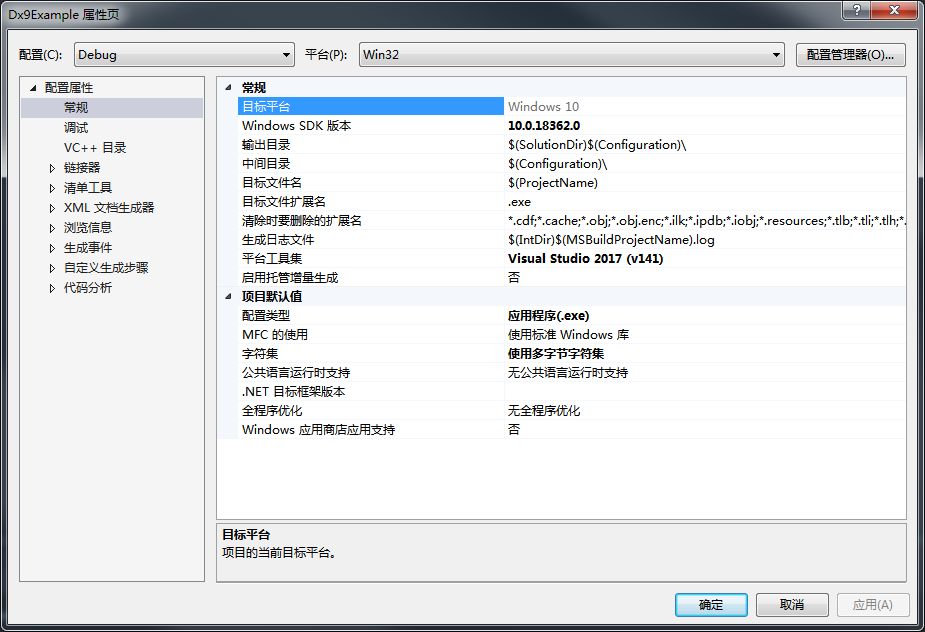
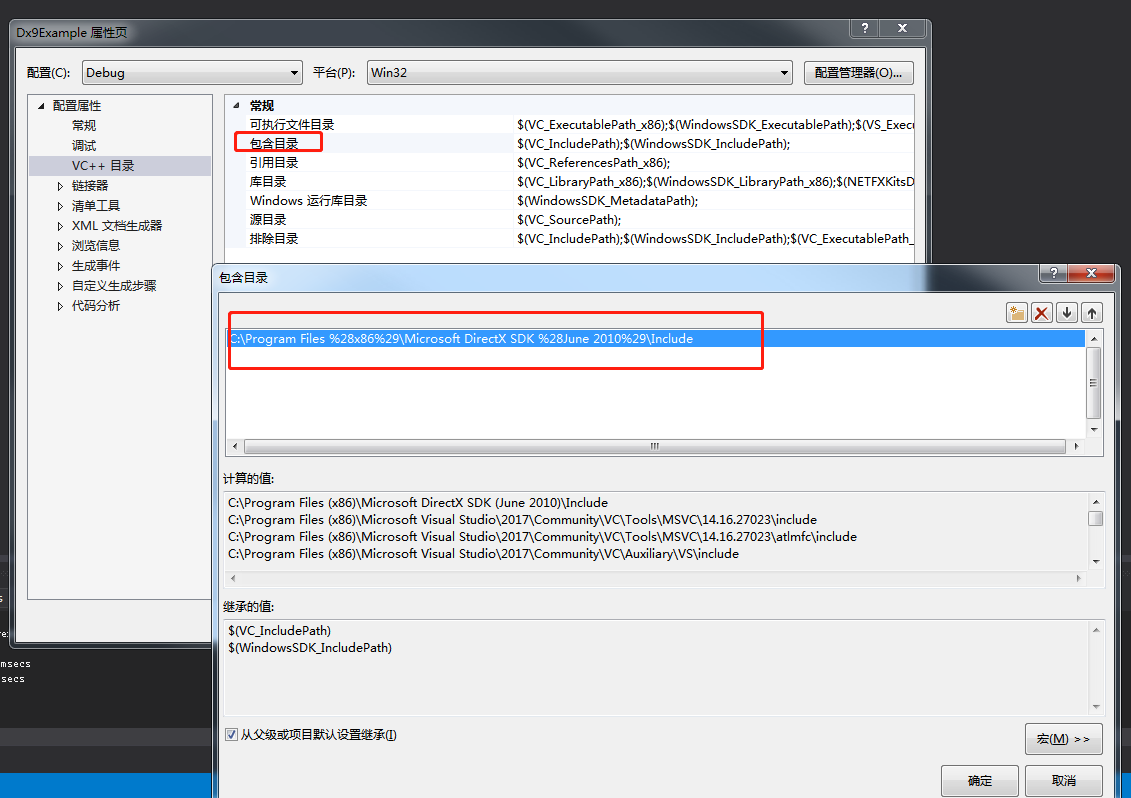
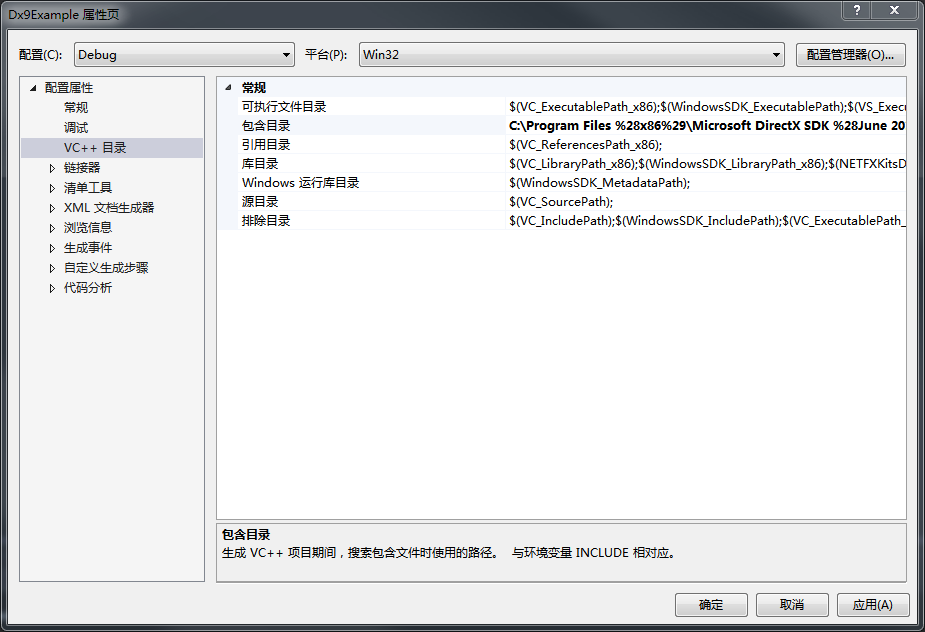
- 点击VC++目录,在包含目录选择编辑导入包含目录,我的路径是(C:\Program Files (x86)\Microsoft DirectX SDK (June 2010)\Include)
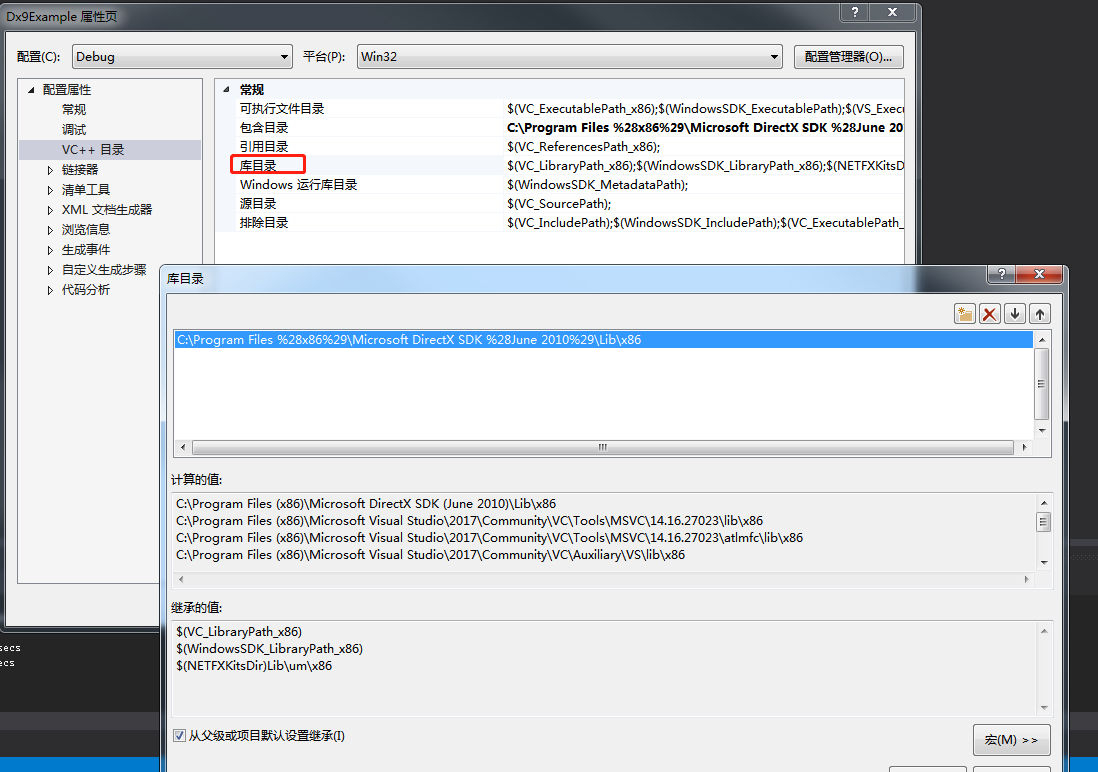
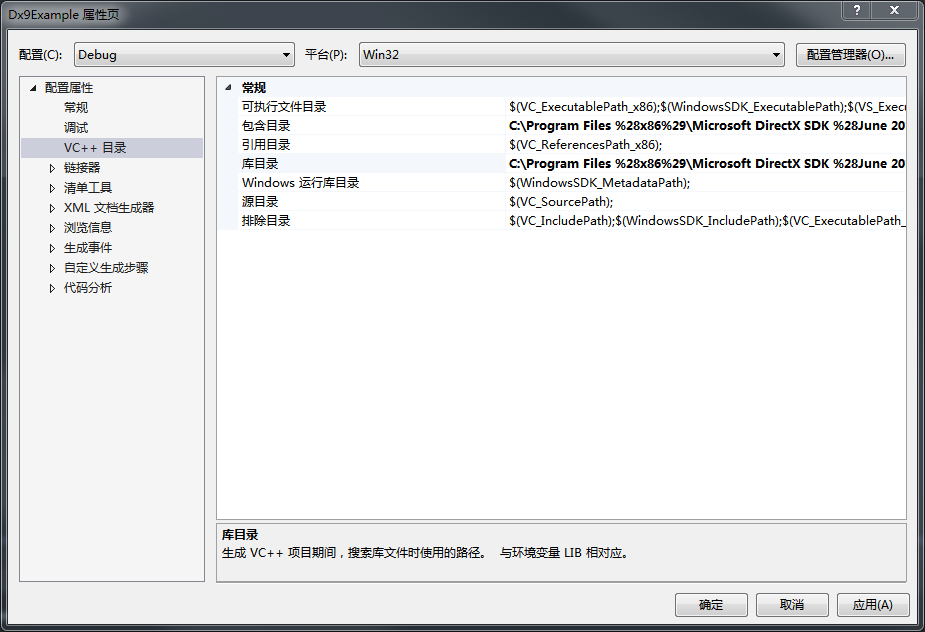
然后选择库目录,导入目录,我的目录是(C:\Program Files (x86)\Microsoft DirectX SDK (June 2010)\Lib\x86)
- 在"链接器"的"输入"中的"附加依赖项"编辑,输入 d3d9.lib d3dx9.lib winmm.lib
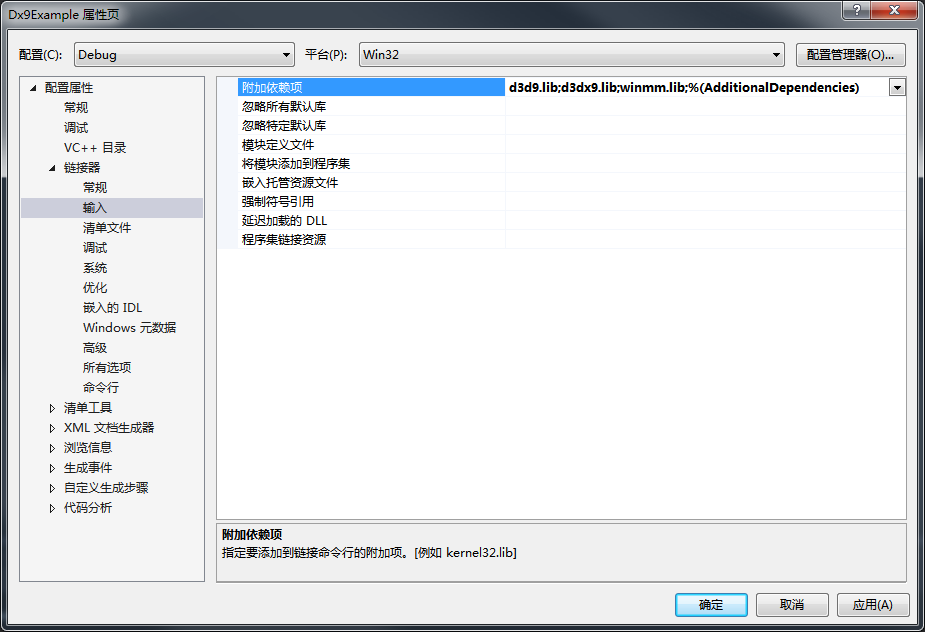
- 点击应用 确定后,环境已经配置完成了,下面开始运行案例。
(源码下载链接:https://pan.baidu.com/s/1cwdJSEu0X6sH0t4wW3vP8w ,密码:m7k2,这里运行的是第一张的案例)
d3dutility.h:
#ifndef __d3dUtilityH__
#define __d3dUtilityH__

#include <d3dx9.h>
#include <string>

namespace d3d
{
    bool InitD3D(
        HINSTANCE hInstance,       // [in] Application instance.
        int width, int height,     // [in] Backbuffer dimensions.
        bool windowed,             // [in] Windowed (true)or full screen (false).
        D3DDEVTYPE deviceType,     // [in] HAL or REF
        IDirect3DDevice9** device);// [out]The created device.

    int EnterMsgLoop(
        bool (*ptr_display)(float timeDelta));

    LRESULT CALLBACK WndProc(
        HWND hwnd,
        UINT msg,
        WPARAM wParam,
        LPARAM lParam);

    template<class T> void Release(T t)
    {
        if( t )
        {
            t->Release();
            t = 0;
        }
    }

    template<class T> void Delete(T t)
    {
        if( t )
        {
            delete t;
            t = 0;
        }
    }
}

#endif // __d3dUtilityH__
d3dUtility.cpp
#include "d3dUtility.h"

bool d3d::InitD3D(
    HINSTANCE hInstance,
    int width, int height,
    bool windowed,
    D3DDEVTYPE deviceType,
    IDirect3DDevice9** device)
{
    //
    // Create the main application window.
    //

    WNDCLASS wc;

    wc.style         = CS_HREDRAW | CS_VREDRAW;
    wc.lpfnWndProc   = (WNDPROC)d3d::WndProc;
    wc.cbClsExtra    = 0;
    wc.cbWndExtra    = 0;
    wc.hInstance     = hInstance;
    wc.hIcon         = LoadIcon(0, IDI_APPLICATION);
    wc.hCursor       = LoadCursor(0, IDC_ARROW);
    wc.hbrBackground = (HBRUSH)GetStockObject(WHITE_BRUSH);
    wc.lpszMenuName  = 0;
    wc.lpszClassName = "Direct3D9App";

    if( !RegisterClass(&wc) )
    {
        ::MessageBox(0, "RegisterClass() - FAILED", 0, 0);
        return false;
    }

    HWND hwnd = 0;
    hwnd = ::CreateWindow("Direct3D9App", "Direct3D9App",
        WS_EX_TOPMOST,
        0, 0, width, height,
        0 /*parent hwnd*/, 0 /* menu */, hInstance, 0 /*extra*/);

    if( !hwnd )
    {
        ::MessageBox(0, "CreateWindow() - FAILED", 0, 0);
        return false;
    }

    ::ShowWindow(hwnd, SW_SHOW);
    ::UpdateWindow(hwnd);

    //
    // Init D3D:
    //

    HRESULT hr = 0;

    // Step 1: Create the IDirect3D9 object.

    IDirect3D9* d3d9 = 0;
    d3d9 = Direct3DCreate9(D3D_SDK_VERSION);

    if( !d3d9 )
    {
        ::MessageBox(0, "Direct3DCreate9() - FAILED", 0, 0);
        return false;
    }

    // Step 2: Check for hardware vp.

    D3DCAPS9 caps;
    d3d9->GetDeviceCaps(D3DADAPTER_DEFAULT, deviceType, &caps);

    int vp = 0;
    if( caps.DevCaps & D3DDEVCAPS_HWTRANSFORMANDLIGHT )
        vp = D3DCREATE_HARDWARE_VERTEXPROCESSING;
    else
        vp = D3DCREATE_SOFTWARE_VERTEXPROCESSING;

    // Step 3: Fill out the D3DPRESENT_PARAMETERS structure.

    D3DPRESENT_PARAMETERS d3dpp;
    d3dpp.BackBufferWidth            = width;
    d3dpp.BackBufferHeight           = height;
    d3dpp.BackBufferFormat           = D3DFMT_A8R8G8B8;
    d3dpp.BackBufferCount            = 1;
    d3dpp.MultiSampleType            = D3DMULTISAMPLE_NONE;
    d3dpp.MultiSampleQuality         = 0;
    d3dpp.SwapEffect                 = D3DSWAPEFFECT_DISCARD;
    d3dpp.hDeviceWindow              = hwnd;
    d3dpp.Windowed                   = windowed;
    d3dpp.EnableAutoDepthStencil     = true;
    d3dpp.AutoDepthStencilFormat     = D3DFMT_D24S8;
    d3dpp.Flags                      = 0;
    d3dpp.FullScreen_RefreshRateInHz = D3DPRESENT_RATE_DEFAULT;
    d3dpp.PresentationInterval       = D3DPRESENT_INTERVAL_IMMEDIATE;

    // Step 4: Create the device.

    hr = d3d9->CreateDevice(
        D3DADAPTER_DEFAULT, // primary adapter
        deviceType,         // device type
        hwnd,               // window associated with device
        vp,                 // vertex processing
        &d3dpp,             // present parameters
        device);            // return created device

    if( FAILED(hr) )
    {
        // try again using a 16-bit depth buffer
        d3dpp.AutoDepthStencilFormat = D3DFMT_D16;

        hr = d3d9->CreateDevice(
            D3DADAPTER_DEFAULT,
            deviceType,
            hwnd,
            vp,
            &d3dpp,
            device);

        if( FAILED(hr) )
        {
            d3d9->Release(); // done with d3d9 object
            ::MessageBox(0, "CreateDevice() - FAILED", 0, 0);
            return false;
        }
    }

    d3d9->Release(); // done with d3d9 object

    return true;
}

int d3d::EnterMsgLoop( bool (*ptr_display)(float timeDelta) )
{
    MSG msg;
    ::ZeroMemory(&msg, sizeof(MSG));

    static float lastTime = (float)timeGetTime();

    while(msg.message != WM_QUIT)
    {
        if(::PeekMessage(&msg, 0, 0, 0, PM_REMOVE))
        {
            ::TranslateMessage(&msg);
            ::DispatchMessage(&msg);
        }
        else
        {
            float currTime  = (float)timeGetTime();
            float timeDelta = (currTime - lastTime)*0.001f;

            ptr_display(timeDelta);

            lastTime = currTime;
        }
    }
    return msg.wParam;
}
d3dInit.cpp
#include "d3dUtility.h"

//
// Globals
//

IDirect3DDevice9* Device = 0;

//
// Framework Functions
//

bool Setup()
{
    // Nothing to setup in this sample.

    return true;
}

void Cleanup()
{
    // Nothing to cleanup in this sample.
}

bool Display(float timeDelta)
{
    if( Device ) // Only use Device methods if we have a valid device.
    {
        // Instruct the device to set each pixel on the back buffer black -
        // D3DCLEAR_TARGET: 0x00000000 (black) - and to set each pixel on
        // the depth buffer to a value of 1.0 - D3DCLEAR_ZBUFFER: 1.0f.
        Device->Clear(0, 0, D3DCLEAR_TARGET | D3DCLEAR_ZBUFFER, 0x00000000, 1.0f, 0);

        // Swap the back and front buffers.
        Device->Present(0, 0, 0, 0);
    }
    return true;
}

//
// WndProc
//
LRESULT CALLBACK d3d::WndProc(HWND hwnd, UINT msg, WPARAM wParam, LPARAM lParam)
{
    switch( msg )
    {
    case WM_DESTROY:
        ::PostQuitMessage(0);
        break;

    case WM_KEYDOWN:
        if( wParam == VK_ESCAPE )
            ::DestroyWindow(hwnd);
        break;
    }
    return ::DefWindowProc(hwnd, msg, wParam, lParam);
}

//
// WinMain
//
int WINAPI WinMain(HINSTANCE hinstance,
                   HINSTANCE prevInstance,
                   PSTR cmdLine,
                   int showCmd)
{
    if(!d3d::InitD3D(hinstance,
        640, 480, true, D3DDEVTYPE_HAL, &Device))
    {
        ::MessageBox(0, "InitD3D() - FAILED", 0, 0);
        return 0;
    }

    if(!Setup())
    {
        ::MessageBox(0, "Setup() - FAILED", 0, 0);
        return 0;
    }

    d3d::EnterMsgLoop( Display );

    Cleanup();

    Device->Release();

    return 0;
}
运行截图:
