Asp.Net Core 中的Swagger中间件
Swagger是什么?是:Api接口文档说明框架;
安装的两种方式:
- 去swagger官网或github上下载源码,然后将源码(一个类库)引入自己的项目;
- NuGet 安装:Swashbuckle.AspNetCore
打开 Starup.cs,添加下面代码到 ConfigureServices 类中:
var ApiName = "ProjectNet5";     // 填写项目名称(只用于Swagger页面中显示)
services.AddSwaggerGen(c =>
{
    c.SwaggerDoc("v1", new OpenApiInfo
    {
         Title = $"{ApiName}.Api",          // 标题
         Version = "v1",              // Api接口版本号
         Description = $"{ApiName} HTTP API V1",              // 描述
         Contact = new OpenApiContact { Name = ApiName, Email = "xxx@xxx.com", Url = new Uri("https://www.xxx.com/") },            // 联系方式
         License = new OpenApiLicense { Name = ApiName, Url = new Uri("https://www.xxx.com/") }              // api的许可信息
    });
    c.OrderActionBy(o=>o.RelativePath);    // 接口根据相对路径排序
});
添加 Swagger中间件 到管道中:
public void Configure(IApplicationBuilder app, IWebHostEnvironment env)
{
    if (env.IsDevelopment())
    {
        app.UseDeveloperExceptionPage();

        app.UseSwagger();
        app.UseSwaggerUI(c =>
        {
            // swagger的api接口地址,默认如下,如果指定了 RoutePrefix ,那么这里必须要显示的写出来
            c.SwaggerEndpoint("/swagger/v1/swagger.json", "v1");
            // 当不配置该项时,默认访问swagger的路径为:/swagger/index.html,而设置为空时,表示直接在根域名
            // 你得去launchSettings.json把launchUrl去掉(localhost:5001/index.html)
            // 如果你想换一个路径,直接写名字即可,比如直接写 c.RoutePrefix = "doc",那么访问路径为:/doc/index.html
            c.RoutePrefix = "";
        });
    }
  ...
启动项目:
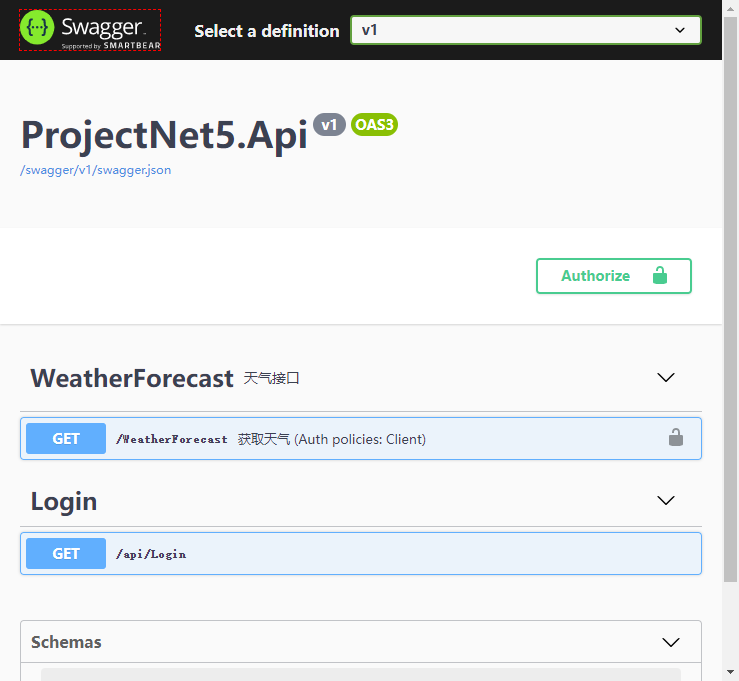
下一步,为 Swagger添加如上图的接口文字注释说明;
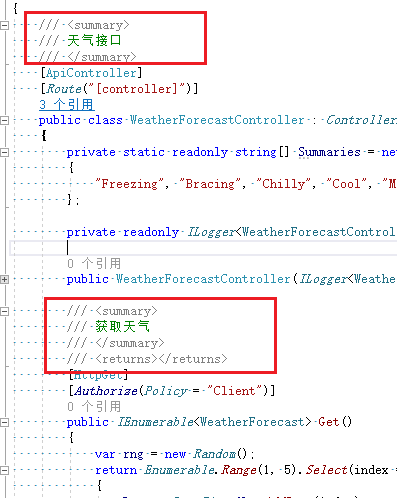
为接口添加注释
在 controller控制器 和 action方法 上添加注释:
同样,我们新建一个 NewBookProject5.Model 类库,里面创建一个 WeatherForecast 类,同样添加注释:
/// <summary>
/// 天气预报
/// </summary>
public class WeatherForecast
{
    /// <summary>
    /// 时间
    /// </summary>
    public DateTime Date { get; set; }

    /// <summary>
    /// 摄氏温度
    /// </summary>
    public int TemperatureC { get; set; }

    /// <summary>
    /// 华氏温度
    /// </summary>
    public int TemperatureF => 32 + (int)(TemperatureC / 0.5556);

    /// <summary>
    /// 摘要
    /// </summary>
    public string Summary { get; set; }
}
NewBookProjectNet5.Api 项目引用这个 Model 类库;
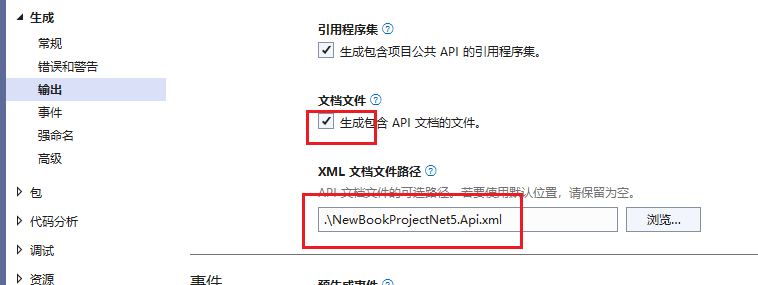
在 类库 和 项目 上的属性页面,设置如下(注意改成你的路径):
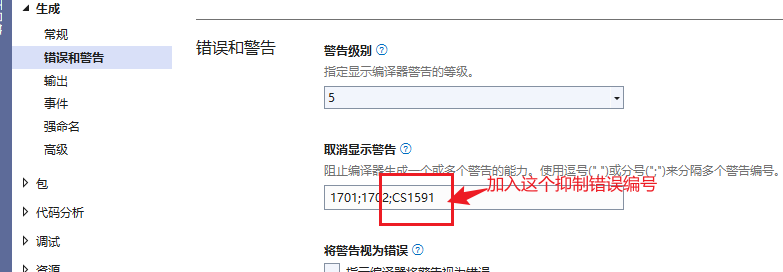
加入抑制错误编号:
然后,在之前注入 Swagger 服务时,我们追加如下代码:
services.AddSwaggerGen(c =>
{
    c.SwaggerDoc("v1", new OpenApiInfo
    {
        Title = "NewBookProjectNet5.Api",
        Version = "v1"
    });

  // 加入下面这些内容:
    var basePath = AppContext.BaseDirectory;        // 项目编译后生成的程序集位置

    var xmlPath = Path.Combine(basePath, "NewBookProjectnet5.Api.xml");
    var xmlModelPath = Path.Combine(basePath, "NewBookProjectNet5.Model.xml");

    c.IncludeXmlComments(xmlPath, true);
    c.IncludeXmlComments(xmlModelPath, true);

    ....
隐藏某些接口。让其不在Swagger中显示
如果不想显示某些接口,直接在controller 上,或者action 上,增加特性
[HttpGet]
[ApiExplorerSettings(IgnoreApi = true)]
public string Get(){ return ""; }
或者直接对这个方法 private,也可以直接使用obsolete属性;

 浙公网安备 33010602011771号