
DC/OS安装
dc/os: https://dcos.io/
- 安装文档-docker:https://docs.mesosphere.com/1.11/installing/oss/custom/system-requirements/install-docker-centos/
- 安装文档-命令行:https://docs.mesosphere.com/1.11/installing/oss/custom/cli/
坑:
- 网上介绍的GUI-web方式安装,在最新版里已经弃用了,也就是没有这个参数了。。。只能命令行来装
- 阿里云centos 7.2以上OS默认安装的docker不是xfs底层存储,需要单独处理(大坑)
其他都很顺利
先说下安装顺序,官网上写的不清楚(这里以阿里云上的ec节点为例):
- 确定bootstrap, master, agent这3个角色的机器分别是多少
- 去阿里云申请机器时,每个节点都多申请一个本地磁盘(后面要把这个本地磁盘挂载为xfs文件系统,并且让docker使用)
- 各个节点全部升级到最新的内核
- 格式化以及挂载本地磁盘到/storage下,并且建立软连接:/var/lib/docker,需要链接到/storage
- 按照dc/os安装文档中一步步安装
先确定bootstrap, master, agent分别多少节点数
- bootstrap就1个,不多不少,就1个
- master:至少1个
- agent:至少1个
我这阿里云的配置:
- bootstrap
- 172.31.91.117
- masters
- 172.31.91.125
- agents
- 172.31.91.124
- 172.31.91.123
各个节点全部升级到最新的内核:
按照这个文档照做,目前只做第一步到第七部,千万不要做第八步!
https://docs.mesosphere.com/1.11/installing/oss/custom/system-requirements/install-docker-centos/
格式化以及挂载本地磁盘到/storage下,并且建立软连接:/var/lib/docker,需要链接到/storage:
执行命令fdisk -l查看当前磁盘设备
Disk /dev/vda: 42.9 GB, 42949672960 bytes, 83886080 sectors
Units = sectors of 1 * 512 = 512 bytes
Sector size (logical/physical): 512 bytes / 512 bytes
I/O size (minimum/optimal): 512 bytes / 512 bytes
Disk label type: dos
Disk identifier: 0x0008d73a

   Device Boot      Start         End      Blocks   Id  System
/dev/vda1   *        2048    83884031    41940992   83  Linux

Disk /dev/vdb: 21.5 GB, 21474836480 bytes, 41943040 sectors
/dev/vda是系统盘,/dev/vdb 才是我们多申请的那个本地磁盘设备,现在要对它进行分区+xfs格式化
[root@izm5e7dqv477rmbrojabgrz ~]# fdisk /dev/vdb
Welcome to fdisk (util-linux 2.23.2).

Changes will remain in memory only, until you decide to write them.
Be careful before using the write command.


Command (m for help):
输入p:查看主分区列表,刚开始时应该是没有的
输入n:新增分区,都选默认值就好
完成后,输入w:写入磁盘(前面都是内存操作,不会实际影响,直到w为止)
[root@izm5e7dqv477rmbrojabgrz ~]# fdisk /dev/vdb
Welcome to fdisk (util-linux 2.23.2).

Changes will remain in memory only, until you decide to write them.
Be careful before using the write command.


Command (m for help): p

Disk /dev/vdb: 21.5 GB, 21474836480 bytes, 41943040 sectors
Units = sectors of 1 * 512 = 512 bytes
Sector size (logical/physical): 512 bytes / 512 bytes
I/O size (minimum/optimal): 512 bytes / 512 bytes
Disk label type: dos
Disk identifier: 0x90e789fd

   Device Boot      Start         End      Blocks   Id  System
/dev/vdb1            2048    41943039    20970496   83  Linux

Command (m for help): w
The partition table has been altered!

Calling ioctl() to re-read partition table.

WARNING: Re-reading the partition table failed with error 16: Device or resource busy.
The kernel still uses the old table. The new table will be used at
the next reboot or after you run partprobe(8) or kpartx(8)
Syncing disks.
然后就是用xfs格式化这个分区
mkfs -t xfs -n ftype=1 /dev/vdb1
然后就是伟大的那步了-挂载/dev/vdb1到/storage:
mkdir /storage
mount /dev/vdb1 /storage
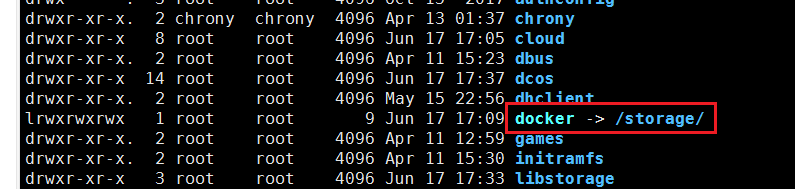
然后,需要把docker的默认存储文件路径变成/storage,一种实现方式就是给/var/lib/docker建立软链接到/storage
ln -sv /storage/ /var/lib/docker
OK,关键一步完成了,剩下的就是回到官方安装教程,开始安装docker
https://docs.mesosphere.com/1.11/installing/oss/custom/system-requirements/install-docker-centos/
从第八步开始安装,安装完后验证方式:
[root@izm5e7dqv477rmbrojabgrz lib]# docker info
Containers: 20
 Running: 0
 Paused: 0
 Stopped: 20
Images: 2
Server Version: 1.13.1
Storage Driver: overlay
 Backing Filesystem: xfs
 Supports d_type: true
Logging Driver: json-file
Cgroup Driver: cgroupfs
Plugins:
 Volume: local
 Network: bridge host macvlan null overlay
Swarm: inactive
Runtimes: runc
Default Runtime: runc
Init Binary: docker-init
containerd version: aa8187dbd3b7ad67d8e5e3a15115d3eef43a7ed1
runc version: 9df8b306d01f59d3a8029be411de015b7304dd8f
init version: 949e6fa
Security Options:
 seccomp
  Profile: default
Kernel Version: 3.10.0-862.3.3.el7.x86_64
Operating System: CentOS Linux 7 (Core)
OSType: linux
Architecture: x86_64
CPUs: 2
Total Memory: 7.639 GiB
Name: izm5e7dqv477rmbrojabgrz
ID: LA6Q:RHIV:BZCN:4T5S:QXW7:3OWY:ITSQ:GJ23:UA6C:E6CN:X2J4:7X7Y
Docker Root Dir: /storage
Debug Mode (client): false
Debug Mode (server): false
Registry: https://index.docker.io/v1/
Experimental: false
Insecure Registries:
 127.0.0.0/8
Live Restore Enabled: false
出现这些字符就代表docker部分完成了,然后安装(都在bootstrap机器上执行)
https://docs.mesosphere.com/1.11/installing/oss/custom/cli/
我把我这的文件目录和内容贴出来:
[root@izm5e44dzsuwalzsalz2rkz ~]# tree genconf/
genconf/
├── config.yaml
├── ip-detect
├── ssh_key
[root@izm5e44dzsuwalzsalz2rkz genconf]# cat config.yaml
agent_list:
- 172.31.91.124
- 172.31.91.123
# Use this bootstrap_url value unless you have moved the DC/OS installer assets.
bootstrap_url: file:///opt/dcos_install_tmp
cluster_name: 'McKayDCOS'
exhibitor_storage_backend: static
master_discovery: static
ip_detect_filename: genconf/ip-detect
master_list:
- 172.31.91.125
resolvers:
- 8.8.4.4
- 8.8.8.8
ssh_port: 22
ssh_user: root
[root@izm5e44dzsuwalzsalz2rkz genconf]# cat ip-detect
#!/usr/bin/env bash
set -o nounset -o errexit
export PATH=/usr/sbin:/usr/bin:$PATH
echo $(ip addr show eth0 | grep -Eo '[0-9]{1,3}\.[0-9]{1,3}\.[0-9]{1,3}\.[0-9]{1,3}' | head -1)
这里还要配置下ssh免密登录(因为bootstrp节点安装的时候会ssh连接到master, agent节点)
ssh-keygen -t rsa 会出现让你输入密码,千万不能写密码,都为空
cp ~/.ssh/id_rsa genconf/ssh_key && chmod 0600 genconf/ssh_key 把ssh私钥key拷贝到安装目录下
ssh-copy-id -i 172.31.91.125    传播公钥到对方节点,期间会要求输入root密码
ssh-copy-id -i 172.31.91.124
ssh-copy-id -i 172.31.91.123
剩下根据安装文档进行安装:
https://docs.mesosphere.com/1.11/installing/oss/custom/cli/
装完后,有几个url:
http://47.104.244.204:8181/exhibitor/v1/ui/index.html zookeeper监控
http://47.104.244.204/#/dashboard?_k=37kze5 marathon界面
http://47.104.244.204/mesos/#/ mesos集群界面
心怀远大理想。
为了家庭幸福而努力。
商业合作请看此处:https://www.magicube.ai

 浙公网安备 33010602011771号