安卓BindService笔记
1 前言
最近学习到了安卓的service,记录一下自己对BindService的理解,学习教程以及部分代码来自菜鸟教程的android教程:菜鸟教程安卓端BindService链接
2 正文
先贴一下布局代码和MainActivity.java代码,在分别解释
布局xml:activity_main.xml
<?xml version="1.0" encoding="utf-8"?>
<LinearLayout xmlns:android="http://schemas.android.com/apk/res/android"
    xmlns:app="http://schemas.android.com/apk/res-auto"
    xmlns:tools="http://schemas.android.com/tools"
    android:layout_width="match_parent"
    android:layout_height="match_parent"
    android:orientation="vertical"
    tools:context=".MainActivity">

    <Button
        android:id="@+id/startbtn"
        android:gravity="center"
        android:textSize="20sp"
        android:text="@string/btnstart"
        android:layout_width="wrap_content"
        android:layout_height="wrap_content" />

    <Button
        android:id="@+id/stopbtn"
        android:gravity="center"
        android:textSize="20sp"
        android:text="@string/btnstop"
        android:layout_width="wrap_content"
        android:layout_height="wrap_content" />
    <Button
        android:id="@+id/getservice"
        android:gravity="center"
        android:textSize="20sp"
        android:text="@string/get"
        android:layout_width="wrap_content"
        android:layout_height="wrap_content" />
</LinearLayout>
MainActivity.java
package com.example.app4;

import android.app.Service;
import android.content.ComponentName;
import android.content.Intent;
import android.content.ServiceConnection;
import android.os.IBinder;
import android.support.v7.app.AppCompatActivity;
import android.os.Bundle;
import android.view.View;
import android.widget.Button;
import android.widget.Toast;

public class MainActivity extends AppCompatActivity {

    private Button startbtm;
    private Button syopbtn;
    private Button getbtn;
    Testservice.MyBinder binder;
    private ServiceConnection conn = new ServiceConnection() {
        @Override
        public void onServiceConnected(ComponentName name, IBinder service) {
            System.out.println("-----------Service Connected--------------");
            binder = (Testservice.MyBinder)service;
        }

        @Override
        public void onServiceDisconnected(ComponentName name) {
            System.out.println("-----------Service DisConnected--------------");
        }
    };

    @Override
    protected void onCreate(Bundle savedInstanceState) {
        super.onCreate(savedInstanceState);
        setContentView(R.layout.activity_main);
        final Intent intent = new Intent(this,Testservice.class);
        intent.setAction("com.example.app4.service.testservice");
        startbtm = (Button)findViewById(R.id.startbtn);
        syopbtn = (Button)findViewById(R.id.stopbtn);
        getbtn = (Button)findViewById(R.id.getservice);
        startbtm.setOnClickListener(new View.OnClickListener() {
            @Override
            public void onClick(View v) {
                bindService(intent,conn, Service.BIND_AUTO_CREATE);
            }
        });
        syopbtn.setOnClickListener(new View.OnClickListener() {
            @Override
            public void onClick(View v) {
                unbindService(conn);
            }
        });
        getbtn.setOnClickListener(new View.OnClickListener() {
            @Override
            public void onClick(View v) {
                Toast.makeText(getApplicationContext(),"Service的count值为:"+binder.getCount(),Toast.LENGTH_LONG).show();
            }
        });
    }
}
activity_main.xml分别设置了三个Button,在MainActivity.java中分别以这三个按钮来说明一下我对BindService的流程以及数据传输过程的理解吧
(1)第一个按钮(id为startbtn,也就是下图中绑定服务那个按钮)
先上一张执行截图
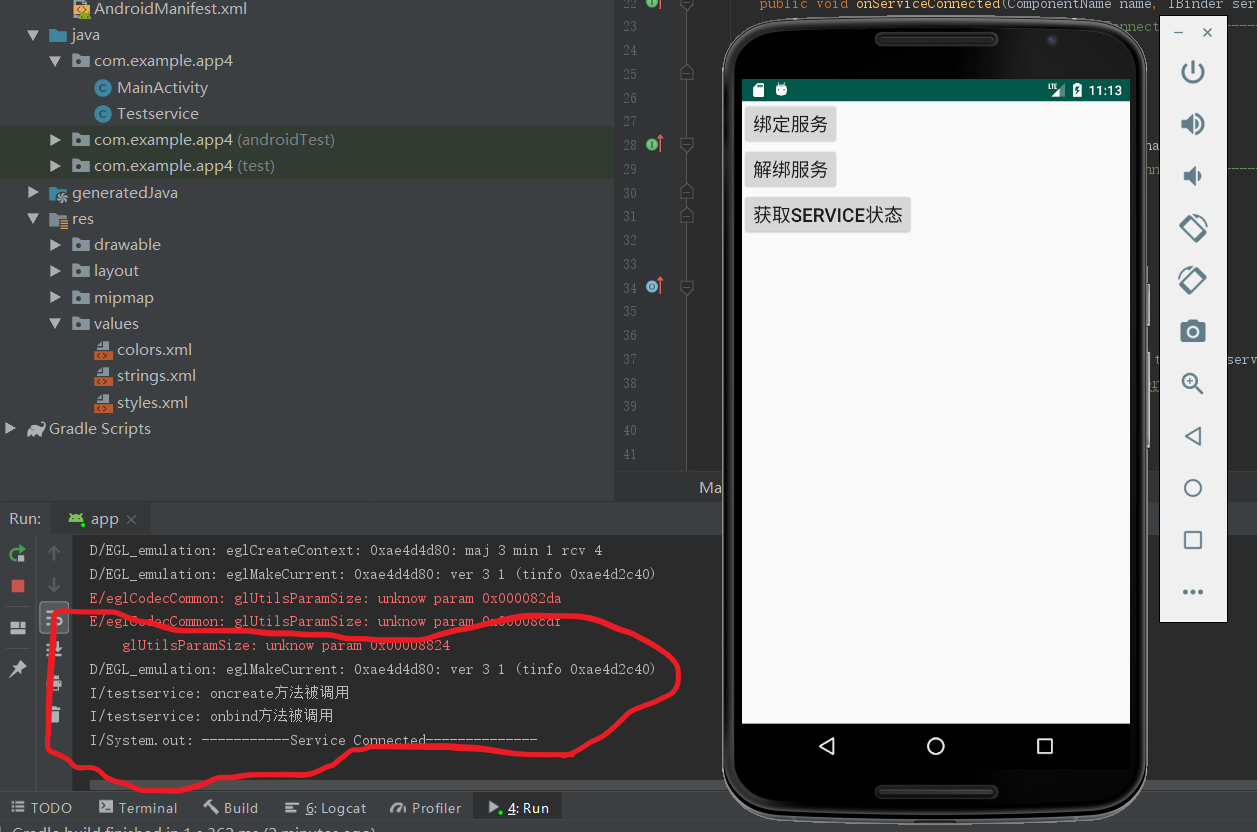
该按钮在被点击之时会调用bindService方法,在绑定服务时,我们可以从截图中看到(红色处)首先调用了oncreate方法,然后调用了onbind方法,最后如果整个过程未出现错误,即连接成功的情况下,会回调ServiceConnection类的onServiceConnected方法,当然,如果整个过程出现错误的情况下,就会回调onServiceDisConnected方法。对于这个过程中,通过Binder对象来传输数据,在bindService方法被调用后,在调用onbind方法时,会返回一个Binder对象,在这之后,ServiceConnection类的onServiceConnected方法被调用,该方法接收了返回来的Binder对象,自此,整个数据被传输,我们即可在相关的代码中读取数据即可。例如,在我的代码中(相关代码在本文末尾),在service中,我在service的oncreate方法中创建了一条线程,该线程作用是每隔一秒就对count变量加一,在onbind方法中返回了MyBinder对象(MyBinder对象为Binder对象的子类,是自定义的类,拥有getCount方法,返回变量count的值),最后在onServiceConnected方法中接收,最后调用getCount方法即可得到count的值。
(2)第二个按钮(下图中第二个按钮)
同样,先贴上截图
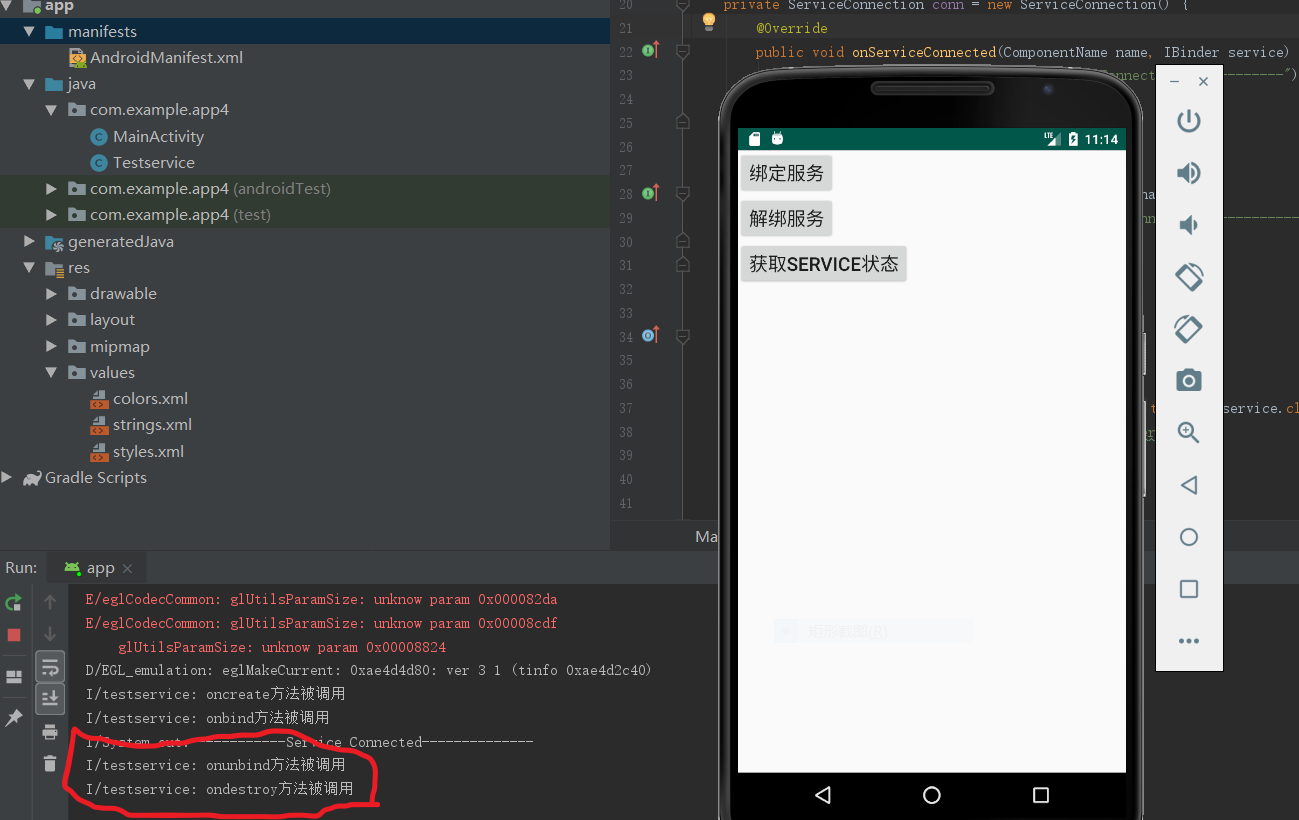
同上面基本差不多,该按钮在被点击后,会调用unbindservice方法,该方法被调用后,我们可以从截图上面看到,首先调用了onunbind方法,用于解除绑定,最后调用了onderstory方法。
(3)最后一个按钮(下图中最后一个按钮)
该按钮作用只是展现了一下数据传输,在第一个按钮哪里数据传输以及讲了,这里就不再写了。
3 相关代码
strings.xml
<resources>
    <string name="app_name">app4</string>
    <string name="btnstart">绑定服务</string>
    <string name="btnstop">解绑服务</string>
    <string name="get">获取service状态</string>
</resources>
AndroidManifest.xml
<?xml version="1.0" encoding="utf-8"?>
<manifest xmlns:android="http://schemas.android.com/apk/res/android"
    package="com.example.app4">

    <application
        android:allowBackup="true"
        android:icon="@mipmap/ic_launcher"
        android:label="@string/app_name"
        android:roundIcon="@mipmap/ic_launcher_round"
        android:supportsRtl="true"
        android:theme="@style/AppTheme">
        <activity android:name=".MainActivity">
            <intent-filter>
                <action android:name="android.intent.action.MAIN" />

                <category android:name="android.intent.category.LAUNCHER" />
            </intent-filter>
        </activity>
        <service android:name=".Testservice">
            <intent-filter>
                <action android:name="com.example.app4.service.testservice"/>
            </intent-filter>
        </service>
    </application>

</manifest>
Testservice.java(服务相关代码)
package com.example.app4;

import android.app.Service;
import android.content.Intent;
import android.os.Binder;
import android.os.IBinder;
import android.util.Log;
import android.widget.Toast;

public class Testservice extends Service {

    private final String tag = "testservice";
    private int count;
    private boolean quit;
    private MyBinder binder = new MyBinder();
    public class MyBinder extends Binder{
        public int getCount(){
            return count;
        }
    }
    @Override
    public IBinder onBind(Intent intent) {
        Log.i(tag,"onbind方法被调用");
        return binder;
    }

    @Override
    public void onCreate() {
        Log.i(tag,"oncreate方法被调用");
        super.onCreate();
        new Thread(){
            @Override
            public void run() {
                while(!quit){
                    try{
                        Thread.sleep(1000);
                    }catch (InterruptedException e){
                        e.printStackTrace();
                    }
                    count++;
                }
            };
        }.start();
    }

    @Override
    public boolean onUnbind(Intent intent) {
        Log.i(tag,"onunbind方法被调用");
        return true;
    }

    @Override
    public void onDestroy() {
        Log.i(tag,"ondestroy方法被调用");
        super.onDestroy();
    }

    @Override
    public void onRebind(Intent intent) {
        Log.i(tag,"onRebind方法被调用");
        super.onRebind(intent);
    }
}
