spring 事务案例--转账
spring 事务案例--转账
1 环境搭建
1.创建表
create databases spring_date;
use spring_date;

create table account(
    id int primary key auto_increment,
    username varchar(50),
    money int);

insert into account(username,money) values('jack','10000')
insert into account(username,money) values('rose','10000')
2.导入jar包
- 核心 4+1
- aop:4 (aop联盟,spring aop,aspectj,spring aspectj)
- 数据库 2 (jdbc ,tx)
- 驱动 mysql
- 连接池 c3p0

3.dao层
package com.itheima.dao;

import org.springframework.jdbc.core.support.JdbcDaoSupport;

public class AccountDaoImpl extends JdbcDaoSupport implements AccountDao{// 继承JdbcDaoSupport,之后只需要注入数据源,底层自动创建模板


	@Override
	public void out(String outer, int money) {//汇款
		// TODO 自动生成的方法存根
		this.getJdbcTemplate().update("update account set money=money-? where username=?", money,outer);//使用JdbcTemplate模板操作数据库
	}

	@Override
	public void in(String inner, int money) {//收款
		// TODO 自动生成的方法存根
		this.getJdbcTemplate().update("update account set money=money+? where username=?", money,inner);
	}

}
4.service层
package com.itheima.service.impl;

import com.itheima.dao.AccountDao;
import com.itheima.service.AccountService;

public class AccountServicImpl implements AccountService {


	private AccountDao accountDao;
	public void setAccountdao(AccountDao accountdao) {//set dao
		this.accountDao = accountdao;
	}
	@Override
	public void transfer(String outer, String inner, int money) {//转账
		// TODO 自动生成的方法存根
		accountDao.out(outer, money);
		accountDao.in(inner, money);

	}

}
5.spring 配置文件
<?xml version="1.0" encoding="UTF-8"?>
<beans xmlns="http://www.springframework.org/schema/beans"
       xmlns:xsi="http://www.w3.org/2001/XMLSchema-instance"
       xmlns:aop="http://www.springframework.org/schema/aop"
       xmlns:context="http://www.springframework.org/schema/context"
       xsi:schemaLocation="http://www.springframework.org/schema/beans
                           http://www.springframework.org/schema/beans/spring-beans.xsd
                           http://www.springframework.org/schema/aop
                           http://www.springframework.org/schema/aop/spring-aop.xsd
                           http://www.springframework.org/schema/context
                           http://www.springframework.org/schema/context/spring-context.xsd">

   	<!-- properti -->
   	<!--datasource  -->
   	<bean id="datasource" class="com.mchange.v2.c3p0.ComboPooledDataSource">
   		<property name="driverClass"  value="com.mysql.jdbc.Driver"></property>
   		<property name="jdbcUrl"  value="jdbc:mysql://localhost:3306/spring_date"></property>
   		<property name="user" value="root"></property>
   		<property name="password" value="123456"></property>
   	</bean>
	<!-- dao -->
	<bean id="accountDao" class="com.itheima.dao.AccountDaoImpl">
		<property name="dataSource" ref="datasource"></property>
	</bean>
	<!-- service -->
	<bean id="accountService" class="com.itheima.service.impl.AccountServicImpl">
		<property name="accountdao" ref="accountDao"></property>
	</bean>

</beans>
6.测试
package com.itheima;

import org.junit.Test;
import org.springframework.context.ApplicationContext;
import org.springframework.context.support.ClassPathXmlApplicationContext;

import com.itheima.service.AccountService;

public class TestApp {

	@Test
	public void demo01() {
                //加载配置文件
		String xmlpath="applicationContext.xml";
		ApplicationContext applicationContext=new ClassPathXmlApplicationContext(xmlpath);
		AccountService accountService= applicationContext.getBean("accountService",AccountService.class);


		accountService.transfer("jack", "rose", 1000);/测试
	}
}
7.结果:
能实现转账功能,但如果在转账过程中间出现异常情况,就会出现只有汇款人金额已经减少,但收款人金额没有增加的现象
2 手动管理事务
- spring 底层使用 TransactionTemplete 事务模板进行操作。
- 操作
1.service 需要获得TransactionTemplete
2.spring 配置模板,并注入给service
3.模板需要注入事务管理器
4.配置事务管理器:DataSourceTransactionManager ,需要注入DataSource。
1修改Service
//需要spring 注入模板
private TransactionTemplate transactionTemplate;
	public void setTransactionTemplate(TransactionTemplate transactionTemplate) {
		this.transactionTemplate = transactionTemplate;
	}


	@Override
	public void transfer(String outer, String inner, int money) {

	        //调用模板的执行方法,使用事务回调匿名内部类进行增删改操作
		transactionTemplate.execute(new TransactionCallbackWithoutResult() {

			@Override
			protected void doInTransactionWithoutResult(TransactionStatus arg0) {
				// TODO 自动生成的方法存根
				accountDao.out(outer, money);
				accountDao.in(inner, money);
			}
		});
3 修改spring配置
<!-- service 注入dao和transactionTemplate事务模板 -->
	<bean id="accountService" class="com.itheima.service.impl.AccountServicImpl">
		<property name="accountdao" ref="accountDao"></property>
		<property name="transactionTemplate" ref="transactionTemplate"></property>
	</bean>

	<!-- 创建模板,注入事务管理器 -->
	<bean id="transactionTemplate" class="org.springframework.transaction.support.TransactionTemplate">
		<property name="transactionManager" ref="txManager"></property>
	</bean>

	<!-- 配置事务管理器,管理器需要事务,事务从connection获得,连接从连接池DataSource获得 -->
	<bean id="txManager" class="org.springframework.jdbc.datasource.DataSourceTransactionManager">
		<property name="dataSource" ref="datasource"></property>
	</bean>
4.测试结果:
能实现转账功能,但如果在转账过程中间出现异常情况,事务就会回滚,取消写入数据库
3 工厂bean生成代理:半自动
- spring 提供 管理事务的代理工厂bean TransactionProxyFactoryBean
1.getBean() 获得代理对象
2.spring 配置一个代理
1 spring配置文件
	<!-- 4.service 代理对象
   		4.1	proxyInterfaces  接口
   		4.2	target	目标类
   		4.3	transactionManager	事务详情
   		4.4 transactionAttributes 事务属性(事务详情)
   		prop.key :确定哪些方法使用当前事务配置
   		prop.text :用于配置事务详情
   			格式:PROPAGATION,ISOLATION,readOnly,-Exception,+Exception
   				传播行为		隔离级别		是否只读	异常回滚 		异常提交
			例如:<prop key="transfer">PROPAGATION_REQUIRED,ISOLATION_DEFAULT</prop>默认传播行为和隔离级别
				<prop key="transfer">PROPAGATION_REQUIRED,ISOLATION_DEFAULT,+java.lang.ArithmeticException</prop> 有异常仍然提交
   	-->
   	<bean id="proxyAccountService" class="org.springframework.transaction.interceptor.TransactionProxyFactoryBean">
   		<property name="proxyInterfaces" value="com.itheima.service.AccountService"></property>
   		<property name="target" ref="accountService"></property>
   		<property name="transactionManager" ref="txManager"></property>
   		<property name="transactionAttributes">
   			<props>
   				<prop key="transfer">PROPAGATION_REQUIRED,ISOLATION_DEFAULT</prop>
   			</props>

   		</property>
   	</bean>

   	<!-- 5.事务管理器 -->
   	<bean id="txManager" class="org.springframework.jdbc.datasource.DataSourceTransactionManager">
   		<property name="dataSource" ref="dataSource"></property>
   	</bean>
2 测试
public class TestApp {

	@Test
	public void demo01() {
		String xmlpath="applicationContext.xml";
		ApplicationContext applicationContext=new ClassPathXmlApplicationContext(xmlpath);
		AccountService accountService= applicationContext.getBean("proxyAccountService",AccountService.class);
		accountService.transfer("jack", "rose", 1000);
	}
}
4 AOP配置 基于xml【掌握】
- 在spring xml 配置aop自动生成代理,进行事务的管理
1.配置管理器
2.配置事务详情
3.配置aop
1.spring 配置
<?xml version="1.0" encoding="UTF-8"?>
<beans xmlns="http://www.springframework.org/schema/beans"
       xmlns:xsi="http://www.w3.org/2001/XMLSchema-instance"
       xmlns:aop="http://www.springframework.org/schema/aop"
       xmlns:context="http://www.springframework.org/schema/context"
       xmlns:tx="http://www.springframework.org/schema/tx"
       xsi:schemaLocation="http://www.springframework.org/schema/beans
                           http://www.springframework.org/schema/beans/spring-beans.xsd
                           http://www.springframework.org/schema/aop
                           http://www.springframework.org/schema/aop/spring-aop.xsd
                           http://www.springframework.org/schema/context
                           http://www.springframework.org/schema/context/spring-context.xsd
                           http://www.springframework.org/schema/tx
                           http://www.springframework.org/schema/tx/spring-tx.xsd">

   	<!-- properti -->
   	<context:property-placeholder location="classpath:jdbcInfo.properties"/>
   	<!--dataSource  -->
   	<bean id="dataSource" class="com.mchange.v2.c3p0.ComboPooledDataSource">
   		<property name="driverClass"  value="${jdbc.driverClass}"></property>
   		<property name="jdbcUrl"  value="${jdbc.jdbcUrl}"></property>
   		<property name="user" value="${jdbc.user}"></property>
   		<property name="password" value="${jdbc.password}"></property>
   	</bean>
	<!-- dao -->
	<bean id="accountDao" class="com.itheima.dao.AccountDaoImpl">
		<property name="dataSource" ref="dataSource"></property>
	</bean>
	<!-- service -->
	<bean id="accountService" class="com.itheima.service.impl.AccountServicImpl">
		<property name="accountdao" ref="accountDao"></property>
	</bean>

   	<!-- 4事务管理 -->
   	<!-- 4.1 事务管理器-->
   	<bean id="txManager" class="org.springframework.jdbc.datasource.DataSourceTransactionManager">
   		<property name="dataSource" ref="dataSource"></property>
   	</bean>
   	<!-- 4.2 事务详情 ,在aop筛选基础上,对ABC三个确定使用什么事务。例如AC读写、B只读等
   		<tx:attributes> 用于配置事务详情
   		<tx:method name=""/> 详情具体配置
   	-->
   	<tx:advice id="txAdvice" transaction-manager="txManager">
   		<tx:attributes>
   			<tx:method name="transfer" propagation="REQUIRED" isolation="DEFAULT"/>
   		</tx:attributes>
   	</tx:advice>
   	<!-- 4.2 AOP编程,目标类有ABCD(4个连接点),切入点表达式确定增强的连接器 -->
   	<aop:config>
   		<aop:advisor advice-ref="txAdvice" pointcut="execution(* com.itheima.service..*(..))"/>
   	</aop:config>
</beans>
5 AOP配置 基于注解【掌握】
1spring配置
<?xml version="1.0" encoding="UTF-8"?>
<beans xmlns="http://www.springframework.org/schema/beans"
       xmlns:xsi="http://www.w3.org/2001/XMLSchema-instance"
       xmlns:aop="http://www.springframework.org/schema/aop"
       xmlns:context="http://www.springframework.org/schema/context"
       xmlns:tx="http://www.springframework.org/schema/tx"
       xsi:schemaLocation="http://www.springframework.org/schema/beans
                           http://www.springframework.org/schema/beans/spring-beans.xsd
                           http://www.springframework.org/schema/aop
                           http://www.springframework.org/schema/aop/spring-aop.xsd
                           http://www.springframework.org/schema/context
                           http://www.springframework.org/schema/context/spring-context.xsd
                           http://www.springframework.org/schema/tx
                           http://www.springframework.org/schema/tx/spring-tx.xsd">

<!--    	properti -->
   	<context:property-placeholder location="classpath:jdbcInfo.properties"/>
   	<!--dataSource  -->
   	<bean id="dataSource" class="com.mchange.v2.c3p0.ComboPooledDataSource">
   		<property name="driverClass"  value="${jdbc.driverClass}"></property>
   		<property name="jdbcUrl"  value="${jdbc.jdbcUrl}"></property>
   		<property name="user" value="${jdbc.user}"></property>
   		<property name="password" value="${jdbc.password}"></property>
   	</bean>
	<!-- dao -->
	<bean id="accountDao" class="com.itheima.dao.AccountDaoImpl">
		<property name="dataSource" ref="dataSource"></property>
	</bean>
	<!-- service -->
	<bean id="accountService" class="com.itheima.service.impl.AccountServicImpl">
		<property name="accountdao" ref="accountDao"></property>
	</bean>

   	<!-- 4.事务管理 -->
   	<!-- 4.1 事务管理器  -->
   	<bean id="txManager" class="org.springframework.jdbc.datasource.DataSourceTransactionManager">
   		<property name="dataSource" ref="dataSource"></property>
   	</bean>

   	<!-- 4.2将管理器交予spring
   		* transaction-manager 配置事务管理器
   		* proxy-target-class
   			true :底层强制使用cglib代理
   	 -->
	<tx:annotation-driven transaction-manager="txManager" proxy-target-class="false"/>
</beans>
2.service层
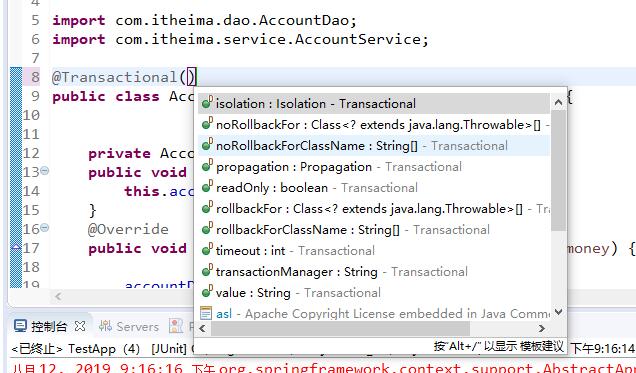
想在那配置事务在那个方法或类的上方添加@Transactional 注解即可
@Transactional
public class AccountServicImpl implements AccountService {
3.事务详情配置