Dockerfile打镜像
一、前端VUE与Nginx打成docker镜像
1.资源需求
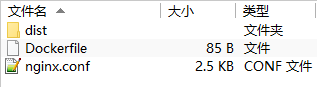
dist:VScode编译vue的资源
Dockerfile:打镜像需要的资源
nginx.conf:根据需求配置的Nginx配置文件
2.Dockerfile内容
FROM nginx
RUN mkdir /app
COPY ./dist /app
COPY ./nginx.conf /etc/nginx/nginx.conf
3.Nginx配置文件内容
user nginx;
worker_processes 1; #设置值和CPU核心数一致
error_log  /var/log/nginx/error.log warn;#日志
pid        /var/run/nginx.pid;
worker_rlimit_nofile 65535;
events
{
  use epoll;
  worker_connections 65535;
}

http {
    include       /etc/nginx/mime.types;
    default_type  application/octet-stream;
    log_format  main  '$remote_addr - $remote_user [$time_local]  "$request" '
                    '$status $body_bytes_sent "$http_referer" '
                    '"$http_user_agent" "$http_x_forwarded_for"';
    access_log  /var/log/nginx/access.log  main;
    sendfile        on;
    keepalive_timeout  65;
    server {
        listen       9006;
        server_name  localhost;

        gzip on;
        gzip_min_length 100;
        #处理请求压缩的缓冲区数量和大小。比如32 4K表示按照内存页(one memory page)大小以4K为单位(即一个系统中内存页为4K),申请32倍的内存空间。建议此项不设置,使用默认值。
        gzip_buffers 32 4k;
        #用于识别http协议的版本,早期的浏览器不支持gzip压缩,用户会看到乱码,所以为了支持前期版本加了此选项。默认在http/1.0的协议下不开启gzip压缩。
        gzip_http_version 1.0;
        #gzip压缩级别,级别越底压缩速度越快文件压缩比越小,反之速度越慢文件压缩比越大。
        gzip_comp_level 2;
        #压缩的文件类型
        gzip_types text/plain application/javascript application/x-javascript application/json text/css font/ttf font/otf font/woff application/vnd.ms-fontobject image/vnd.microsoft.icon image/svg+xml application/xml text/javascript application/x-httpd-php image/jpeg image/gif image/png;
        #是否在http header中添加Vary: Accept-Encoding
        gzip_vary on;
        #禁用IE 6 gzip
        gzip_disable "MSIE [1-6]\.";

        location / {
            root   /app;#站点目录
            index  index.html;
        }
        #aweb后端代理&会话cookie
        location /aweb-api {
            proxy_pass http://IP:端口/api;
            proxy_cookie_path /api /;
        }
        #第三方代理
        location /api1/ {
            proxy_pass http://IP1:端口1/api/;
        }

        location /api2 {
            proxy_pass http://IP2:端口2/api;
        }

        error_page   500 502 503 504  /50x.html;
        location = /50x.html {
            root   /usr/share/nginx/html;
        }
  }
}
4.打包命令
#登录
docker login IP:端口
#Dockerfile打镜像包含Nginx (使用当前目录下Dockerfile,打成web包的20220817175602版本到,用户目录,如/root/web/docker)
#注意:要有Nginx
docker build -f ./Dockerfile -t web:20220817175601 ./
docker build -f ./Dockerfile -t IP:端口/pro/web:20220817175602 .
#查询打包好的docker镜像
docker images | grep web
#重命名
docker tag web:20220817175601 IP:端口/pro/web:20220817175601
#上传
docker push IP:端口/pro/web:20220817175601
#docker镜像启动命令
docker run -it --rm IP:端口/pro/web:20220817175601 /bin/bash
#删除
docker rmi -f IP:端口/pro/web:20220817175601
二、后端SpringBoot编译的jar打docker镜像
1.资源需求

background.jar:SpringBoot编译的jar
Dockerfile:打镜像需要的资源
2.Dockerfile内容
#FROM openjdk:8-jdk-alpine
FROM jdk:1.8.0
ENV TZ="Asia/Shanghai"
ARG JAR_FILE=./aweb*.jar
COPY ${JAR_FILE} app.jar
#RUN apk add --update font-adobe-100dpi ttf-dejavu fontconfig
ENTRYPOINT ["java","-Djasypt.encryptor.password=密钥","-jar","/app.jar"]
#ENTRYPOINT ["java", "-jar", "app.jar", "--spring.profiles.active=test", "--server.port=8080", "> /log/app.log"]
3.打包命令同上
4.需要注意的是验证码,需要ttf-dejavu字体,或者使用Sun公司的jdk,但是打镜像的时候加载字体非常慢,亲测需要13分钟
如有帮助希望点个推荐;如果没帮助到或者内容有错误,可以下面留言,谢谢!

 浙公网安备 33010602011771号