Asp.net core使用Authentication使用jwt简单登录认证
研究了两天,简单使用就这些,如果需要token续期或者刷新或者自定义校验处理需要重写比较麻烦。
在controller中单独获取请求头可使用
HttpContext.Request.Headers["Authorization"]
使用流程是:先认证登录 -> 再校验权限
Authentication -> Authorization
- 安装依赖,.net8版本为例
- Microsoft.AspNetCore.Authentication.JwtBearer
- Newtonsoft.Json
- 配置jwt所需配置,再appsettings.json文件
"Jwt": {
  "SecretKey": "U2FsdGVkX1/52fw3vL3OY4F1H7BV12pjPPb1mUhZyEPVRk72S5X2z/A8V9lTvK6T",
  "Issuer": "WebAppIssuer",
  "Audience": "WebAppAudience",
  "Expire": 30000
}
- jwt生成或解析帮助类 JwtHelper
using System.IdentityModel.Tokens.Jwt;
using System.Security.Claims;
using System.Text;
using Microsoft.IdentityModel.Tokens;

namespace jwt_api.Helper;

public class JwtHelper
{

    private readonly IConfiguration _configuration;

    public JwtHelper(IConfiguration configuration)
    {
        _configuration = configuration;
    }

    public string CreateToken(string Name, int id)
    {
        // 1. 定义需要使用到的Claims
        var claims = new[]
        {
            new Claim(ClaimTypes.Name, "u_admin"), //HttpContext.User.Identity.Name
            new Claim("Id", id.ToString()),
            new Claim("Name", Name)
        };

        // 2. 从 appsettings.json 中读取SecretKey
        var secretKey = new SymmetricSecurityKey(Encoding.UTF8.GetBytes(_configuration["Jwt:SecretKey"]));

        // 3. 选择加密算法
        var algorithm = SecurityAlgorithms.HmacSha256Signature;

        // 4. 生成Credentials
        var signingCredentials = new SigningCredentials(secretKey, algorithm);

        // 5. 根据以上,生成token
        var jwtSecurityToken = new JwtSecurityToken(
            _configuration["Jwt:Issuer"],     //Issuer
            _configuration["Jwt:Audience"],   //Audience
            claims,                          //Claims,
            DateTime.Now,                    //notBefore
            DateTime.Now.AddSeconds(Convert.ToInt32(_configuration["Jwt:Expire"])),    //expires
            signingCredentials               //Credentials
        );

        // 6. 将token变为string
        var token = new JwtSecurityTokenHandler().WriteToken(jwtSecurityToken);

        return token;
    }

}
- 主程序编写 Program.cs
using System.Text;
using jwt_api.Helper;
using Microsoft.AspNetCore.Authentication.JwtBearer;
using Microsoft.IdentityModel.Tokens;
using Newtonsoft.Json;

var builder = WebApplication.CreateBuilder(args);

// Add services to the container.
builder.Services.AddControllers();

#region 配置登录认证

var configuration = builder.Configuration;
// 配置登录认证
builder.Services.AddAuthentication(options =>
                                   {
                                       options.DefaultScheme = JwtBearerDefaults.AuthenticationScheme;
                                   }).AddJwtBearer(options =>
                {
                    options.TokenValidationParameters = new TokenValidationParameters()
                    {
                        ValidateIssuer = true, //是否验证Issuer
                        ValidIssuer = configuration["Jwt:Issuer"], //发行人Issuer
                        ValidateAudience = true, //是否验证Audience
                        ValidAudience = configuration["Jwt:Audience"], //订阅人Audience
                        ValidateIssuerSigningKey = true, //是否验证SecurityKey
                        IssuerSigningKey = new SymmetricSecurityKey(Encoding.UTF8.GetBytes(configuration["Jwt:SecretKey"])), //SecurityKey
                        ValidateLifetime = true, //是否验证失效时间
                        ClockSkew = TimeSpan.FromSeconds(30), //过期时间容错值,解决服务器端时间不同步问题(秒)
                        RequireExpirationTime = true,
                    };
                    // 当token验证通过后(执行完 JwtBearerEvents.TokenValidated 后),
                    // 是否将token存储在 Microsoft.AspNetCore.Authentication.AuthenticationProperties 中
                    // 默认 true
                    options.SaveToken = true;
                    options.Events = new JwtBearerEvents
                    {
                        //此处为权限验证失败后触发的事件
                        OnChallenge = context =>
                        {
                            //此处代码为终止.Net Core默认的返回类型和数据结果,这个很重要哦,必须
                            context.HandleResponse();

                            //自定义自己想要返回的数据结果,我这里要返回的是Json对象,通过引用Newtonsoft.Json库进行转换
                            var payload = JsonConvert.SerializeObject(new { Code = "401", Message = "很抱歉,您无权访问该接口;请登录!" });
                            //自定义返回的数据类型
                            context.Response.ContentType = "application/json";
                            //自定义返回状态码,默认为401 我这里改成 200
                            context.Response.StatusCode = StatusCodes.Status200OK;
                            //输出Json数据结果
                            context.Response.WriteAsync(payload);
                            return Task.FromResult(0);
                        }
                    };
                });
// 添加一个生成jwt和解析帮助类
builder.Services.AddSingleton<JwtHelper>();

#endregion

builder.Services.AddEndpointsApiExplorer();
builder.Services.AddSwaggerGen();

var app = builder.Build();

if (app.Environment.IsDevelopment())
{
    app.UseSwagger();
    app.UseSwaggerUI();
}

app.UseHttpsRedirection();

#region 启用认证

app.UseAuthentication();
app.UseAuthorization();

#endregion

app.MapControllers();

/*app.MapGet("/secret", (ClaimsPrincipal user) => $"Hello {user.Identity?.Name}. My secret")
    .RequireAuthorization();*/

app.Run();
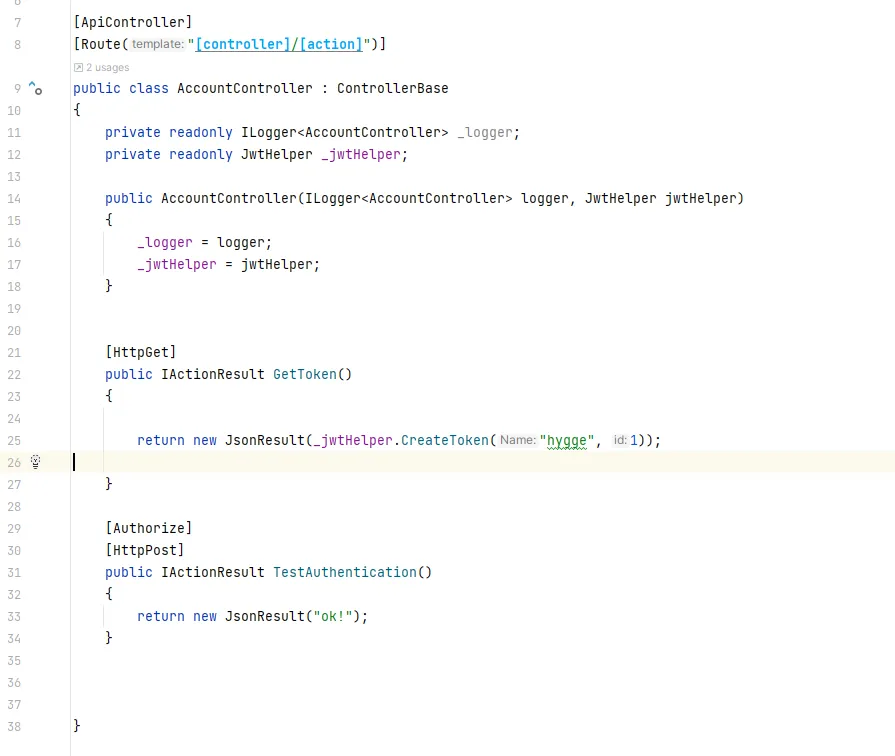
- 编写测试请求

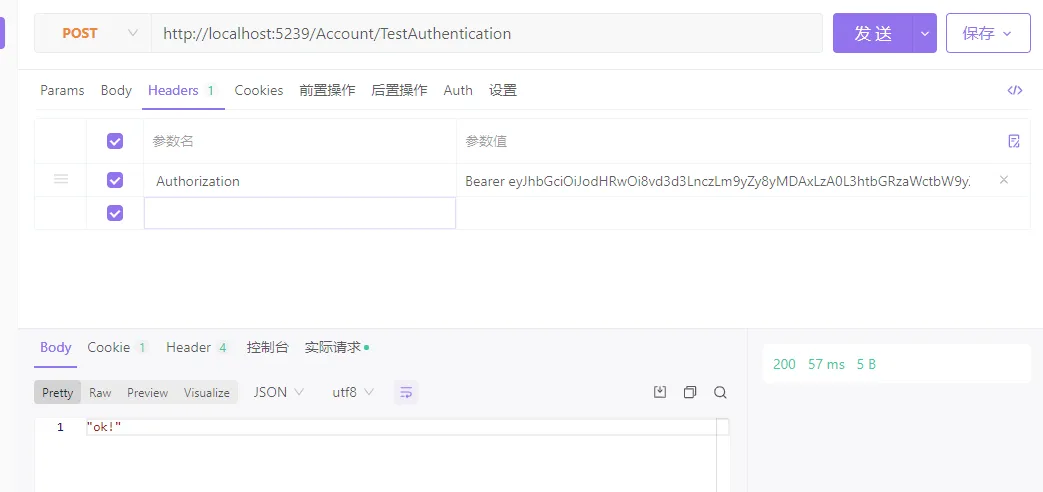
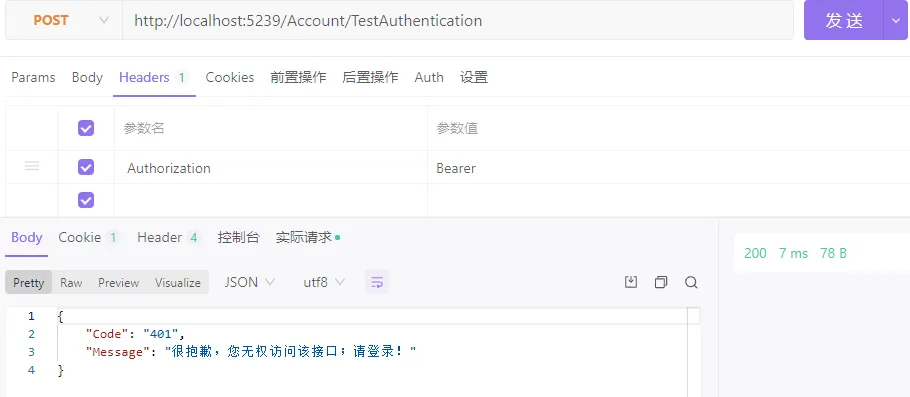
- 测试结果
- 使用1接口获取token,再测试2接口成功结果

- 失败结果如下


【推荐】国内首个AI IDE,深度理解中文开发场景,立即下载体验Trae
【推荐】编程新体验,更懂你的AI,立即体验豆包MarsCode编程助手
【推荐】抖音旗下AI助手豆包,你的智能百科全书,全免费不限次数
【推荐】轻量又高性能的 SSH 工具 IShell:AI 加持,快人一步
· TypeScript + Deepseek 打造卜卦网站:技术与玄学的结合
· 阿里巴巴 QwQ-32B真的超越了 DeepSeek R-1吗?
· 【译】Visual Studio 中新的强大生产力特性
· 【设计模式】告别冗长if-else语句:使用策略模式优化代码结构
· 10年+ .NET Coder 心语 ── 封装的思维:从隐藏、稳定开始理解其本质意义