
第20章 Redis配置
20.1 Redis基础配置文件

20.2 Redis备份(持久化)
save 900 1
save 300 10
save 60 10000

# By default Redis will stop accepting writes if RDB snapshots are enabled
# (at least one save point) and the latest background save failed.
# This will make the user aware (in a hard way) that data is not persisting
# on disk properly, otherwise chances are that no one will notice and some
# disaster will happen.
#
# If the background saving process will start working again Redis will
# automatically allow writes again.
#
# However if you have setup your proper monitoring of the Redis server
# and persistence, you may want to disable this feature so that Redis will
# continue to work as usual even if there are problems with disk,
# permissions, and so forth.
stop-writes-on-bgsave-error yes

# Compress string objects using LZF when dump .rdb databases?
# For default that's set to 'yes' as it's almost always a win.
# If you want to save some CPU in the saving child set it to 'no' but
# the dataset will likely be bigger if you have compressible values or keys.
rdbcompression yes

# Since version 5 of RDB a CRC64 checksum is placed at the end of the file.
# This makes the format more resistant to corruption but there is a performance
# hit to pay (around 10%) when saving and loading RDB files, so you can disable it
# for maximum performances.
#
# RDB files created with checksum disabled have a checksum of zero that will
# tell the loading code to skip the check.
rdbchecksum yes

# The filename where to dump the DB
dbfilename dump.rdb

# The working directory.
#
# The DB will be written inside this directory, with the filename specified
# above using the 'dbfilename' configuration directive.
#
# The Append Only File will also be created inside this directory.
#
# Note that you must specify a directory here, not a file name.
dir ./

################################# REPLICATION #################################

# Master-Slave replication. Use slaveof to make a Redis instance a copy of
# another Redis server. A few things to understand ASAP about Redis replication.
#
# 1) Redis replication is asynchronous, but you can configure a master to
#    stop accepting writes if it appears to be not connected with at least
#    a given number of slaves.
# 2) Redis slaves are able to perform a partial resynchronization with the
#    master if the replication link is lost for a relatively small amount of
#    time. You may want to configure the replication backlog size (see the next
#    sections of this file) with a sensible value depending on your needs.
# 3) Replication is automatic and does not need user intervention. After a
#    network partition slaves automatically try to reconnect to masters
#    and resynchronize with them.
#
# slaveof <masterip> <masterport>

# If the master is password protected (using the "requirepass" configuration
# directive below) it is possible to tell the slave to authenticate before
# starting the replication synchronization process, otherwise the master will
# refuse the slave request.
#
# masterauth <master-password>

# When a slave loses its connection with the master, or when the replication
# is still in progress, the slave can act in two different ways:
#
# 1) if slave-serve-stale-data is set to 'yes' (the default) the slave will
#    still reply to client requests, possibly with out of date data, or the
#    data set may just be empty if this is the first synchronization.
#
# 2) if slave-serve-stale-data is set to 'no' the slave will reply with
#    an error "SYNC with master in progress" to all the kind of commands
#    but to INFO and SLAVEOF.
#
slave-serve-stale-data yes

# You can configure a slave instance to accept writes or not. Writing against
# a slave instance may be useful to store some ephemeral data (because data
# written on a slave will be easily deleted after resync with the master) but
# may also cause problems if clients are writing to it because of a
# misconfiguration.
#
# Since Redis 2.6 by default slaves are read-only.
#
# Note: read only slaves are not designed to be exposed to untrusted clients
# on the internet. It's just a protection layer against misuse of the instance.
# Still a read only slave exports by default all the administrative commands
# such as CONFIG, DEBUG, and so forth. To a limited extent you can improve
# security of read only slaves using 'rename-command' to shadow all the
# administrative / dangerous commands.
slave-read-only yes

# Replication SYNC strategy: disk or socket.
#
# -------------------------------------------------------
# WARNING: DISKLESS REPLICATION IS EXPERIMENTAL CURRENTLY
# -------------------------------------------------------
#
# New slaves and reconnecting slaves that are not able to continue the replication
# process just receiving differences, need to do what is called a "full
# synchronization". An RDB file is transmitted from the master to the slaves.
# The transmission can happen in two different ways:
#
# 1) Disk-backed: The Redis master creates a new process that writes the RDB
#                 file on disk. Later the file is transferred by the parent
#                 process to the slaves incrementally.
# 2) Diskless: The Redis master creates a new process that directly writes the
#              RDB file to slave sockets, without touching the disk at all.
#
# With disk-backed replication, while the RDB file is generated, more slaves
# can be queued and served with the RDB file as soon as the current child producing
# the RDB file finishes its work. With diskless replication instead once
# the transfer starts, new slaves arriving will be queued and a new transfer
# will start when the current one terminates.
#
# When diskless replication is used, the master waits a configurable amount of
# time (in seconds) before starting the transfer in the hope that multiple slaves
# will arrive and the transfer can be parallelized.
#
# With slow disks and fast (large bandwidth) networks, diskless replication
# works better.
repl-diskless-sync no

# When diskless replication is enabled, it is possible to configure the delay
# the server waits in order to spawn the child that transfers the RDB via socket
# to the slaves.
#
# This is important since once the transfer starts, it is not possible to serve
# new slaves arriving, that will be queued for the next RDB transfer, so the server
# waits a delay in order to let more slaves arrive.
#
# The delay is specified in seconds, and by default is 5 seconds. To disable
# it entirely just set it to 0 seconds and the transfer will start ASAP.
repl-diskless-sync-delay 5

# Slaves send PINGs to server in a predefined interval. It's possible to change
# this interval with the repl_ping_slave_period option. The default value is 10
# seconds.
#
# repl-ping-slave-period 10

# The following option sets the replication timeout for:
#
# 1) Bulk transfer I/O during SYNC, from the point of view of slave.
# 2) Master timeout from the point of view of slaves (data, pings).
# 3) Slave timeout from the point of view of masters (REPLCONF ACK pings).
#
# It is important to make sure that this value is greater than the value
# specified for repl-ping-slave-period otherwise a timeout will be detected
# every time there is low traffic between the master and the slave.
#
# repl-timeout 60

# Disable TCP_NODELAY on the slave socket after SYNC?
#
# If you select "yes" Redis will use a smaller number of TCP packets and
# less bandwidth to send data to slaves. But this can add a delay for
# the data to appear on the slave side, up to 40 milliseconds with
# Linux kernels using a default configuration.
#
# If you select "no" the delay for data to appear on the slave side will
# be reduced but more bandwidth will be used for replication.
#
# By default we optimize for low latency, but in very high traffic conditions
# or when the master and slaves are many hops away, turning this to "yes" may
# be a good idea.
repl-disable-tcp-nodelay no

# Set the replication backlog size. The backlog is a buffer that accumulates
# slave data when slaves are disconnected for some time, so that when a slave
# wants to reconnect again, often a full resync is not needed, but a partial
# resync is enough, just passing the portion of data the slave missed while
# disconnected.
#
# The bigger the replication backlog, the longer the time the slave can be
# disconnected and later be able to perform a partial resynchronization.
#
# The backlog is only allocated once there is at least a slave connected.
#
# repl-backlog-size 1mb

# After a master has no longer connected slaves for some time, the backlog
# will be freed. The following option configures the amount of seconds that
# need to elapse, starting from the time the last slave disconnected, for
# the backlog buffer to be freed.
#
# A value of 0 means to never release the backlog.
#
# repl-backlog-ttl 3600

# The slave priority is an integer number published by Redis in the INFO output.
# It is used by Redis Sentinel in order to select a slave to promote into a
# master if the master is no longer working correctly.
#
# A slave with a low priority number is considered better for promotion, so
# for instance if there are three slaves with priority 10, 100, 25 Sentinel will
# pick the one with priority 10, that is the lowest.
#
# However a special priority of 0 marks the slave as not able to perform the
# role of master, so a slave with priority of 0 will never be selected by
# Redis Sentinel for promotion.
#
# By default the priority is 100.
slave-priority 100

# It is possible for a master to stop accepting writes if there are less than
# N slaves connected, having a lag less or equal than M seconds.
#
# The N slaves need to be in "online" state.
#
# The lag in seconds, that must be <= the specified value, is calculated from
# the last ping received from the slave, that is usually sent every second.
#
# This option does not GUARANTEE that N replicas will accept the write, but
# will limit the window of exposure for lost writes in case not enough slaves
# are available, to the specified number of seconds.
#
# For example to require at least 3 slaves with a lag <= 10 seconds use:
#
# min-slaves-to-write 3
# min-slaves-max-lag 10
#
# Setting one or the other to 0 disables the feature.
#
# By default min-slaves-to-write is set to 0 (feature disabled) and
# min-slaves-max-lag is set to 10.

################################## SECURITY ###################################

# Require clients to issue AUTH <PASSWORD> before processing any other
# commands.  This might be useful in environments in which you do not trust
# others with access to the host running redis-server.
#
# This should stay commented out for backward compatibility and because most
# people do not need auth (e.g. they run their own servers).
#
# Warning: since Redis is pretty fast an outside user can try up to
# 150k passwords per second against a good box. This means that you should
# use a very strong password otherwise it will be very easy to break.
#
# requirepass foobared

# Command renaming.
#
# It is possible to change the name of dangerous commands in a shared
# environment. For instance the CONFIG command may be renamed into something
# hard to guess so that it will still be available for internal-use tools
# but not available for general clients.
#
# Example:
#
# rename-command CONFIG b840fc02d524045429941cc15f59e41cb7be6c52
#
# It is also possible to completely kill a command by renaming it into
# an empty string:
#
# rename-command CONFIG ""
#
# Please note that changing the name of commands that are logged into the
# AOF file or transmitted to slaves may cause problems.

################################### LIMITS ####################################

# Set the max number of connected clients at the same time. By default
# this limit is set to 10000 clients, however if the Redis server is not
# able to configure the process file limit to allow for the specified limit
# the max number of allowed clients is set to the current file limit
# minus 32 (as Redis reserves a few file descriptors for internal uses).
#
# Once the limit is reached Redis will close all the new connections sending
# an error 'max number of clients reached'.
#
# maxclients 10000

# If Redis is to be used as an in-memory-only cache without any kind of
# persistence, then the fork() mechanism used by the background AOF/RDB
# persistence is unnecessary. As an optimization, all persistence can be
# turned off in the Windows version of Redis. This will redirect heap
# allocations to the system heap allocator, and disable commands that would
# otherwise cause fork() operations: BGSAVE and BGREWRITEAOF.
# This flag may not be combined with any of the other flags that configure
# AOF and RDB operations.
# persistence-available [(yes)|no]

# Don't use more memory than the specified amount of bytes.
# When the memory limit is reached Redis will try to remove keys
# according to the eviction policy selected (see maxmemory-policy).
#
# If Redis can't remove keys according to the policy, or if the policy is
# set to 'noeviction', Redis will start to reply with errors to commands
# that would use more memory, like SET, LPUSH, and so on, and will continue
# to reply to read-only commands like GET.
#
# This option is usually useful when using Redis as an LRU cache, or to set
# a hard memory limit for an instance (using the 'noeviction' policy).
#
# WARNING: If you have slaves attached to an instance with maxmemory on,
# the size of the output buffers needed to feed the slaves are subtracted
# from the used memory count, so that network problems / resyncs will
# not trigger a loop where keys are evicted, and in turn the output
# buffer of slaves is full with DELs of keys evicted triggering the deletion
# of more keys, and so forth until the database is completely emptied.
#
# In short... if you have slaves attached it is suggested that you set a lower
# limit for maxmemory so that there is some free RAM on the system for slave
# output buffers (but this is not needed if the policy is 'noeviction').
#
# WARNING: not setting maxmemory will cause Redis to terminate with an
# out-of-memory exception if the heap limit is reached.
#
# NOTE: since Redis uses the system paging file to allocate the heap memory,
# the Working Set memory usage showed by the Windows Task Manager or by other
# tools such as ProcessExplorer will not always be accurate. For example, right
# after a background save of the RDB or the AOF files, the working set value
# may drop significantly. In order to check the correct amount of memory used
# by the redis-server to store the data, use the INFO client command. The INFO
# command shows only the memory used to store the redis data, not the extra
# memory used by the Windows process for its own requirements. Th3 extra amount
# of memory not reported by the INFO command can be calculated subtracting the
# Peak Working Set reported by the Windows Task Manager and the used_memory_peak
# reported by the INFO command.
#
# maxmemory <bytes>

# MAXMEMORY POLICY: how Redis will select what to remove when maxmemory
# is reached. You can select among five behaviors:
#
# volatile-lru -> remove the key with an expire set using an LRU algorithm
# allkeys-lru -> remove any key according to the LRU algorithm
# volatile-random -> remove a random key with an expire set
# allkeys-random -> remove a random key, any key
# volatile-ttl -> remove the key with the nearest expire time (minor TTL)
# noeviction -> don't expire at all, just return an error on write operations
#
# Note: with any of the above policies, Redis will return an error on write
#       operations, when there are no suitable keys for eviction.
#
#       At the date of writing these commands are: set setnx setex append
#       incr decr rpush lpush rpushx lpushx linsert lset rpoplpush sadd
#       sinter sinterstore sunion sunionstore sdiff sdiffstore zadd zincrby
#       zunionstore zinterstore hset hsetnx hmset hincrby incrby decrby
#       getset mset msetnx exec sort
#
# The default is:
#
# maxmemory-policy noeviction

# LRU and minimal TTL algorithms are not precise algorithms but approximated
# algorithms (in order to save memory), so you can select as well the sample
# size to check. For instance for default Redis will check three keys and
# pick the one that was used less recently, you can change the sample size
# using the following configuration directive.
#
# maxmemory-samples 3

############################## APPEND ONLY MODE ###############################

# By default Redis asynchronously dumps the dataset on disk. This mode is
# good enough in many applications, but an issue with the Redis process or
# a power outage may result into a few minutes of writes lost (depending on
# the configured save points).
#
# The Append Only File is an alternative persistence mode that provides
# much better durability. For instance using the default data fsync policy
# (see later in the config file) Redis can lose just one second of writes in a
# dramatic event like a server power outage, or a single write if something
# wrong with the Redis process itself happens, but the operating system is
# still running correctly.
#
# AOF and RDB persistence can be enabled at the same time without problems.
# If the AOF is enabled on startup Redis will load the AOF, that is the file
# with the better durability guarantees.
#
# Please check http://redis.io/topics/persistence for more information.

appendonly no

# The name of the append only file (default: "appendonly.aof")
appendfilename "appendonly.aof"

# The fsync() call tells the Operating System to actually write data on disk
# instead of waiting for more data in the output buffer. Some OS will really flush
# data on disk, some other OS will just try to do it ASAP.
#
# Redis supports three different modes:
#
# no: don't fsync, just let the OS flush the data when it wants. Faster.
# always: fsync after every write to the append only log . Slow, Safest.
# everysec: fsync only one time every second. Compromise.
#
# The default is "everysec", as that's usually the right compromise between
# speed and data safety. It's up to you to understand if you can relax this to
# "no" that will let the operating system flush the output buffer when
# it wants, for better performances (but if you can live with the idea of
# some data loss consider the default persistence mode that's snapshotting),
# or on the contrary, use "always" that's very slow but a bit safer than
# everysec.
#
# More details please check the following article:
# http://antirez.com/post/redis-persistence-demystified.html
#
# If unsure, use "everysec".

# appendfsync always
appendfsync everysec
# appendfsync no

# When the AOF fsync policy is set to always or everysec, and a background
# saving process (a background save or AOF log background rewriting) is
# performing a lot of I/O against the disk, in some Linux configurations
# Redis may block too long on the fsync() call. Note that there is no fix for
# this currently, as even performing fsync in a different thread will block
# our synchronous write(2) call.
#
# In order to mitigate this problem it's possible to use the following option
# that will prevent fsync() from being called in the main process while a
# BGSAVE or BGREWRITEAOF is in progress.
#
# This means that while another child is saving, the durability of Redis is
# the same as "appendfsync none". In practical terms, this means that it is
# possible to lose up to 30 seconds of log in the worst scenario (with the
# default Linux settings).
#
# If you have latency problems turn this to "yes". Otherwise leave it as
# "no" that is the safest pick from the point of view of durability.
no-appendfsync-on-rewrite no

# Automatic rewrite of the append only file.
# Redis is able to automatically rewrite the log file implicitly calling
# BGREWRITEAOF when the AOF log size grows by the specified percentage.
#
# This is how it works: Redis remembers the size of the AOF file after the
# latest rewrite (if no rewrite has happened since the restart, the size of
# the AOF at startup is used).
#
# This base size is compared to the current size. If the current size is
# bigger than the specified percentage, the rewrite is triggered. Also
# you need to specify a minimal size for the AOF file to be rewritten, this
# is useful to avoid rewriting the AOF file even if the percentage increase
# is reached but it is still pretty small.
#
# Specify a percentage of zero in order to disable the automatic AOF
# rewrite feature.

auto-aof-rewrite-percentage 100
auto-aof-rewrite-min-size 64mb

# An AOF file may be found to be truncated at the end during the Redis
# startup process, when the AOF data gets loaded back into memory.
# This may happen when the system where Redis is running
# crashes, especially when an ext4 filesystem is mounted without the
# data=ordered option (however this can't happen when Redis itself
# crashes or aborts but the operating system still works correctly).
#
# Redis can either exit with an error when this happens, or load as much
# data as possible (the default now) and start if the AOF file is found
# to be truncated at the end. The following option controls this behavior.
#
# If aof-load-truncated is set to yes, a truncated AOF file is loaded and
# the Redis server starts emitting a log to inform the user of the event.
# Otherwise if the option is set to no, the server aborts with an error
# and refuses to start. When the option is set to no, the user requires
# to fix the AOF file using the "redis-check-aof" utility before to restart
# the server.
#
# Note that if the AOF file will be found to be corrupted in the middle
# the server will still exit with an error. This option only applies when
# Redis will try to read more data from the AOF file but not enough bytes
# will be found.
aof-load-truncated yes
20.3 Redis内存回收策略
# volatile-lru -> remove the key with an expire set using an LRU algorithm
# allkeys-lru -> remove any key according to the LRU algorithm
# volatile-random -> remove a random key with an expire set
# allkeys-random -> remove a random key, any key
# volatile-ttl -> remove the key with the nearest expire time (minor TTL)
# noeviction -> don't expire at all, just return an error on write operations
20.4 复制
20.4.1 主从同步基础概念
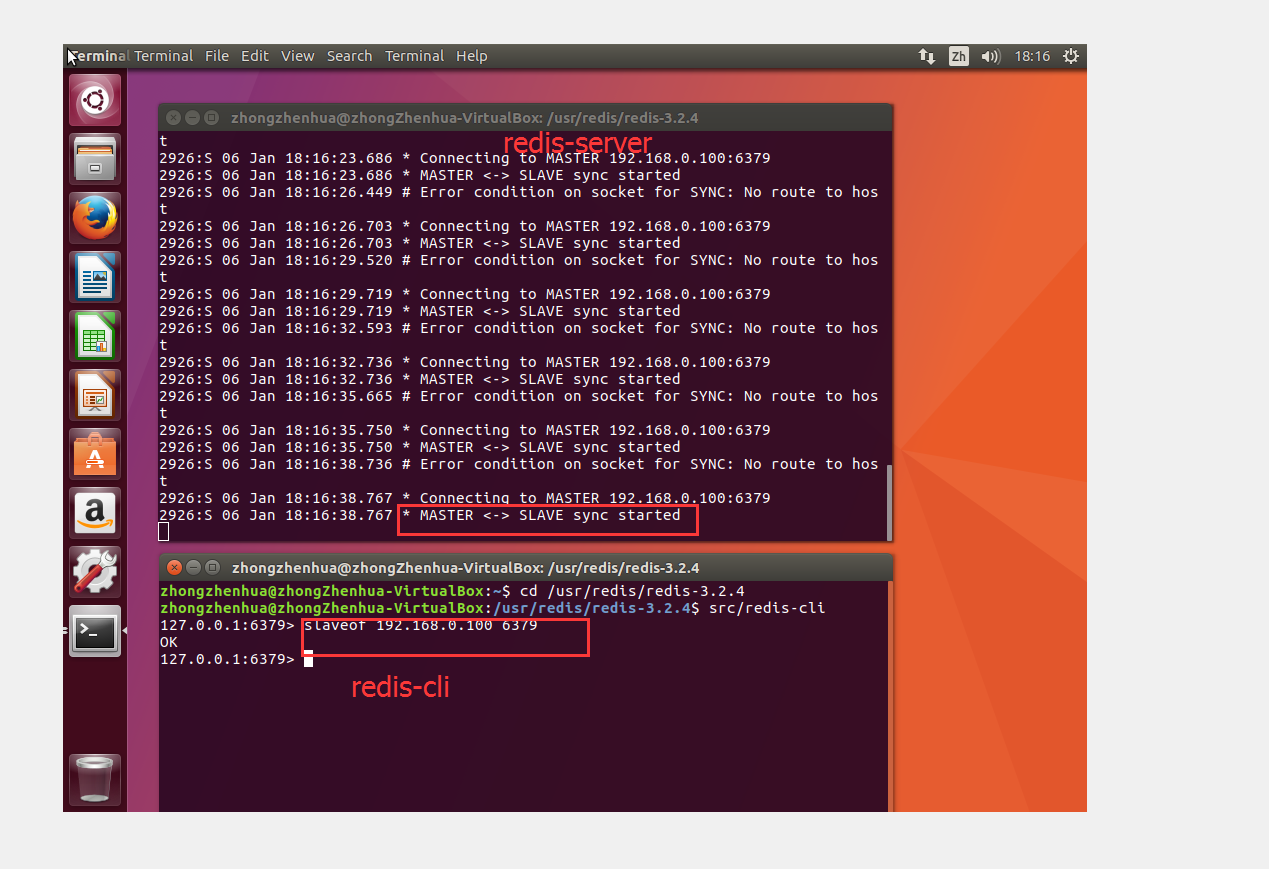
20.4.2 Redis主从同步配置


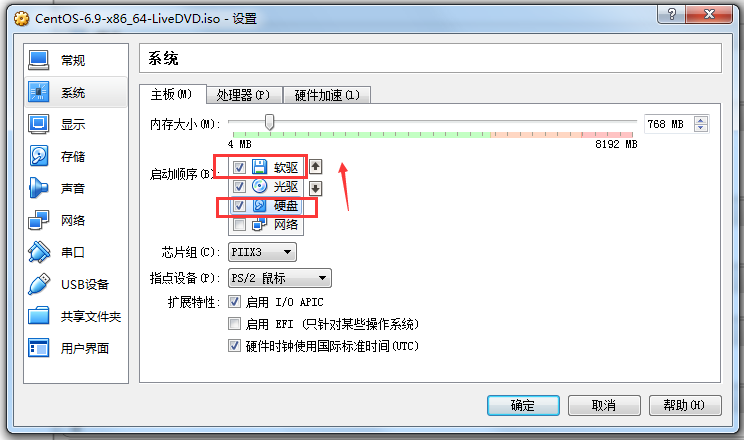
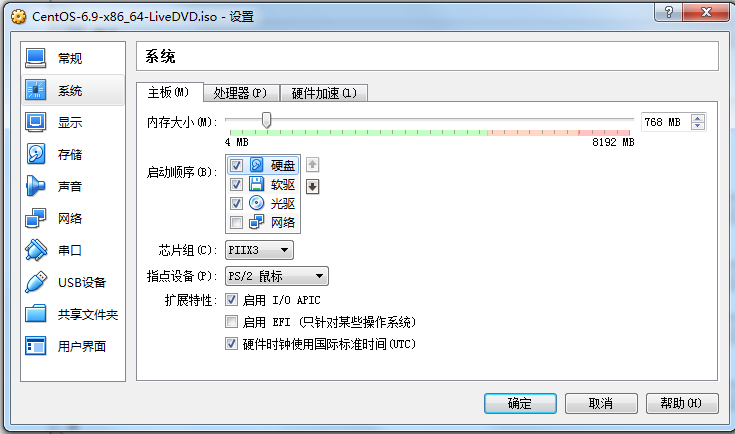
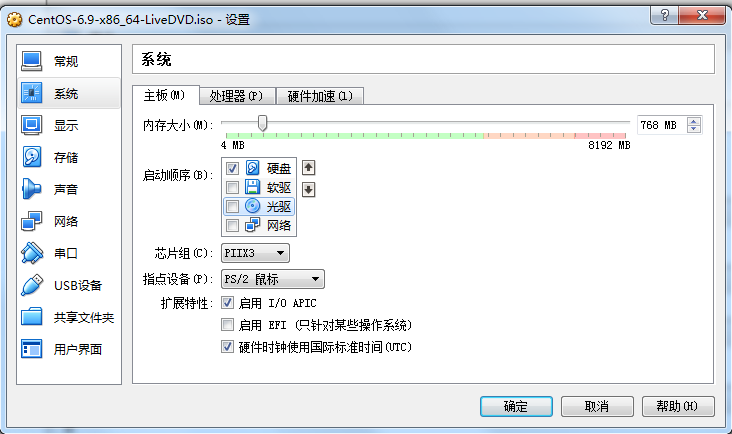


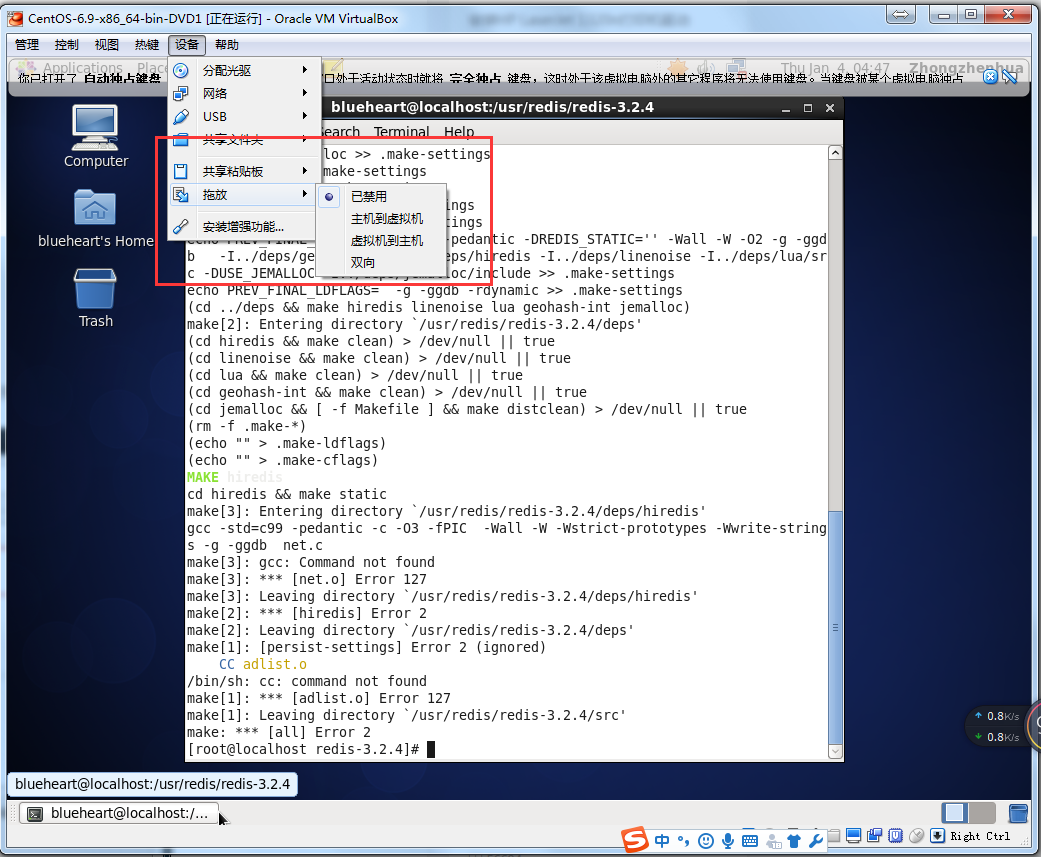


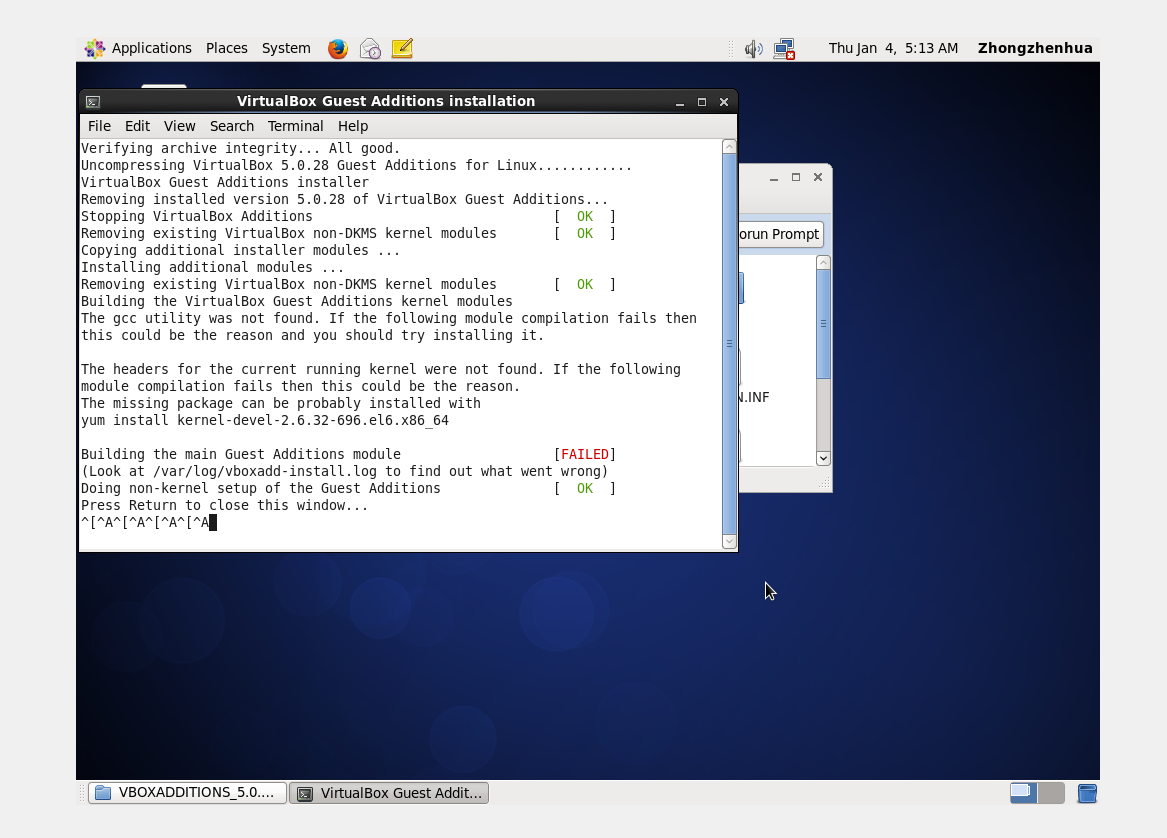
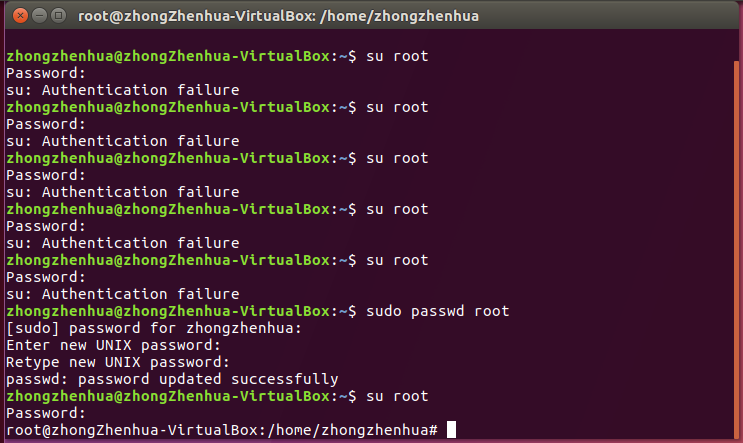
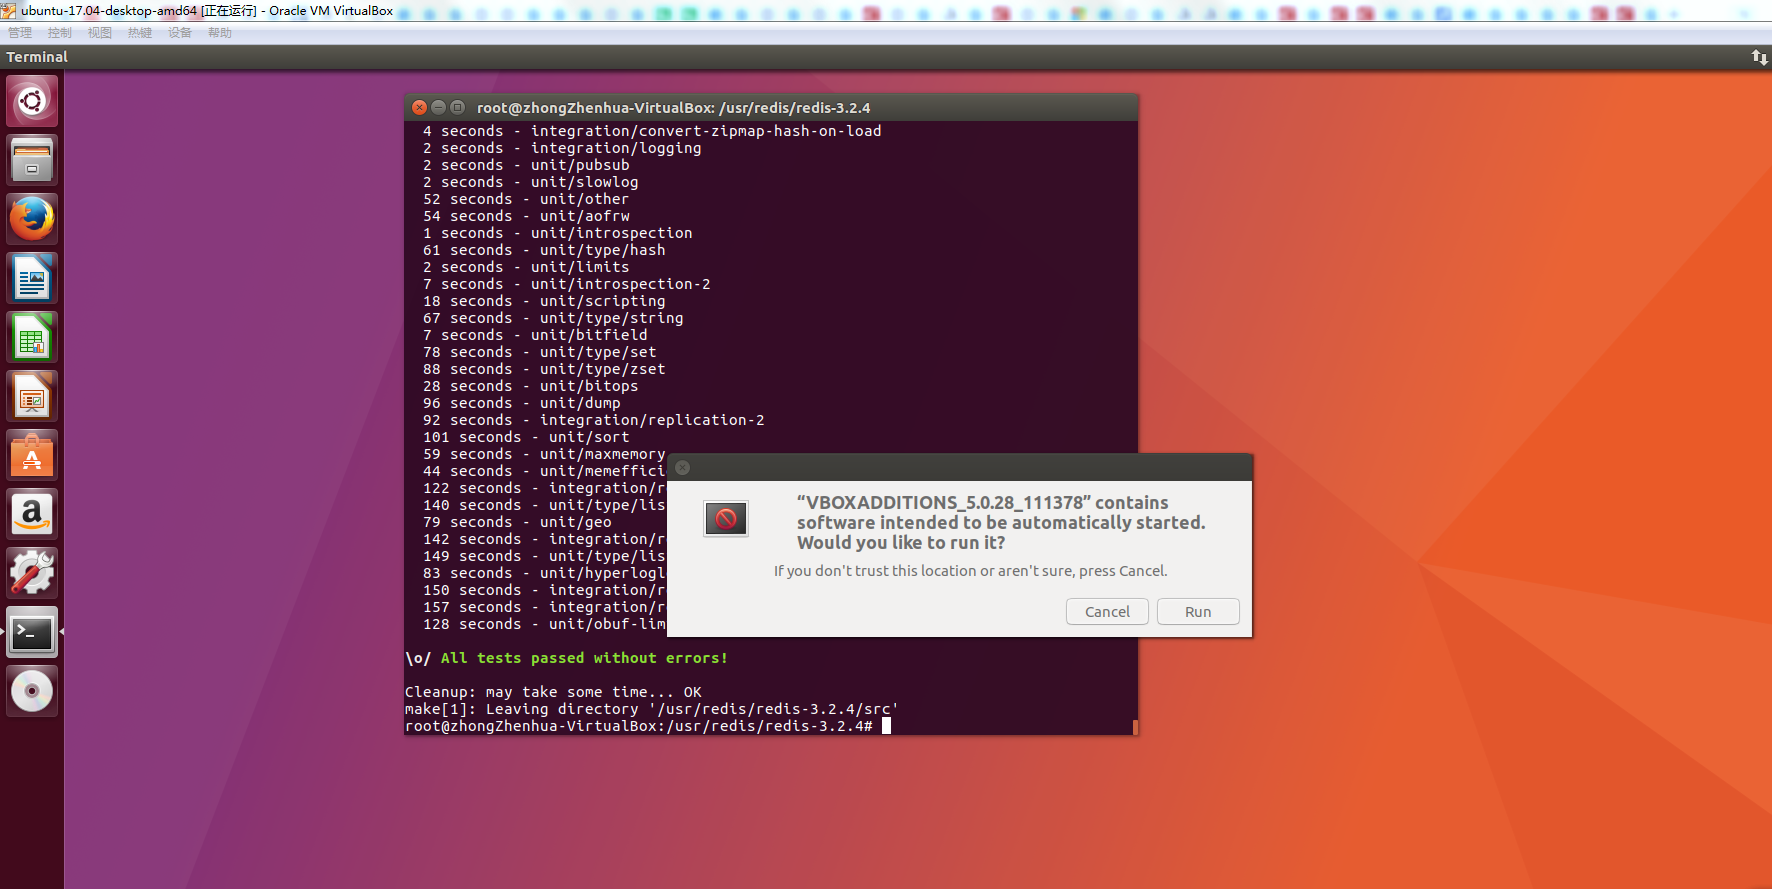
坑爹装Virtual Box增强都会报错,哦,我记得了,应该要用超级管理员账户登录才可以安装增强。

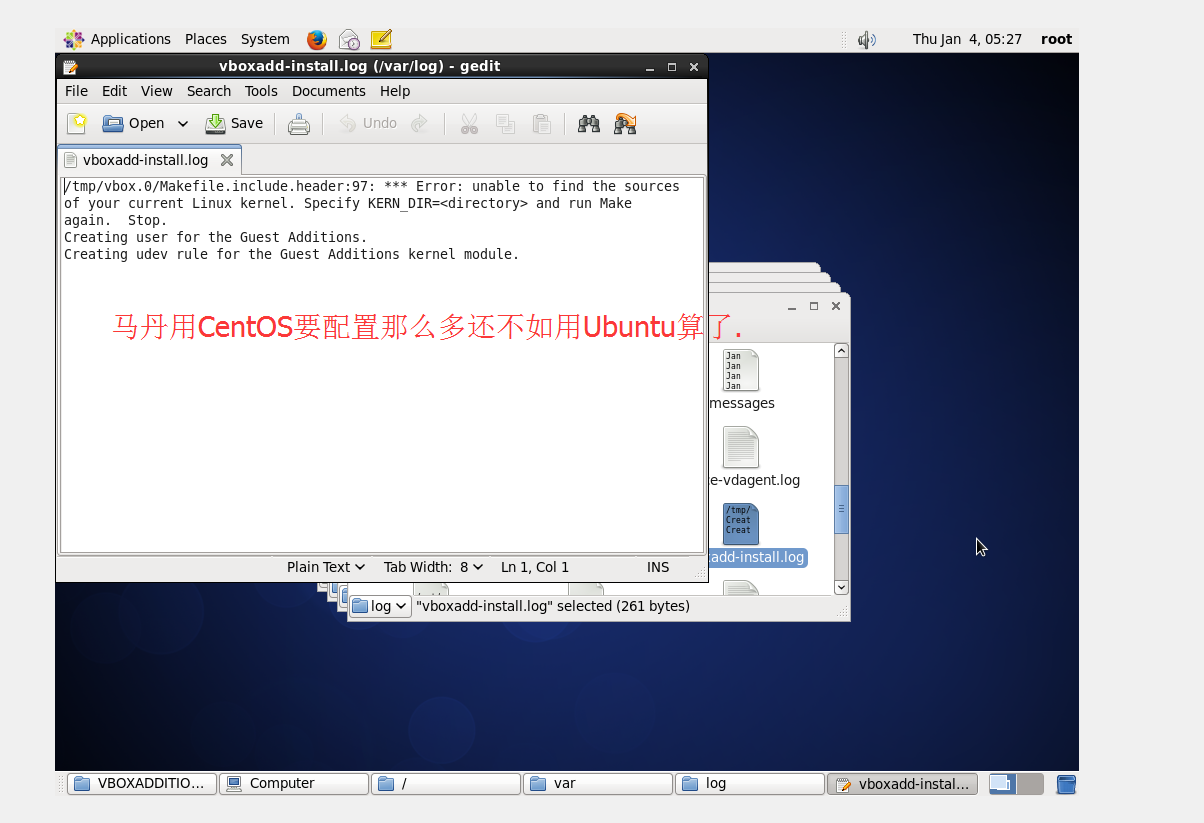
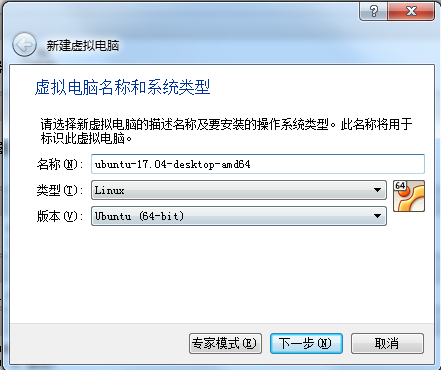


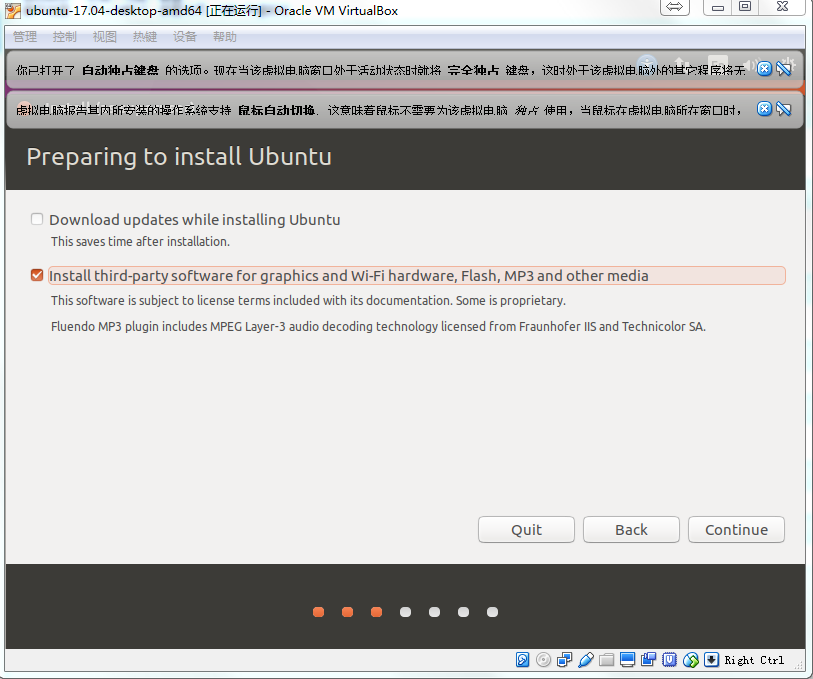
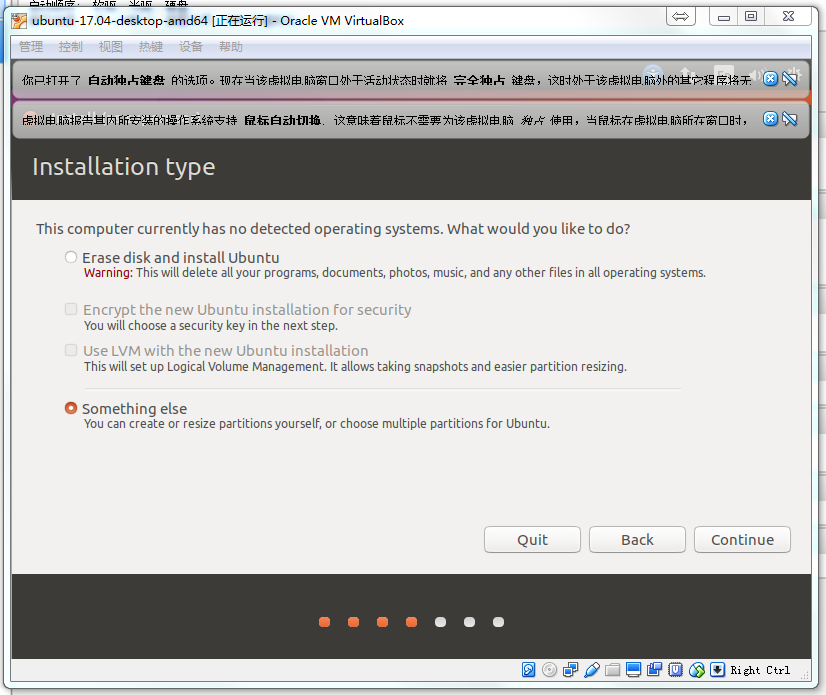
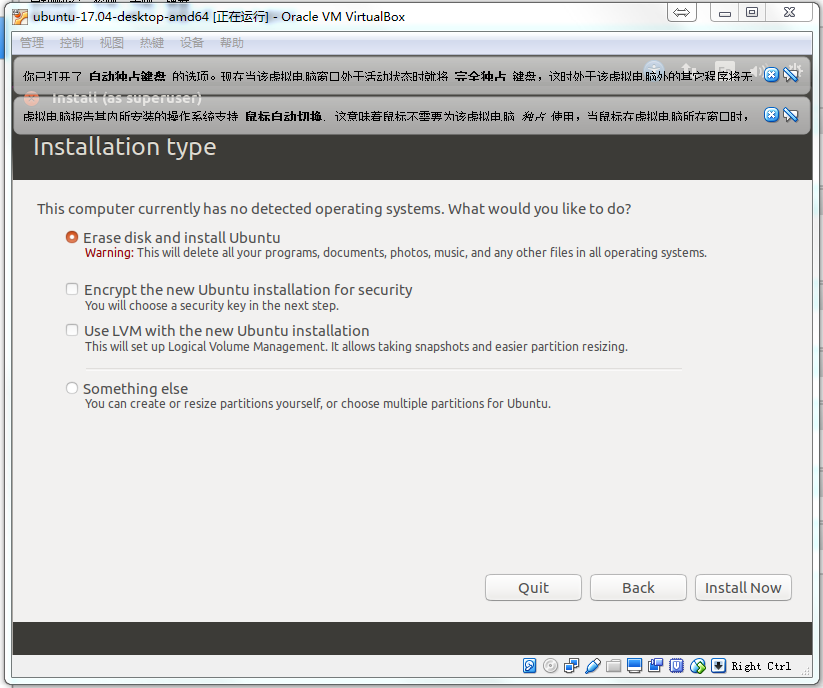
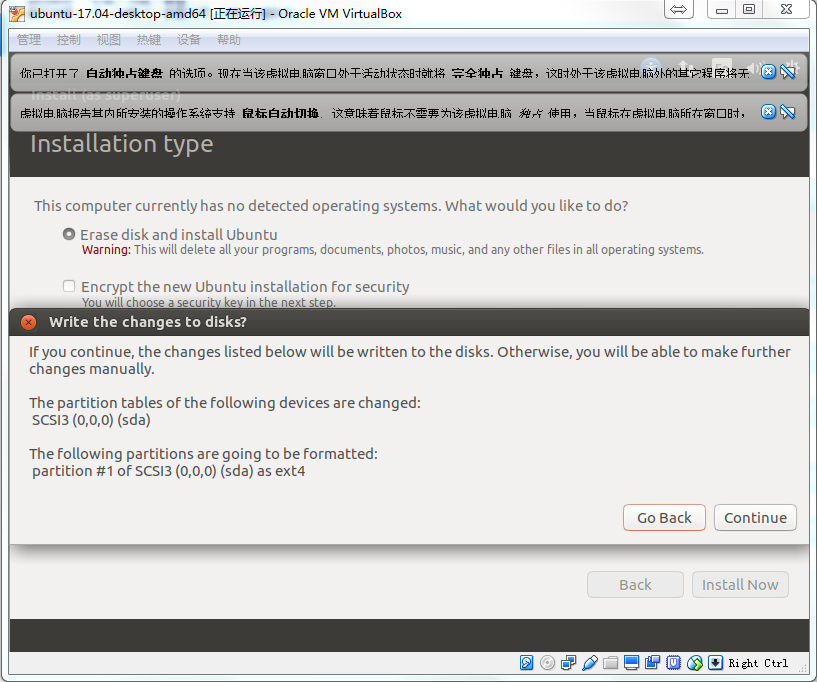

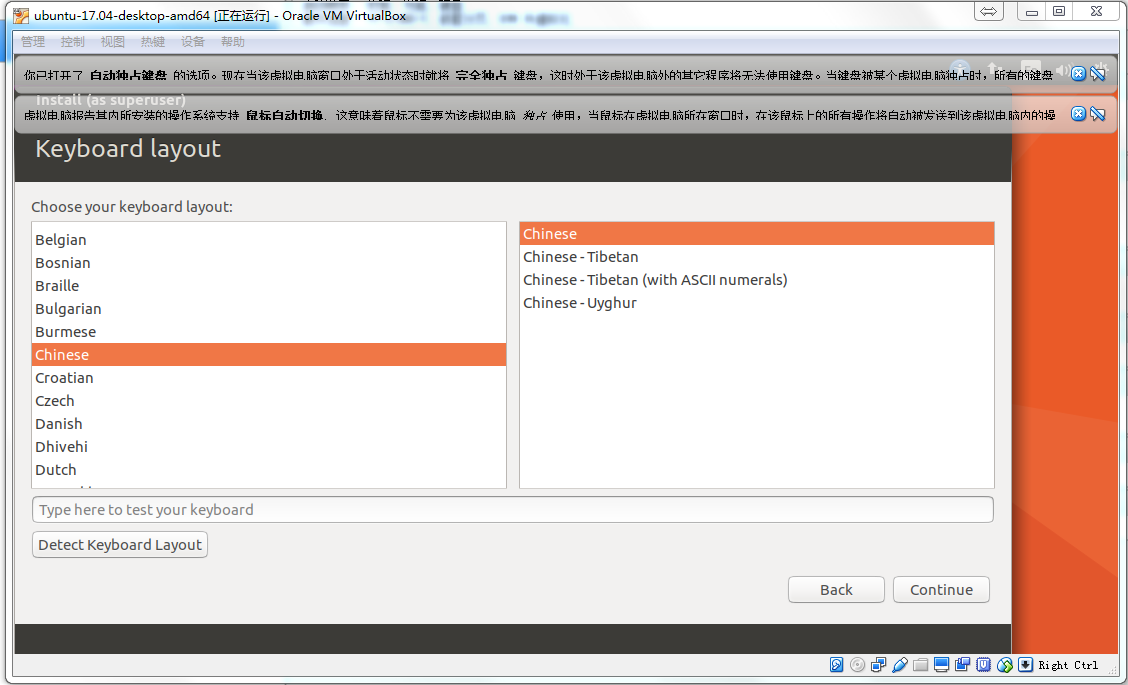

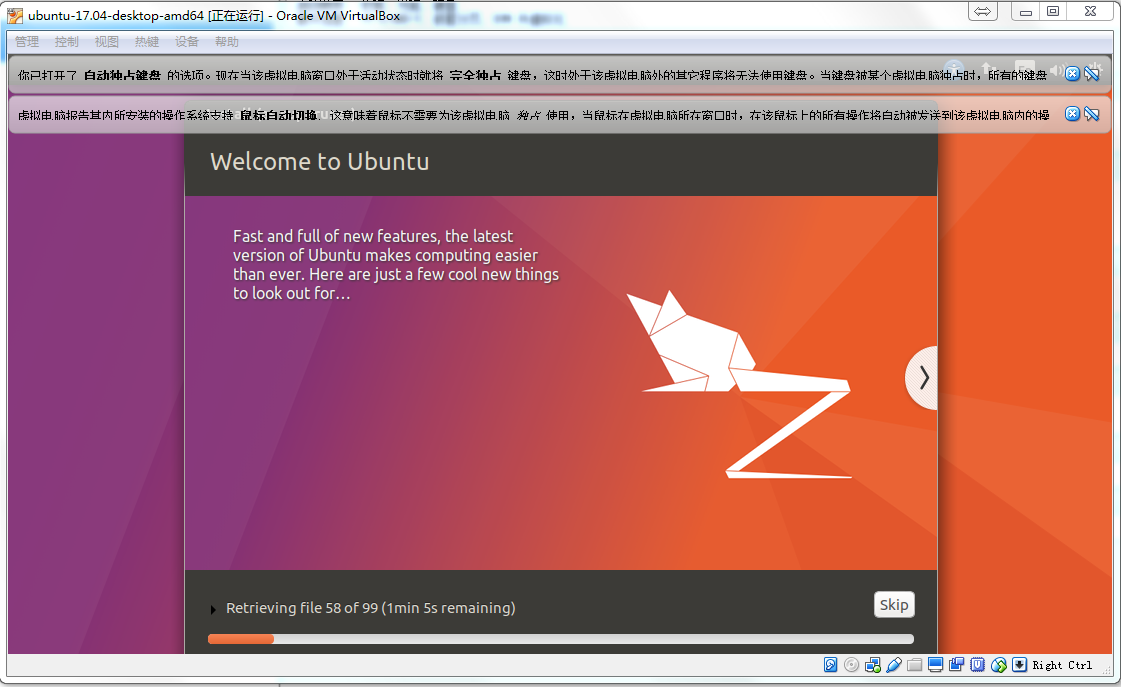
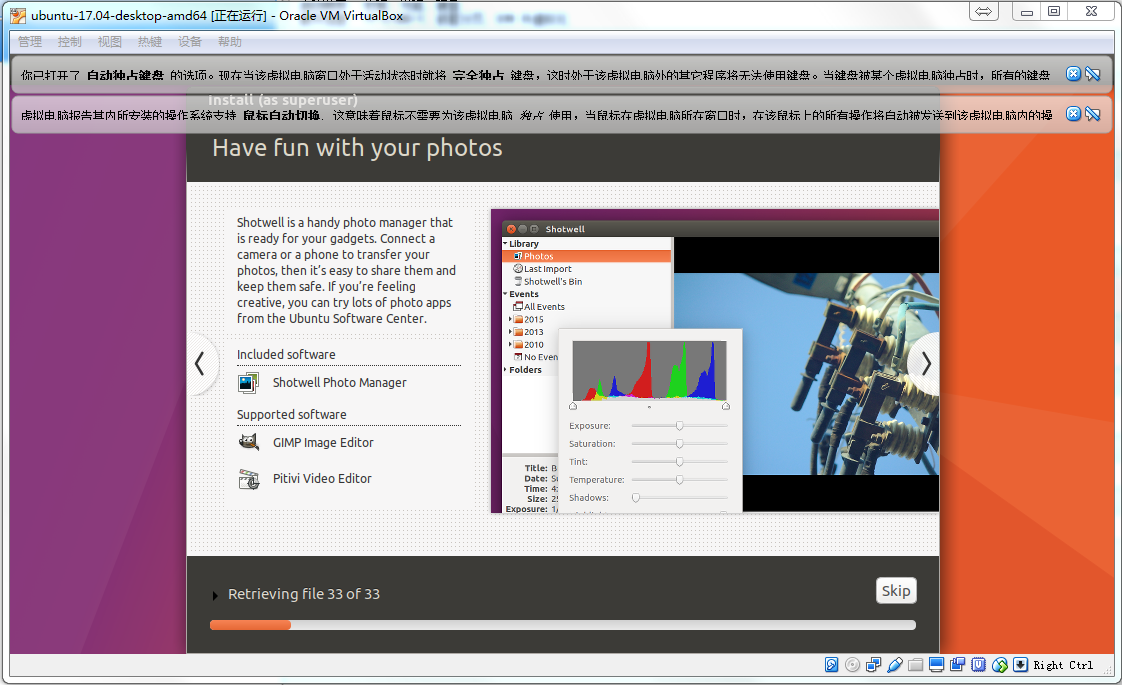


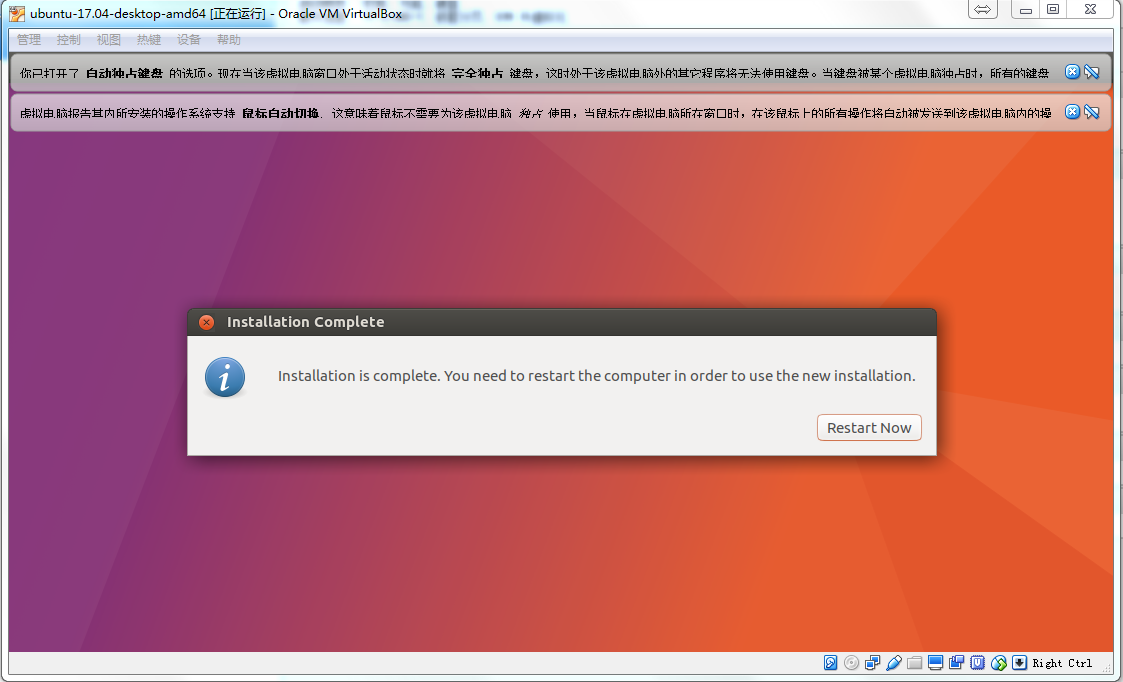
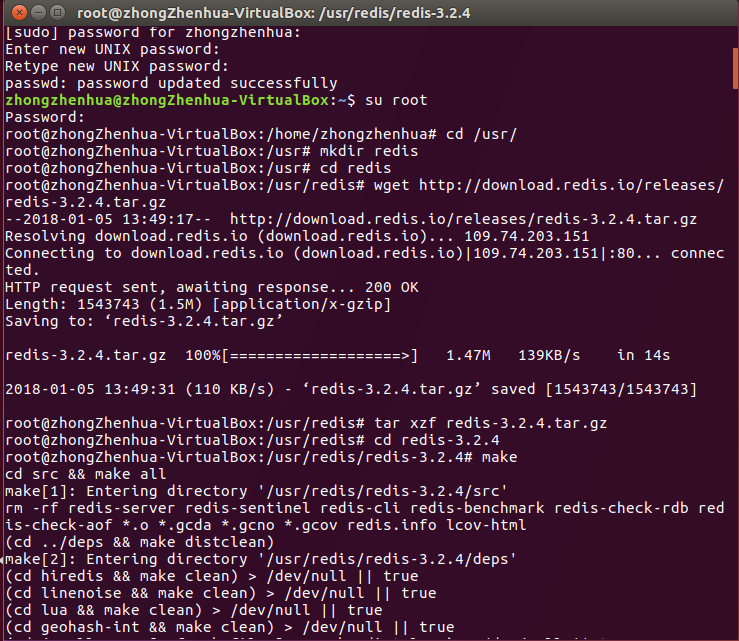
接下来安装一下Virtual Box的增强功能吧,Ubuntu系统应该没问题,不需要配置。
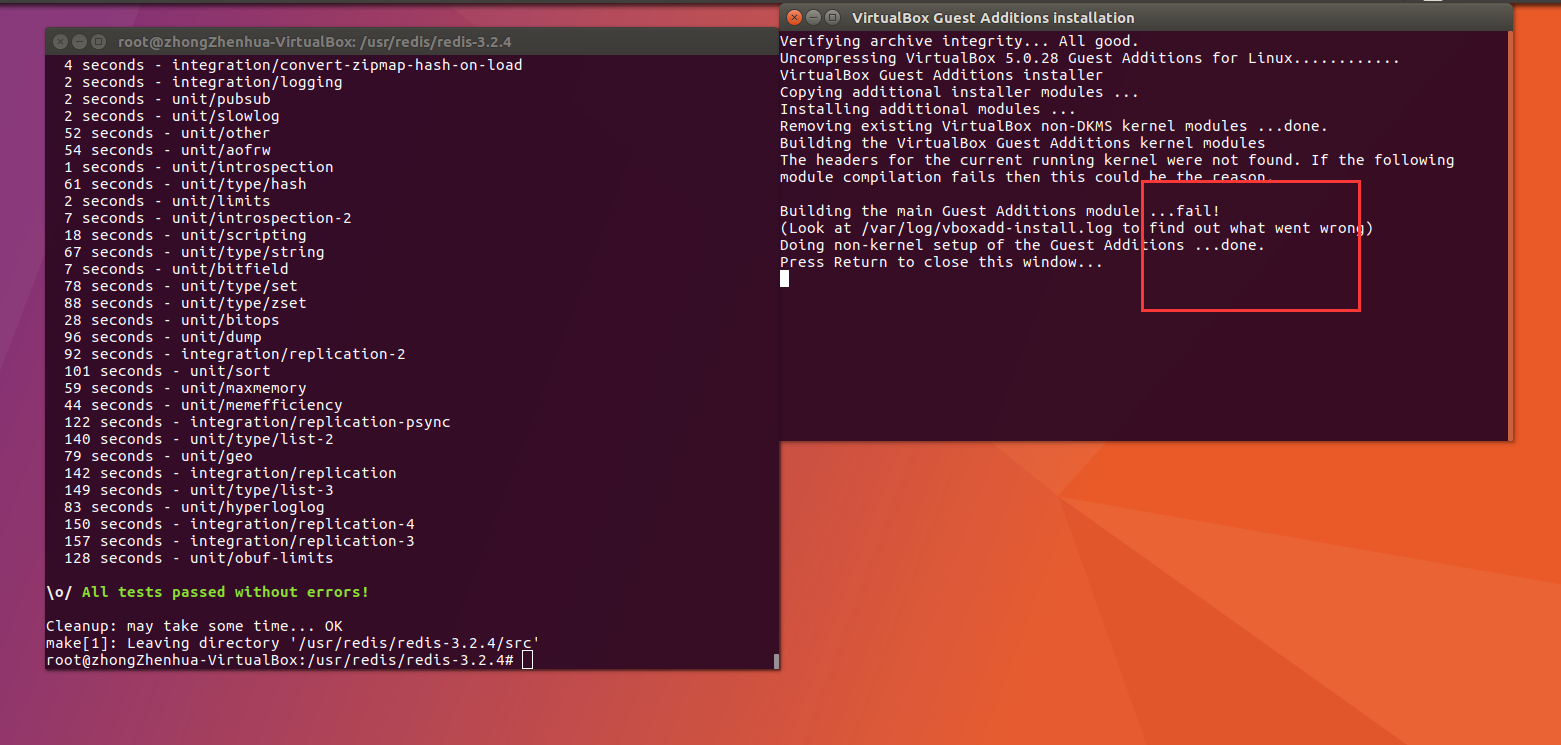
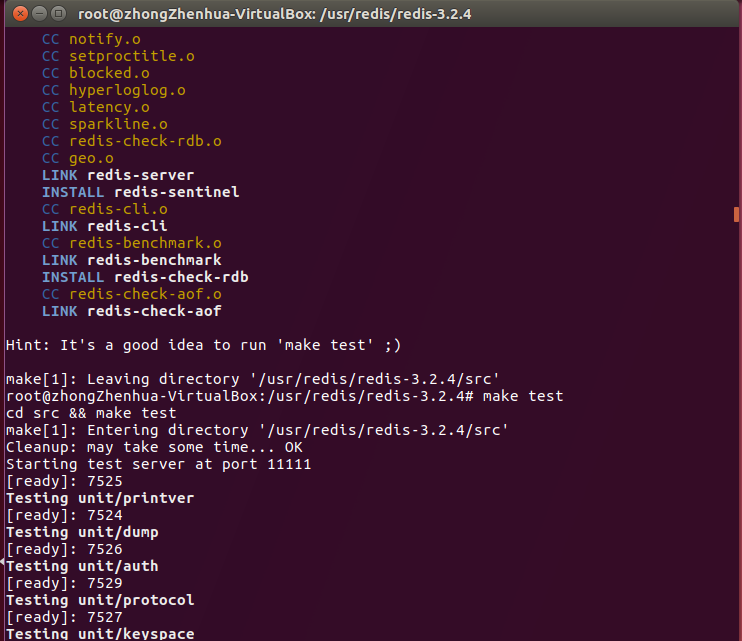
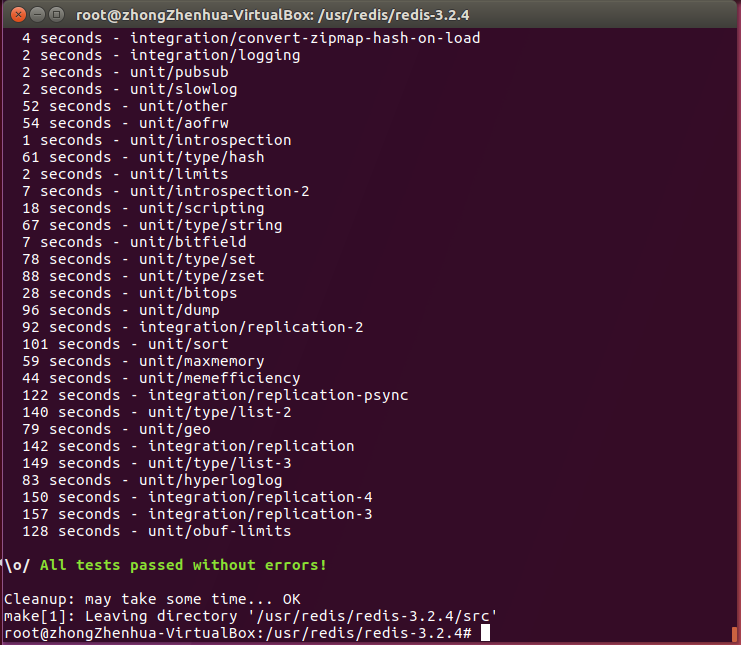
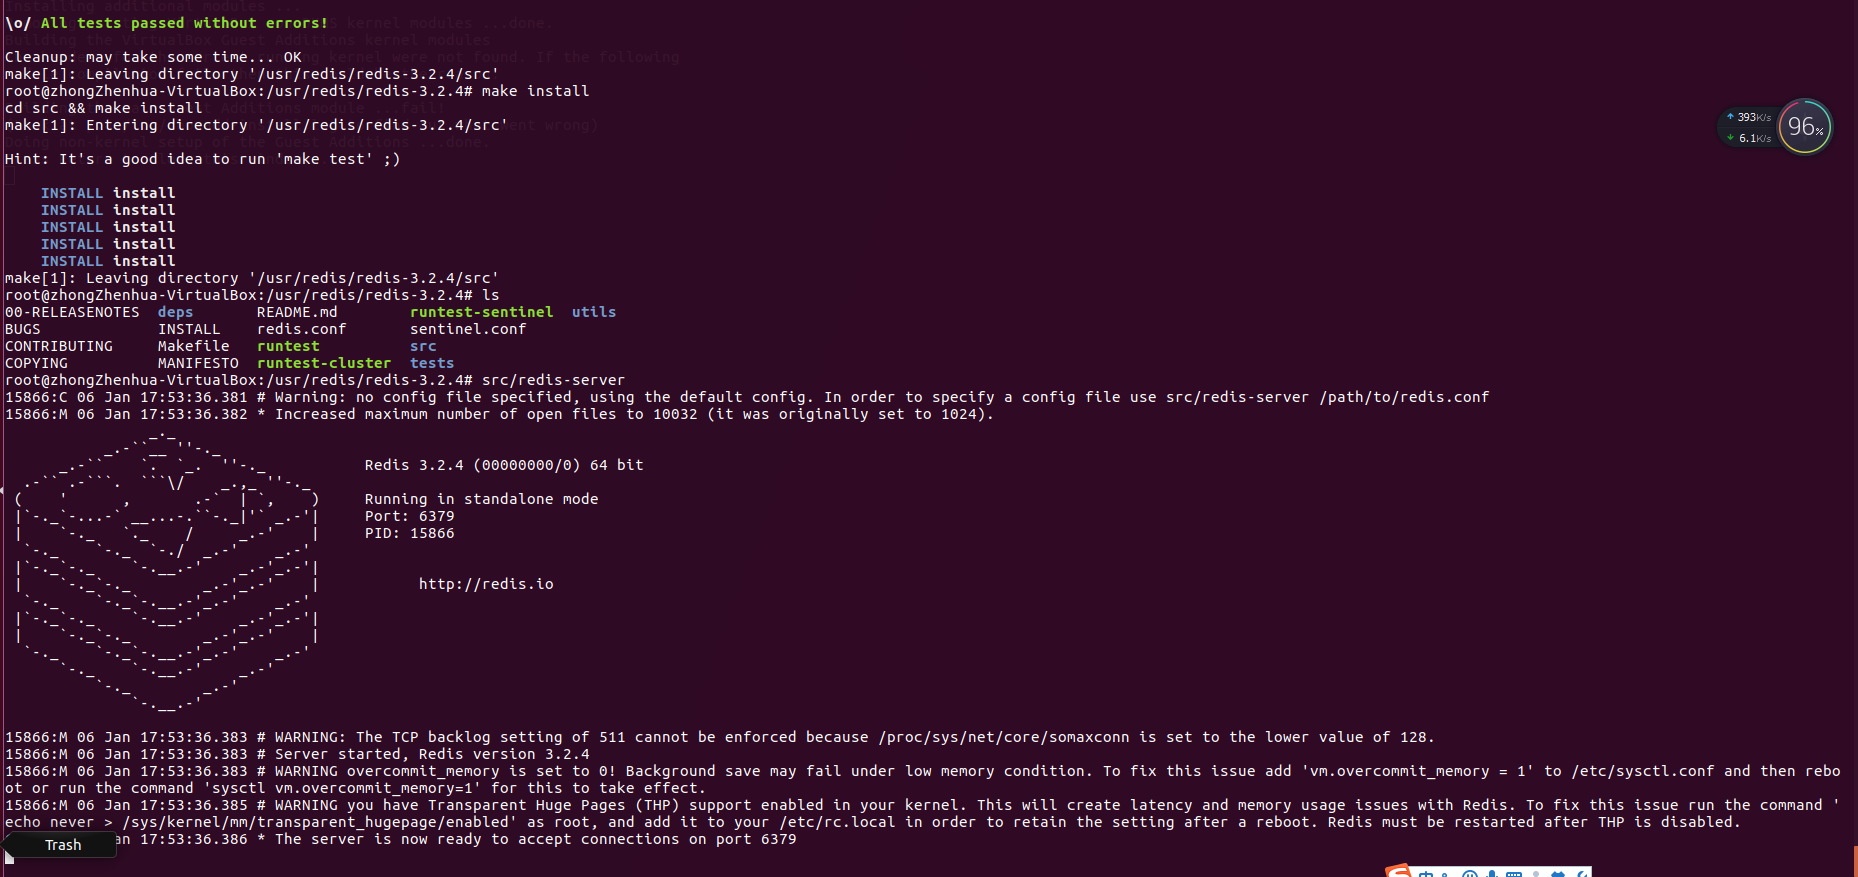
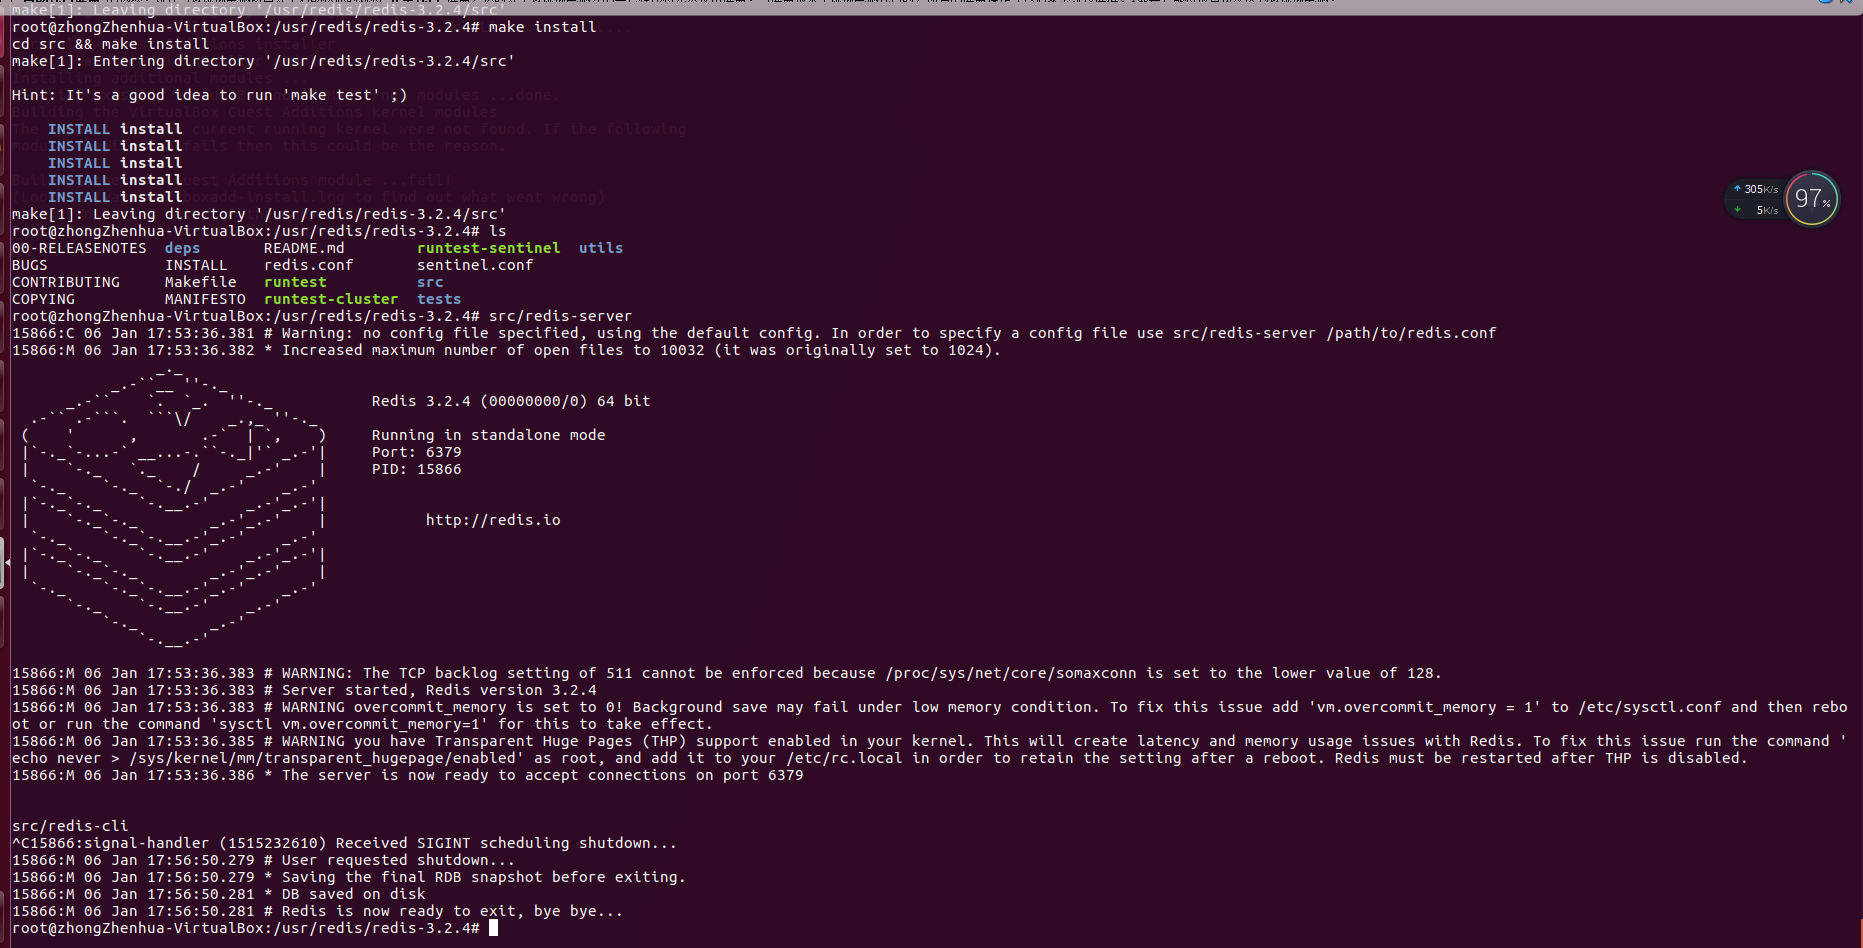
make install

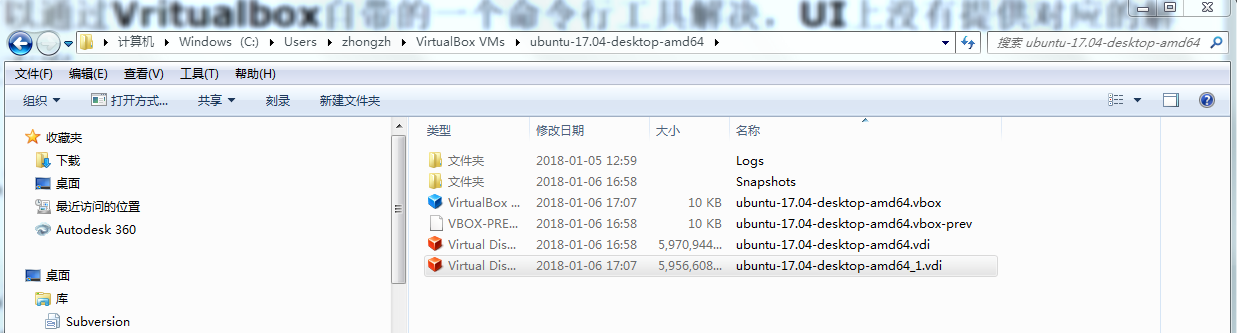
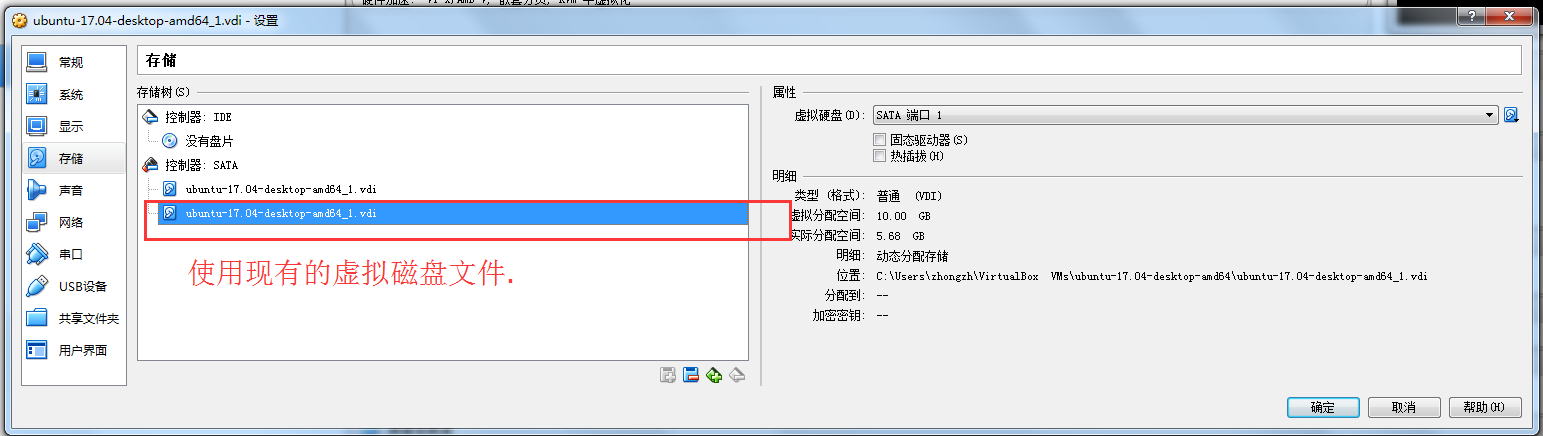
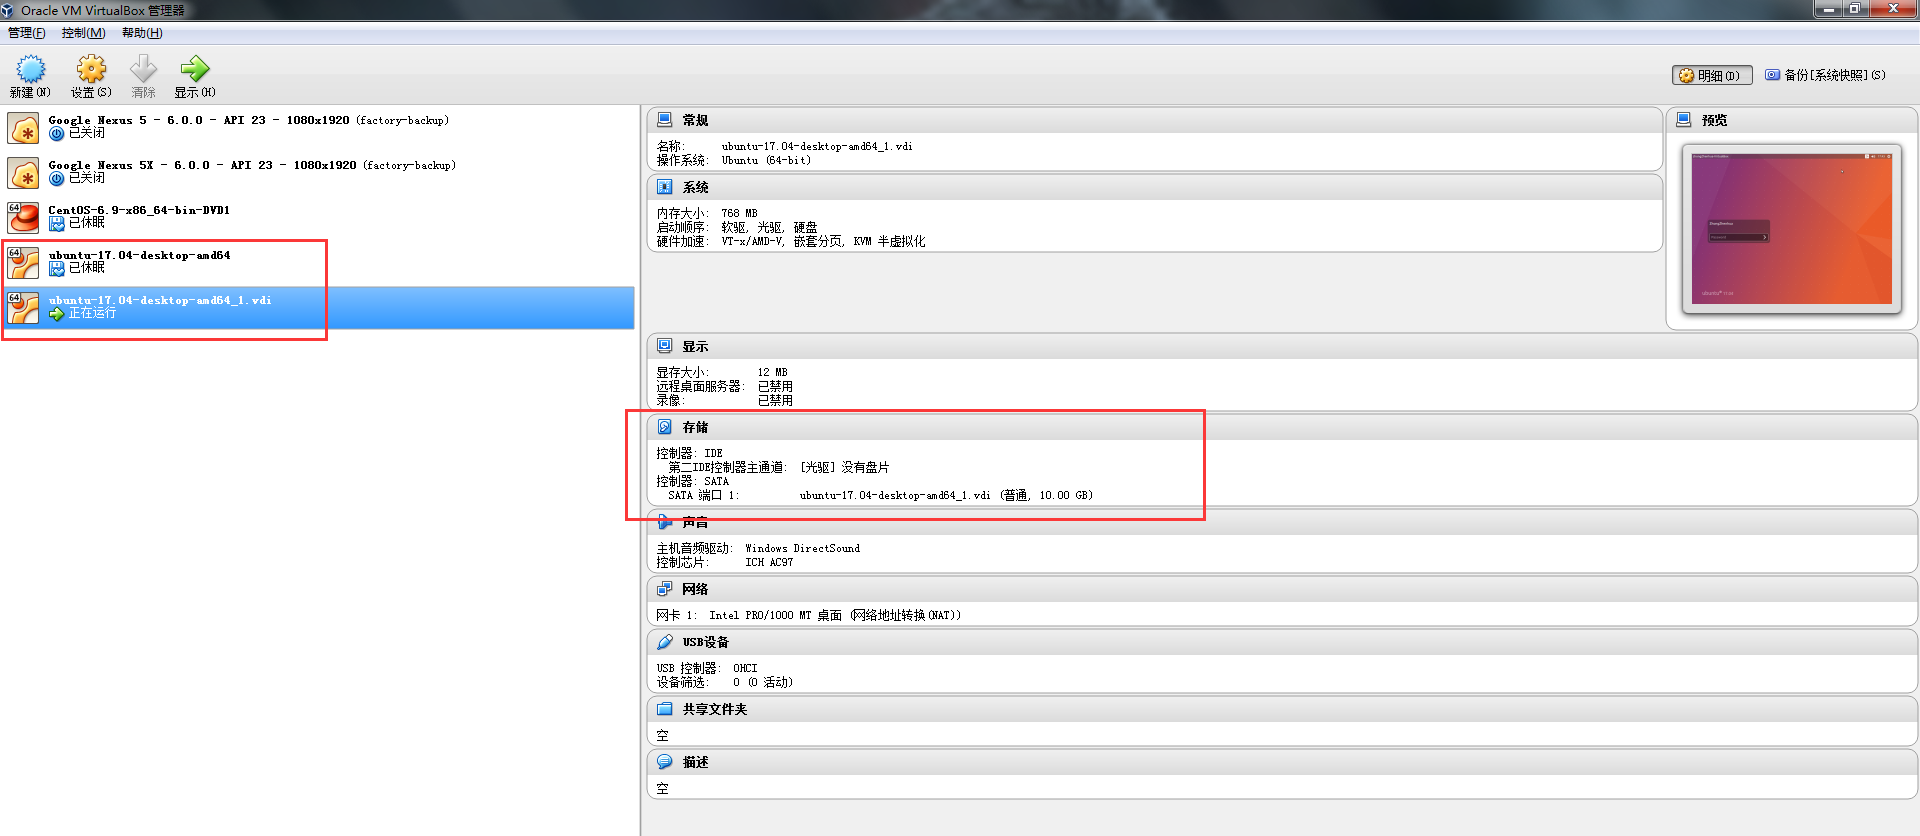
利用Virtual Box的虚拟机克隆功能将刚刚那个linux系统克隆一份作为slave,并修改其IP为192.168.0.110。
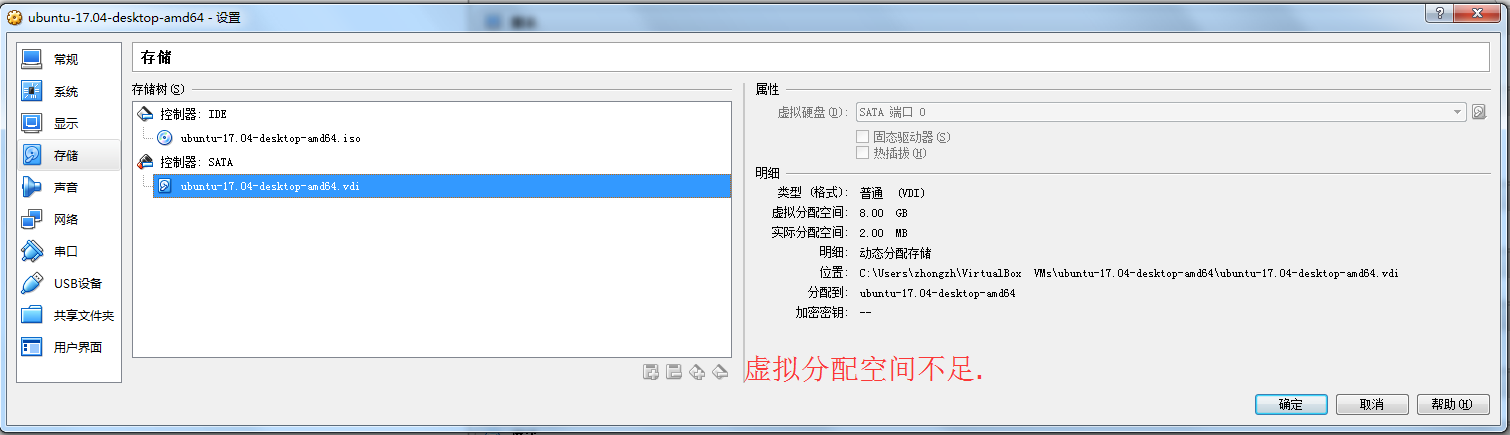
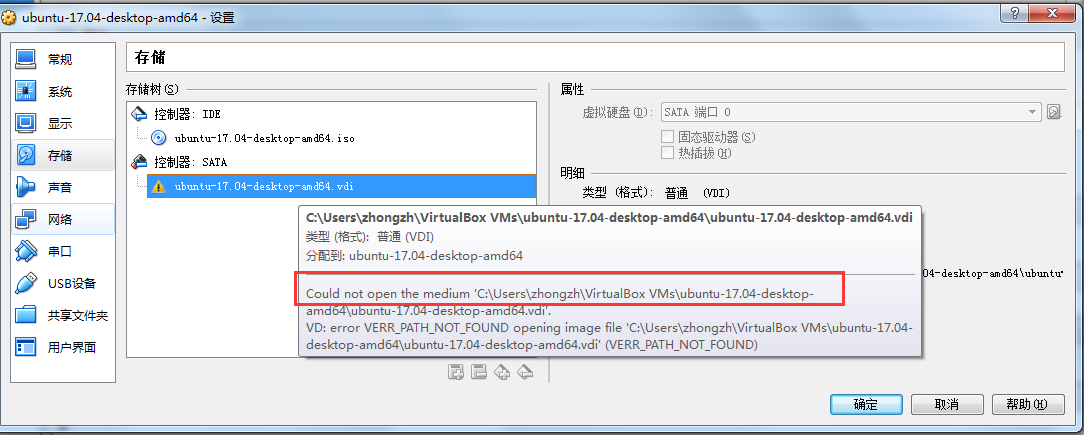
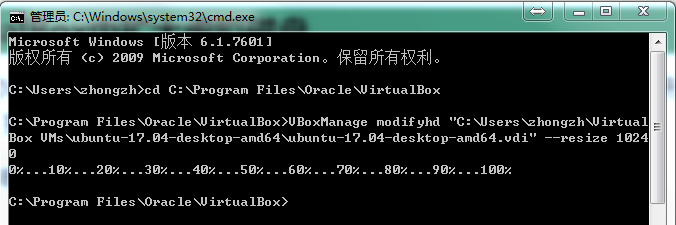
可以通过Vritualbox自带的一个命令行工具解决,UI上没有提供对应的解决方案
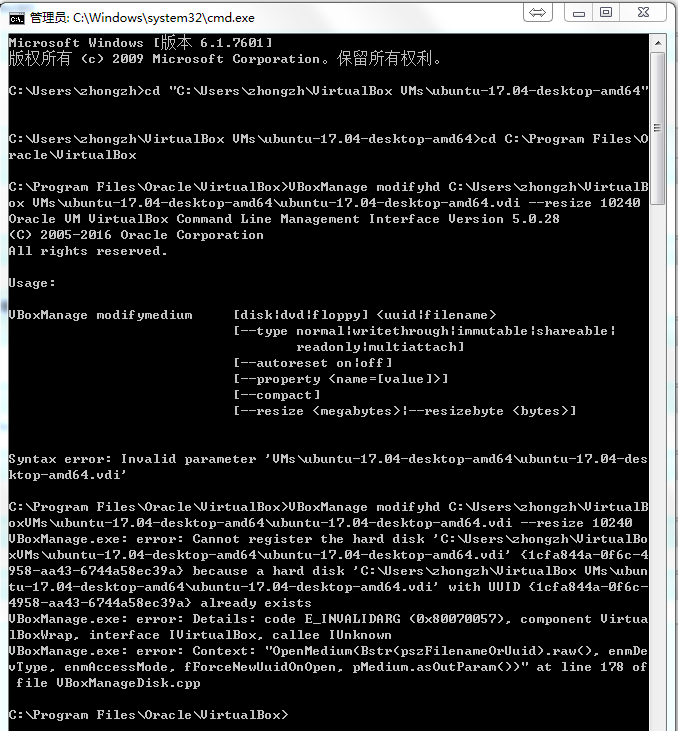
1.定位到Vritualbox的安装目录,不能用全路径的方式直接执行该命令行
2.执行VBoxManage.exe clonevdi "C:\Users\zhongzh\VirtualBox VMs\ubuntu-17.04-desktop-amd64\ubuntu-17.04-desktop-amd64.vdi" "C:\Users\zhongzh\VirtualBox VMs\ubuntu-17.04-desktop-amd64\ubuntu-17.04-desktop-amd64_1.vdi"
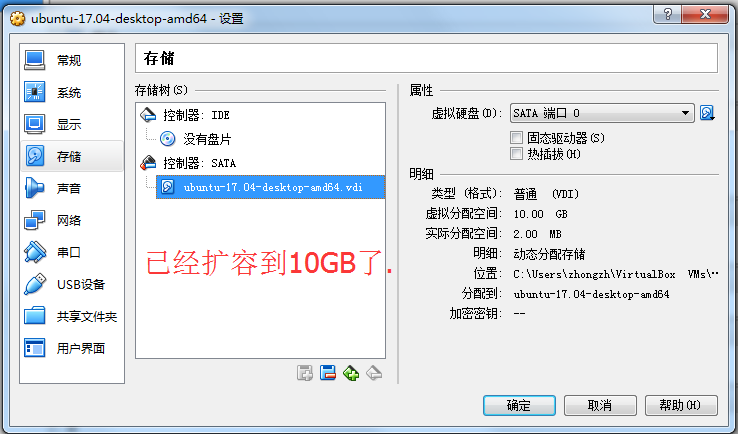
执行过程,大概就是这样了,原本一个10G的vdi,几分钟就克隆完了
C:\Program Files\Oracle\VirtualBox>VBoxManage.exe clonevdi "C:\Users\zhongzh\Vir
tualBox VMs\ubuntu-17.04-desktop-amd64\ubuntu-17.04-desktop-amd64.vdi" "C:\Users
\zhongzh\VirtualBox VMs\ubuntu-17.04-desktop-amd64\ubuntu-17.04-desktop-amd64_1.
vdi"
0%...10%...20%...30%...40%...50%...60%...70%...80%...90%...100%
Clone medium created in format 'VDI'. UUID: 4e5b286e-3d15-45eb-99fe-f48f9f6062f2


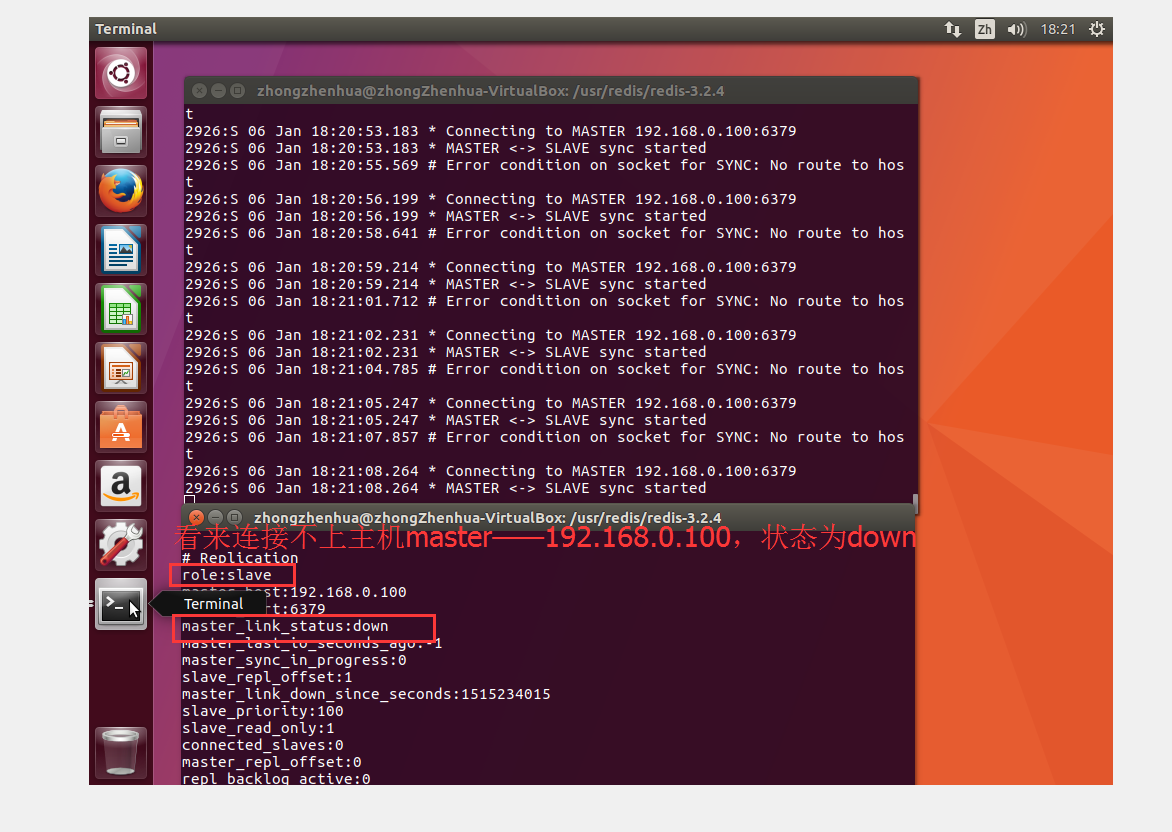

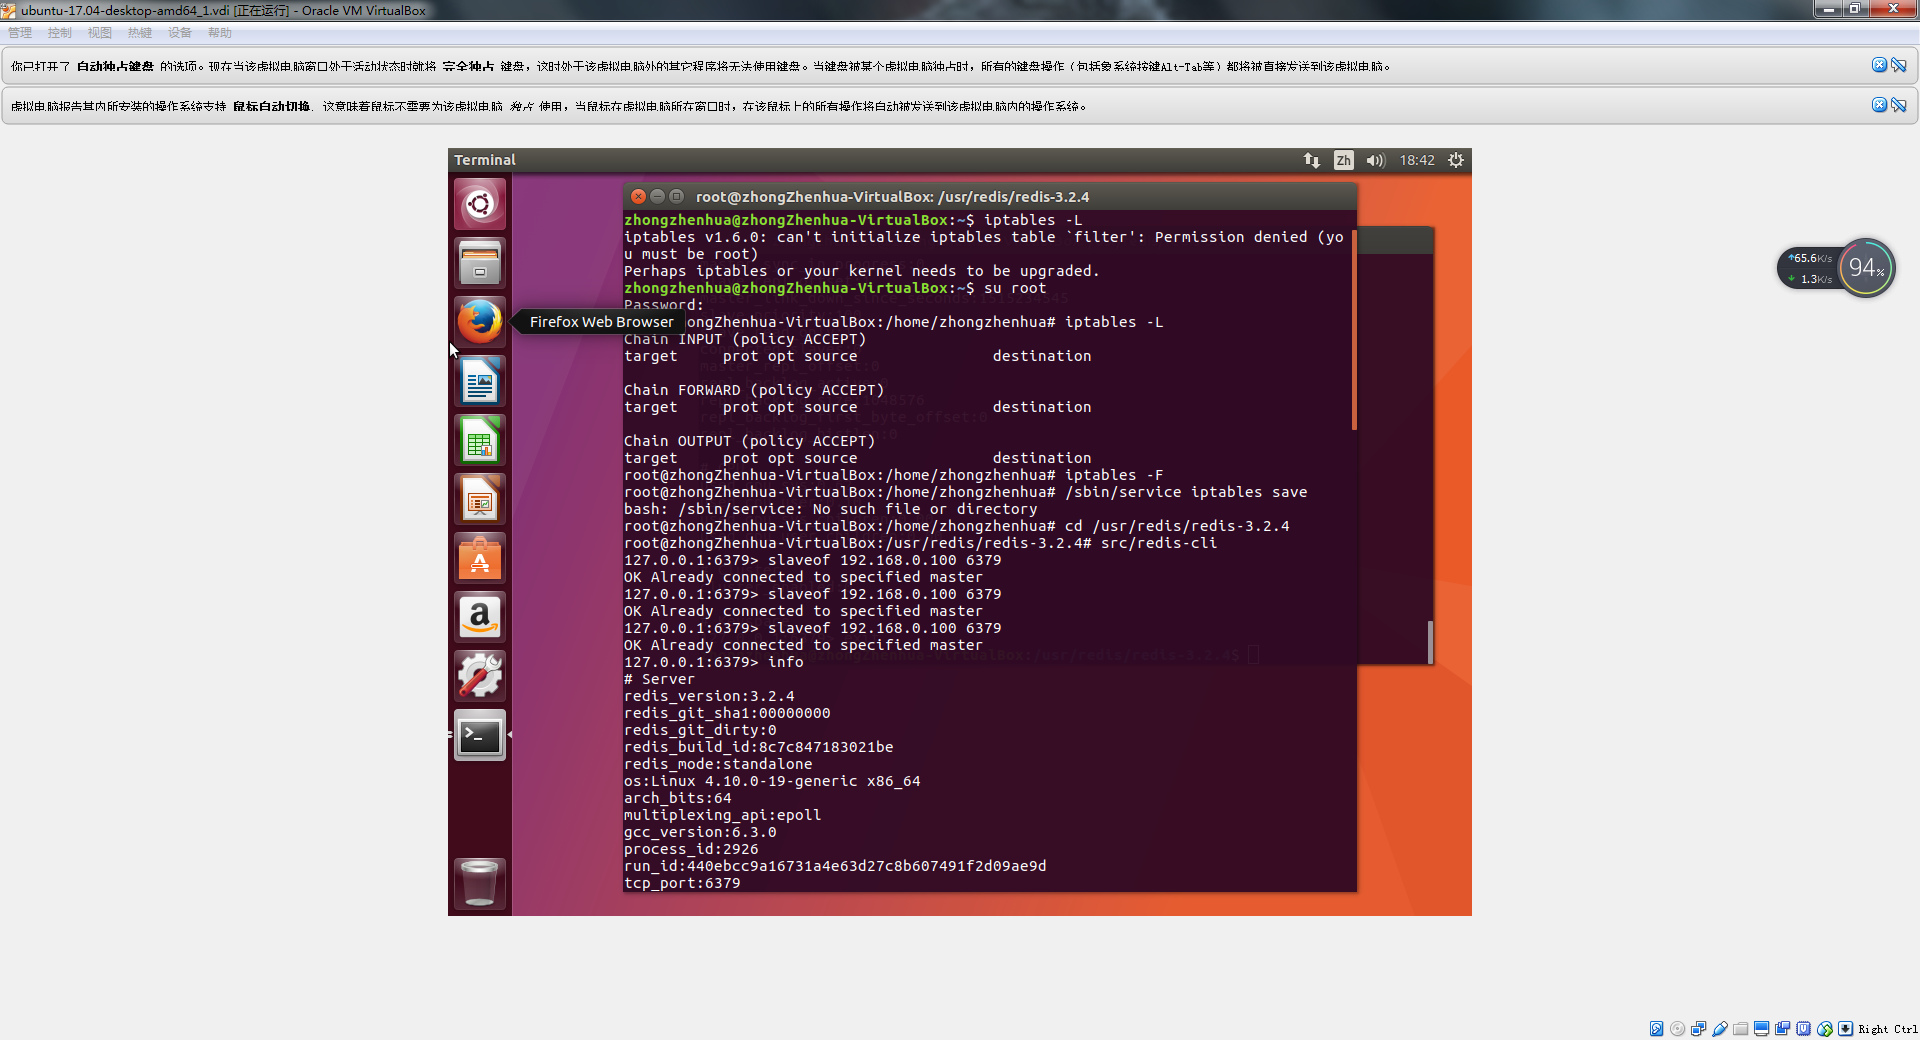
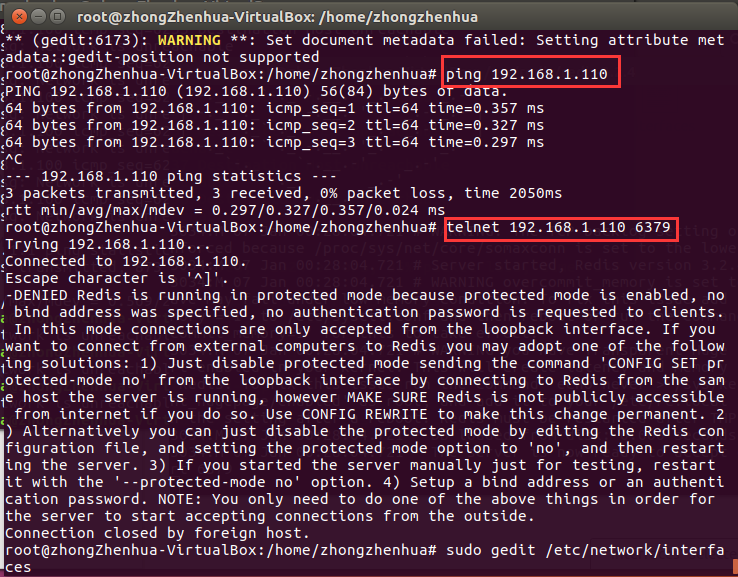
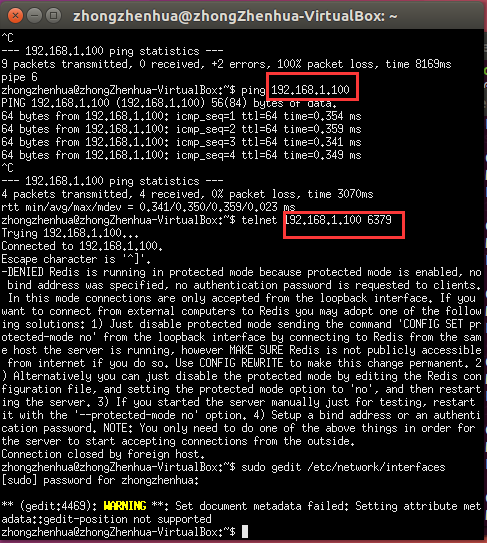
应该是网络问题,因为master和slave都ping不通宿主机,调试一下网络

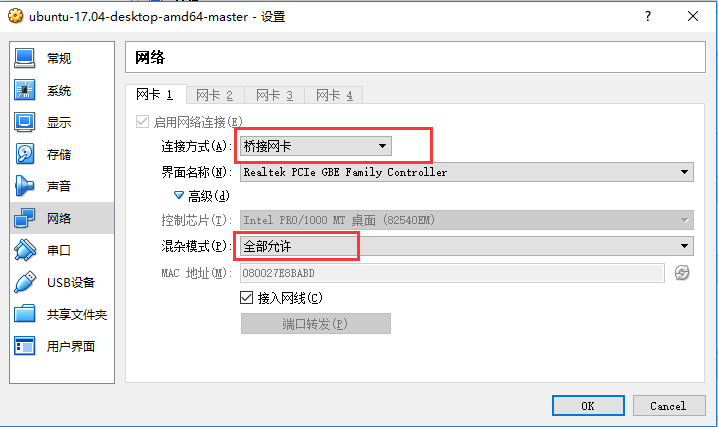

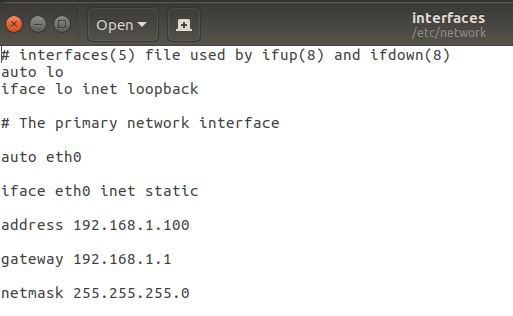
修改master和slave的网络配置文件

然后master和slave就可以互相ping和telnet通了
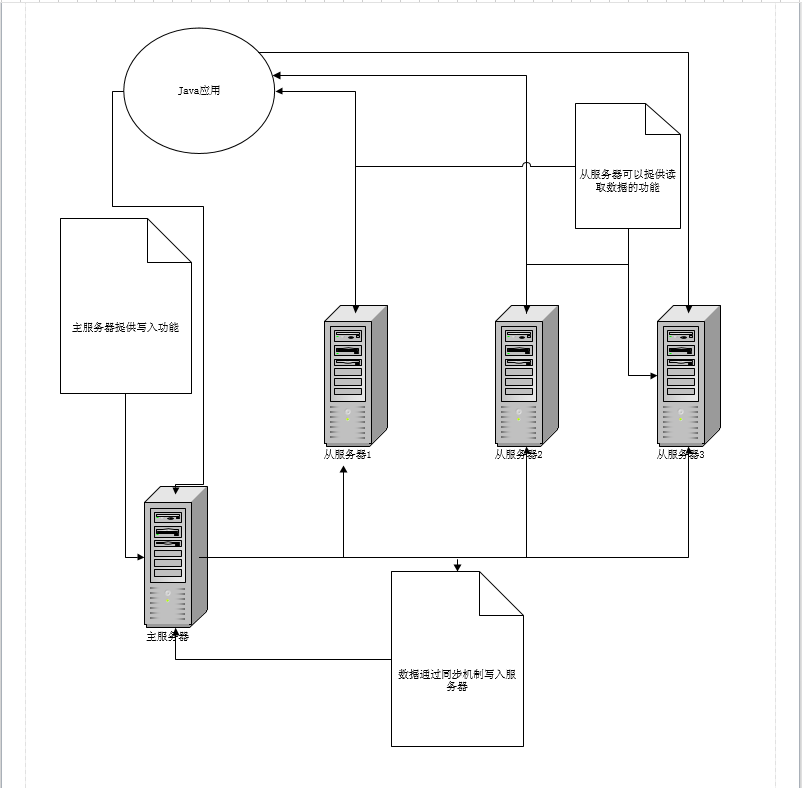
20.4.3 Redis主从同步过程
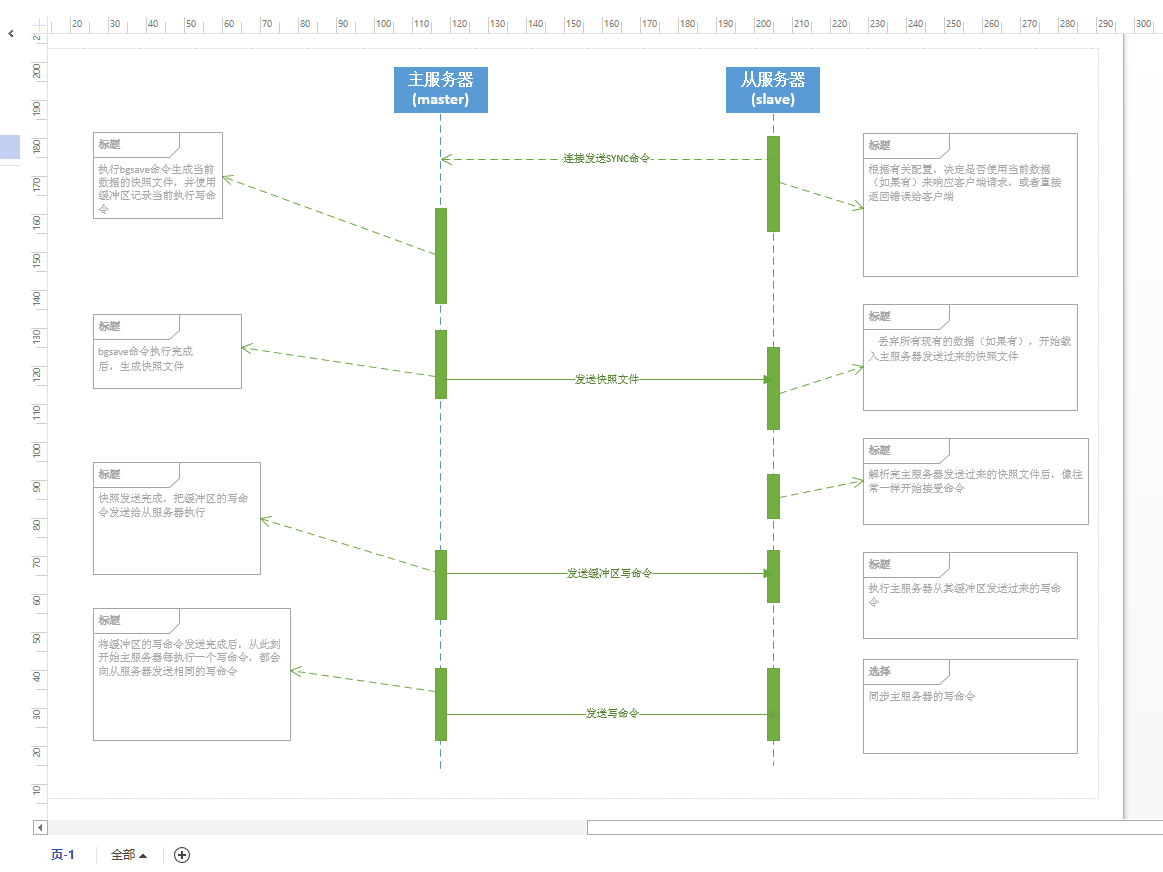
多从机同步机制,如图20-4所示。

图20-4 多从机同步机制
20.5 哨兵(Sentinel)模式
20.5.1 哨兵模式概述
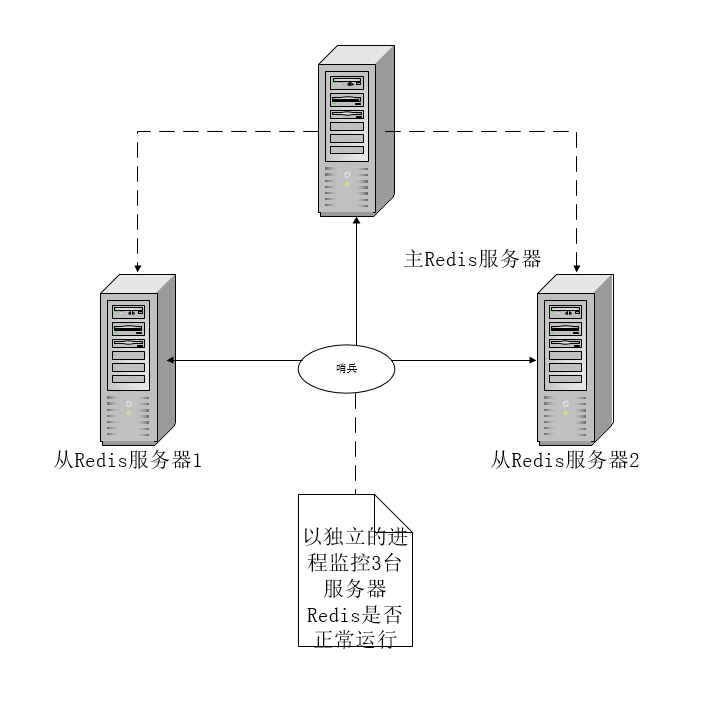
图20-5 Redis哨兵
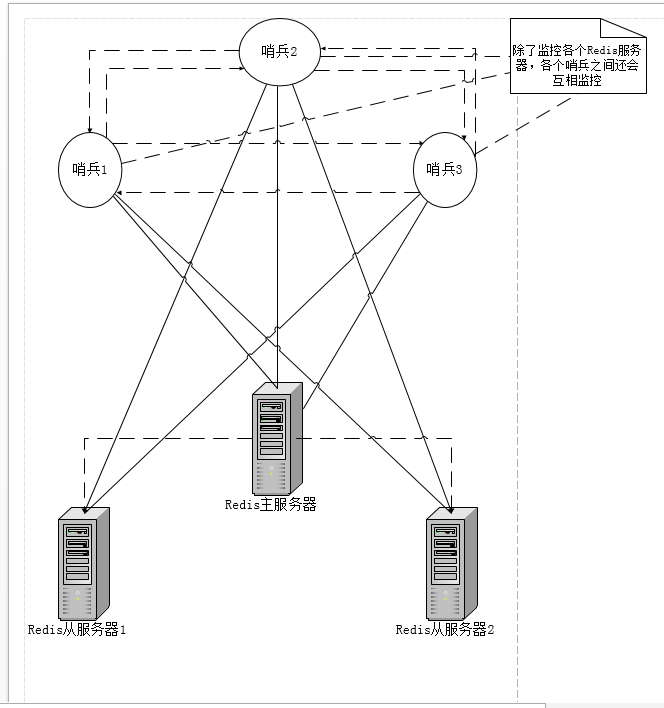
图20-6 多哨兵监控Redis
20.5.2 搭建哨兵模式
20.5.3 在Java中使用哨兵模式
20.5.4 哨兵模式的其他配置项


