
Python----Pytest 单元测试框架
1.说明
官方文档:https://docs.pytest.org/en/stable/index.html
pip install pytest #使用pip安装pytest库
目录:
1.说明
2.pytest框架约束详解
3.pytest数据驱动
4.pytest fixture scoop 定义不同域执行前后需执行的方法
5.获取pytest执行状态,根据状态执行不同的方法
2.pytest运行状态
3.pytest框架约束详解
在pytest框架中,有如下约束:
(1)在单测文件中,方法名称以 test 开头的方法使用pytest可以运行
(2)在单测文件中,测试类以 Test 开头,并且不能带有 init 方法(注意:定义class时,需要以T开头,不然pytest是不会去运行该class的)
(3)在单测文件中,可以包含一个或多个test_开头的函数。执行类里面的方法,类名以 Test 开头(看1,2的详解即可)
(4)在目录中,文件名以 test_xxx / Test_xxx 模式,可以使用pytest运行
pytest框架运行命令:
       pytest  1.py  -v                  # 使用pytest 执行时 添加 -v 参数,可以显示出详细的运行结果

       pytest 1.py   -s  -v              # -s 打印出测试用例中print语句

       pytest  1.py  -s  -v   --tb=no    # --tb=no :只显示关键的报错信息

       pytest  1.py::test_01  -s  -v     # 1.py::test_01 表示只执行1.py文件中test_01方法


       pytest   demo    -s  -v           # 运行demo目录下,所有满足条件的文件

       pytest   demo/1.py   -s  -v       # 运行demo目录下1.py文件
---------------------------------------------------------------------------------------------------------------------------------------------------------------------------------------------------
(1)在单测文件中,方法名称以 test 开头的方法使用pytest可以运行 详解
"""
   第十八节课内容 : python类-多态,pytest框架
       1.类-多态
       2.pytest 框架
"""

# 当前文件 1.py
# 2.pytest框架
# 在单测文件中,方法名称以 test  开头的方法使用pytest可以运行

def test_01():  # test开头,pytest可运行
    assert 1 == 1


def test():  # test开头,pytest可运行
    assert 1 == 1


def Test():
    assert 1 == 1


def a():
    assert 1 == 1
def b_test():
    assert 1 == 1
使用pytest运行,运行结果:

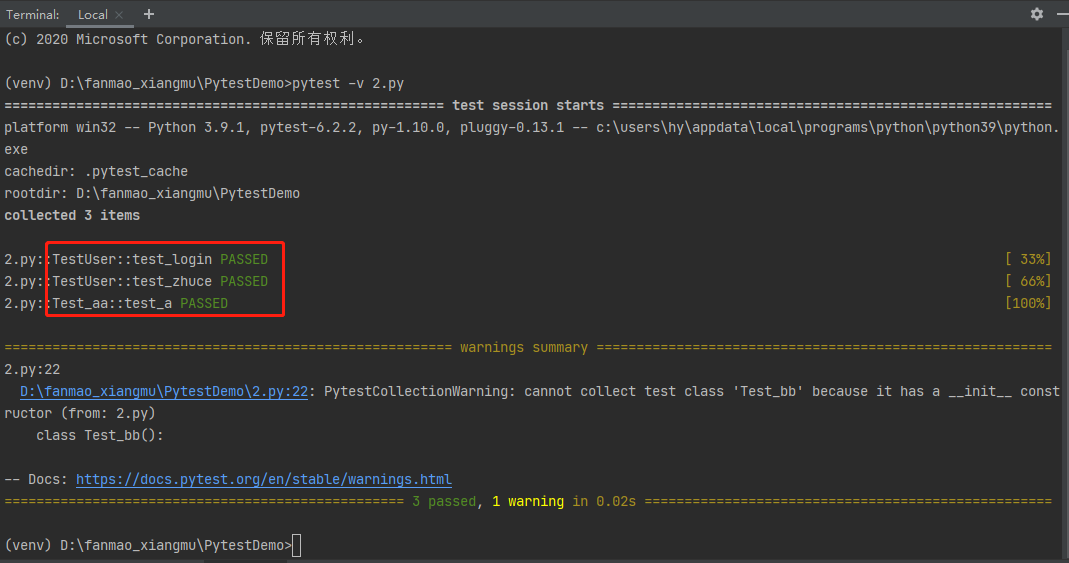
(2)在单测文件中,测试类以 Test 开头,并且不能带有 init 方法(注意:定义class时,需要以T开头,不然pytest是不会去运行该class的) 详解
# 在类中使用pytest
# 在单测文件中,测试类以 Test 开头,并且不能带有 init 方法(注意:定义class时,需要以T开头,不然pytest是不会去运行该class的)

class TestUser:   # 类以 Test 开头,pytest可运行
    # 普通方法
    def get_user_info(self):
        assert 1 == 1

    # 测试方法
    def test_login(self):   # 方法以 test 开头,pytest可运行
        assert 1 == 1

    def test_zhuce(self):   # 方法以 test 开头,pytest可运行
        assert 1 == 1


class Test_aa():   # 类以 Test 开头,pytest可运行
    def test_a(self):   # 方法以 test 开头,pytest可运行
        assert 1 == 1


class Test_bb():  # 类中有init 方法,整个类都不能运行
    def __init__(self):
        assert 1 == 1

    def test_b(self):
        assert 1 == 1


class test222:    # 类以 Test 开头,pytest可运行 ;以test开头则不能运行
    def test_c(self):
        assert 1 == 1
使用pytest运行,运行结果:
(4)在目录中,文件名以 test_xxx 模式,可以使用pytest运行
每个文件中,均定义了一个,pytest可运行的方法

使用pytest运行,运行结果: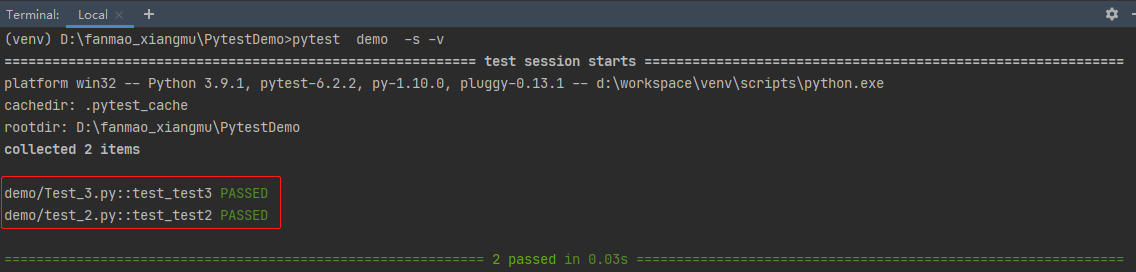
4.pytest数据驱动
# 当前文件 5.py
# 3.pytest_数据驱动

test_data = [
    ('test1','123456'),
    ('','123456'),
    ('!@@#$%^','123456'),
    ('test1','#$%^&*'),
    ('','')
]
import pytest
class TestUser:
    @pytest.mark.parametrize('name,pwd',test_data)
    def test_login(self,name,pwd):
        print(f'登陆系统~~~name={name} ,pwd={pwd}')
使用pytest运行,运行结果:

5.pytest fixture scoop 定义不同域执行前后需执行的方法
设置fixture 的scope ,官方文档地址:https://docs.pytest.org/en/stable/fixture.html#fixtures
在执行自动化脚本的时候,有时需要在执行所有的用例之前或者所有的用例之后要进行某些操纵。比如:在运行所有的用例之前需要对数据库进行恢复操作。
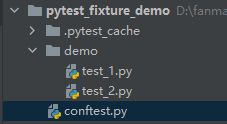
在项目的根目录下创建 conftest.py , pytest 在运行的时候会自动加载此文件中定义的方法。
实战:(点击下载实战代码)
# test_1.py 文件

def test_noe():
    print('----noe方法----')

def test_noe2():
    print('----noe2方法----')


class Test_A:
    def test_a1(self):
        print('----a1方法----')

    def test_a2(self):
        print('----a2方法----')


class Test_B:
    def test_b1(self):
        print('----b1方法----')
|
# test_2.py 文件


def test_fir():
    print('----fir方法----')


class Test_C:
    def test_y1(self):
        print('----y1方法----')
|
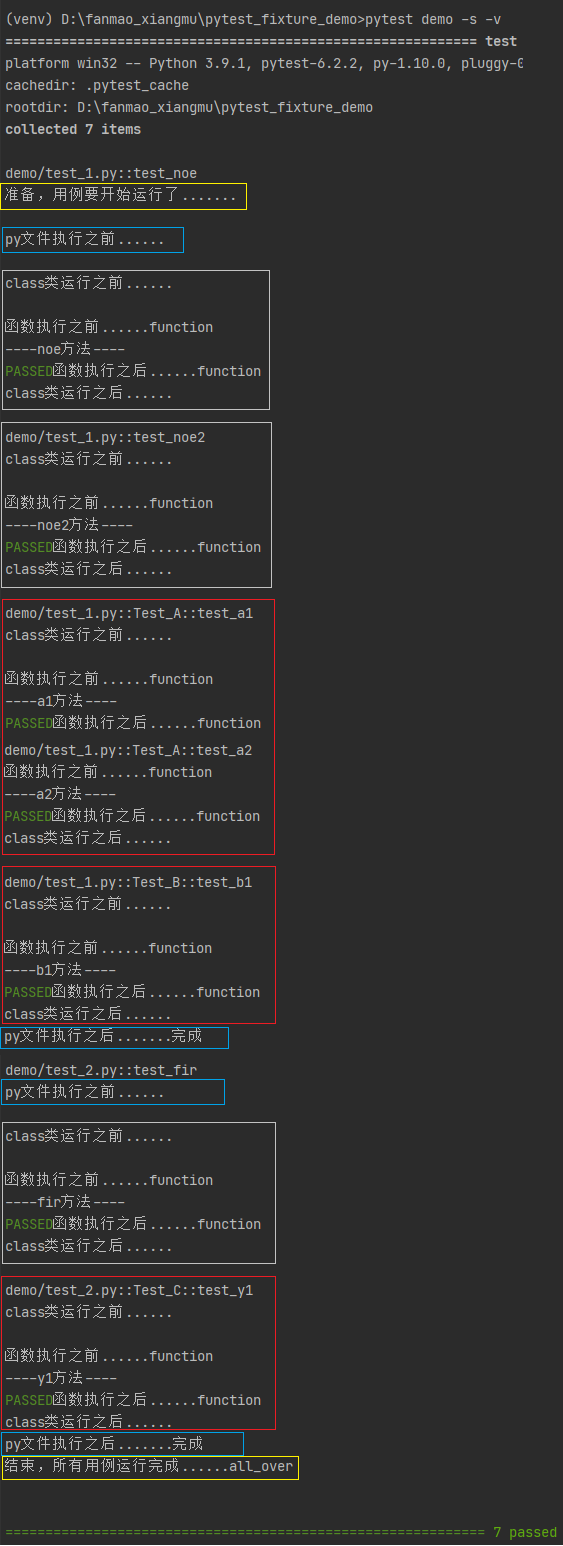
# pytest配置文件 conftest.py 文件 import pytest ''' scope='session' 指定定义的方法执行域为所有用例运行之前 autouse=True 运行该方法,不写的话,方法不会执行 ''' @pytest.fixture(scope='session',autouse=True) def session_A(): # 定义所以用例运行之前的操作...... print('\n准备,用例要开始运行了.......') yield # 定义所以用例运行之后的操作...... print('结束,所有用例运行完成......all_over') ''' scope='module' 指定定义的方法执行域为所有py文件运行之前 autouse=True 运行该方法 ''' @pytest.fixture(scope='module',autouse=True) def module_B(): print('\npy文件执行之前......') yield print('py文件执行之后.......完成') ''' scope='class' 指定定义的方法执行域为所有class类运行之前 autouse=True 运行该方法 ''' @pytest.fixture(scope='class',autouse=True) def class_C(): print('\nclass类运行之前......') yield print('class类运行之后......') ''' scope='function' 指定定义的方法执行域为所有def函数运行之前 autouse=True 运行该方法 ''' @pytest.fixture(scope='function',autouse=True) def function_D(): print('\n函数执行之前......function') yield print('函数执行之后......function') |
运行结果:
6.获取pytest执行状态,根据状态执行不同的方法
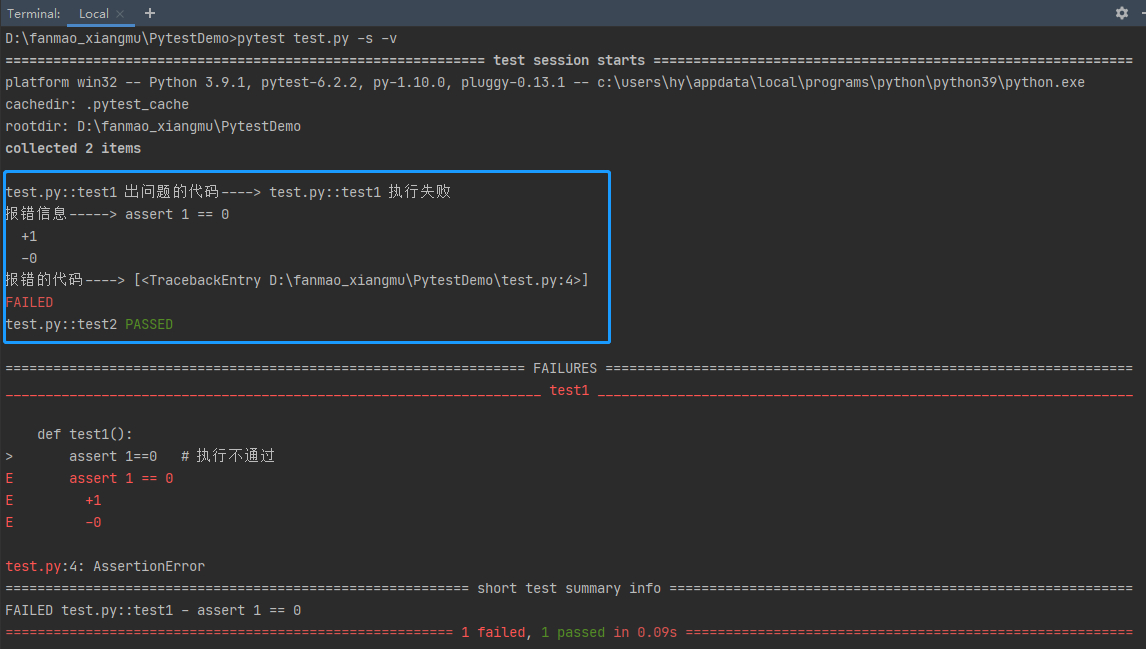
# test.py 文件

def test1():
    assert 1==0   # 执行不通过

def test2():
    assert 1==1   # 执行通过
# pytest 的配置文件 conftest.py
import pytest
from _pytest.reports import TestReport
from _pytest.runner import CallInfo
from pluggy.callers import _Result
from py._code.code import ExceptionInfo

# 获取测试结果报错信息和报错代码
# 注意:方法名固定
@pytest.hookimpl(tryfirst=True, hookwrapper=True)
def pytest_runtest_makereport(item, call:CallInfo):
    outcome:_Result = yield
    # 获取测试结果,通过 call 来访问到具体的报错
    testreport:TestReport = outcome.get_result()
    if testreport.when == 'call' and testreport.outcome == 'failed':
        print('出问题的代码---->',testreport.nodeid, '执行失败')
        if call.when == 'call':
            # print(call.excinfo)
            excinfo: ExceptionInfo = call.excinfo
            # 报错信息
            print('报错信息----->',excinfo.value)
            # 报错的代码
            print('报错的代码---->',excinfo.traceback)
- when='setup' 表示用例执行之前
- when='call' 表示用例执行之中
- when='teardown' 表示用例执行之后
- outcome='passed' 表示执行结果(当前结果:通过)
运行结果:
优化conftest.py
增加 每个测试用例执行完成之后,如果执行失败截图,截图的名称为测试用例名称+时间格式 的相关处理
from appium import webdriver
import pytest
import os, time
chromedriver= os.path.join(os.path.dirname(os.path.abspath(__file__)),'drivers/chrome/75.0.3770.140/chromedriver.exe')

# scope='session' 标记的方法执行域为---->所有测试用例运行之前/之后 运行的方法
@pytest.fixture(scope='session',autouse=True)
def driver():
    desired_caps = {
        'platformName': 'Android',                    # 测试Android系统
        'platformVersion': '7.1.2',                   # Android版本 可以在手机的设置中关于手机查看
        'deviceName': '127.0.0.1:62001',              # adb devices 命令查看  设置为自己的设备
        'automationName': 'UiAutomator2',             # 自动化引擎
        'noReset': False,                             # 不要重置app的状态
        'fullReset': False,                           # 不要清理app的缓存数据
        'chromedriverExecutable': chromedriver,       # chromedriver 对应的绝对路径
        'appPackage': "org.cnodejs.android.md",       # 应用的包名
        'appActivity': ".ui.activity.LaunchActivity"  # 应用的活动页名称(appium会启动app的加载页)
    }
    driver = webdriver.Remote('http://127.0.0.1:4723/wd/hub', desired_capabilities=desired_caps)
    driver.implicitly_wait(5)  # 全局的隐式等待时间
    yield driver  # 将driver 传递出来
    driver.quit()


# 该方法是用来获取测试用例执行的结果(passed / FAILED)
@pytest.hookimpl(tryfirst=True,hookwrapper=True)
def pytest_runtest_makereport(item, call):
    outcome = yield
    rep = outcome.get_result()               # 获取用例的执行结果
    print('用例的执行结果rep---->',rep)
    setattr(item, "rep_" + rep.when, rep)    # 将执行结果保存到 item 属性中 , req.when 执行时


# scope='function' 标记的方法执行域为---->每个测试用例运行之前/之后 运行的方法
@pytest.fixture(scope='function',autouse=True)
def case_run(driver:webdriver,request):   # request 为 pytest_runtest_makereport 方法获取到的执行结果(固定参数和用法)
    yield
    # 每个测试用例执行完成之后,如果执行失败截图,截图的名称为测试用例名称+时间格式
    if request.node.rep_call.failed:
        screenshots = os.path.join(os.path.dirname(os.path.abspath(__file__)), 'screenshots')
        if not os.path.exists(screenshots):
            os.mkdir(screenshots)
        casename: str = request.node.nodeid
        # print("执行测试用例的名字:", casename)
        # 测试用例的名字很长 testcases/test_ddt/test_ddt_login.py::TestDdtLogin::test_login[....]
        # 对字符串进行截取,截取之后显示为  test_ddt_login-TestDdtLogin
        casename = casename[casename.rfind('/')+1:casename.rfind('::')].replace('.py::','-')
        filename = casename + '-' + time.strftime('%Y_%m_%d-%H_%M_%S')  +".png"
        screenshot_file = os.path.join(screenshots, filename)
        # 保存截图
        driver.save_screenshot(screenshot_file)

 浙公网安备 33010602011771号