

安装Elasticsearch和head与cerebro
1 2 3 4 5 6 7 8 9 10 11 12 13 14 15 16 17 18 19 20 21 22 23 24 25 26 27 28 29 30 31 32 33 34 35 36 37 38 39 40 41 42 43 44 45 46 47 48 49 50 51 52 53 54 55 56 57 58 59 60 61 62 63 64 65 66 67 68 69 70 71 72 73 74 75 76 77 78 79 80 81 82 83 84 85 86 87 88 89 90 91 92 93 94 95 96 97 98 99 100 101 102 103 104 105 106 107 108 109 110 111 112 113 114 115 116 117 118 | 说明:es7版本以后,软件包的有带和不带jdk版本,都需要配置环境变量,有jdk版本路径:/usr/share/elasticsearch/jdk 无jdk版本: 需要配置环境变量。1.安装JDKopenjdk 安装方法方式1:直接使用 yum 安装 openjdk yum install java-1.8.0*方式2:本地安装在 oracle 官网下载 rpm 安装包:yum localinstall jdk-8u92-linux-x64.rpm方式3:下载二进制包自定义 profile 环境变量:下 载 地 址 : http://www.oracle.com/technetwork/java/javase/downloads/jdk8-downloads-2133151.html# tar xvf jdk-8u121-linux-x64.tar.gz -C /usr/local/# ln -sv /usr/local/jdk1.8.0_121 /usr/local/jdk# ln -sv /usr/local/jdk/bin/java /usr/bin/# vim /etc/profileexport HISTTIMEFORMAT="%F %T `whoami` "export JAVA_HOME=/usr/local/jdkexport CLASSPATH=.:$JAVA_HOME/jre/lib/rt.jar:$JAVA_HOME/lib/dt.jar:$JAVA_HOME/lib/tools.jarexport PATH=$PATH:$JAVA_HOME/bin# source /etc/profile2.下载解压即可,修改配置文件#cat /etc/elasticsearch/elasticsearch.yml |grep -v "^#"cluster.name: ZZHZ #集群名称node.name: node-1 #集群节点名称 node.name: ${HOSTNAME} ,使用变量名,要添加DNS解析。path.data: /usr/local/es/data #数据文件路径,要es用户权限。path.logs: /usr/local/es/data #日志文件路径,要es用户权限。bootstrap.memory_lock: true #锁定物理内存地址,防止elasticsearch内存被交换出去,也就是避免es使用swap交换分区network.host: 0.0.0.0 #ip地址http.port: 9200 #开放端口号#gateway.recover_after_nodes: 2 #一个集群中的 N 个节点启动后,才允许进行数据恢复处理,默认是 1, 此数为集群的N/2+1(单机部署不用)#discovery.zen.ping.unicast.hosts: ["192.168.15.11", "192.168.15.12"] #2.x 5.x 6.x 配置节点发现列表#discovery.seed_hosts: ["192.168.0.31","192.168.0.32", "192.168.0.33"] #设置集群节点地址,(单机部署不用)。cluster.initial_master_nodes: ["node-1"] #指定主节点列表:IP 、node.name名称 、变量名[" ${HOSTNAME} "],有空格.单机只写本节点。群集全部节点都要写。action.destructive_requires_name: true #设置是否可以通过正则或者_all 删除或者关闭索引库,默认 true 表示必须需要显式指定索引库名称,生产环境建议设置为 true,删除索引库的时候必须指定,否则可能会误删索引库中的索引库。http.cors.enabled: true #打开跨域访问,head 插件需要这打开这两个配置http.cors.allow-origin: "*"3.DNS解析(不强制),如果配置文件中名称最好添加。# cat /etc/hosts192.168.80.100 localhost7A.localdomain node-1192.168.80.110 localhost7B.localdomain node-2192.168.80.120 localhost7C.localdomain node-3 4.设置JVM堆内存大小,根据服务器内存大小进行设置,最好不要超过总内存的一半(不强制)#cat /etc/elasticsearch/jvm.options ## JVM configuration# Xms represents the initial size of total heap space# Xmx represents the maximum size of total heap space-Xms2g-Xmx2g5.设置资源限制(文件句柄数)vim /etc/security/limits.conf* soft nofile 65536* hard nofile 65536* soft nproc 4096* hard nproc 81926.限制一个进程可以拥有的VMA(虚拟内存区域)的数量cat /etc/sysctl.conf vm.max_map_count=2621447.添加用户和修改权限useradd eschown -R es:es /usr/local/elasticsearch 8.运行ES, 需要es用户运行。各服务器创建数据和日志目录并修改目录权限为 es:# mkdir /usr/local/elasticsearch/{data,logs}# su es # cd /usr/local/elasticsearch/bin/# ./local/elasticsearch -d9。测试:[root@localhost7A elasticsearch-7.6.1]# curl http://192.168.80.100:9200{ "name" : "node-1", "cluster_name" : "ZZHZ", "cluster_uuid" : "6ShxRW5lQbae2phub5J4eQ", "version" : { "number" : "7.6.1", "build_flavor" : "default", "build_type" : "tar", "build_hash" : "aa751e09be0a5072e8570670309b1f12348f023b", "build_date" : "2020-02-29T00:15:25.529771Z", "build_snapshot" : false, "lucene_version" : "8.4.0", "minimum_wire_compatibility_version" : "6.8.0", "minimum_index_compatibility_version" : "6.0.0-beta1" }, "tagline" : "You Know, for Search"}#健康状态[root@localhost7A elasticsearch-7.6.1]# curl -XGET 'http://192.168.80.100:9200/_cluster/health?pretty=true'{ "cluster_name" : "ZZHZ", "status" : "green", "timed_out" : false, "number_of_nodes" : 1, "number_of_data_nodes" : 1, "active_primary_shards" : 0, "active_shards" : 0, "relocating_shards" : 0, "initializing_shards" : 0, "unassigned_shards" : 0, "delayed_unassigned_shards" : 0, "number_of_pending_tasks" : 0, "number_of_in_flight_fetch" : 0, "task_max_waiting_in_queue_millis" : 0, "active_shards_percent_as_number" : 100.0} |
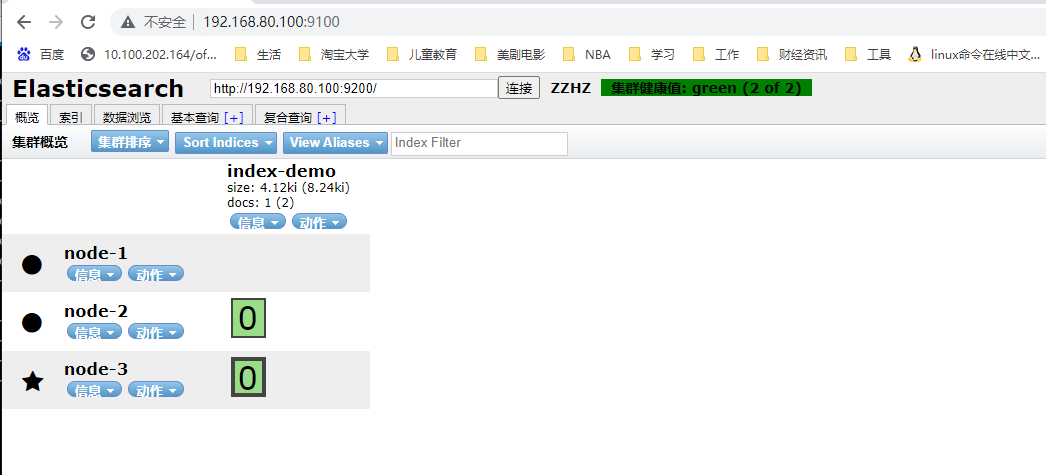
安装 elasticsearch 插件之 head,默认为9100

Head插件是Elasticsearch的图形化界面工具,通过此插件可以很方便的对数据进行增删改查等数据交互操作。在Elasticsearch5.x版本以后,
head插件已经是一个独立的Web App了,所以不需要和Elasticsearch进行集成。可以将Head插件安装到任何一台机器上,我就布置在我的第一个节点了。

由于Head插件本质上是一个Node.js的工程,因此需要安装Node.js,使用npm工具来安装依赖的包。
NPM的全名叫Node Package Manager,是随NodeJS一起安装的包管理和分发工具,方便让JavaScript开发者下载、安装、上传以及管理已经安装的包。
在 elasticsearch 5.x 版本以后不再支持直接安装 head 插件,而是需要通过启动一个服务方式,git 地址:https://github.com/mobz/elasticsearch-head

Elasticsearch 在 5.0 版本后,Elasticsearch-head 插件需要作为独立服务进行安装,需要使用npm工具(NodeJS的包管理工具)安装。
安装 Elasticsearch-head 需要提前安装好依赖软件 node 和 phantomjs。
node:是一个基于 Chrome V8 引擎的 JavaScript 运行环境。
phantomjs:是一个基于 webkit 的JavaScriptAPI,可以理解为一个隐形的浏览器,任何基于 webkit 浏览器做的事情,它都可以做到。


1 下载Node.js和NPM工具,
直接yum install -y nodejs会提示找不到nodejs这个模块,因此:安装nodesource后再执行yum install -y nodejs, cetnos7以下方法不行。
curl --silent --location https://rpm.nodesource.com/setup_8.x | sudo bash -
或
curl --silent --location https://rpm.nodesource.com/setup_10.x | sudo bash -
然后

yum -y install nodejs  npm

2 下载并安装Head插件
yum install -y git
git clone git://github.com/mobz/elasticsearch-head.git

3 设置配置文件
进去elasticsearch-head/_site/app.js文件,设置ES集群中其中的一个es服务的IP地址: 修改如下配置
 app.App = ui.AbstractWidget.extend({
                defaults: {
                        base_uri: null
                },
                init: function(parent) {
                        this._super();
                        this.prefs = services.Preferences.instance();
                        this.base_uri = this.config.base_uri || this.prefs.get("app-base_uri") || "http://192.168.80.120:9200"; 设置ES的IP
                        if( this.base_uri.charAt( this.base_uri.length - 1 ) !== "/" ) {
                                // XHR request fails if the URL is not ending with a "/"
                                this.base_uri += "/";

4修改 elasticsearch 服务配置文件: 开启跨域访问支持,然后重启 elasticsearch 服务:
# vim /etc/elasticsearch/elasticsearch.yml
http.cors.enabled: true #开启支持跨域访问
http.cors.allow-origin: "*" #指定允许访问范围"

5. 安装NPM
npm config set registry=http://registry.npm.taobao.org/    //修改源地址为淘宝NPM镜像,因为默认NPM的官方源为https://registry.npmjs.org/。
国外下载速度会很慢,所以这里建议切换到淘宝的NPM镜像站点比较好。
cd elasticsearch-head
npm install     #npm install 安装时,可能会报 phantomjs-prebuilt@2.1.16安装失败。解决方法:# npm install phantomjs-prebuilt@2.1.16 - -ignore-scripts


6 启动服务,生成一个grunt进程,简而言之就是运行在node.js上面的任务管理器(task runner),其可以在任何语言和项目中自动化指定的任务,
可通过npm来安装Grunt。是一个很方便的构建工具,可以进行打包压缩、测试、执行等等的工作,6.0里的Head插件就是通过Grunt启动的。因此还需要安装一下Grunt:

cd /usr/local/docker/elasticsearch-head/
#npm run start & #后台启动服务

[root@localhost7A elasticsearch-7.6.1]# ps aux  | grep grunt
root       8072  0.0  0.5 655364 11032 pts/3    Sl   12月12   0:01 grunt


7.插入索引
#通过命令插入一个测试索引,索引为 index-demo,类型为 test。
curl -X PUT '192.168.80.100:9200/index-demo/test/1?pretty&pretty' -H 'content-Type: application/json' -d '{"user":"zhangsan","mesg":"hello world"}'

----------------------------其它说明---------------------------------------------
编译安装 node
#上传软件包 node-v8.2.1.tar.gz 到/opt
yum install gcc gcc-c++ make -y

cd /opt
tar zxvf node-v8.2.1.tar.gz

cd node-v8.2.1/
./configure
make && make install

安装 phantomjs
#上传软件包 phantomjs-2.1.1-linux-x86_64.tar.bz2 到/opt
tar jxvf phantomjs-2.1.1-linux-x86_64.tar.bz2 -C /usr/local/src/
cd /usr/local/src/phantomjs-2.1.1-linux-x86_64/bin
cp phantomjs /usr/local/bin
elasticsearch-plugin的插件安装,此方法很少用
elasticsearch 插件安装,
bin/elasticsearch-plugin install [plugin_name]

已安装查看列表
bin/elasticsearch-plugin list

插件卸载
bin/elasticsearch-plugin remove [pluginname]
yum安装elasticsearch
1.安装
yum install elasticsearch-7.6.1-x86_64.rpm

2.设置配置
vim /etc/elasticsearch/elasticsearch.yml


3.设置elasticsearch的JAVA_HOME,配置JDK(rpm包方式),或者在/usr/share/elasticsearch/jdk添加软件连接文件
#cat /etc/sysconfig/elasticsearch |grep "JAVA_HOME"
JAVA_HOME=/usr/java/jdk-11.0.6/

4.centos7需要修改systemd配置,否则启动会报错
/etc/systemd/system.conf
DefaultLimitNOFILE=65536
DefaultLimitNPROC=32000

5.vim /usr/lib/systemd/system/elasticsearch.service
DefaultLimitMEMLOCK=infinity
ERROR: bootstrap checks failed memory locking requested for elasticsearch process but memory is not locked
官网说明:elasticsearch官网建议生产环境需要设置bootstrap.memory_lock: true
官网的解释是:发生系统swapping的时候ES节点的性能会非常差,也会影响节点的稳定性。所以要不惜一切代价来避免swapping。swapping会导致Java GC的周期延迟从毫秒级恶化到分钟,
更严重的是会引起节点响应延迟甚至脱离集群。所以最好限制住elasticsearch占用的内存情况,可选少用swap
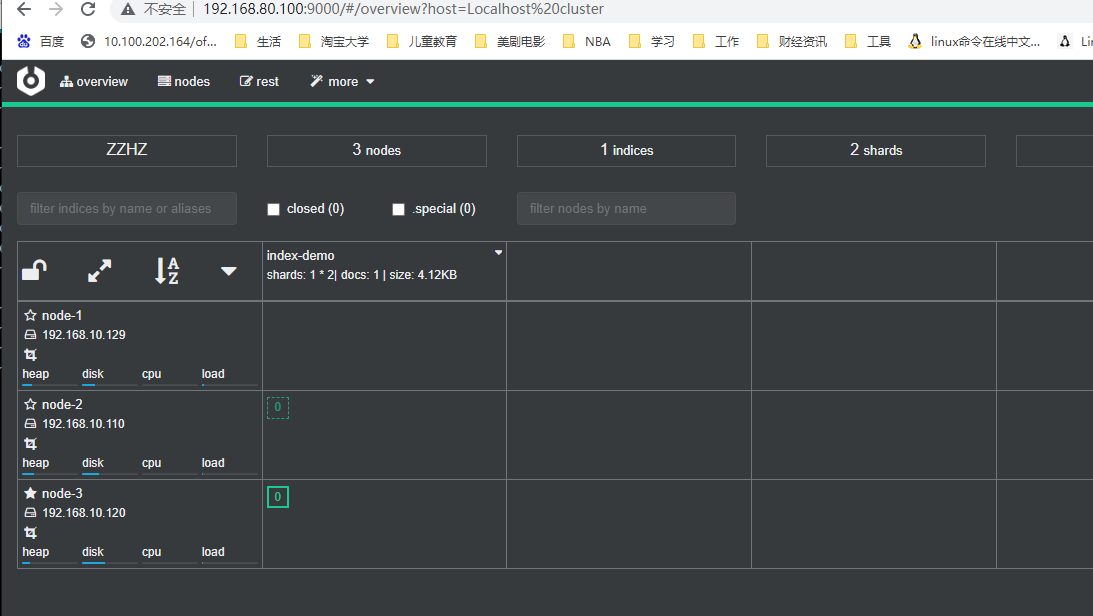
cerebro安装
新开源的 elasticsearch 集群 web 管理程序,需要 java1.8 或者更高版本,https://github.com/lmenezes/cerebro
tar xvf cerebro-0.8.5.tgz
cd cerebro-0.8.5/
pwd
/usr/local/src/cerebro-0.8.5

修改配置文件:
vim conf/application.conf
hosts = [
 {
 host = "http://172.31.0.201:9200"
 name = "magedu"
 # headers-whitelist = [ "x-proxy-user", "x-proxy-roles", "X-Forwarded-For" ]
 }


启动  注:cerebro默认监听的ip和端口为0.0.0.0:9000,如果要监听在指定的ip和端口可以使用以下方式启动
# ./bin/cerebro
# nohup bin/cerebro >> logs/application.log 2>&1 &
# nohup bin/cerebro -Dhttp.port=1234 -Dhttp.address=192.168.7.41 >> logs/application.log 2>&1 &
Docker安装Elasticsearch7.6.1、elasticsearch-head
1.安装Elasticsearch7.6.1
拉取镜像
docker pull elasticsearch:7.6.1

运行命令创建启动容器: discovery.type=single-node:单机学习直接添加该参数,表示单节点运行,避免启动的时候es的引导检查会报错
docker run -d --name es -p 9200:9200 -p 9300:9300 -e "discovery.type=single-node" elasticsearch:7.6.1

将配置文件、数据目录拷出来做挂载:
docker cp es:/usr/share/elasticsearch/config /usr/local/docker/elasticsearch/
docker cp es:/usr/share/elasticsearch/data/ /usr/local/docker/elasticsearch/


设置允许跨域访问,否则后面安装elasticsearch-head连接不上
#进入配置文件目录修改elasticsearch.yml
vim /usr/local/docker/elasticsearch/config/elasticsearch.yml
cluster.name: "docker-cluster"
network.host: 0.0.0.0
http.cors.enabled: true
http.cors.allow-origin: "*"


销毁容器,重新以挂载方式运行:docker rm -f es
#挂载配置文件
docker run -d --name es -p 9200:9200 -p 9300:9300 \
-v /usr/local/docker/elasticsearch/config/:/usr/share/elasticsearch/config/ \
-v /usr/local/docker/elasticsearch/data/:/usr/share/elasticsearch/data/ \
-e "discovery.type=single-node" \
elasticsearch:7.6.1


2.安装elasticsearch-head
拉取镜像
docker pull mobz/elasticsearch-head:5

运行容器
docker run -d --name es-head -p 9100:9100 mobz/elasticsearch-head:5

拷出容器的app.js、vendor.js,待会有用
docker cp es-head:/usr/src/app/_site/app.js /usr/local/docker/elasticsearch-head/

修改app.js
vim  /usr/local/docker/elasticsearch-head/app.js
...
this.base_uri = this.config.base_uri || this.prefs.get("app-base_uri") || "http://192.168.80.120:9200"; 设置ES的IP
...
# 销毁容器
docker rm -f es-head

#重新运行容器
docker run -d --name es-head -p 9100:9100   -v /usr/local/docker/elasticsearch-head/app.js:/usr/src/app/_site/app.js   mobz/elasticsearch-head:5


【推荐】国内首个AI IDE,深度理解中文开发场景,立即下载体验Trae
【推荐】编程新体验,更懂你的AI,立即体验豆包MarsCode编程助手
【推荐】抖音旗下AI助手豆包,你的智能百科全书,全免费不限次数
【推荐】轻量又高性能的 SSH 工具 IShell:AI 加持,快人一步
· Manus爆火,是硬核还是营销?
· 终于写完轮子一部分:tcp代理 了,记录一下
· 别再用vector<bool>了!Google高级工程师:这可能是STL最大的设计失误
· 单元测试从入门到精通
· 震惊!C++程序真的从main开始吗?99%的程序员都答错了