


fabric2.2安装使用文档
Fabirc2.2安装、使用文档
官方文档: https://hyperledger-fabric.readthedocs.io/en/release-2.2/write_first_app.html
参考文档: https://blog.csdn.net/shengsikandan/article/details/107656060
1、Fabric2.2环境安装
1.1、环境准备
1.1.1、Go语言
(1)安装必须的依赖
sudo yum install libtool libltdl-dev
(2)下载Go语言安装包,我的版本是:go1.14.6.linux-amd64.tar.gz
将压缩包上传到/usr/local下,解压。
cd /usr/local
tar zxvf go1.14.6.linux-amd64.tar.gz
(3)配置Go环境变量
- 编辑/etc/profile文件
vi /etc/profile
- 在文件末尾追加
export PATH=$PATH:/usr/local/go/bin
export GOROOT=/usr/local/go
export GOPATH=$HOME/go
export PATH=$PATH:$GOPATH/bin
- 重新加载该文件
source /etc/profile
- 通过查看go版本检查是否安装成功
go version

1.1.2、docker以及docker-compose安装
- 首先安装所需工具包yum-utils,它提供了yum-config-manager,并且device mapper 存储驱动程序需要 device-mapper-persistent-data 和 lvm2
sudo yum install -y yum-utils device-mapper-persistent-data lvm2
- 设置yum源添加docker仓库
官方源地址(比较慢)
sudo yum-config-manager --add-repo https://download.docker.com/linux/centos/docker-ce.repo
阿里云(推荐)
sudo yum-config-manager --add-repo http://mirrors.aliyun.com/docker-ce/linux/centos/docker-ce.repo
清华大学源
sudo yum-config-manager --add-repo https://mirrors.tuna.tsinghua.edu.cn/docker-ce/linux/centos/docker-ce.repo
- 安装docker(默认最新)
sudo yum install docker-ce
- 安装docker compose
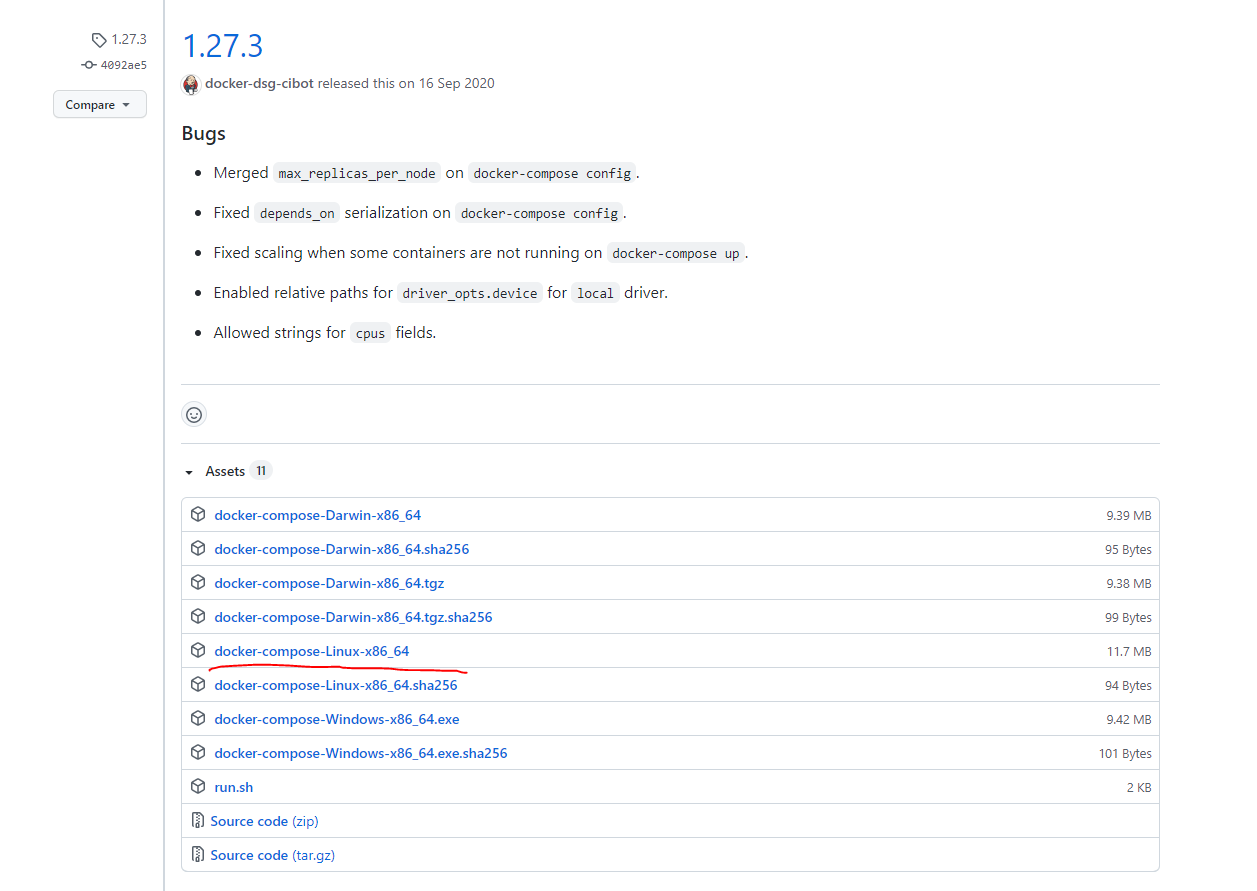
sudo curl -L "https://github.com/docker/compose/releases/download/1.27.3/docker-compose-$(uname -s)-$(uname -m)" -o /usr/local/bin/docker-compose
如果网速慢,下载失败, 可以用下载工具进行下载,传到linux的/usr/bin目录即可,
下载地址: https://github.com/docker/compose/releases
下载完成后需要赋予docker-compose可执行的权限,
chmod +x /usr/bin/docker-compose
- 验证docker是否安装成功
docker version
- 验证docker compose 是否安装成功
docker-compose -v
- 启动docker
systemctl start docker
1.2 Fabric环境搭建
- 创建文件夹
cd                  #cd 返回Home文件夹
mkdir -p go/src/github.com/hyperledger/
#进入刚刚创建的文件夹内
cd go/src/github.com/hyperledger/
- 从github上拉取fabric的源码:
git clone "https://github.com/hyperledger/fabric.git"
如果没有git环境,先安装git,如下
yum install git
下载fabric源码比较慢,可以在github上下载然后上传到服务器新建的文件夹下。
- 进入到克隆下的fabric目录下的scripts文件夹
cd fabric/scripts/
- fabric官方提供了一个bootstrap.sh的脚本, 该脚本拥有三个功能 :
-
下载fabric-samples文件;
-
下载二进制文件;
-
拉取docker镜像。
并且这个脚本支持三个参数, 可以灵活地控制它的执行 . 分别是
-b:加上此参数,则不下载二进制文件
-d:加上此参数则不拉取docker镜像
-s:加上此参数则不下载fabric-samples
- 如果直接执行 bootstrap.sh脚本会特别慢,修改bootstrap.sh。
vi bootstrap.sh
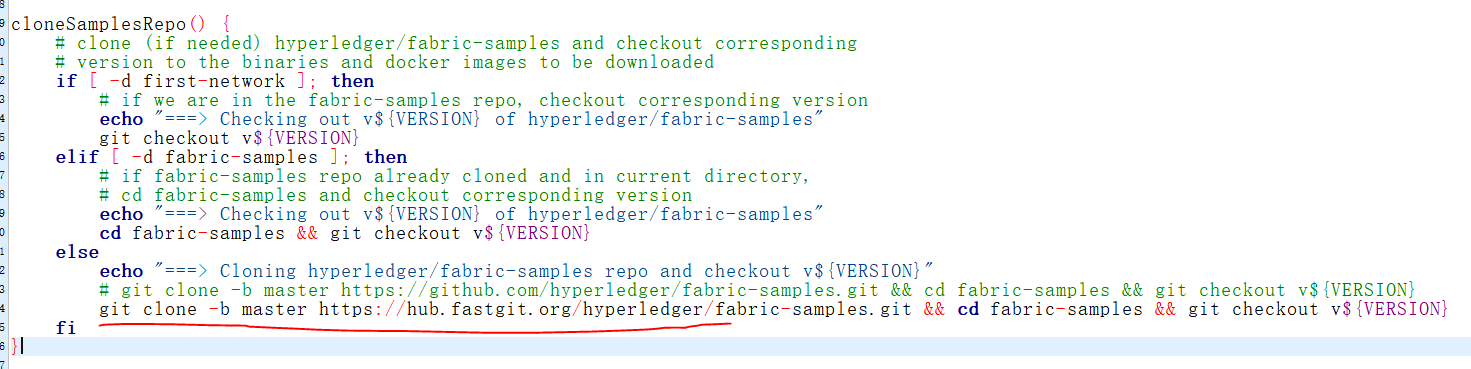
- 修改cloneSamplesRepo() 函数
在cloneSamplesRepo() 函数中会发现fabric-samples是在GitHub中克隆的,注释原克隆代码,修改为以下三个地址中任一克隆代码(可以试试哪一个访问地址最快,选择最快的访问地址)
# 源代码为
# git clone -b master https://github.com/hyperledger/fabric-samples.git && cd fabric-samples && git checkout v${VERSION}
# 修改为
git clone -b master https://hub.fastgit.org/hyperledger/fabric-samples.git && cd fabric-samples && git checkout v${VERSION}
# or
git clone -b master https://github.com.cnpmjs.org/hyperledger/fabric-samples.git && cd fabric-samples && git checkout v${VERSION}
# or
git clone -b master https://github.91chifun.workers.dev//https://github.com/hyperledger/fabric-samples.git && cd fabric-samples && git checkout v${VERSION}
修改完后函数为:
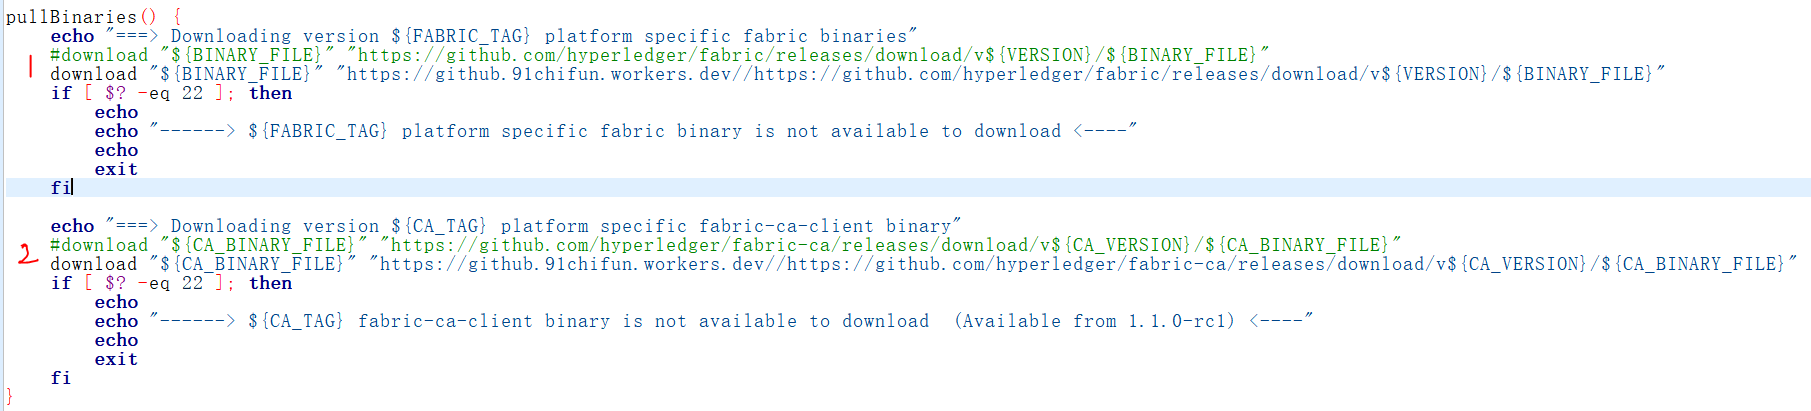
- 修改pullBinaries() 函数
在pullBinaries() 函数中会发现二进制文件fabric v* 和 fabric ca v*也是在GitHub中下载的,注释原下载代码,修改为以下代码
# 源代码为
download "${BINARY_FILE}" "https://github.com/hyperledger/fabric/releases/download/v${VERSION}/${BINARY_FILE}"
download "${CA_BINARY_FILE}" "https://github.com/hyperledger/fabric-ca/releases/download/v${CA_VERSION}/${CA_BINARY_FILE}"
# 修改为
download "${BINARY_FILE}" "https://github.91chifun.workers.dev//https://github.com/hyperledger/fabric/releases/download/v${VERSION}/${BINARY_FILE}"
download "${CA_BINARY_FILE}" "https://github.91chifun.workers.dev//https://github.com/hyperledger/fabric-ca/releases/download/v${CA_VERSION}/${CA_BINARY_FILE}"
修改完后函数为:
保存脚本。
- 执行修改后bootstrap.sh脚本
./bootstrap.sh
如果修改后下载二进制文件还是很慢,加上-b忽略二进制文件,稍后通过手动下载二进制文件)
./bootstrap.sh -b
执行完成后会生成一个 fabric-samples文件夹。
- 切换到该目录下
cd fabric-samples
在目录下会有一个bin目录,就是存放二进制文件。
- 接下来下载二进制文件(如果已经有二进制文件,则忽略此步)
下载地址: https://github.com/hyperledger/fabric/releases/
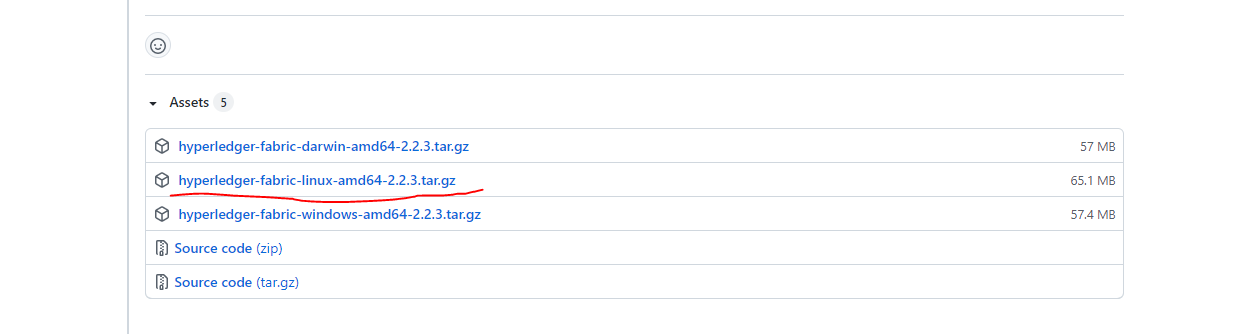
下载完成后,上传到当前fabric-samples所在目录,然后解压,解压完成后在bin目录下就会出现:
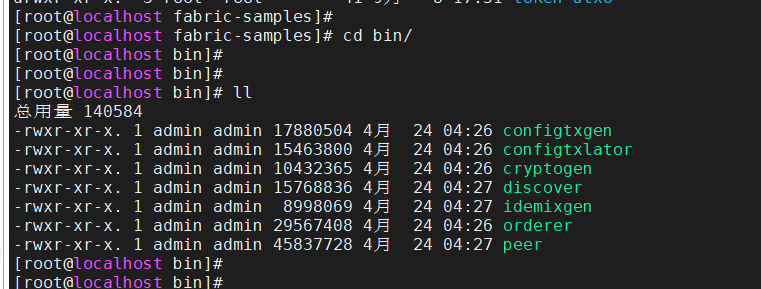
-
然后切换到test-network:
cd ../test-network/启动测试网络:
sudo ./network.sh up -
第一次启动时会创建证书
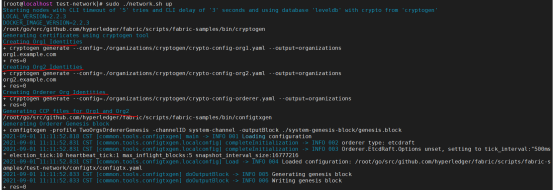
- 出现如下界面,则环境搭建成功。
- 关闭网络,执行:
./network.sh down
如果启动时出现,找不到docker-compose命令,但是docker-compose -v命令可以查看版本,则检查该文件的位置,如果是在/usr/local/bin目录下。
两个办法:
1、建立软链接: sudo ln -s /usr/local/bin/docker-compose /usr/bin/docker-compose
2、复制一份到/usr/bin目录下,并赋予可执行权限。
2、fabric使用描述
2.1、创建通道
(1)与 Fabric 网络交互的每个节点和用户都需要属于一个组织才能参与网络。测试网络包括两个对等组织,Org1 和 Org2。它还包括一个维护网络订购服务的单一订购者组织。
(2)网络中的每个peer节点都需要属于一个组织。在测试网络中,每个组织都操作一个peer节点,peer0.org1.example.com 并且peer0.org2.example.com.
(3)机器上运行了 peer 和 orderer 节点,我们可以使用脚本为 Org1 和 Org2 之间的交易创建一个 Fabric 通道。通道是特定网络成员之间的私有通信层。通道只能由受邀加入通道的组织使用,并且对网络的其他成员不可见。每个通道都有一个单独的区块链分类账。被邀请的组织将其同行“加入”通道以存储通道分类帐并验证通道上的交易。
(4)可以使用该network.sh脚本在 Org1 和 Org2 之间创建一个通道,并将它们的对等节点加入该通道。运行以下命令以创建一个默认名称为 的通道mychannel:
./network.sh createChannel
指定通道名称创建:
./network.sh createChannel -c channel1
一步启动网络并创建通道,可以同时使用up和createChannel模式
./network.sh up createChannel
2.2、在通道上启动链码
(1)创建通道后,可以开始使用智能合约与通道分类帐进行交互。智能合约包含管理区块链分类账上资产的业务逻辑。由网络成员运行的应用程序可以调用智能合约在分类账上创建资产,以及更改和转移这些资产。应用程序还会查询智能合约以读取分类帐上的数据。
(2)为确保交易有效,使用智能合约创建的交易通常需要由多个组织签署才能提交到通道分类账。多重签名是 Fabric 信任模型不可或缺的一部分。要求对交易进行多次背书可以防止通道上的一个组织篡改其peer节点的分类帐或使用未经同意的业务逻辑。要签署交易,每个组织都需要在其peer节点上调用并执行智能合约,然后对交易的输出进行签名。如果输出一致并且已被足够多的组织签署,则可以将交易提交到分类帐中。指定通道上需要执行智能合约的设置组织的策略称为背书策略,
(3)在 Fabric 中,智能合约以称为链码的包的形式部署在网络上。Chaincode 安装在组织的peer节点上,然后部署到通道,然后可用于对交易进行背书并与区块链分类账进行交互。在将链码部署到通道之前,通道的成员需要就建立链码治理的链码定义达成一致。当所需的组织数量同意时,链码定义可以提交到通道,链码就可以使用了。
(4)使用network.sh创建通道后,可以使用以下命令在通道上启动链码:
./network.sh deployCC -ccn basic -ccp ../asset-transfer-basic/chaincode-go -ccl go
所述deployCC子命令将安装资产转移chaincode到 peer0.org1.example.com和peer0.org2.example.com,然后部署信道对chaincode使用信道标志指定的(或mychannel 如果未指定信道)。如果您是第一次部署链码,脚本将安装链码依赖项。您可以使用语言标志 ,-l来安装链代码的 Go、typescript 或 javascript 版本。可以asset-transfer-basic在fabric-samples 目录的文件夹中找到资产转移(基本)链代码。此文件夹包含作为示例提供并由教程用于突出 Fabric 功能的示例链代码。
3、链码部署以及执行示例
资产转移智能合约和应用程序的 JavaScript 版本,fabric-samples文件夹下提供了多种语言示例,基本案例位于:
fabric-samples/asset-transfer-basic/
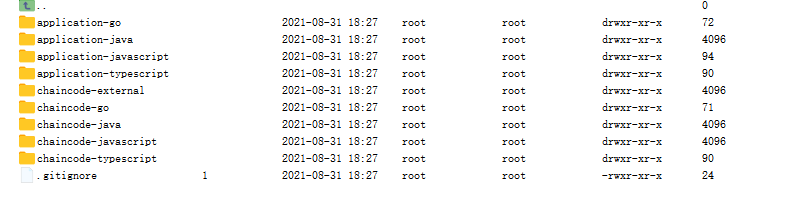
chaincode-*:表示各种语言对应的链码
application-*:表示各种语言调用链码的应用程序
3.1、资产转移案例
此资产转移(基本)示例演示了如何使用资产初始化分类帐、查询这些资产、创建新资产、基于资产 ID 查询单个资产、更新现有资产以及将资产转移给新所有者。它涉及以下两个组成部分:
- 示例应用程序:调用区块链网络,调用链码(智能合约)中实现的交易。该应用程序位于以下
fabric-samples目录中:asset-transfer-basic/application-javascript
- 智能合约本身,实现涉及与账本交互的交易。智能合约(链码)位于以下
fabric-samples目录中:asset-transfer-basic/chaincode-(javascript, java, go, typescript)
3.2、设置区块链网络
(1)进入到目录cd fabric-samples/test-network
- 如果已经有一个测试网络在运行,请将其关闭以确保环境干净
./network.sh down
- 使用
network.shshell 脚本启动 Fabric 测试网络
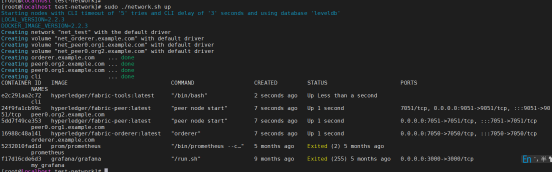
./network.sh up createChannel -c mychannel -ca
此命令将部署具有两个peer、一个order排序服务和三个证书颁发机构(Orderer、Org1、Org2)的 Fabric 测试网络。不使用 cryptogen 工具,而是使用证书颁发机构来启动测试网络,因此是-ca标志。此外,组织管理员用户注册在证书颁发机构启动时被引导。在后面的步骤中,我们将展示示例应用程序如何完成管理员注册。
执行完成后如图所示:
可能的报错:
(1)错误信息如下

- 没有将fabric-samples/bin/目录加到环境变量中。
- 编辑/etc/profile
export PATH=$PATH:/root/go/src/github.com/hyperledger/fabric/scripts/fabric-samples/bin
- 重新加载
source /etc/profile
(2)错误信息如下

-
缺少fabric-ca-client脚本文件
-
下载fabric-ca源码:下载地址: https://github.com/hyperledger/fabric-ca/tags
-
下载1.5.0版本完成后并上传,解压后进入目录
make fabric-ca-client
make fabric-ca-server
执行完成后,会生成一个bin目录,bin目录下会由两个可执行文件,复制到环境变量配置的bin目录下
/root/go/src/github.com/hyperledger/fabric/scripts/fabric-samples/bin。
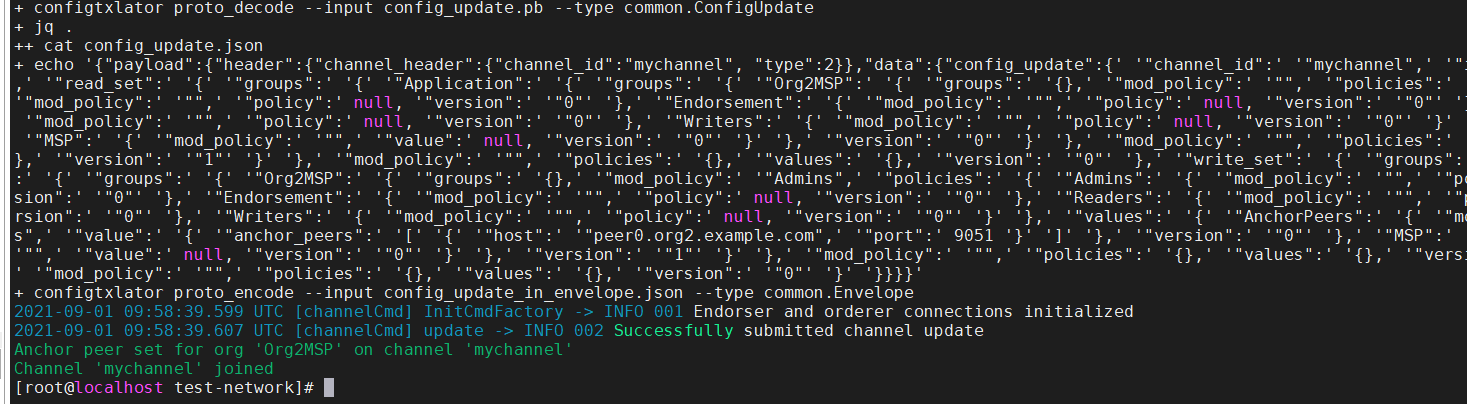
- 通过
./network.sh使用链码名称和语言选项调用脚本来部署链码
./network.sh deployCC -ccn basic -ccp ../asset-transfer-basic/chaincode-javascript/ -ccl javascript
3.3、应用程序调用链码
使用javascript应用程序进行测试
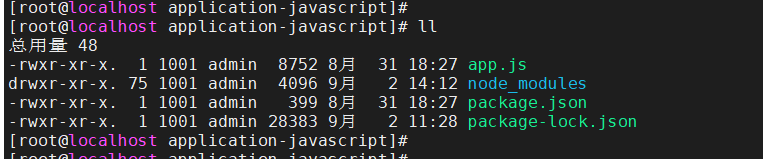
(1) 打开一个新终端,然后导航到该application-javascript文件夹
cd asset-transfer-basic/application-javascript
(2) 此目录包含使用 Fabric SDK for Node.js 开发的示例程序。运行以下命令以安装应用程序依赖项。
npm install
此过程是安装应用程序的 package.json. 其中最重要的是fabric-networkNode.js 模块;它使应用程序能够使用身份、钱包和网关连接到通道、提交交易和等待通知。使用fabric-ca-client模块为用户注册各自的证书颁发机构,生成一个有效身份,然后fabric-network模块使用该身份与区块链网络进行交互。
如果报错显示npm未找到命令,则需要安装node环境
fabric2.2.3版本支持的node版本:"node":"^10.15.3 || ^12.13.1 || 14.13.1","npm":"6.4.1"
官网下载nodejs,https://nodejs.org/en/download/
- 获取安装包,或者下载上传到centos
wget https://nodejs.org/dist/latest-v8.x/node-v14.13.1-linux-x64.tar.gz
- 解压
tar -xvf node-v14.13.1-linux-x64
- 加入环境变量,编辑 /etc/profile,我的安装目录为:/usr/local/node/node-v14.13.1-linux-x64/bin
在/etc/profile文件末尾添加:
export PATH=$PATH:/usr/local/node/node-v14.13.1-linux-x64/bin
- 使文件生效
source /etc/profile
- 检查是否安装成功
node -v
安装过程中出现:

解决:使用 yum install gcc-c++
之后,会看到以下目录:
(3) 在第一步启动 Fabric 测试网络时,创建了一个管理员用户(字面称为admin)作为证书颁发机构 (CA)的注册商。第一步是 admin通过让应用程序调用enrollAdmin. 此过程使用证书签名请求(CSR) — 首先在本地生成私钥和公钥,然后将公钥发送到 CA,CA 返回编码证书以供应用程序使用。然后这些凭据存储在钱包中,使我们能够充当 CA 的管理员。
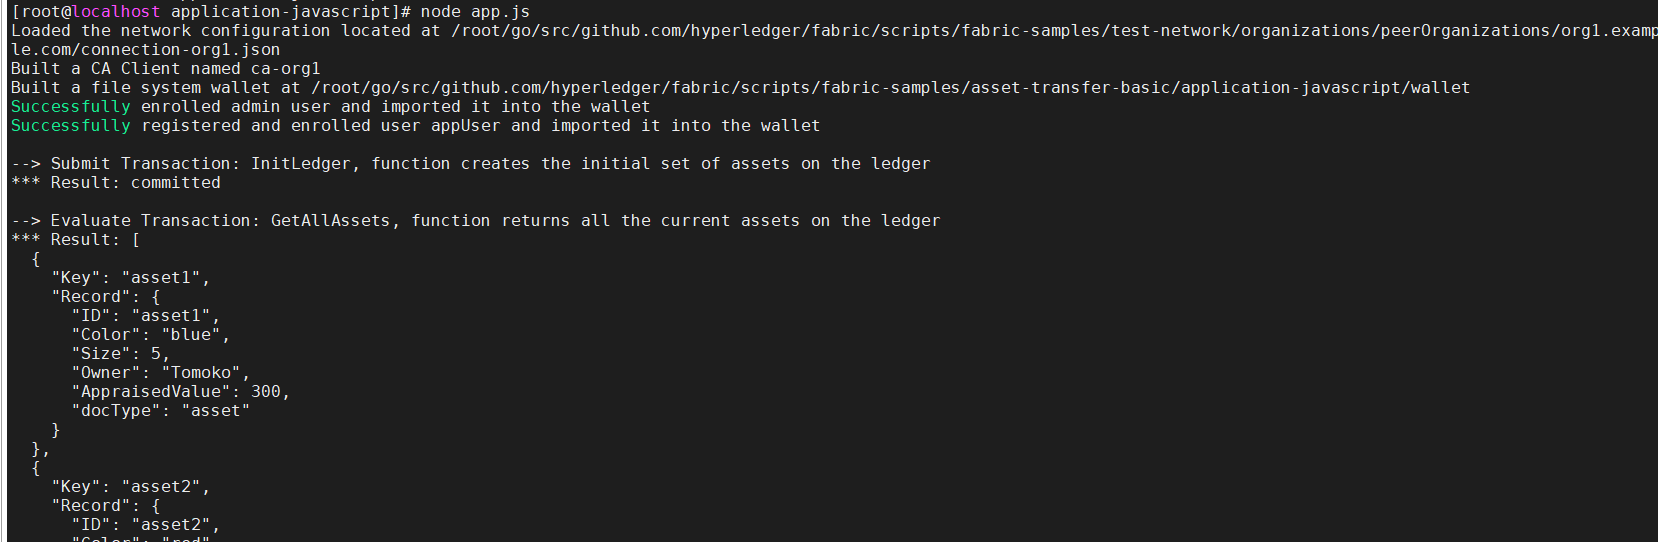
执行命令:
node app.js
可以看到应用调用链码,执行结果:
3.4、应用程序代码
3.4.1、JavaScript
控制台中的输出,都可以在代码中找到对应的位置
/*
 * Copyright IBM Corp. All Rights Reserved.
 *
 * SPDX-License-Identifier: Apache-2.0
 */

'use strict';

const { Gateway, Wallets } = require('fabric-network');
const FabricCAServices = require('fabric-ca-client');
const path = require('path');
const { buildCAClient, registerAndEnrollUser, enrollAdmin } = require('../../test-application/javascript/CAUtil.js');
const { buildCCPOrg1, buildWallet } = require('../../test-application/javascript/AppUtil.js');

const channelName = 'mychannel';
const chaincodeName = 'basic';
const mspOrg1 = 'Org1MSP';
const walletPath = path.join(__dirname, 'wallet');
const org1UserId = 'appUser';

function prettyJSONString(inputString) {
	return JSON.stringify(JSON.parse(inputString), null, 2);
}

// pre-requisites:
// - fabric-sample two organization test-network setup with two peers, ordering service,
//   and 2 certificate authorities
//         ===> from directory /fabric-samples/test-network
//         ./network.sh up createChannel -ca
// - Use any of the asset-transfer-basic chaincodes deployed on the channel "mychannel"
//   with the chaincode name of "basic". The following deploy command will package,
//   install, approve, and commit the javascript chaincode, all the actions it takes
//   to deploy a chaincode to a channel.
//         ===> from directory /fabric-samples/test-network
//         ./network.sh deployCC -ccn basic -ccp ../asset-transfer-basic/chaincode-javascript/ -ccl javascript
// - Be sure that node.js is installed
//         ===> from directory /fabric-samples/asset-transfer-basic/application-javascript
//         node -v
// - npm installed code dependencies
//         ===> from directory /fabric-samples/asset-transfer-basic/application-javascript
//         npm install
// - to run this test application
//         ===> from directory /fabric-samples/asset-transfer-basic/application-javascript
//         node app.js

// NOTE: If you see  kind an error like these:
/*
    2020-08-07T20:23:17.590Z - error: [DiscoveryService]: send[mychannel] - Channel:mychannel received discovery error:access denied
    ******** FAILED to run the application: Error: DiscoveryService: mychannel error: access denied

   OR

   Failed to register user : Error: fabric-ca request register failed with errors [[ { code: 20, message: 'Authentication failure' } ]]
   ******** FAILED to run the application: Error: Identity not found in wallet: appUser
*/
// Delete the /fabric-samples/asset-transfer-basic/application-javascript/wallet directory
// and retry this application.
//
// The certificate authority must have been restarted and the saved certificates for the
// admin and application user are not valid. Deleting the wallet store will force these to be reset
// with the new certificate authority.
//

/**
 *  A test application to show basic queries operations with any of the asset-transfer-basic chaincodes
 *   -- How to submit a transaction
 *   -- How to query and check the results
 *
 * To see the SDK workings, try setting the logging to show on the console before running
 *        export HFC_LOGGING='{"debug":"console"}'
 */
async function main() {
	try {
		//使用网络配置(也称为连接配置文件)构建内存对象
		const ccp = buildCCPOrg1();

		// 根据网络配置中的信息构建fabric ca服务客户端的实例
		const caClient = buildCAClient(FabricCAServices, ccp, 'ca.org1.example.com');

		// 设置钱包以保存应用程序用户的凭据
		const wallet = await buildWallet(Wallets, walletPath);

		// 在实际应用程序中,这将在管理流程中完成,并且仅一次。应用程序注册admin用户
		await enrollAdmin(caClient, wallet, mspOrg1);

		// 在实际应用程序中,这仅在需要添加新用户并且将成为管理流程的一部分时完成
		await registerAndEnrollUser(caClient, wallet, mspOrg1, org1UserId, 'org1.department1');

		// Create a new gateway instance for interacting with the fabric network.
		// In a real application this would be done as the backend server session is setup for
		// a user that has been verified.
		const gateway = new Gateway();

		try {
			// setup the gateway instance
			// The user will now be able to create connections to the fabric network and be able to
			// submit transactions and query. All transactions submitted by this gateway will be
			// signed by this user using the credentials stored in the wallet.
			await gateway.connect(ccp, {
				wallet,
				identity: org1UserId,
				discovery: { enabled: true, asLocalhost: true } // using asLocalhost as this gateway is using a fabric network deployed locally
			});

			// Build a network instance based on the channel where the smart contract is deployed
			//根据部署智能合约的通道构建网络实例
			const network = await gateway.getNetwork(channelName);

			// Get the contract from the network.
			//从网络获取合约
			const contract = network.getContract(chaincodeName);

			// Initialize a set of asset data on the channel using the chaincode 'InitLedger' function.
			// This type of transaction would only be run once by an application the first time it was started after it
			// deployed the first time. Any updates to the chaincode deployed later would likely not need to run
			// an "init" type function.
			console.log('\n--> Submit Transaction: InitLedger, function creates the initial set of assets on the ledger');
			await contract.submitTransaction('InitLedger');
			console.log('*** Result: committed');

			// Let's try a query type operation (function).
			// This will be sent to just one peer and the results will be shown.
			console.log('\n--> Evaluate Transaction: GetAllAssets, function returns all the current assets on the ledger');
			let result = await contract.evaluateTransaction('GetAllAssets');
			console.log(`*** Result: ${prettyJSONString(result.toString())}`);

			// Now let's try to submit a transaction.
			// This will be sent to both peers and if both peers endorse the transaction, the endorsed proposal will be sent
			// to the orderer to be committed by each of the peer's to the channel ledger.
			console.log('\n--> Submit Transaction: CreateAsset, creates new asset with ID, color, owner, size, and appraisedValue arguments');
			result = await contract.submitTransaction('CreateAsset', 'asset13', 'yellow', '5', 'Tom', '1300');
			console.log('*** Result: committed');
			if (`${result}` !== '') {
				console.log(`*** Result: ${prettyJSONString(result.toString())}`);
			}

			console.log('\n--> Evaluate Transaction: ReadAsset, function returns an asset with a given assetID');
			result = await contract.evaluateTransaction('ReadAsset', 'asset13');
			console.log(`*** Result: ${prettyJSONString(result.toString())}`);

			console.log('\n--> Evaluate Transaction: AssetExists, function returns "true" if an asset with given assetID exist');
			result = await contract.evaluateTransaction('AssetExists', 'asset1');
			console.log(`*** Result: ${prettyJSONString(result.toString())}`);

			console.log('\n--> Submit Transaction: UpdateAsset asset1, change the appraisedValue to 350');
			await contract.submitTransaction('UpdateAsset', 'asset1', 'blue', '5', 'Tomoko', '350');
			console.log('*** Result: committed');

			console.log('\n--> Evaluate Transaction: ReadAsset, function returns "asset1" attributes');
			result = await contract.evaluateTransaction('ReadAsset', 'asset1');
			console.log(`*** Result: ${prettyJSONString(result.toString())}`);

			try {
				// How about we try a transactions where the executing chaincode throws an error
				// Notice how the submitTransaction will throw an error containing the error thrown by the chaincode
				console.log('\n--> Submit Transaction: UpdateAsset asset70, asset70 does not exist and should return an error');
				await contract.submitTransaction('UpdateAsset', 'asset70', 'blue', '5', 'Tomoko', '300');
				console.log('******** FAILED to return an error');
			} catch (error) {
				console.log(`*** Successfully caught the error: \n    ${error}`);
			}

			console.log('\n--> Submit Transaction: TransferAsset asset1, transfer to new owner of Tom');
			await contract.submitTransaction('TransferAsset', 'asset1', 'Tom');
			console.log('*** Result: committed');

			console.log('\n--> Evaluate Transaction: ReadAsset, function returns "asset1" attributes');
			result = await contract.evaluateTransaction('ReadAsset', 'asset1');
			console.log(`*** Result: ${prettyJSONString(result.toString())}`);
		} finally {
			// Disconnect from the gateway when the application is closing
			// This will close all connections to the network
			gateway.disconnect();
		}
	} catch (error) {
		console.error(`******** FAILED to run the application: ${error}`);
	}
}

main();
(1)注册管理员, 注册管理员是发生在应用程序和证书颁发机构之间的交互,而不是应用程序和链码之间的交互
//使用网络配置(也称为连接配置文件)构建内存对象
const ccp = buildCCPOrg1();
// 根据网络配置中的信息构建fabric ca服务客户端的实例
const caClient = buildCAClient(FabricCAServices, ccp, 'ca.org1.example.com');
// 设置钱包以保存应用程序用户的凭据
const wallet = await buildWallet(Wallets, walletPath);
// 在实际应用程序中,这将在管理流程中完成,并且仅一次。应用程序注册admin用户
await enrollAdmin(caClient, wallet, mspOrg1);
这段代码 在获取公共连接配置文件路径的引用、确保连接配置文件存在并指定创建钱包的位置后, enrollAdmin()将执行并从证书颁发机构生成管理员凭据 。
此命令将 CA 管理员的凭据存储在wallet目录中。可以在wallet/admin.id 文件中找到管理员的证书和私钥。
enrollAdmin() 和其他 CA 相关函数包含在
fabric-samples/test-application/javascript/CAUtil.js通用实用程序中
(2)注册用户(应用程序用户)
现在我们在钱包中拥有管理员的凭据,应用程序使用admin 用户来注册将用于与区块链网络交互的应用程序用户
// 在实际应用程序中,这仅在需要添加新用户并且将成为管理流程的一部分时完成
await registerAndEnrollUser(caClient, wallet, mspOrg1, org1UserId, 'org1.department1');
与管理员注册类似,此功能使用 CSR 来注册和注册appUser并将其凭据与admin钱包中的凭据一起存储。我们现在有两个独立用户的身份——admin和appUser——应用程序中可以使用这些身份。
运行结果开头中出现两个Successfully:

(3)连接通道和智能合约
应用程序生成了管理员和应用程序用户凭据并将它们放在钱包中。如果凭据存在并且具有与其关联的正确权限,则示例应用程序用户将能够在获取对通道名称和合约名称的引用后调用链代码函数。
try {
			// 新建一个网关实例
			// 使用org1UserId用户签名校验连接
			await gateway.connect(ccp, {
				wallet,
				identity: org1UserId,
                //告诉节点客户端 sdk 使用服务发现(在对等方上运行),该服务发现获取当前在线的其他对等方、相关背书策略等元数据以及与其他节点通信所需的任何静态信息。asLocalhost设置为true告诉它为localhost连接,因为我们的客户端是同一网络等织物的节点上运行。如果与其他结构节点不在相同的网络上运行客户端的部署中,该asLocalhost选项将设置为false。
				discovery: { enabled: true, asLocalhost: true }
			});
			//根据部署智能合约的通道构建网络实例
			const network = await gateway.getNetwork(channelName);

			//根据合约名从网络获取部署的合约
			const contract = network.getContract(chaincodeName);
(4)开始调用智能合约的方法
console.log('\n--> Submit Transaction: InitLedger, function creates the initial set of assets on the ledger');
await contract.submitTransaction('InitLedger');
console.log('*** Result: committed');

// Let's try a query type operation (function).
// This will be sent to just one peer and the results will be shown.
console.log('\n--> Evaluate Transaction: GetAllAssets, function returns all the current assets on the ledger');
let result = await contract.evaluateTransaction('GetAllAssets');
console.log(`*** Result: ${prettyJSONString(result.toString())}`);
submitTransaction() 函数用于调用链码InitLedger函数以使用一些示例数据填充分类帐。在内部,submitTransaction() 函数将使用服务发现为链代码找到一组所需的背书节点,在所需数量的节点上调用链代码,从这些节点收集链代码背书结果,最后将交易提交给order排序服务。
3.4.2、Java
参考官方文档。
3.4.3、Go
参考官方文档。
