springboot与dubbo整合入门(三种方式)
Springboot与Dubbo整合三种方式详解
整合环境:
jdk:8.0
dubbo:2.6.2
springboot:2.1.5
项目结构:

1、搭建项目环境:
(1)创建父项目与三个子项目,创建项目时,都使用spring initializr,创建时,父项目中注意的一点:

(2)创建三个子项目,在已有的父项目上右键,新建模块;
(3)创建完成后:将三个子项目在父项目pom.xml中配置:

(4)修改所有子项目中的parent标签:(删掉之前parent中的springboot)修改为:

(5)项目创建完成;
2、配置项目dubboservice,只包含接口:
3、第一种方式使用xml文件:
3.1、配置项目dubboserviceimpl(服务提供者):
(1)引入dubbo相关依赖,以及zookeeper客户端依赖,由于需要与其他服务器通信,引入web依赖,pom.xml:
<?xml version="1.0" encoding="UTF-8"?>
<project xmlns="http://maven.apache.org/POM/4.0.0" xmlns:xsi="http://www.w3.org/2001/XMLSchema-instance"
         xsi:schemaLocation="http://maven.apache.org/POM/4.0.0 http://maven.apache.org/xsd/maven-4.0.0.xsd">
    <modelVersion>4.0.0</modelVersion>
    <parent>
        <groupId>top.free</groupId>
        <artifactId>springboot-dubbo</artifactId>
        <version>0.0.1-SNAPSHOT</version>
    </parent>
    <groupId>top.free</groupId>
    <artifactId>dubboserviceimpl</artifactId>
    <version>0.0.1-SNAPSHOT</version>

    <properties>
        <java.version>1.8</java.version>
    </properties>

    <dependencies>
        <!--依赖dubboservice接口-->
        <dependency>
            <groupId>top.free</groupId>
            <artifactId>dubboservice</artifactId>
            <version>0.0.1-SNAPSHOT</version>
        </dependency>
        <!--web依赖-->
        <dependency>
            <groupId>org.springframework.boot</groupId>
            <artifactId>spring-boot-starter-web</artifactId>
        </dependency>
        <!--dubbo与springboot整合依赖-->
        <dependency>
            <groupId>com.alibaba.boot</groupId>
            <artifactId>dubbo-spring-boot-starter</artifactId>
            <version>0.2.0</version>
        </dependency>
       <!-- zookeeper依赖-->
        <dependency>
            <groupId>com.101tec</groupId>
            <artifactId>zkclient</artifactId>
            <version>0.10</version>
        </dependency>

        <dependency>
            <groupId>org.springframework.boot</groupId>
            <artifactId>spring-boot-starter-test</artifactId>
            <scope>test</scope>
        </dependency>
    </dependencies>
</project>
(2) xml文件配置 provider.xml:
<?xml version="1.0" encoding="UTF-8"?>
<beans xmlns="http://www.springframework.org/schema/beans"
    xmlns:xsi="http://www.w3.org/2001/XMLSchema-instance"
    xmlns:dubbo="http://dubbo.apache.org/schema/dubbo"
    xsi:schemaLocation="http://www.springframework.org/schema/beans http://www.springframework.org/schema/beans/spring-beans-4.3.xsd
         http://dubbo.apache.org/schema/dubbo http://dubbo.apache.org/schema/dubbo/dubbo.xsd
        ">

    <!-- 发布服务到注册中心 -->
    <!-- 为服务起一个别名 -->
    <dubbo:application name="provider" />
    <!--address 注册中心的地址   protocol  指的是注册中心的协议的格式 -->
    <dubbo:registry address="XXXXXXXX:2181" protocol="zookeeper"/>
    <!-- interface告诉注册中心是哪个类型
         ref说明具体是哪个服务
         timeout连接超时的时间
    -->
    <dubbo:service interface="top.free.dubboservice.TestDubboService" ref="serviceImpl" timeout="60000"></dubbo:service>
    <!--, 配置端口,协议是dubbo,消费者消费的时候必须通过端口来消费,端口可以随便写,但是不能被占用,一个dubbo,独占一个端口 -->
    <dubbo:protocol name="dubbo" port="20881"></dubbo:protocol>
</beans>
(3) 配置实现类ServiceImpl:
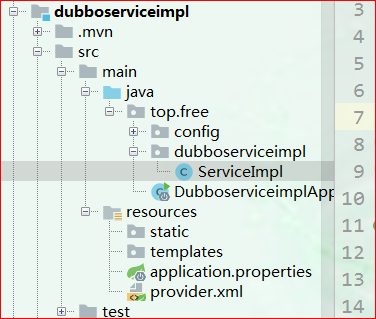
package top.free.dubboserviceimpl;
import org.springframework.stereotype.Component;
import top.free.dubboservice.TestDubboService;

@Component
public class ServiceImpl implements TestDubboService {
    @Override
    public String getData(String user) {
        return "你好,我们通信了:"+user;
    }
}
(4)主启动类上加上:@ImportResource(locations = "classpath:provider.xml")
package top.free;

import com.alibaba.dubbo.config.spring.context.annotation.DubboComponentScan;
import com.alibaba.dubbo.config.spring.context.annotation.EnableDubbo;
import org.springframework.boot.SpringApplication;
import org.springframework.boot.autoconfigure.SpringBootApplication;
import org.springframework.context.annotation.ImportResource;

@SpringBootApplication
@ImportResource(locations = "classpath:provider.xml")
public class DubboserviceimplApplication {
    public static void main(String[] args) {
        SpringApplication.run(DubboserviceimplApplication.class, args);
    }
}
(5)在application.properties中加上项目启动的端口号: server.port=8080
3.2、配置dubboweb项目(消费者)
(1)引入dubbo相关依赖,以及zookeeper客户端依赖,由于需要与其他服务器通信,引入web依赖,pom.xml:
<?xml version="1.0" encoding="UTF-8"?>
<project xmlns="http://maven.apache.org/POM/4.0.0" xmlns:xsi="http://www.w3.org/2001/XMLSchema-instance"
         xsi:schemaLocation="http://maven.apache.org/POM/4.0.0 http://maven.apache.org/xsd/maven-4.0.0.xsd">
    <modelVersion>4.0.0</modelVersion>
    <parent>
        <groupId>top.free</groupId>
        <artifactId>springboot-dubbo</artifactId>
        <version>0.0.1-SNAPSHOT</version>
    </parent>
    <groupId>top.free</groupId>
    <artifactId>dubboweb</artifactId>
    <version>0.0.1-SNAPSHOT</version>
    <name>dubboweb</name>
    <description>Demo project for Spring Boot</description>
    <properties>
        <java.version>1.8</java.version>
    </properties>
    <dependencies>
        <dependency>
            <groupId>top.free</groupId>
            <artifactId>dubboservice</artifactId>
            <version>0.0.1-SNAPSHOT</version>
        </dependency>
        <dependency>
            <groupId>org.springframework.boot</groupId>
            <artifactId>spring-boot-starter-web</artifactId>
        </dependency>
        <dependency>
            <groupId>com.alibaba.boot</groupId>
            <artifactId>dubbo-spring-boot-starter</artifactId>
            <version>0.2.0</version>
        </dependency>
        <dependency>
            <groupId>com.101tec</groupId>
            <artifactId>zkclient</artifactId>
            <version>0.10</version>
        </dependency>
        <dependency>
            <groupId>org.springframework.boot</groupId>
            <artifactId>spring-boot-starter-test</artifactId>
            <scope>test</scope>
        </dependency>
    </dependencies>
</project>
(2)配置controller:
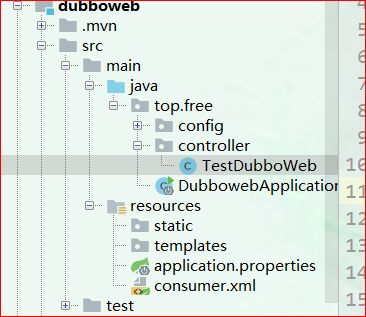
package top.free.controller;
import org.springframework.beans.factory.annotation.Autowired;
import org.springframework.web.bind.annotation.PathVariable;
import org.springframework.web.bind.annotation.RequestMapping;
import org.springframework.web.bind.annotation.RestController;
import top.free.dubboservice.TestDubboService;

@RestController
public class TestDubboWeb {
    //serviceImpl会显示红色,这个是因为编译时找不到bean注入,不影响结果
    @Autowired
    private TestDubboService servcieImpl;

    @RequestMapping("/test/{user}")
    public String getData(@PathVariable("user")String user){
        String data =servcieImpl.getData(user);
        return data;
    }
}
(3)配置消费者的consumer.xml文件:
<?xml version="1.0" encoding="UTF-8"?>
<beans xmlns="http://www.springframework.org/schema/beans"
    xmlns:xsi="http://www.w3.org/2001/XMLSchema-instance"
    xmlns:dubbo="http://dubbo.apache.org/schema/dubbo"
    xsi:schemaLocation="http://www.springframework.org/schema/beans http://www.springframework.org/schema/beans/spring-beans-4.3.xsd
         http://dubbo.apache.org/schema/dubbo http://dubbo.apache.org/schema/dubbo/dubbo.xsd
">
    <!-- 消费者起一个别名 -->
    <dubbo:application name="consumer"/>
    <!--address 注册中心的地址   protocol  指的是注册中心的协议的格式 -->
    <dubbo:registry address="XXXXXXXX:2181" protocol="zookeeper"/>
    <!-- 告诉注册中心我需要什么 -->
    <dubbo:reference interface="top.free.dubboservice.TestDubboService" id="serviceImpl"></dubbo:reference>

</beans>
(4)在主启动类上加:@ImportResource(locations = "classpath:consumer.xml")
package top.free;

import org.springframework.boot.SpringApplication;
import org.springframework.boot.autoconfigure.SpringBootApplication;
import org.springframework.context.annotation.ImportResource;

@SpringBootApplication
@ImportResource(locations = "classpath:consumer.xml")
public class DubbowebApplication {
    public static void main(String[] args) {
        SpringApplication.run(DubbowebApplication.class, args);
    }
}
(5)在application.properties文件中加上启动的端口号:server.port=8081
(6)、第一种xml方式配置完成;
(7)、首先在本地安装这三个项目:
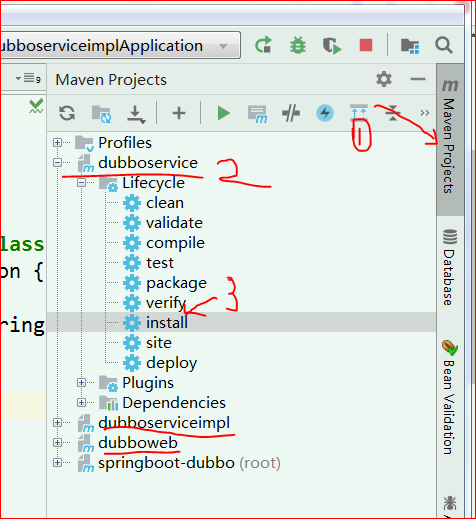
(8)、安装完成后就可以起动dubboserviceimpl与dubboweb两个项目,并测试:

4、第二种使用配置类方式(API):pom.xml文件不修改,application.properties文件不做修改(只配置了端口号)
4.1、服务提供者(项目dubboserviceimpl):配置类DubboProviderConfig(注意与主程序类XXXApplication的位置)

(1)、配置类代码:
package top.free.config;

import com.alibaba.dubbo.config.ApplicationConfig;
import com.alibaba.dubbo.config.ProtocolConfig;
import com.alibaba.dubbo.config.RegistryConfig;
import org.springframework.context.annotation.Bean;
import org.springframework.context.annotation.Configuration;

@Configuration
public class DubboProviderConfig {
    /*相当于xml中服务提供者的别名:<dubbo:application name="provider" />*/
    @Bean
    public ApplicationConfig myApplicationConfig(){
        ApplicationConfig ac = new ApplicationConfig();
        ac.setName("provider3");
        return ac;
    }
    /*相当于注册中心配置:<dubbo:registry address="XXXXXXXX:2181" protocol="zookeeper"/>*/
    @Bean
    public RegistryConfig myregistryConfig(){
        RegistryConfig rc = new RegistryConfig();
        rc.setAddress("XXXXXXXX:2181");
        rc.setProtocol("zookeeper");
        return rc;
    }
 /*相当于暴露服务的协议以及端口:<dubbo:protocol name="dubbo" port="20881"></dubbo:protocol>*/
    @Bean
    public ProtocolConfig myProtocolConfig(){
        ProtocolConfig pc = new ProtocolConfig();
        pc.setName("dubbo");
        pc.setPort(20888);
        return pc;
    }
    /*在实现类上加注解来代替:暴露的服务<dubbo:service interface="top.free.dubboservice.TestDubboService" ref="serviceImpl" timeout="60000"></dubbo:service>*/
}
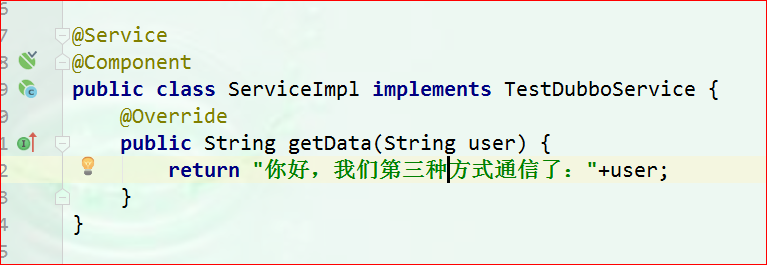
(2)、实现类:注意这里使用的@Service注解是Dubbo的service注解,标志这个类时提供服务的类

(3)、主程序类上加入@EnableDubbo扫描所有包下使用dubbo提供的注解类(或者@EnableDubbo(scanBasePackages = "top.free.dubboserviceimpl")只扫描特定包下有没有使用dubbo提供的注解),注意:注释掉第一种方式加载的xml文件;
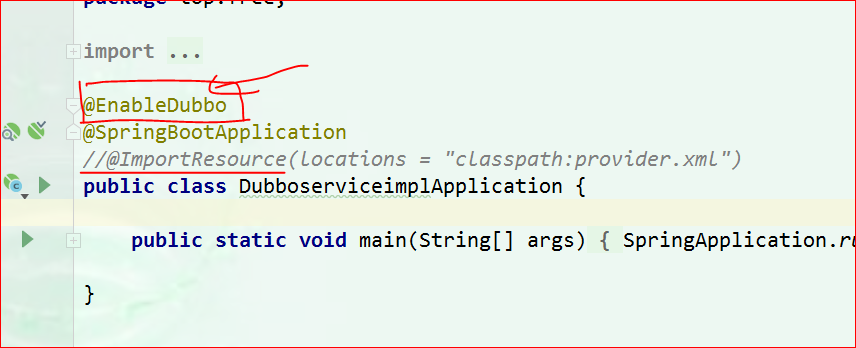
4.2、配置消费者(dubboweb项目):配置类DubboConsumerConfig
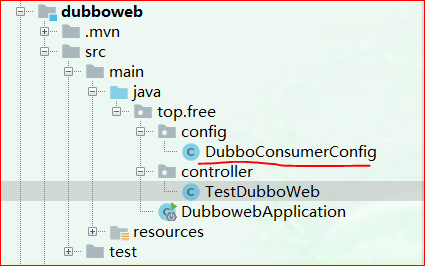
(1)、配置类代码:

package top.free.config;

import com.alibaba.dubbo.config.ApplicationConfig;
import com.alibaba.dubbo.config.RegistryConfig;
import org.springframework.context.annotation.Bean;
import org.springframework.context.annotation.Configuration;

@Configuration
public class DubboConsumerConfig {
    /*相当于consumer.xml中的:<dubbo:application name="consumer"/>*/
    @Bean
    public ApplicationConfig myapplicationConfig(){
        ApplicationConfig ac = new ApplicationConfig();
        ac.setName("consumer3");
        return ac;
    }
    /*相当于:<dubbo:registry address="39.108.125.227:2181" protocol="zookeeper"/>*/
    @Bean
    public RegistryConfig myregistryConfig(){
        RegistryConfig rc = new RegistryConfig();
        rc.setAddress("39.108.125.227:2181");
        rc.setProtocol("zookeeper");
        return rc;
    }
/*使用注解方式来代替:<dubbo:reference interface="top.free.dubboservice.TestDubboService" id="serviceImpl"></dubbo:reference>*/
}
(2)、在Controller的属性上加注解@Reference:注意,是dubbo提供的注解,用于标志需要引用的服务
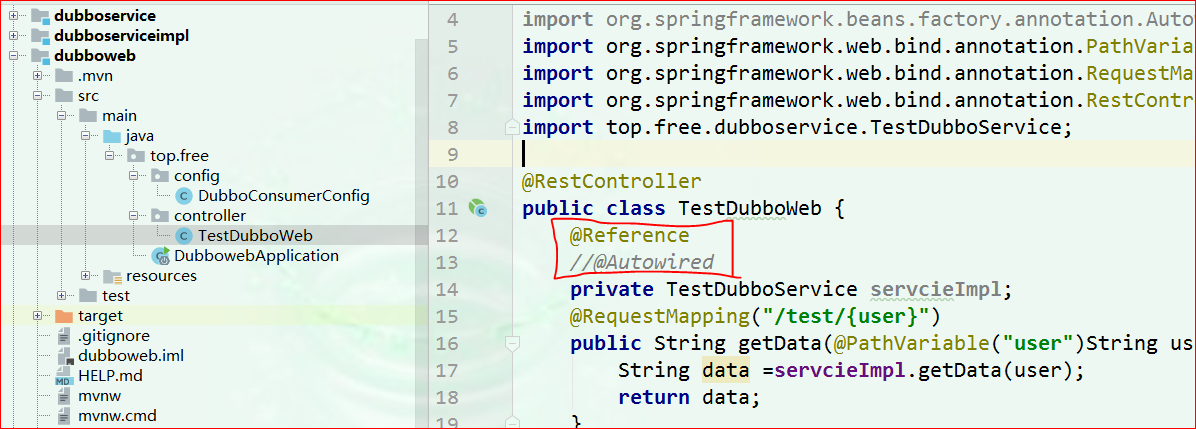
(3)、在主启动类上加:@EnableDubbo扫描使用dubbo提供的注解,注释第一种方式加载的xml(我试过,消费者好像不加@EnableDubbo也可以,提供者必须加);

(4)、启动dubboserviceimpl和dubboweb两个程序,并测试:

5、第三种方式:属性文件方式:
5.1、服务提供者(dubboserviceimpl项目):
(1)把第二种方式中,配置类文件让它不要被加载:(注释掉这个注解,不需要这个类)
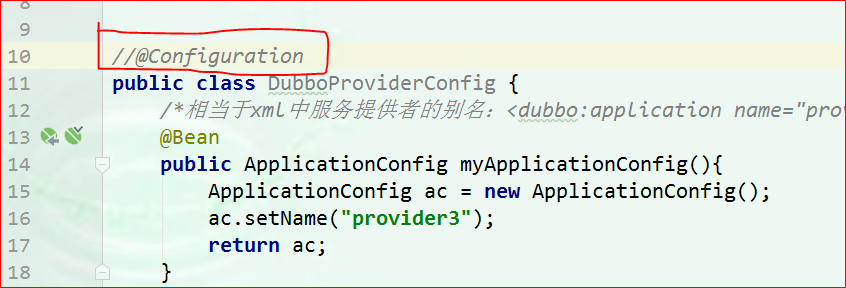
(2)实现类不变:如下图:使用@Service来标志提供的服务
(3)主程序类不变,与第二种方式一致,如下:

(4)在application.properties文件中加入如下:
#别名
dubbo.application.name=prodiver2
#注册中心zookeeper地址
dubbo.registry.address=XXXXXXXX:2181
dubbo.registry.protocol=zookeeper
#暴露的服务端口与协议
dubbo.protocol.name=dubbo
dubbo.protocol.port=20880

server.port=8080
5.2、消费者(dubboweb项目):
(1)把第二种方式中,配置类文件让它不要被加载:(注释掉这个注解,不需要这个类)

(2)、Controller服务调用与第二种方式一致,如下:使用@Reference来表明需要引用服务的属性
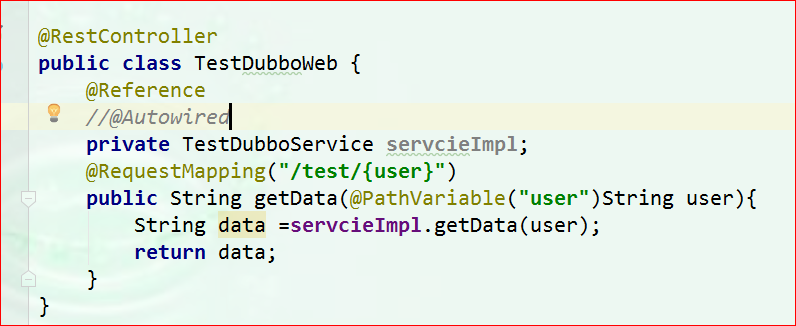
(3)主配置类不变(与第二种方式一致),如下:

(4)application.properties属性文件中:
#消费者别名
dubbo.application.name=consumer
#注册中心zookeeper地址与协议
dubbo.registry.address=zookeeper://39.108.125.227:2181
dubbo.registry.protocol=zookeeper

server.port=8081
(5)启动测试:


