使用CoreData [3]
使用CoreData [3]

此篇幅介绍CoreData如何升级版本防止崩溃
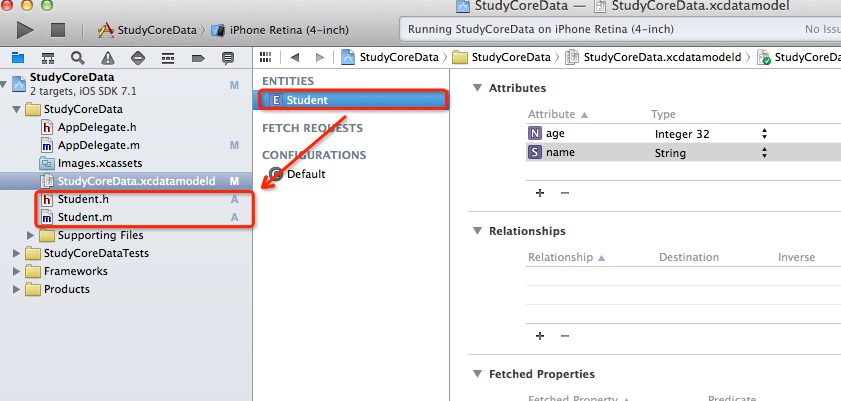
把你之前创建的实体文件全部删除掉,把沙盒中的数据库文件删除掉,实体只保持一个,然后重新创建出实体文件.
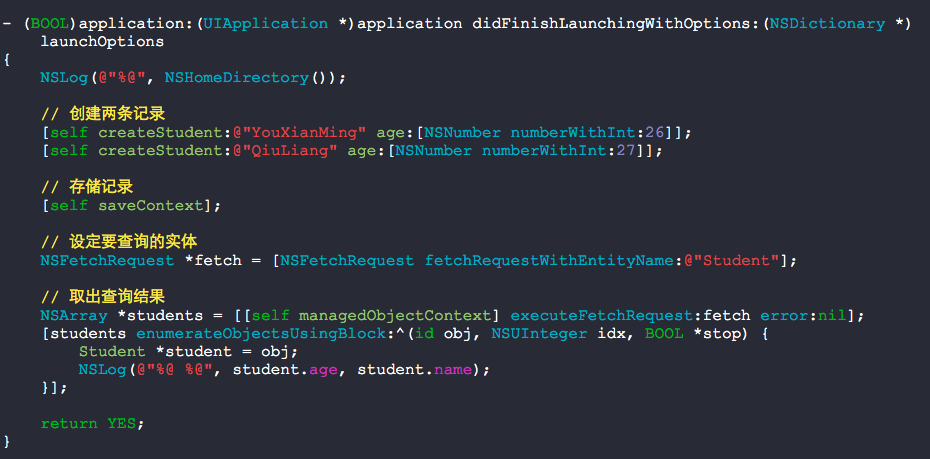
- (BOOL)application:(UIApplication *)application didFinishLaunchingWithOptions:(NSDictionary *)launchOptions
{
    NSLog(@"%@", NSHomeDirectory());

    // 创建两条记录
    [self createStudent:@"YouXianMing" age:[NSNumber numberWithInt:26]];
    [self createStudent:@"QiuLiang" age:[NSNumber numberWithInt:27]];

    // 存储记录
    [self saveContext];

    // 设定要查询的实体
    NSFetchRequest *fetch = [NSFetchRequest fetchRequestWithEntityName:@"Student"];

    // 取出查询结果
    NSArray *students = [[self managedObjectContext] executeFetchRequest:fetch error:nil];
    [students enumerateObjectsUsingBlock:^(id obj, NSUInteger idx, BOOL *stop) {
        Student *student = obj;
        NSLog(@"%@ %@", student.age, student.name);
    }];

    return YES;
}

- (Student *)createStudent:(NSString *)name age:(NSNumber *)age
{
    // 实体描述信息
    NSEntityDescription *description = \
    [NSEntityDescription entityForName:@"Student"
                inManagedObjectContext:[self managedObjectContext]];

    // 初始化对象
    Student *student = [[Student alloc] initWithEntity:description
                        insertIntoManagedObjectContext:[self managedObjectContext]];
    student.name     = name;
    student.age      = age;

    return student;
}
执行上述代码后运行结果为:
2014-07-31 09:13:40.424 StudyCoreData[16612:60b] 26 YouXianMing
2014-07-31 09:13:40.425 StudyCoreData[16612:60b] 27 QiuLiang
检查下数据库,此时只有两个属性哦:

然后我们给这个Student表新增加一个属性然后进行数据库的版本升级.
首先,我们先创建新的数据库表版本.
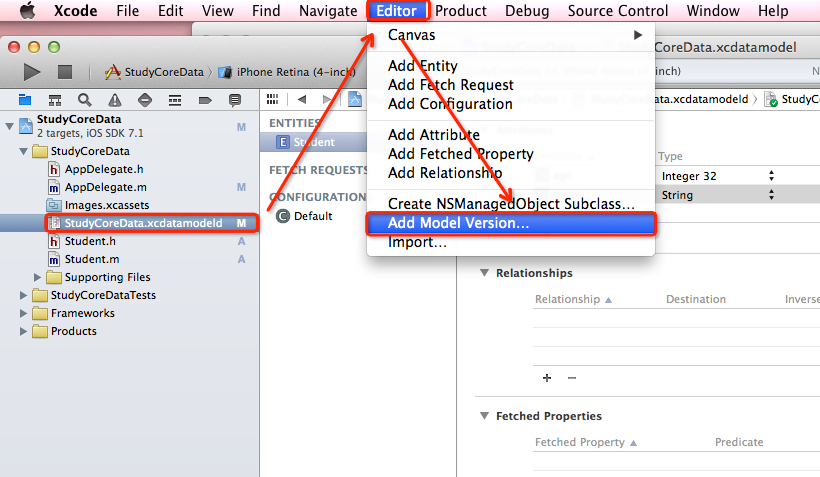
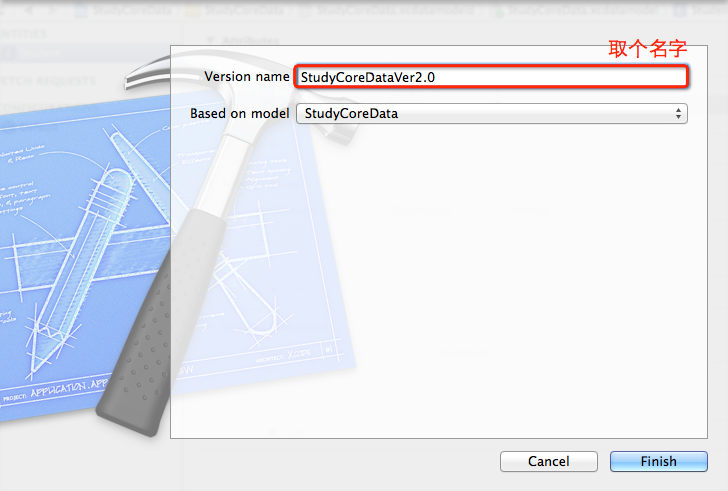

然后切换版本:

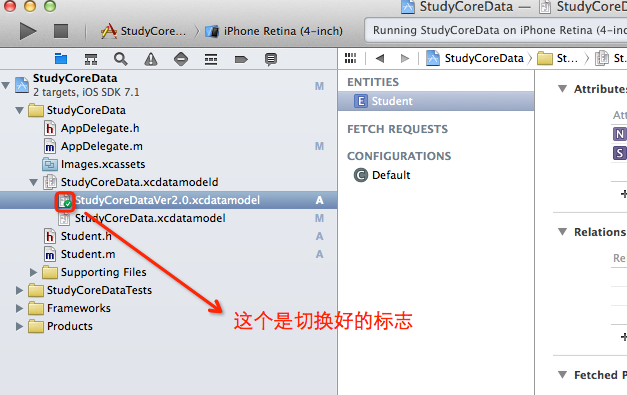
然后给Student新增加一个属性值
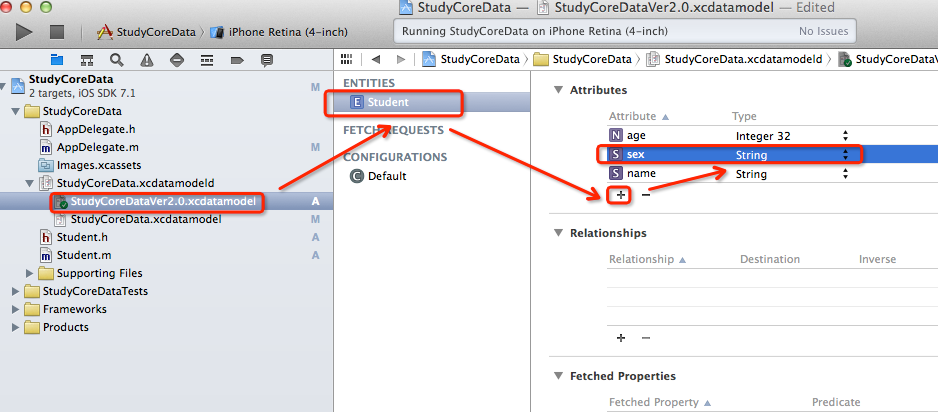

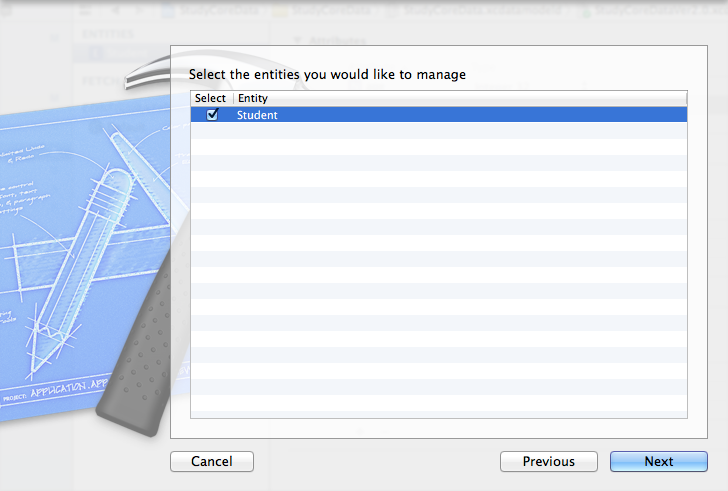
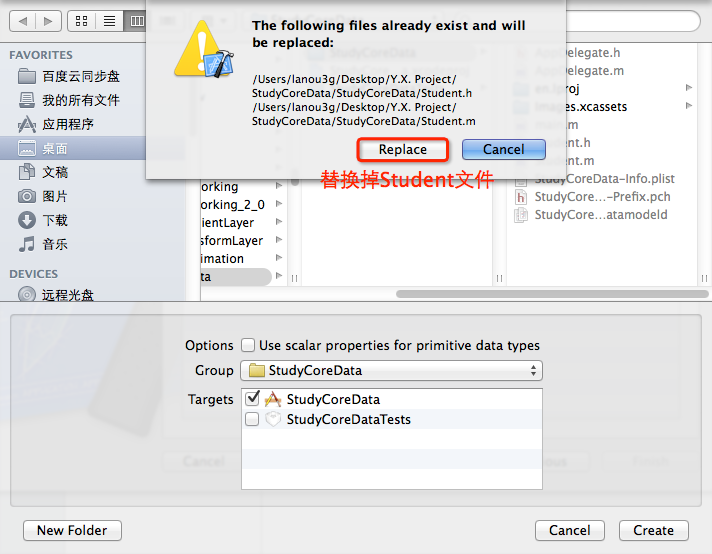
然后,我们来修改下源码试验测试结果:
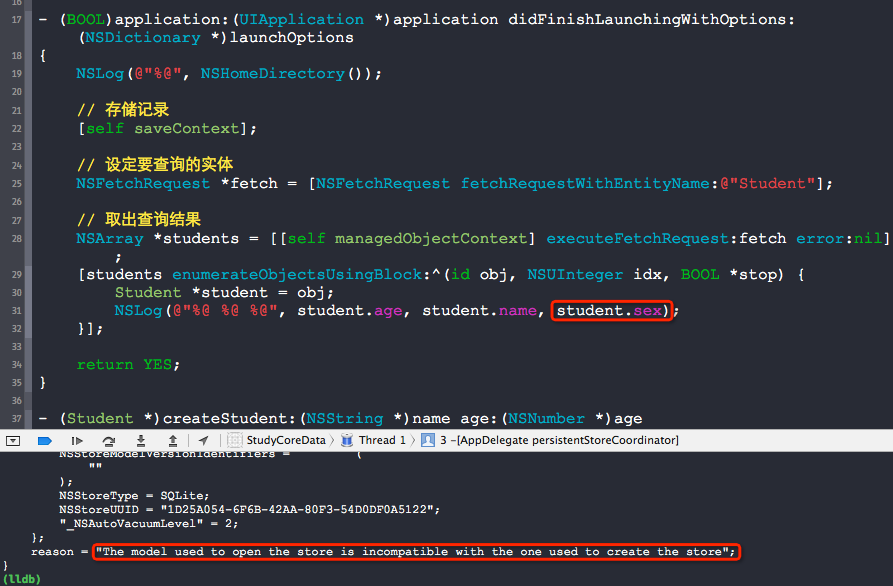
- (BOOL)application:(UIApplication *)application didFinishLaunchingWithOptions:(NSDictionary *)launchOptions
{
    NSLog(@"%@", NSHomeDirectory());

    // 存储记录
    [self saveContext];

    // 设定要查询的实体
    NSFetchRequest *fetch = [NSFetchRequest fetchRequestWithEntityName:@"Student"];

    // 取出查询结果
    NSArray *students = [[self managedObjectContext] executeFetchRequest:fetch error:nil];
    [students enumerateObjectsUsingBlock:^(id obj, NSUInteger idx, BOOL *stop) {
        Student *student = obj;
        NSLog(@"%@ %@ %@", student.age, student.name, student.sex);
    }];

    return YES;
}
运行后会崩溃,提示不兼容.
这个时候我们需要修改点东西:
找到以下地方.
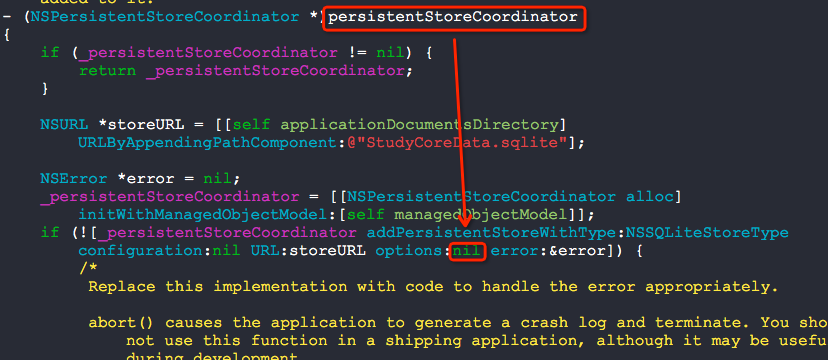
将nil替换成如下的形式.
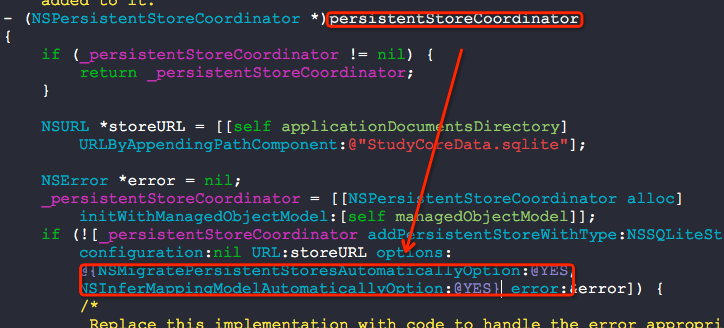
然后运行.

崩溃问题解决了,版本升级成功哦:)
解决问题出处:
http://stackoverflow.com/questions/8881453/the-model-used-to-open-the-store-is-incompatible-with-the-one-used-to-create-the
Deleting the app is sometimes not the case! Suggest, your app has already been published! You can't just add new entity to the data base and go ahead - you need to perform migration!
For those who doesn't want to dig into documentation and is searching for a quick fix:
- Open your .xcdatamodeld file
- click on Editor
- select Add model version...
- Add a new version of your model (the new group of datamodels added)
- select the main file, open file inspector (right-hand panel)
- and under
Versioned core data modelselect your new version of data model for current data model - THAT'S NOT ALL ) You should perform so called "light migration".
- Go to your
AppDelegateand find where thepersistentStoreCoordinatoris being created - Find this line
if (![_persistentStoreCoordinator addPersistentStoreWithType:NSSQLiteStoreType configuration:nil URL:storeURL options:nil error:&error]) - Replace
niloptions with@{NSMigratePersistentStoresAutomaticallyOption:@YES, NSInferMappingModelAutomaticallyOption:@YES}(actually provided in the commented code in that method) - Here you go, have fun!
P.S. This only applies for lightweight migration. For your migration to qualify as a lightweight migration, your changes must be confined to this narrow band:
- Add or remove a property (attribute or relationship).
- Make a nonoptional property optional.
- Make an optional attribute nonoptional, as long as you provide a default value.
- Add or remove an entity.
- Rename a property.
- Rename an entity.

