使用WebViewJavascriptBridge与UIWebView交互
使用WebViewJavascriptBridge与UIWebView交互

https://github.com/marcuswestin/WebViewJavascriptBridge
核心的地方:
UIWebView在加载完网页之后,通过方法stringByEvaluatingJavaScriptFromString:来让这个webView执行js脚本,之后想干啥干啥.
注意:必须是加载完之后!
使用
下载源码拖入工程.

使用一个本地的html文件.
<!doctype html>
<html><head>
    <style type='text/css'>
        html { font-family:Helvetica; color:#222; }
        h1 { color:steelblue; font-size:24px; margin-top:24px; }
        button { margin:0 3px 10px; font-size:12px; }
        .logLine { border-bottom:1px solid #ccc; padding:4px 2px; font-family:courier; font-size:11px; }
    </style>
</head><body>
    <h1>WebViewJavascriptBridge Demo</h1>


    <!--脚本开始的地方-->
    <script>
    window.onerror = function(err) {
        log('window.onerror: ' + err)
    }

    <!--申明方法-->
    function connectWebViewJavascriptBridge(callback) {
        if (window.WebViewJavascriptBridge) {
            callback(WebViewJavascriptBridge)
        } else {
            document.addEventListener('WebViewJavascriptBridgeReady', function() {
                callback(WebViewJavascriptBridge)
            }, false)
        }
    }

    <!--激活方法-->
    connectWebViewJavascriptBridge(function(bridge) {
        var uniqueId = 1
        function log(message, data) {
            var log = document.getElementById('log')
            var el = document.createElement('div')
            el.className = 'logLine'
            el.innerHTML = uniqueId++ + '. ' + message + (data ? ':<br/>' + JSON.stringify(data) : '')
            if (log.children.length) { log.insertBefore(el, log.children[0]) }
            else { log.appendChild(el) }
        }
        bridge.init(function(message, responseCallback) {
            log('JS got a message', message)
            var data = { 'Javascript Responds':'Wee!' }
            log('JS responding with', data)
            responseCallback(data)
        })

        bridge.registerHandler('testJavascriptHandler', function(data, responseCallback) {
            log('ObjC called testJavascriptHandler with', data)
            var responseData = { 'Javascript Says':'Right back atcha!' }
            log('JS responding with', responseData)
            responseCallback(responseData)
        })

        <!--创建一个按钮-->
        var button = document.getElementById('buttons').appendChild(document.createElement('button'))
        button.innerHTML = 'Send message to ObjC'
        button.onclick = function(e) {
            e.preventDefault()

            <!--此处是你传参数的地方-->
            var data = 'YouXianMing'
            log('JS sending message', data)
            bridge.send(data, function(responseData) {
                log('JS got response', responseData)
            })
        }

        document.body.appendChild(document.createElement('br'))
    })

    <!--脚本结束的地方-->
    </script>
    <div id='buttons'></div> <div id='log'></div>
</body></html>
RootViewController代码如下:
//
//  RootViewController.m
//  WebViewJavascriptBridge
//
//  Copyright (c) 2014年 Y.X. All rights reserved.
//

#import "RootViewController.h"
#import "WebViewJavascriptBridge.h"

@interface RootViewController ()<UIWebViewDelegate>

@property (nonatomic, strong) UIWebView                *webView;
@property (nonatomic, strong) WebViewJavascriptBridge  *bridge;

@end

#define BUNDLE_FILE(fileName)  [[NSBundle mainBundle] pathForResource:fileName ofType:nil];
#define HTML_STRING(htmlPath)  [NSString stringWithContentsOfFile:htmlPath \
encoding:NSUTF8StringEncoding error:nil]
#define FILE_URL(path)         [NSURL fileURLWithPath:path]

@implementation RootViewController

- (void)viewDidLoad
{
    [super viewDidLoad];

    // 获取本地html文件
    NSString *htmlPath = BUNDLE_FILE(@"demo.html");

    // 初始化UIWebView并添加进view中
    _webView = [[UIWebView alloc] initWithFrame:self.view.bounds];
    [_webView loadHTMLString:HTML_STRING(htmlPath)
                     baseURL:FILE_URL(htmlPath)];
    [self.view addSubview:_webView];

    // 让UIWebView执行脚本并监听回调
    _bridge = [WebViewJavascriptBridge bridgeForWebView:_webView handler:^(id data, WVJBResponseCallback responseCallback) {

        // 监听回调
        NSLog(@"%@", data);
    }];
}

@end
执行效果如下:

分析
WebViewJavascriptBridge.m 的源码里面有写着让webView执行js脚本的地方哦.

其实,我们只需要能够从UIWebView获取到值就行了,我们才不需要把值传递给UIwebView呢,有了这个UIWebView给iOS传值的功能,基本上能满足我们大部分的需求了哦.
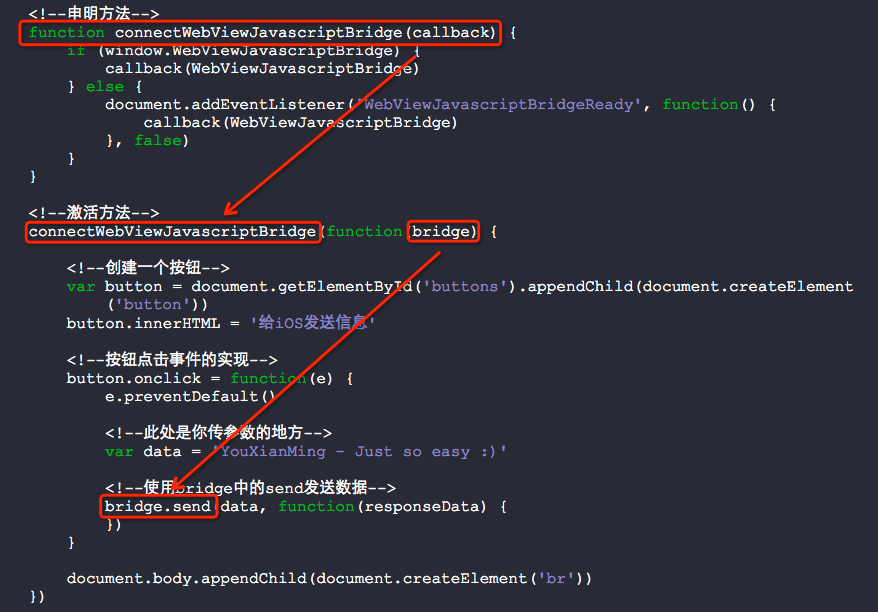
最后,我将html页面进行修改,精简到大家能看懂为止:).
demo.html
<!doctype html>
<html><head>
    <style type='text/css'>
        html { font-family:Helvetica; color:#222; }
        h1 { color:steelblue; font-size:24px; margin-top:24px; }
        button { margin:0 3px 10px; font-size:12px; }
        .logLine { border-bottom:1px solid #ccc; padding:4px 2px; font-family:courier; font-size:11px; }
    </style>
</head><body>
    <h1>UIWebView与iOS直接交互</h1>


    <!--脚本开始的地方-->
    <script>

    <!--申明方法-->
    function connectWebViewJavascriptBridge(callback) {
        if (window.WebViewJavascriptBridge) {
            callback(WebViewJavascriptBridge)
        } else {
            document.addEventListener('WebViewJavascriptBridgeReady', function() {
                callback(WebViewJavascriptBridge)
            }, false)
        }
    }

    <!--激活方法-->
    connectWebViewJavascriptBridge(function(bridge) {

        <!--创建一个按钮-->
        var button = document.getElementById('buttons').appendChild(document.createElement('button'))
        button.innerHTML = '给iOS发送信息'

        <!--按钮点击事件的实现-->
        button.onclick = function(e) {
            e.preventDefault()

            <!--此处是你传参数的地方-->
            var data = 'YouXianMing - Just so easy :)'

            <!--使用bridge中的send发送数据-->
            bridge.send(data, function(responseData) {
            })
        }

        document.body.appendChild(document.createElement('br'))
    })

    <!--脚本结束的地方-->
    </script>
    <div id='buttons'></div> <div id='log'></div>
</body></html>

以下是修改后的执行效果:

附录:
WebViewJavascriptBridge与UIWebView交互原理


