Python word_cloud 样例 标签云系列(三)
转载地址:https://zhuanlan.zhihu.com/p/20436642
word_cloud/examples at master · amueller/word_cloud · GitHub
上面是官方样例。这一篇里的大部分尝试都基于这些样例进行修改。前提是你已经完成了安装,依照上一篇修改了 FONT_PATH 。
还记得 http://zhuanlan.zhihu.com/666666/20432734 里提到的中文分词方法吧,这次我们就不再赘述对文本的预处理了。有所不同的是,在上次的 pytagcloud 库中我们要求传入字典,而这次我们要求传入数组。所以需要做一点小小的改动。
上一次我们是这么写的:
wd = {}

fp=codecs.open("rsa.txt", "r",'utf-8');

alllines=fp.readlines();

fp.close();

for eachline in alllines:
    line = eachline.split('        ')
    #print eachline,
    wd[line[0]] = int(line[1])
print wd
这次我们需要将其中生成字典的部分变为数组:
# -*- coding: utf-8 -*-
import codecs
fp=codecs.open("rs300.txt", "r",'utf-8');

wd = []
alllines=fp.readlines();

fp.close();

for eachline in alllines:
    line = eachline.split('\\')
    line[1]=int(line[1])
    wd.append(line)
    #print eachline,

print wd
文本预处理好了以后,我们就可以开始对照样例依葫芦画瓢,尝试生成词云了。在此过程中会强调一些比较重要的方法,请自行对照上一篇的文档理解。
word_cloud 生成词云有两个方法。from text 和 from frequencies 。如果我们处理英文文档的话,就可以直接使用第一个方法,而不需要提前预处理文本,由于我们要做的是中文文本,所以我们必须自己分词,并处理为数组,使用第二种方法。
让我们从一个最简单的例子开始,也就是官方文档的 simple.py
#-*- coding: utf-8 -*-
"""
Minimal Example
===============
Generating a square wordcloud from the US constitution using default arguments.
"""

from os import path
from wordcloud import WordCloud

d = path.dirname(__file__)

# Read the whole text.
 此处原为处理英文文本,我们修改为传入中文数组
#text = open(path.join(d, 'constitution.txt')).read()
frequencies = [(u'知乎',5),(u'小段同学',4),(u'曲小花',3),(u'中文分词',2),(u'样例',1)]

# Generate a word cloud image 此处原为 text 方法,我们改用 frequencies
#wordcloud = WordCloud().generate(text)
wordcloud = WordCloud().fit_words(frequencies)

# Display the generated image:
# the matplotlib way:
import matplotlib.pyplot as plt
plt.imshow(wordcloud)
plt.axis("off")

# take relative word frequencies into account, lower max_font_size
#wordcloud = WordCloud(max_font_size=40, relative_scaling=.5).generate(text)
wordcloud = WordCloud(max_font_size=40, relative_scaling=.5).fit_words(frequencies)
plt.figure()
plt.imshow(wordcloud)
plt.axis("off")
plt.show()

# The pil way (if you don't have matplotlib)
#image = wordcloud.to_image()
#image.show()
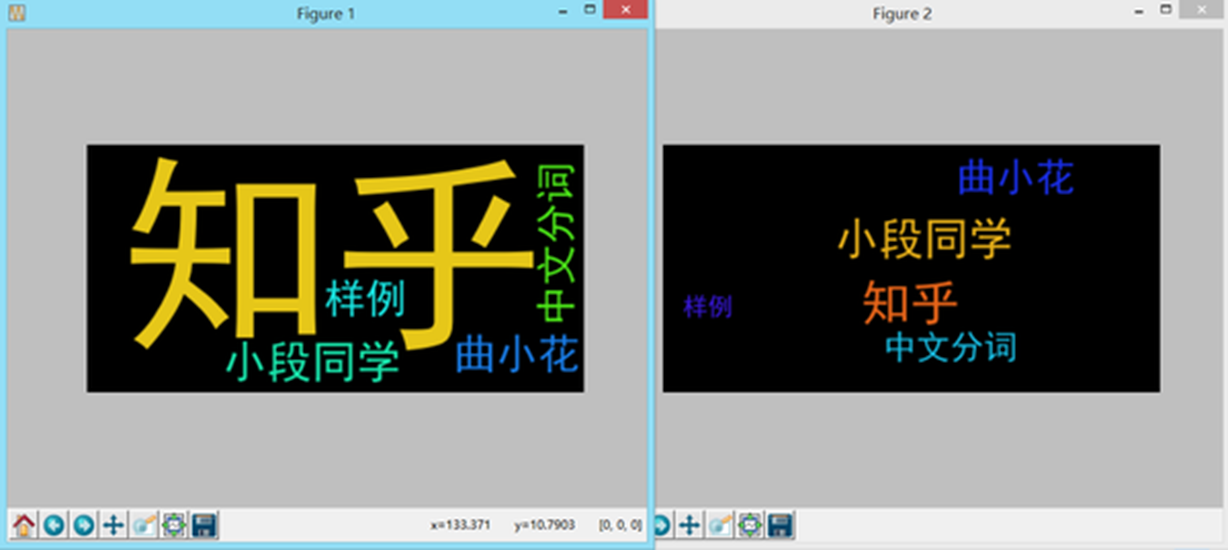
运行代码得到结果:
 长的很像我们在第一篇中输出的结果。但是我们可以注意到,上次的结果如右图,词语间是不会发生嵌套的,而这次输出的左图,字间空隙也可以插入词语了。
这一步成功以后起码说明我们中文环境配好了,可以开始更深层次的尝试了。
在下面的演示中,我为了节省力气,会直接使用一些英文的文档,这样省去处理中文分词的步骤。
大家在用的时候只要记得修改 FONT_PATH 、 utf-8 编码、处理数据为数组格式使用 frequencies 方法这三点就可以了。
接下来我们来到 masked.py
如文件名所示,这一次我们要自定义遮罩形状来生成真正的词云了!
根据文档说明,遮罩图片的白色部分将被视作透明,只在非白色部分区域作图。于是我们找到一张黑白素材图。

# -*- coding: utf-8 -*-
""""
Masked wordcloud
================
Using a mask you can generate wordclouds in arbitrary shapes.
"""

from os import path
from PIL import Image
import numpy as np
import matplotlib.pyplot as plt

from wordcloud import WordCloud, STOPWORDS

d = path.dirname(__file__)

# Read the whole text.
text = open(path.join(d, 'alice.txt')).read()

# read the mask image
# taken from
# http://www.stencilry.org/stencils/movies/alice%20in%20wonderland/255fk.jpg
alice_mask = np.array(Image.open(path.join(d, "huge.jpg")))

wc = WordCloud(background_color="white", max_words=2000, mask=alice_mask,
               stopwords=STOPWORDS.add("said"))
# generate word cloud
wc.generate(text)

# store to file
wc.to_file(path.join(d, "alice.png"))

# show
plt.imshow(wc)
plt.axis("off")
plt.figure()
plt.imshow(alice_mask, cmap=plt.cm.gray)
plt.axis("off")
plt.show()
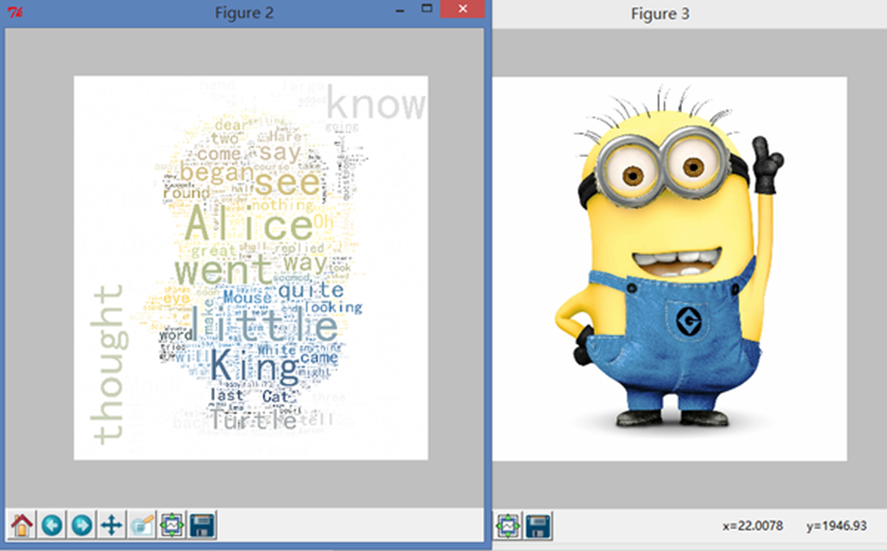
如下图:


图做好了,可是总觉得哪里怪怪的。可能是颜色太过鲜艳吧,配色总感觉不是那么舒服,有没有更逼格的处理?自然是有的。我们来到 a_new_hope.py
还是上面的图,直接处理。
"""
Using custom colors
====================
Using the recolor method and custom coloring functions.
"""

import numpy as np
from PIL import Image
from os import path
import matplotlib.pyplot as plt
import random

from wordcloud import WordCloud, STOPWORDS


def grey_color_func(word, font_size, position, orientation, random_state=None, **kwargs):
    return "hsl(0, 0%%, %d%%)" % random.randint(60, 100)

d = path.dirname(__file__)

# read the mask image
# taken from
# http://www.stencilry.org/stencils/movies/star%20wars/storm-trooper.gif
mask = np.array(Image.open(path.join(d, "huge.jpg")))

# movie script of "a new hope"
# http://www.imsdb.com/scripts/Star-Wars-A-New-Hope.html
# May the lawyers deem this fair use.
text = open("a_new_hope.txt").read()

# preprocessing the text a little bit
text = text.replace("HAN", "Han")
text = text.replace("LUKE'S", "Luke")

# adding movie script specific stopwords
stopwords = STOPWORDS.copy()
stopwords.add("int")
stopwords.add("ext")

wc = WordCloud(max_words=1000, mask=mask, stopwords=stopwords, margin=10,
               random_state=1).generate(text)
# store default colored image
default_colors = wc.to_array()
plt.title("Custom colors")
plt.imshow(wc.recolor(color_func=grey_color_func, random_state=3))
wc.to_file("a_new_hope.png")
plt.axis("off")
plt.figure()
plt.title("Default colors")
plt.imshow(default_colors)
plt.axis("off")
plt.show()


这样的灰调颜色比上面花花绿绿的感觉好多了。可是总不能老用黑白啊,需要色彩的时候怎么办?最后一站我们来到 colored.py
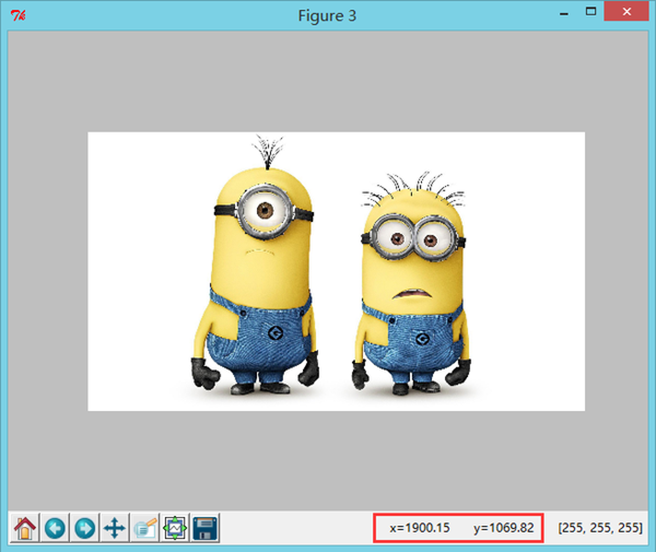
为了突出我们鲜明且令人舒服的色调,我挑选了一幅小黄人的图片进行处理。
#!/usr/bin/env python2
"""
Image-colored wordcloud
========================
You can color a word-cloud by using an image-based coloring strategy implemented in
ImageColorGenerator. It uses the average color of the region occupied by the word
in a source image. You can combine this with masking - pure-white will be interpreted
as 'don't occupy' by the WordCloud object when passed as mask.
If you want white as a legal color, you can just pass a different image to "mask",
but make sure the image shapes line up.
"""

from os import path
from PIL import Image
import numpy as np
import matplotlib.pyplot as plt

from wordcloud import WordCloud, STOPWORDS, ImageColorGenerator

d = path.dirname(__file__)

# Read the whole text.
text = open(path.join(d, 'alice.txt')).read()

# read the mask / color image
# taken from http://jirkavinse.deviantart.com/art/quot-Real-Life-quot-Alice-282261010
alice_coloring = np.array(Image.open(path.join(d, "xhr.jpg")))

wc = WordCloud(background_color="white", max_words=2000, mask=alice_coloring,
               stopwords=STOPWORDS.add("said"),
               max_font_size=40, random_state=42)
# generate word cloud
wc.generate(text)

# create coloring from image
image_colors = ImageColorGenerator(alice_coloring)

# show
plt.imshow(wc)
plt.axis("off")
plt.figure()
# recolor wordcloud and show
# we could also give color_func=image_colors directly in the constructor
plt.imshow(wc.recolor(color_func=image_colors))
plt.axis("off")
plt.figure()
plt.imshow(alice_coloring, cmap=plt.cm.gray)
plt.axis("off")
plt.show()

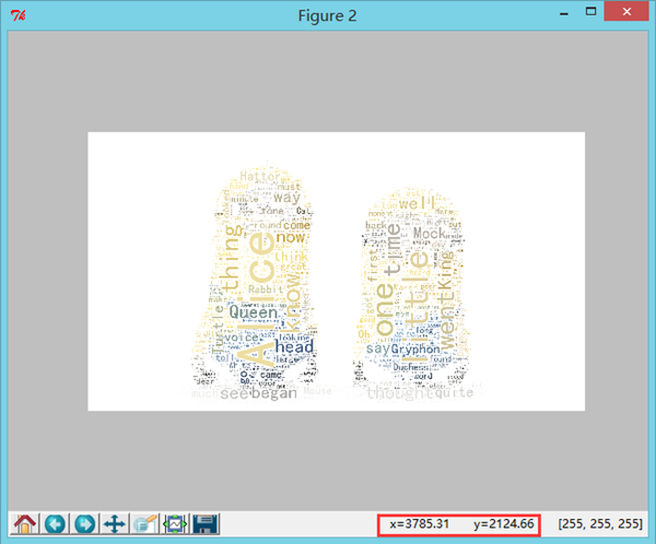
效果还可以,但是和我想的…不太一样…我们尝试调整一些参数。……当然,最佳效果可能需要很多次的尝试才会出现。比如我将字号调大以后
就会出现一些……奇怪的输出,难道是因为白色白的不够纯净吗。


总体上讲这样的配色已经比上面那种花花绿绿的配色好多了…至于为什么白色区域还会有词语,我刚看了一下小黄人的原图,
白色区域的确不完全是 255,255,255 ,应该是这个原因。
好了,到这里我们四幅样例就都做完了。最后我发现缺少一张封面图,那就再多来一张,顺便尝试一下 scale 参数。
我们尝试在如下位置加入 scale 参数,设置为 1.5 倍。
1 | wc=WordCloud(background_color="white",max_words=2000,mask=alice_coloring,stopwords=STOPWORDS.add("said"),max_font_size=40,random_state=42,scale =1.5 ) |

 可以看到输出的图片的确是原图的 2 倍。
再次强调使用 word_cloud 的几个要点吧:
1、FONT_PATH
2、中文要实现分词,输出为数组,使用 frequencies 方法
3、scale 的用法,由于程序运行时间较长,如果生成大幅图片会很慢,可以使用 scale 调节大小,但是会牺牲词语对形状的拟合度
到此标签云这一系列就能告一段落了。我们由中文分词引入,为了可视化展示,试用了两个标签云生成器。下面简单总结比较一下 pytagcloud 和 word_cloud 的优点:
pytagcloud :
优点:依赖较少;可以同时添加多个字体,在代码中选择;提供相对完善的配色方案。
word_cloud:
优点:文字空隙可以嵌套词语;支持自定义词云形状;支持通过图片上色。
缺点:依赖较多;程序运行较慢;默认颜色花花绿绿实在是丑…
最后谈一下对做标签云的看法:
分词、取词是关键和基础。图片毕竟只是一个可视化的展示手段,内容更重要。分词前要想清楚是否屏蔽某些词性( jieba 提供这种功能,但是学习的还不透彻,以后可以专门记录一些分词的东西),分词以后也可以手动删除一些词语,使重点突出。
遮罩图片的选择很重要。首先需要是大面积白底,否则会整张图片铺满词语。其次,图片的颜色要丰富,最好能有渐变度,这样的配色会很舒服。但是符合条件的图片实在是太难找了…可遇而不可求。
最后,完美的图片需要很多次地微调参数。词语的数量,字体的大小等,都会对整张图片的效果和词云形状的拟合度产生影响。
这些只是对现有工具的简单学习应用,并没有什么创新与创造。
希望这几篇文章能对感兴趣的人有所帮助。
#这一篇主要是对官方样例的重复,比较简单,代码也是现成的。图片可以根据喜好自己去找,就不提供这次用到的文件了。


【推荐】编程新体验,更懂你的AI,立即体验豆包MarsCode编程助手
【推荐】抖音旗下AI助手豆包,你的智能百科全书,全免费不限次数
【推荐】轻量又高性能的 SSH 工具 IShell:AI 加持,快人一步
· .NET开发智能桌面机器人:用.NET IoT库编写驱动控制两个屏幕
· 用纯.NET开发并制作一个智能桌面机器人:从.NET IoT入门开始
· 一个超经典 WinForm,WPF 卡死问题的终极反思
· ASP.NET Core - 日志记录系统(二)
· .NET 依赖注入中的 Captive Dependency
· 开箱你的 AI 语音女友「GitHub 热点速览」
· 互联网不景气了那就玩玩嵌入式吧,用纯.NET开发并制作一个智能桌面机器人(二):用.NET IoT库
· 几个自学项目的通病,别因为它们浪费了时间!
· C#钩子(Hook) 捕获键盘鼠标所有事件 - 5分钟没有操作,自动关闭 Form 窗体
· 单点认证(SSO)方案调研总结