【杂文】renpy漫游记
【杂文】renpy漫游记
程序工作基本告一段落了。后续如果有新的折磨再补充(希望不要再有了TAT)。
1.【隐藏对话框】
在剧本文件中可以直接用指令 window hide 隐藏(但隐藏不了按钮)。
如果想让快捷按钮跟着对话框一起隐藏,可以写两个 label:
label Show:
    window show #显示对话框
    $quick_menu = True #显示快捷按钮
    return
label Hide:
    $quick_menu = False #不显示快捷按钮
    window hide #隐藏对话框
    return
如果要做点击按钮实现“隐藏”功能,需要 action 。由于 00keymap.rpy 文件中内置有 label _hide_windows,直接写 action Call("_hide_windows") 即可。
2.【在设置页面创建一个bar调整对话框透明度】
搞了一整个晚上,遇到诸如“条的 value 不能是实数”,“变量修改后如果换个界面莫名其妙回到默认”,“对话框所属 window 组件的特性”等等一大堆问题,因为尝试了各种各样的方法,所以还有别的许多……让人掉头发的东西……
最后在社区找到了这个:Changing the opacity of the Dialogue box with a Slider
这篇帖子里又出现这个:how do I change the opacity of the dialogue box in Ren’Py
最终终于是解决了问题。
首先,在 screen say 的 window 组件里添加对话框背景图片时用这句话:
window:
    id "window"

    background Transform(Image("gui/ui_dialogue/ui_dialogue_box.png",xalign=0.5, yalign=1.0), alpha=persistent.windowalpha) #加这句

    if who is not None:
        window:
            id "namebox"
            style "namebox"
            text who id "who"
注意一下,这句大有来头。
首先是必须放在这个位置(即 window 组件内的最上面。免得将后面的文字和名字框覆盖),这个很显然。
其二:必须在这里写 Transform() 函数,如果在 screen 外面用 transform xxx: 语句定义一个变换的话,那么就是定死了无法再改变。
其三:Transform() 函数里那个 persistent.windowalpha 变量定义在 screen say 外面,要求这样子写:
define persistent.windowalpha=0.5 #0.5是设置的初始值,改成1.0也可
实测用 default my.windowalpha 会寄……奶奶滴……还是老老实实用 define 和 persistent 吧(虽然我并不清楚原理)
update-2023-12-6:用 persistent 前缀定义的变量可以作为个人游戏数据保存下来(类似于存档)。
然后,后面 bar 这样写(注意 style="xxx" 不能省):
bar value FieldValue(persistent,"windowalpha",range=1.0,style="slider")
我的 style 长这样:
screen preferences(title="textpage",pre_title="none"):
    ...
    vbox:
        ypos 410
        style_prefix "mysliderh"
        yalign 0.0
        spacing 52
        bar value Preference("text speed")#文本显示速度
        bar value ...#文本显示速度...
        bar value FieldValue(persistent,"windowalpha",range=1.0,style="slider")#对话框透明度

style mysliderh_slider:
    xpos 969
    xsize 676
    thumb_offset 34#这个很重要
    left_gutter 34#这个也很重要
    right_gutter 34#这个也很重要
    base_bar "gui/ui_setting/ui_setting_slider_h.png"
    thumb "gui/ui_setting/ui_setting_thumb_h.png"
3.【主界面BGM/粒子效果】
因为一些我不懂的奇怪问题,直接在 screen main_menu(): 里播放BGM的话,会放两次(如果在这里加粒子效果,也会有两次),而且进入设置页面后再回来会重播……所以还是去 00start.rpy 里修改吧。引擎内置有 BGM 播放的代码,照着抄一份粒子的就可以了。
4.【播放视频且禁用交互】
首先注意视频格式编码(据说还要弄成24fps)。
关于如何禁用用户点击跳过,试了各种各样的方法,最后只有 pause(hard) 管用。
但如果这期间使用了快进,程序会开始执行后面的脚本,画面上却保留着影片图像继续播放(仅图像,音乐被成功跳过了)。目前没有什么更好的办法,只能禁止了。
#写法1
label chapter_0:
    $ _skipping=False #禁用快进
    play movie "movies/PV.avi"
    $ renpy.pause(72,hard=True) #注意时间要和影片长度一致。
    $ _skipping=True #启用快进
update:像这样写可以正常 skip:
#写法2
label chapter_0:
    play movie "movies/PV.avi"
    $ renpy.pause(72,hard=True) #注意时间要和影片长度一致。
    stop movie
    hide movie
update:第二种写法有bug,如果在播放的时候按 ESC 或者鼠标右键打开存档页面,影片就会被关掉(这时候返回label流程之后就会一直黑屏)。
#写法3
image mymovie = Movie(play="movies/PV.avi",size=(1920, 1080), xalign=0.5, yalign=0.5,loop=False)
screen mymoviescreen: #创建一个专门的页面用来播放影片
    add "mymovie"
    timer 72.0 action Return()
label chapter_0:
    $ _skipping=False
    call screen mymoviescreen
    $ _skipping=True
5.【播放动态图片】
gif肯定是不行了,但可以暴力切帧。
image Wao:
    "images/cgsp/wao/wao_1.png"
    0.03448
    "images/cgsp/wao/wao_2.png"
    0.03448
    "images/cgsp/wao/wao_3.png"
    0.03448

    ...

    "images/cgsp/wao/wao_29.png"
    0.03448
    repeat

label chapter_0:
    show Wao #显示图片
这里是 \(29\) 张,拿 \(1\) 秒去除一下计算间隔时间。
或许高级一点的做法:Renpy 帧动画
6.【能覆盖对话框的图层】
还是这个奇奇怪怪的 window 组件,想在它上面覆盖图片需要这样写:
image FullNoise="gui/fullnoise.png"
label chapter_0:
	show FullNoise onlayer screens zorder 1
window 组件大概是在 screens 图层上。经测试,使用 zorder=1 可以一直覆盖,zorder=0 时不行。具体机制我也不太懂。
7.【雨雪天气】
The NVL Maker 自带天气效果,RenPy居然没有。琢磨了一阵手搓了一个。
思路大概就是搞一堆随机数然后让雨水向下平移模拟坠落。
图片是 The NVL Maker 引擎的默认素材。
image Rain_0="images/rain_0_0.png"
image Rain_1="images/rain_0_1.png"
image Rain_2="images/rain_0_2.png"
image Rain_3="images/rain_0_3.png"
image BigRain_0="images/rain_0_0.png"
image BigRain_1="images/rain_0_1.png"
image BigRain_2="images/rain_0_2.png"
image BigRain_3="images/rain_0_3.png"

transform Rain_ts(x1,y1,x2,y2,x3,y3,t1,t2,t3,y_t1=0.16,y_t2=0.16,y_t3=0.16,y_add=500):
    xpos x1 ypos y1-y_add yoffset 0
    easeout y_t1 yoffset y_add
    ypos 1200 #这里是把图片挪到屏幕外,不然在中间悬空不动怪哈人的
    pause t1 #随机暂停一小段时间后再播放下一个
    xpos x2 ypos y2-y_add yoffset 0
    easeout y_t2 yoffset y_add
    ypos 1200
    pause t2
    xpos x3 ypos y3-y_add yoffset 0
    easeout y_t3 yoffset y_add
    ypos 1200
    pause t3
    repeat

label Rain:
    show Rain_0 at Rain_ts(1976,1015,  1670,149 ,  119 ,642 , 0.08,0.18,0.24 ) onlayer screens zorder 1
    show Rain_1 at Rain_ts(1807,114 ,  760 ,331 ,  298 ,1017, 0.02,0.35,0.13 ) onlayer screens zorder 1
    show Rain_2 at Rain_ts(772 ,1048,  856 ,882 ,  890 ,357 , 0.25,0.10,0.15 ) onlayer screens zorder 1
    show Rain_3 at Rain_ts(996 ,360 ,  1333,676 ,  428 ,988 , 0.34,0.08,0.08 ) onlayer screens zorder 1
    return
label BigRain:
    show Rain_0 at Rain_ts(1976,1015,  1670,149 ,  119 ,642 , 0.08,0.18,0.24 ) onlayer screens zorder 1
    show Rain_1 at Rain_ts(1807,114 ,  760 ,331 ,  298 ,1017, 0.02,0.35,0.13 ) onlayer screens zorder 1
    show Rain_2 at Rain_ts(772 ,1048,  856 ,882 ,  890 ,357 , 0.25,0.10,0.15 ) onlayer screens zorder 1
    show Rain_3 at Rain_ts(996 ,360 ,  1333,676 ,  428 ,988 , 0.34,0.08,0.08 ) onlayer screens zorder 1
    show BigRain_0 at Rain_ts(912 ,335 ,  986 ,397 ,  965 ,763 , 0.12,0.26,0.12 ) onlayer screens zorder 1
    show BigRain_1 at Rain_ts(1391,921 ,  1666,586 ,  475 ,435 , 0.17,0.29,0.04 ) onlayer screens zorder 1
    show BigRain_2 at Rain_ts(1075,431 ,  573 ,955 ,  1128,448 , 0.33,0.04,0.13 ) onlayer screens zorder 1
    show BigRain_3 at Rain_ts(52  ,560 ,  1084,1058,  93  ,731 , 0.11,0.09,0.30 ) onlayer screens zorder 1
8.【复古唱片机】
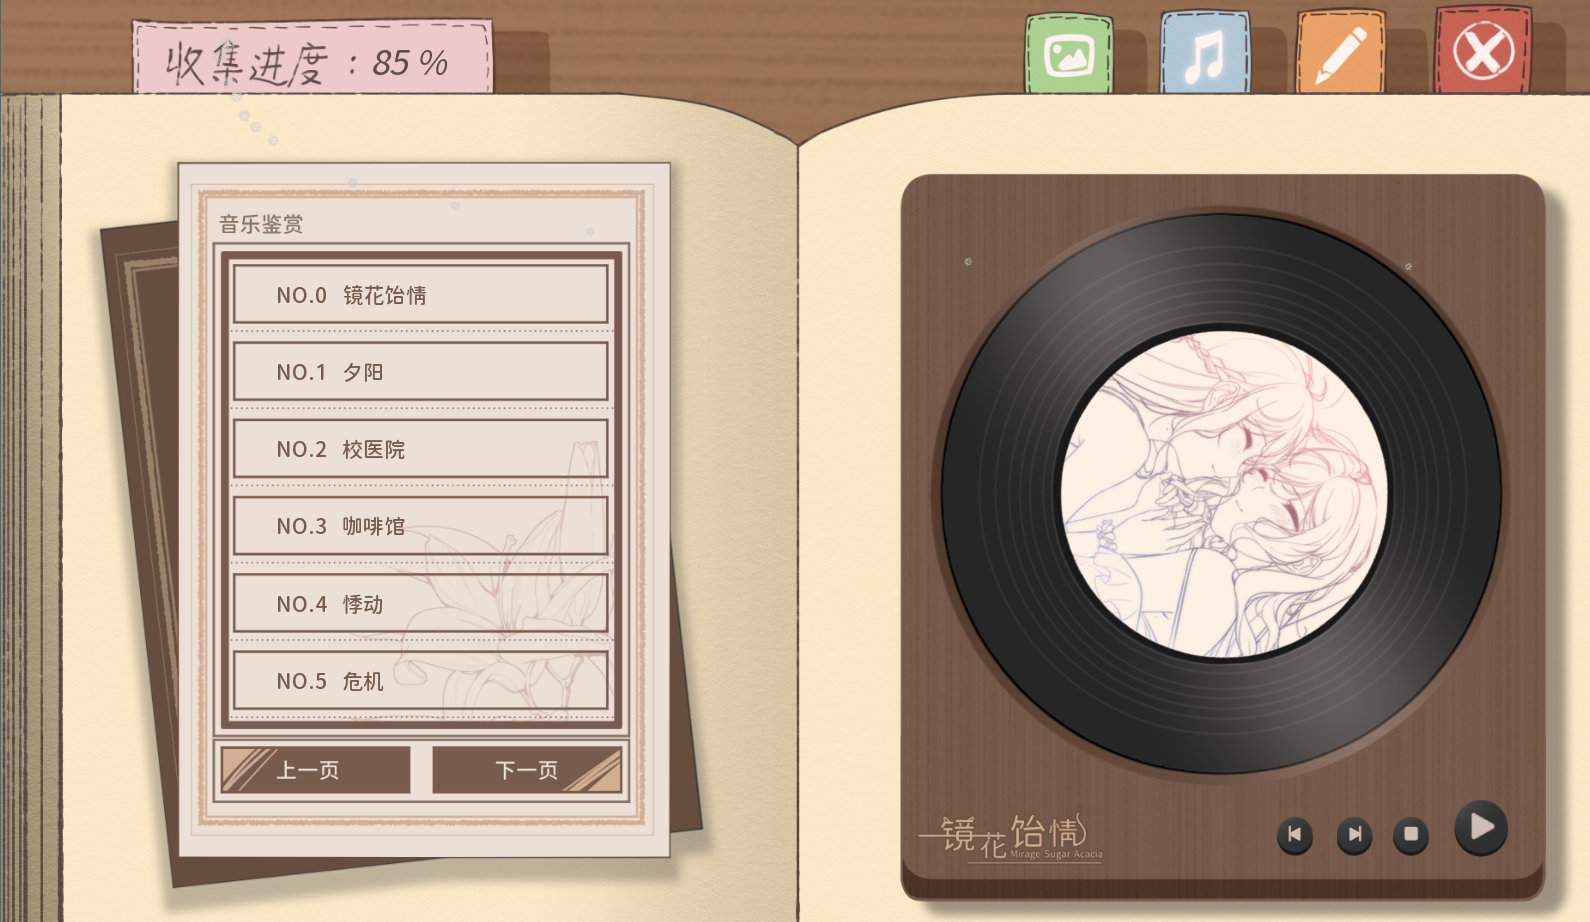
先搞个图片动态旋转:
首先做个 1920*1080 的全屏图,matrixanchor 设置成旋转中心的坐标(试了好久,只有这种方案能成功)。
define gal_rimg="gui/ui_gallery/ui_gallery_bgmpage_rotate.png"
transform gal_rimg_rotate(ti=0.066):
    perspective True
    matrixanchor (1234+191,388+191)
    matrixtransform RotateMatrix(0, 0, 0)
    linear 10.0 matrixtransform RotateMatrix(0,0,360)
    repeat

##鉴赏页
screen gallery(title="cgpage",pre_title="none",pagenumber=0):
    ...
	##右边旋转图
	if renpy.music.is_playing()==True:
		add gal_rimg at gal_rimg_rotate
    ...
右下角的小按钮都有内置函数。
##右下角小按钮
imagebutton:
    xpos 1487 ypos 955
    idle galpath+"bgmpage_smallbutton_1.png"
    hover galpath+"bgmpage_smallbutton_1.png"
    action mr.Previous()#上一首
imagebutton:
    xpos 1556 ypos 955
    idle galpath+"bgmpage_smallbutton_2.png"
    hover galpath+"bgmpage_smallbutton_2.png"
    action mr.Next()#下一首
imagebutton:
    xpos 1622 ypos 955
    idle galpath+"bgmpage_smallbutton_3.png"
    hover galpath+"bgmpage_smallbutton_3.png"
    action mr.Stop()#停止播放
imagebutton:
    xpos 1693 ypos 935
    idle galpath+"bgmpage_smallbutton_4.png"
    hover galpath+"bgmpage_smallbutton_4.png"
    if renpy.music.is_playing()==True:
        action PauseAudio("music",value="toggle") #如果频道上有音乐正在播放,使用暂停/继续功能
    else:
        action mr.RandomPlay() #否则随机开始播放
9.【关于Steamworks】
Steam游戏生成版本清单里商店与 Devcomp 程序包吻合选项一直勾不上,捣鼓了好久,最后在这里找到了解决方案。
原因是之前上过demo,于是在主商店的商店程序包里自动出现了demo的应用和depot,把它删掉就好了。


 浙公网安备 33010602011771号