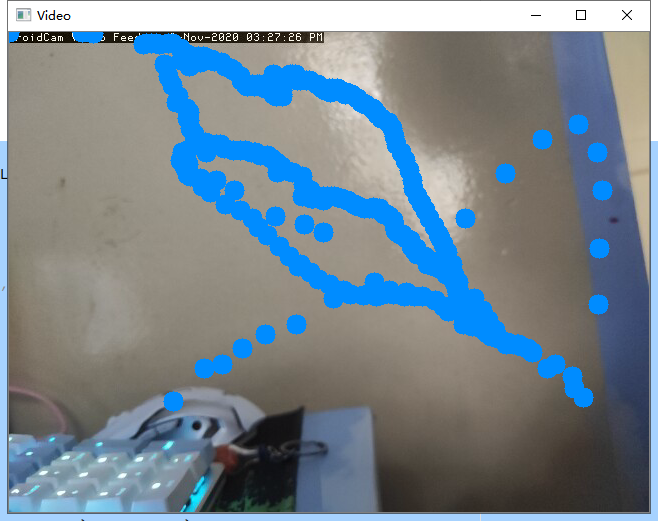
opencv入门——捕捉物体运动轨迹
效果

1、先获取视频流,逐帧对视频进行处理
# #加载视频,网络摄像头
# cap=cv2.VideoCapture("http://192.168.1.121:4747/video")
# #图像显示:遍历帧
# colors=([3,125,0],[47,255,255])
# points = [[0, 0]]
2、获取所需物品的色彩范围
具体代码在这一篇的色彩提取里有https://www.cnblogs.com/XiaoGao128/p/13934329.html
3、将每帧图片色彩转换为HSV格式,通过色彩提取中的色相、亮度、饱和度的最大最小值设置,提取遮罩,获取遮罩的轮廓并返回中心点
4、通过points记录路径并打印
# def getContours(img):
#     coutours,hierarchy=cv2.findContours(img,cv2.RETR_EXTERNAL,cv2.CHAIN_APPROX_NONE)
#     x,y,w,h=0,0,0,0
#     for cnt in coutours:
#         area=cv2.contourArea(cnt)
#         # if area>5:
#         # cv2.drawContours(imgcontours, cnt, -1, (0, 0, 255), 5)
#         #周长
#         peri=cv2.arcLength(cnt,True)
#         #拟合轮廓点集
#         approx=cv2.approxPolyDP(cnt,0.03*peri,True)
#         objcor=len(approx)
#         x,y,w,h=cv2.boundingRect(approx)
#     return x+w//2,y
# points = [[0, 0]]
# while True:
#     success,img=cap.read()
#     imgcontours=img.copy()
#     imgHsv=cv2.cvtColor(img,cv2.COLOR_BGR2HSV)

#     low = np.array([0,150,105])
#     high = np.array([23,255,255])
#     mask = cv2.inRange(imgHsv, low, high)
#     imgRes = cv2.bitwise_and(img,img, mask=mask)
#     x,y=getContours(mask)
#     cv2.circle(imgcontours,(x,y),10,(255,140,0),cv2.FILLED)
#     points.append([x,y])
#
#   for point in points:
#         cv2.circle(imgcontours, (point[0], point[1]), 10, (255, 140, 0), cv2.FILLED)
#     print(points)
# # cv2.imshow("Video", imgcontours) # if cv2.waitKey(1) & 0xFF == ord('q'): # break;


