SQLyog基础操作(十六)-IDEA连接数据库、IDEA进行数据库事务操作、数据库连接池(开源数据库(DBCP、C3P0))
10.8 使用IDEA连接数据库
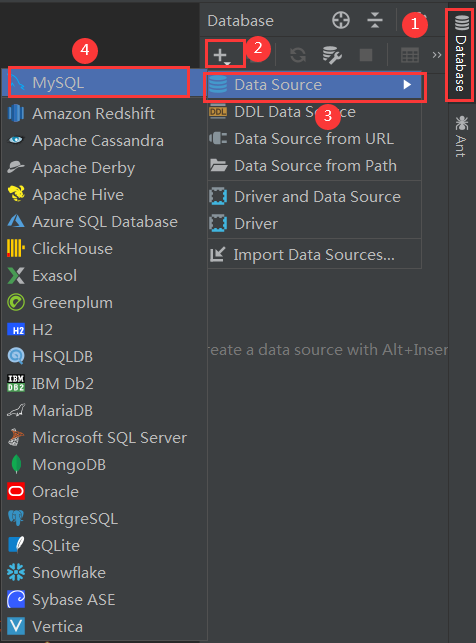
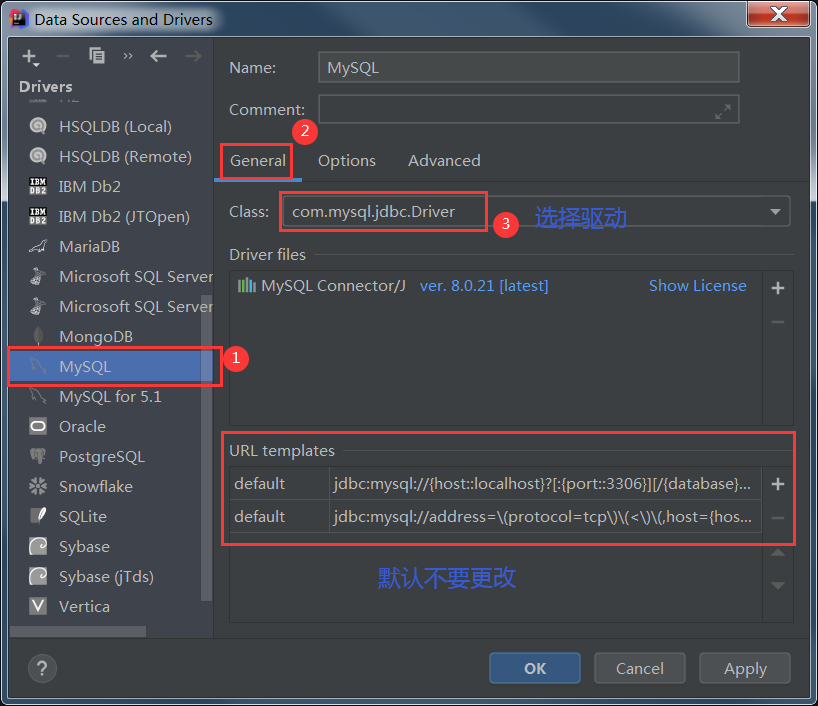
2.出现新页面后,在Drivers选项卡下,向下滑,找到MySQL
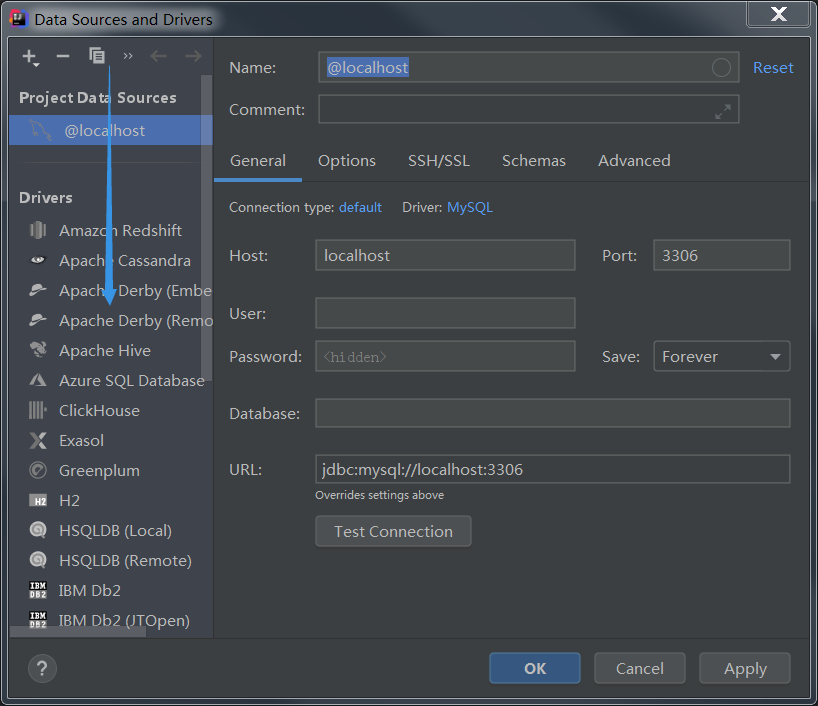
选择MySQL,加载数据库驱动,Apply,OK
切换到上面的MySQL-@localhost进行数据库连接,输入用户名、密码,进行测试连接,测试成功后,Apply,OK
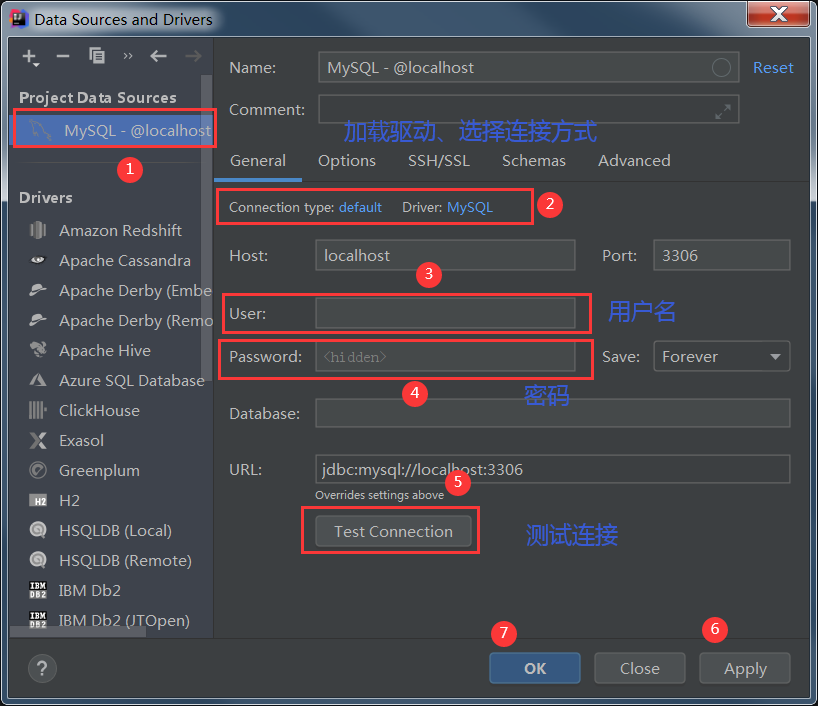
连接成功
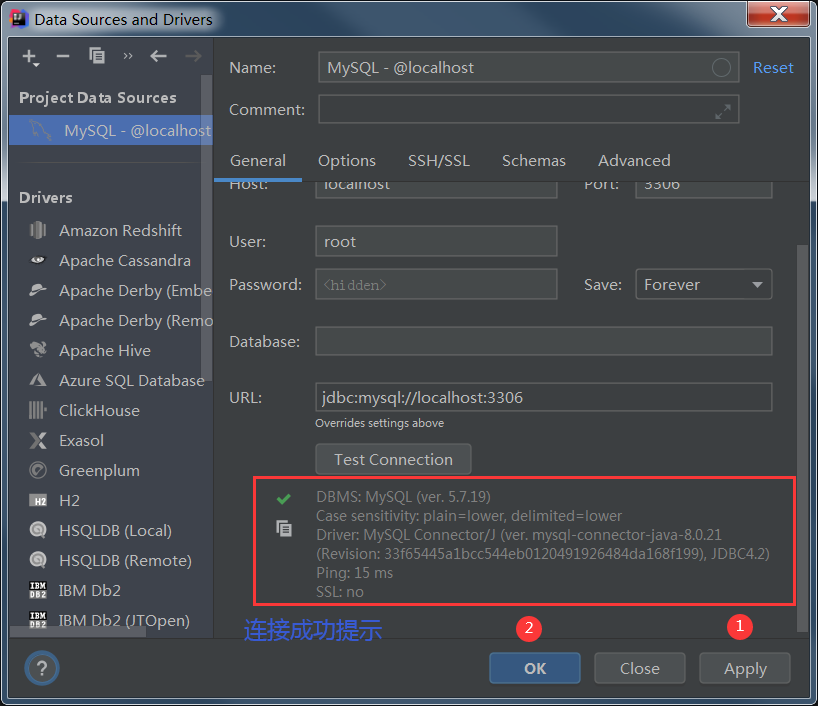
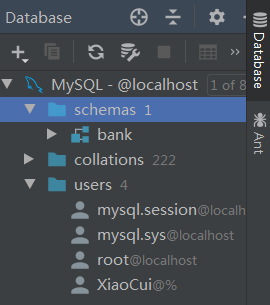
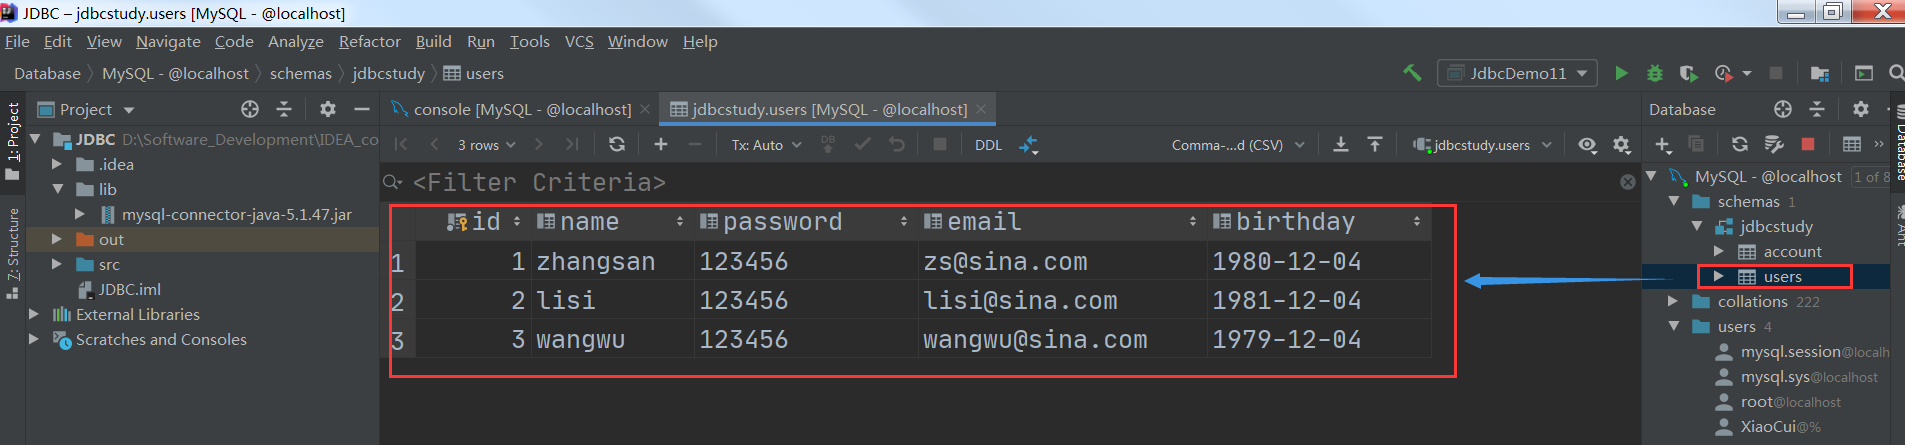
连接成功后的数据信息
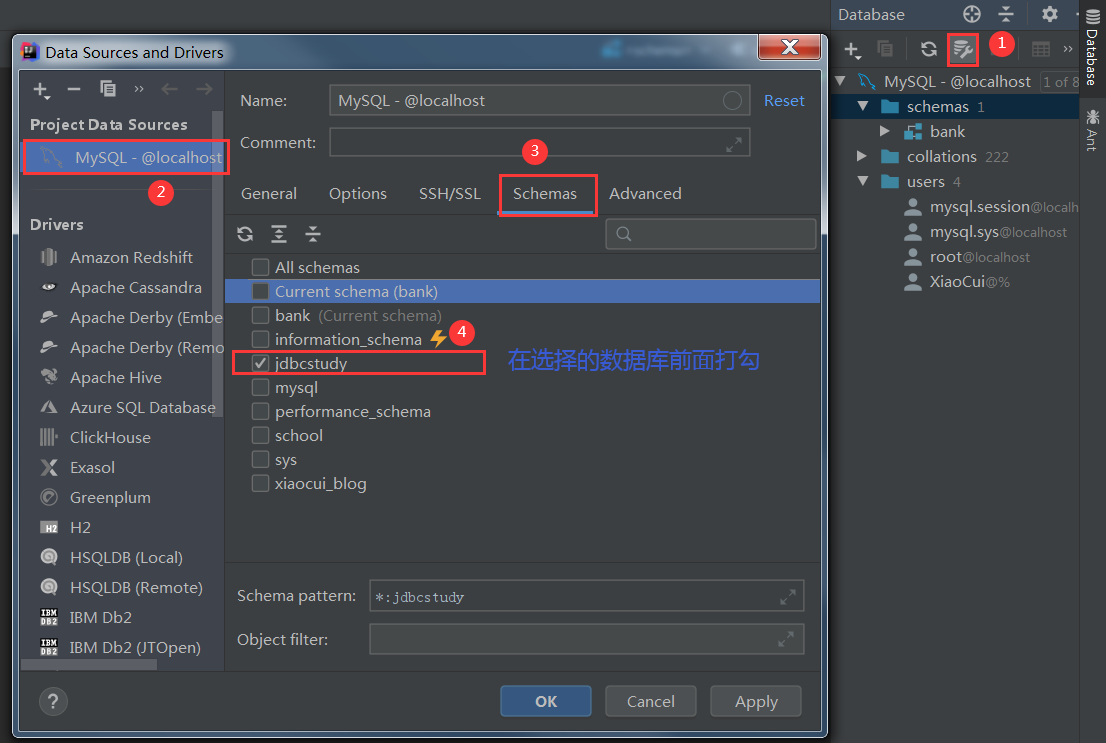
切换数据库:选择设置,点击当前数据库下的Schemes,选择要使用的数据库,Apply,OK
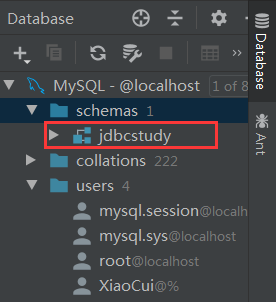
切换成功
双击表名称,查看表内容
修改表内容:在表格数据上直接修改,修改完后点击“含有DB的向上箭头”,完成数据的更新

IDEA中代码执行:
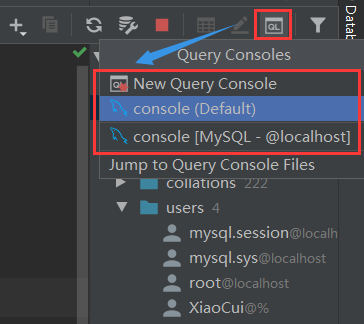
打开控制台,可以在默认打开的控制台中直接编写,此处默认的是console[MySQL-@localhost]
编写SQL代码:
/*创建账户表*/
CREATE TABLE `account`(
`id` INT PRIMARY KEY AUTO_INCREMENT,
`name` VARCHAR(40),
`money` FLOAT
);
/*插入测试数据*/
INSERT INTO `account`(`name`,`money`) VALUES('A',1000);
INSERT INTO `account`(`name`,`money`) VALUES('B',1000);
INSERT INTO `account`(`name`,`money`) VALUES('C',1000);

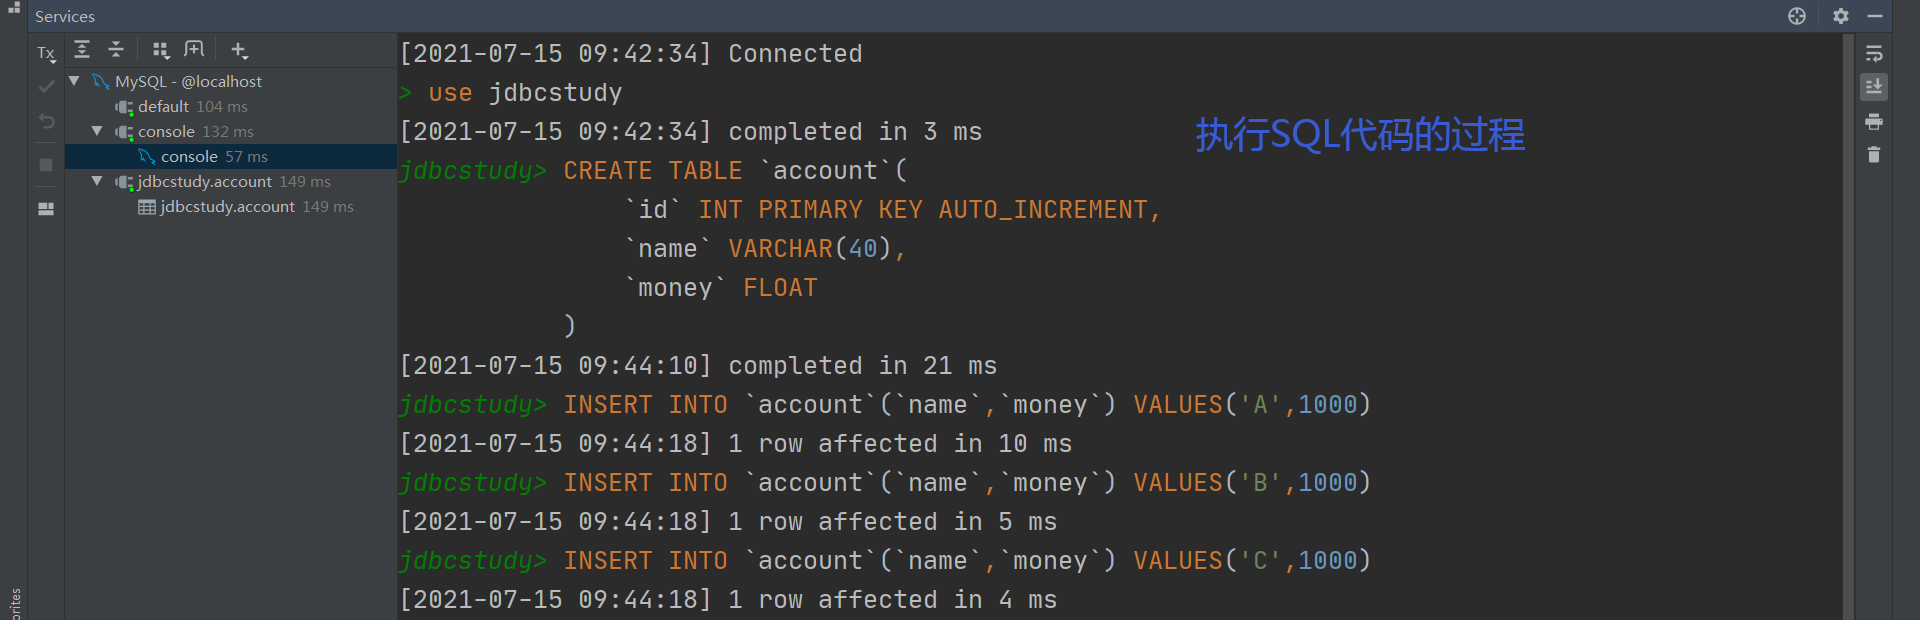
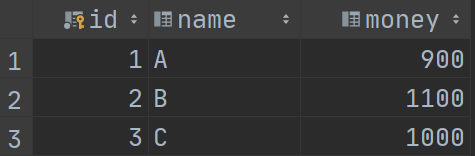
输出结果:

10.9 使用IDEA进行数据库事务操作
代码实现:
-
开启事务
-
一组业务执行完毕后,提交事务
-
可以在catch语句中显式的定义回滚语句,但默认失败就会回滚
测试代码:
package com.study.lesson;
import utils.JdbcUtils;
import java.sql.Connection;
import java.sql.PreparedStatement;
import java.sql.ResultSet;
import java.sql.SQLException;
/**
* 事务
*/
public class JdbcTransaction {
public static void main(String[] args) {
//声明对象,扩大作用范围
Connection cn = null;
PreparedStatement ps = null;
ResultSet rs = null;
try {
//连接数据库
cn = JdbcUtils.getConnection();
//开启事务
cn.setAutoCommit(false);
//sql语句
String sql1 = "UPDATE `account` SET `money` = `money` - 100 WHERE `id` = 1";
//预编译sql语句
ps = cn.prepareStatement(sql1);
//执行sql语句
ps.executeUpdate();
//int i = 1/0;//一定不成立的语句,被除数不能为零,这条语句不会编译报错,在运行时会报错
String sql2 = "UPDATE `account` SET `money` = `money` + 100 WHERE `id` = 2";
ps = cn.prepareStatement(sql2);
ps.executeUpdate();
//业务完毕,提交事务
cn.commit();
System.out.println("成功!");
} catch (SQLException e) {
//如果失败,则回滚事务
try {
cn.rollback();
} catch (SQLException e1) {
e1.printStackTrace();
}
e.printStackTrace();
} catch(Exception e){
e.printStackTrace();
} finally {
JdbcUtils.release(cn,ps,null);
}
}
}
输出结果:
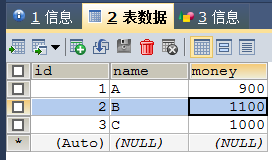
(1)执行成功
控制台输出:成功!
IDEA和SQLyog均可查看最终结果(两者一致):
(2)执行失败:报错,回滚
控制台输出:java.lang.ArithmeticException: / by zero at com.study.lesson.JdbcTransaction.main(JdbcTransaction.java:31)
IDEA和SQLyog均可查看最终结果(两者一致),无变化,与上面结果一致!
10.10 数据库连接池
数据库操作流程:数据库连接---执行完毕---释放连接资源,其中,从连接到释放,十分浪费系统资源,引入池化技术。
池化技术:准备一些预先的资源,过来就直接连接预先准备好的。
基本参数
-
常用连接数:10
-
最小连接数:10
-
最大连接数:15
-
等待超时:100ms
编写连接池,实现一个接口DataSource,调用准备好的资源。
10.10.1 开源数据源(拿来直接用)
使用了这些数据库连接池之后,我们在项目开发中就不需要编写连接数据库的代码了
10.10.2 DBCP
需要用到的jar包:commons-dbcp-1.4、commons-pool-1.6
下载地址:
https://mvnrepository.com/artifact/commons-dbcp/commons-dbcp/1.4
https://mvnrepository.com/artifact/commons-pool/commons-pool/1.6
1.编写dbcpconfig.properties配置文件
# 连接设置
driverClassName=com.mysql.jdbc.Driver
url = jdbc:mysql://localhost:3306/jdbcstudy?useUnicode=true&characterEncoding=utf8&useSSL=true
username = root
password = 123456
# <!-- 初始化连接 -->
initialSize=10
# 最大连接数量
maxActive=50
# <!-- 最大空闲连接 -->
maxIdle=20
# <!-- 最小空闲连接 -->
minIdle=5
# <!-- 超时等待时间以毫秒为单位 6000毫秒/1000等于60秒 -->
maxWait=60000
# JDBC驱动建立连接时附带的连接属性属性的格式必须为这样:【属性名=property;】
# 注意:user 与 password 两个属性会被明确地传递,因此这里不需要包含他们。
connectionProperties=useUnicode=true;characterEncoding=utf8
# 指定由连接池所创建的连接的自动提交(auto-commit)状态。
defaultAutoCommit=true
# driver default 指定由连接池所创建的连接的只读(read-only)状态。
#如果没有设置该值,则“setReadOnly”方法将不被调用。(某些驱动并不支持只读模式,如:Informix)
defaultReadOnly=
# driver default 指定由连接池所创建的连接的事务级别(TransactionIsolation)。
# 可用值为下列之一:(详情可见javadoc。)NONE,READ_UNCOMMITTED, READ_COMMITTED, REPEATABLE_READ, SERIALIZABLE
defaultTransactionIsolation=READ_COMMITTED
2.新建utils包,包下新建JdbcUtils_DBCP.java,用于从dbcpconfig.properties文件中读取文件资源、加载驱动、获取连接、释放连接资源等。
package com.study.lesson.utils;
import org.apache.commons.dbcp.BasicDataSourceFactory;
import javax.sql.DataSource;
import java.io.InputStream;
import java.sql.Connection;
import java.sql.ResultSet;
import java.sql.SQLException;
import java.sql.Statement;
import java.util.Properties;
/**
* 用于加载dbcpconfig.properties文件资源、加载驱动、获取连接、释放连接资源等
*/
public class JdbcUtils_DBCP {
//声明DataSource对象,扩大作用范围
private static DataSource dataSource = null;
static {
try{
//加载资源
InputStream in = JdbcUtils_DBCP.class.getClassLoader().getResourceAsStream("dbcpconfig.properties");
//获取资源
Properties properties = new Properties();
properties.load(in);
//创建数据源 工厂模式--->创建
dataSource = BasicDataSourceFactory.createDataSource(properties);
} catch(Exception e){
e.printStackTrace();
}
}
/**
* 获取连接
* @return
* @throws SQLException
*/
public static Connection getConnection() throws SQLException{
return dataSource.getConnection();//从数据源中获取连接
}
/**
* 释放连接资源
* @param connection
* @param statement
* @param resultSet
*/
public static void release(Connection connection, Statement statement, ResultSet resultSet){
//关闭的顺序依次为resultSet、statement、connection
if(resultSet!=null){
try {
resultSet.close();
} catch (SQLException e) {
e.printStackTrace();
} catch(Exception e){
e.printStackTrace();
}
}
if(statement!=null){
try {
statement.close();
} catch (SQLException e) {
e.printStackTrace();
} catch(Exception e){
e.printStackTrace();
}
}
if(connection!=null){
try {
connection.close();
} catch (SQLException e) {
e.printStackTrace();
} catch(