DirectX11 With Windows SDK--21 鼠标拾取
前言
拾取是一项非常重要的技术,不论是电脑上用鼠标操作,还是手机的触屏操作,只要涉及到UI控件的选取则必然要用到该项技术。除此之外,一些类似魔兽争霸3、星际争霸2这样的3D即时战略游戏也需要通过拾取技术来选中角色。
给定在2D屏幕坐标系中由鼠标选中的一点,并且该点对应的正是3D场景中某一个对象表面的一点。 现在我们要做的,就是怎么判断我们选中了这个3D对象。
在阅读本章之前,先要了解下面的内容:
| 章节 |
|---|
| 05 键盘和鼠标输入 |
| 06 DirectXMath数学库 |
| 10 摄像机类 |
| 18 使用DirectXCollision库进行碰撞检测 |
DirectX11 With Windows SDK完整目录
欢迎加入QQ群: 727623616 可以一起探讨DX11,以及有什么问题也可以在这里汇报。
核心思想
龙书11上关于鼠标拾取的数学原理讲的过于详细,这里尽可能以简单的方式来描述。
因为我们所能观察到的3D对象都处于视锥体的区域,而且又已经知道摄像机所在的位置。因此在屏幕上选取一点可以理解为从摄像机发出一条射线,然后判断该射线是否与场景中视锥体内的物体相交。若相交,则说明选中了该对象。
当然,有时候射线会经过多个对象,这个时候我们就应该选取距离最近的物体。
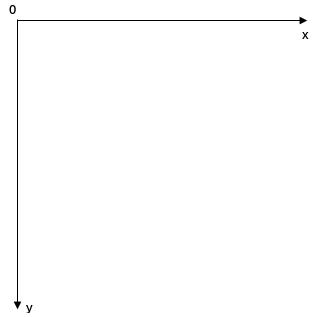
一个3D对象的顶点原本是位于局部坐标系的,然后经历了世界变换、观察变换、投影变换后,会来到NDC空间中,可视物体的深度值(z值)通常会处于0.0到1.0之间。而在NDC空间的坐标点还需要经过视口变换,才会来到最终的屏幕坐标系。在该坐标系中,坐标原点位于屏幕左上角,x轴向右,y轴向下,其中x和y的值指定了绘制在屏幕的位置,z的值则用作深度测试。而且从NDC空间到屏幕坐标系的变换只影响x和y的值,对z值不会影响。

而现在我们要做的,就是将选中的2D屏幕点按顺序进行视口逆变换、投影逆变换和观察逆变换,让其变换到世界坐标系并以摄像机位置为射线原点,构造出一条3D射线,最终才来进行射线与物体的相交。在构造屏幕一点的时候,将z值设为0.0即可。z值的变动,不会影响构造出来的射线,相当于在射线中前后移动而已。
现在回顾一下视口类D3D11_VIEWPORT的定义:
typedef struct D3D11_VIEWPORT {
    FLOAT TopLeftX;
    FLOAT TopLeftY;
    FLOAT Width;
    FLOAT Height;
    FLOAT MinDepth;
    FLOAT MaxDepth;
} D3D11_VIEWPORT;
从NDC坐标系到屏幕坐标系的变换矩阵如下:
现在,给定一个已知的屏幕坐标点(x, y, 0),要实现鼠标拾取的第一步就是将其变换回NDC坐标系。对上面的变换矩阵进行求逆,可以得到:
尽管DirectXMath没有构造视口矩阵的函数,我们也没必要去直接构造一个这样的矩阵,因为上面的矩阵实际上可以看作是进行了一次缩放和平移,即对向量进行了一次乘法和加法:
由于可以从之前的Camera类获取当前的投影变换矩阵和观察变换矩阵,这里可以直接获取它们并进行求逆,得到在世界坐标系的位置:
射线类Ray
Ray类的定义如下:
struct Ray
{
	Ray();
	Ray(const DirectX::XMFLOAT3& origin, const DirectX::XMFLOAT3& direction);

	static Ray ScreenToRay(const Camera& camera, float screenX, float screenY);

	bool Hit(const DirectX::BoundingBox& box, float* pOutDist = nullptr, float maxDist = FLT_MAX);
	bool Hit(const DirectX::BoundingOrientedBox& box, float* pOutDist = nullptr, float maxDist = FLT_MAX);
	bool Hit(const DirectX::BoundingSphere& sphere, float* pOutDist = nullptr, float maxDist = FLT_MAX);
	bool XM_CALLCONV Hit(DirectX::FXMVECTOR V0, DirectX::FXMVECTOR V1, DirectX::FXMVECTOR V2, float* pOutDist = nullptr, float maxDist = FLT_MAX);

	DirectX::XMFLOAT3 origin;		// 射线原点
	DirectX::XMFLOAT3 direction;	// 单位方向向量
};
其中静态方法Ray::ScreenToRay执行的正是鼠标拾取中射线构建的部分,其实现灵感来自于DirectX::XMVector3Unproject函数,它通过给定在屏幕坐标系上的一点、视口属性、投影矩阵、观察矩阵和世界矩阵,来进行逆变换,得到在物体坐标系的位置:
inline XMVECTOR XM_CALLCONV XMVector3Unproject
(
    FXMVECTOR V,
    float     ViewportX,
    float     ViewportY,
    float     ViewportWidth,
    float     ViewportHeight,
    float     ViewportMinZ,
    float     ViewportMaxZ,
    FXMMATRIX Projection,
    CXMMATRIX View,
    CXMMATRIX World
)
{
    static const XMVECTORF32 D = { { { -1.0f, 1.0f, 0.0f, 0.0f } } };

    XMVECTOR Scale = XMVectorSet(ViewportWidth * 0.5f, -ViewportHeight * 0.5f, ViewportMaxZ - ViewportMinZ, 1.0f);
    Scale = XMVectorReciprocal(Scale);

    XMVECTOR Offset = XMVectorSet(-ViewportX, -ViewportY, -ViewportMinZ, 0.0f);
    Offset = XMVectorMultiplyAdd(Scale, Offset, D.v);

    XMMATRIX Transform = XMMatrixMultiply(World, View);
    Transform = XMMatrixMultiply(Transform, Projection);
    Transform = XMMatrixInverse(nullptr, Transform);

    XMVECTOR Result = XMVectorMultiplyAdd(V, Scale, Offset);

    return XMVector3TransformCoord(Result, Transform);
}
将其进行提取修改,用于我们的Ray对象的构造:
Ray Ray::ScreenToRay(const Camera & camera, float screenX, float screenY)
{
	//
	// 节选自DirectX::XMVector3Unproject函数,并省略了从世界坐标系到局部坐标系的变换
	//

	// 将屏幕坐标点从视口变换回NDC坐标系
	static const XMVECTORF32 D = { { { -1.0f, 1.0f, 0.0f, 0.0f } } };
	XMVECTOR V = XMVectorSet(screenX, screenY, 0.0f, 1.0f);
	D3D11_VIEWPORT viewPort = camera.GetViewPort();

	XMVECTOR Scale = XMVectorSet(viewPort.Width * 0.5f, -viewPort.Height * 0.5f, viewPort.MaxDepth - viewPort.MinDepth, 1.0f);
	Scale = XMVectorReciprocal(Scale);

	XMVECTOR Offset = XMVectorSet(-viewPort.TopLeftX, -viewPort.TopLeftY, -viewPort.MinDepth, 0.0f);
	Offset = XMVectorMultiplyAdd(Scale, Offset, D.v);

	// 从NDC坐标系变换回世界坐标系
	XMMATRIX Transform = XMMatrixMultiply(camera.GetViewXM(), camera.GetProjXM());
	Transform = XMMatrixInverse(nullptr, Transform);

	XMVECTOR Target = XMVectorMultiplyAdd(V, Scale, Offset);
	Target = XMVector3TransformCoord(Target, Transform);

	// 求出射线
	XMFLOAT3 direction;
	XMStoreFloat3(&direction, XMVector3Normalize(Target - camera.GetPositionXM()));
	return Ray(camera.GetPosition(), direction);
}
此外,在构造Ray对象的时候,还需要预先检测direction是否为单位向量:
Ray::Ray(const DirectX::XMFLOAT3 & origin, const DirectX::XMFLOAT3 & direction)
	: origin(origin)
{
	// 射线的direction长度必须为1.0f,误差在1e-5f内
	XMVECTOR dirLength = XMVector3Length(XMLoadFloat3(&direction));
	XMVECTOR error = XMVectorAbs(dirLength - XMVectorSplatOne());
	assert(XMVector3Less(error, XMVectorReplicate(1e-5f)));

	XMStoreFloat3(&this->direction, XMVector3Normalize(XMLoadFloat3(&direction)));
}
构造好射线后,就可以跟各种碰撞盒(或三角形)进行相交检测了:
bool Ray::Hit(const DirectX::BoundingBox & box, float * pOutDist, float maxDist)
{

	float dist;
	bool res = box.Intersects(XMLoadFloat3(&origin), XMLoadFloat3(&direction), dist);
	if (pOutDist)
		*pOutDist = dist;
	return dist > maxDist ? false : res;
}

bool Ray::Hit(const DirectX::BoundingOrientedBox & box, float * pOutDist, float maxDist)
{
	float dist;
	bool res = box.Intersects(XMLoadFloat3(&origin), XMLoadFloat3(&direction), dist);
	if (pOutDist)
		*pOutDist = dist;
	return dist > maxDist ? false : res;
}

bool Ray::Hit(const DirectX::BoundingSphere & sphere, float * pOutDist, float maxDist)
{
	float dist;
	bool res = sphere.Intersects(XMLoadFloat3(&origin), XMLoadFloat3(&direction), dist);
	if (pOutDist)
		*pOutDist = dist;
	return dist > maxDist ? false : res;
}

bool XM_CALLCONV Ray::Hit(FXMVECTOR V0, FXMVECTOR V1, FXMVECTOR V2, float * pOutDist, float maxDist)
{
	float dist;
	bool res = TriangleTests::Intersects(XMLoadFloat3(&origin), XMLoadFloat3(&direction), V0, V1, V2, dist);
	if (pOutDist)
		*pOutDist = dist;
	return dist > maxDist ? false : res;
}
至于射线与网格模型的拾取,有三种实现方式,对精度要求越高的话效率越低:
- 将网格模型单个OBB盒(或AABB盒)与射线进行相交检测,精度最低,但效率最高;
- 将网格模型划分成多个OBB盒,分别于射线进行相交检测,精度较高,效率也比较高;
- 将网格模型的所有三角形与射线进行相交检测,精度最高,但效率最低。而且模型面数越大,效率越低。这里可以先用模型的OBB(或AABB)盒与射线进行大致的相交检测,若在包围盒内再跟所有的三角形进行相交检测,以提升效率。
在该演示教程中只考虑第1种方法,剩余的方法根据需求可以自行实现。
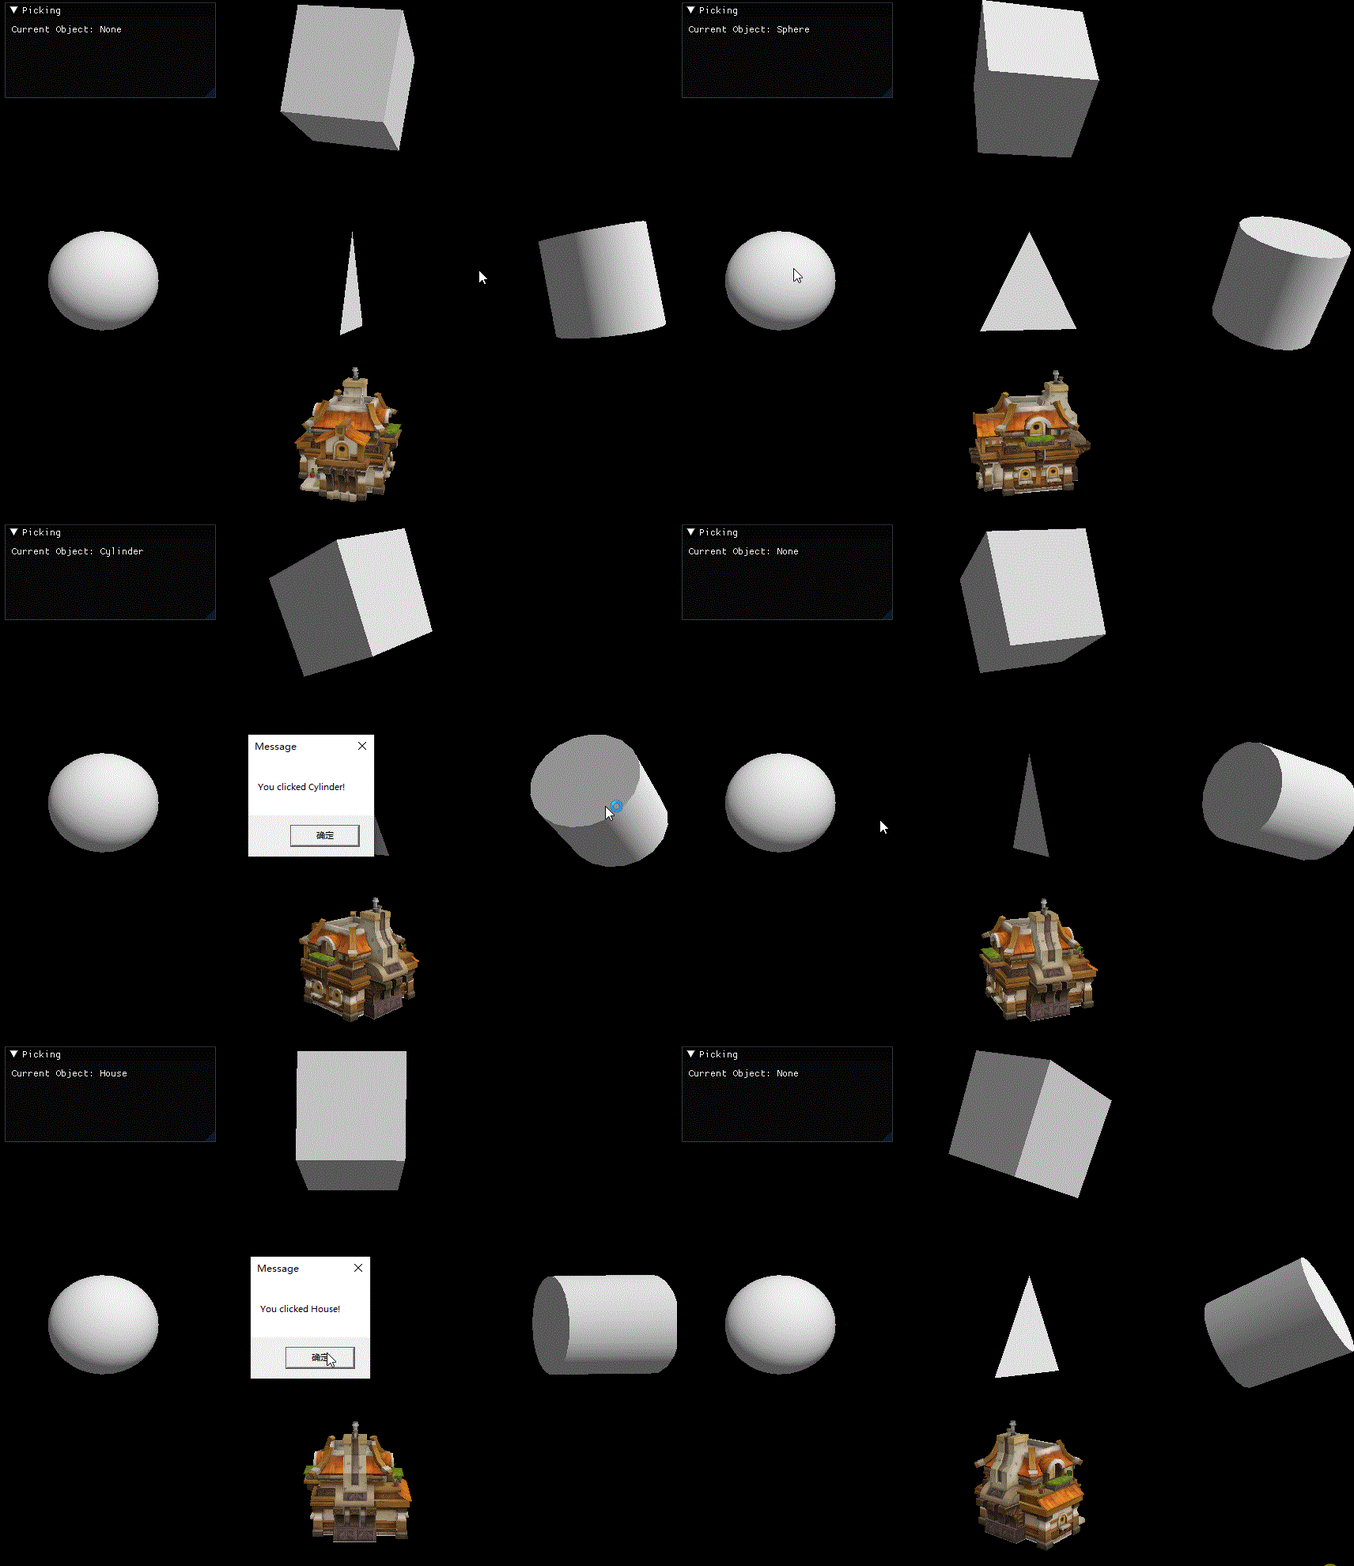
最后是一个项目演示动图,该项目没有做点击物体后的反应。鼠标放到这些物体上会当即显示出当前所拾取的物体,点击物体就会弹出窗口。其中立方体和房屋使用的是OBB盒。

DirectX11 With Windows SDK完整目录
欢迎加入QQ群: 727623616 可以一起探讨DX11,以及有什么问题也可以在这里汇报。


 浙公网安备 33010602011771号